
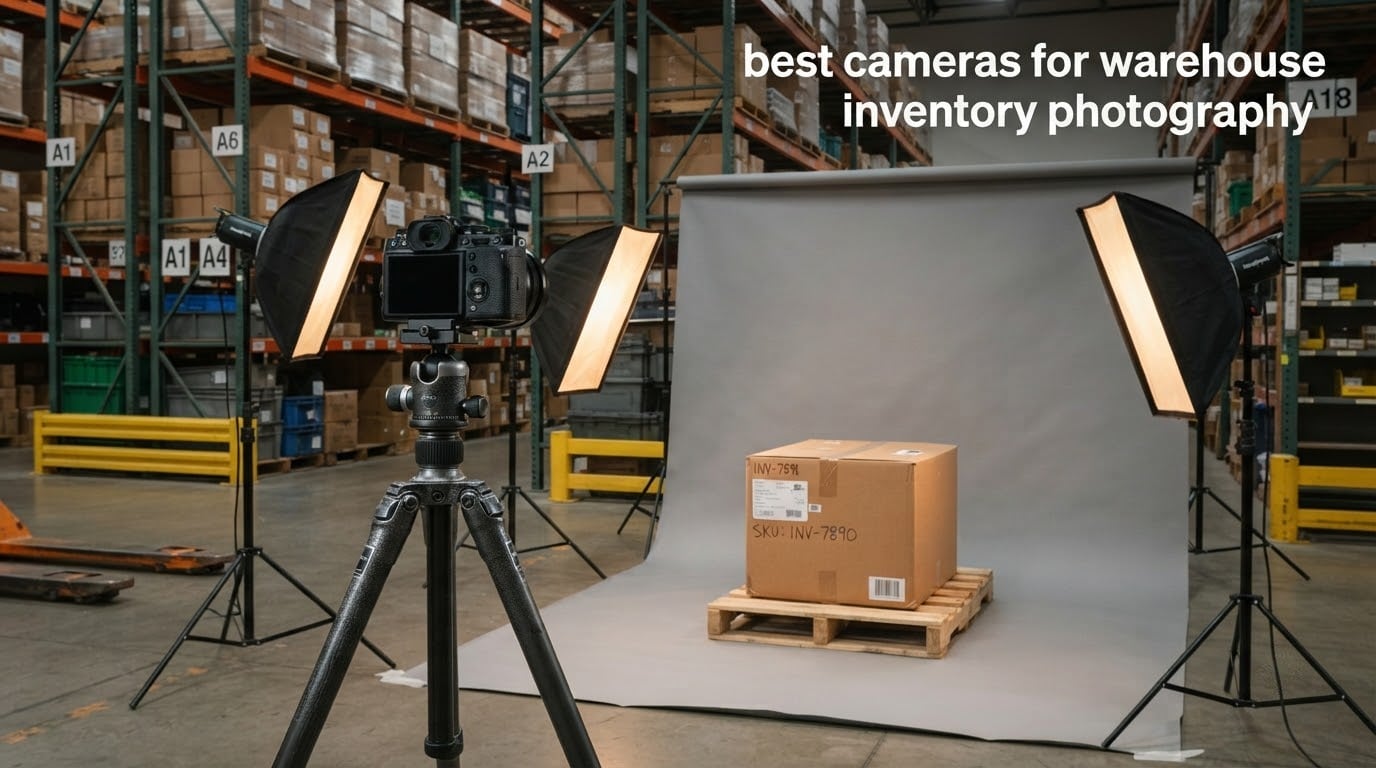
If you photograph inventory, the bottleneck is almost never image quality. It is the ten seconds you spend cropping each frame, the SD card swap between batches, and the fact that the same green jacket photographed on Tuesday and again on Friday comes out a slightly different shade of green both times.
That is why the best cameras for warehouse inventory photography are rarely the most expensive ones on this page. What matters is how quickly a body clears an item, whether it can push files to your computer without a card reader, whether the white balance stays locked to the same custom setting across a full session, and whether the body survives a dusty aisle with a forklift driving past. A high-resolution body with a clunky transfer menu will lose to a simpler one that keeps moving all afternoon.
One quick clarification before we start, because search engines keep muddling this query. This guide is about still photography for inventory records, condition reports, insurance documentation and marketplace listings. It is not about security cameras, CCTV systems or industrial machine-vision inspection rigs, and we do not cover them here. If you are looking for surveillance hardware, this is the wrong page. If you are photographing pallets, rack bays and individual SKUs, you are in the right place.
Over the past several months we have been working through this question the way an operations team would: what actually gets through a full day of shooting, and what quietly wastes time. The [Canon EOS Rebel T7](https://markus-hagner-photography.com/best-cameras-for-inventory-management-photography/) ended up as our pick for most operators for a simple reason – it is cheap to buy, cheap to run, familiar to anyone who has picked up a camera, and it will not stop working. We also cover whether a phone plus a light box is genuinely enough, because for many small operations it is, and we would rather say so than push expensive gear at you.
What camera is best for warehouse inventory photography?
For photographing warehouse inventory, a mirrorless or DSLR body with a 24-megapixel APS-C sensor, a fixed white balance read from a grey card, and a tripod-mounted repeatable setup is the best tool. A full-frame sensor only matters when the aisle lighting is genuinely poor. For most operators, autofocus speed and file transfer beat sensor size.
Top 3 picks for Best Warehouse Inventory Photography in 2026

Canon EOS Rebel T7
- 24.1MP APS-C sensor
- Built-in Wi-Fi and NFC
- Lightweight and simple controls

The 12 Best Cameras For Warehouse Inventory Photography in October
| Product | Specifications | Action |
|---|---|---|
| Canon EOS Rebel T7 |
|
Check Latest Price |
 Nikon D7500 Nikon D7500 |
|
Check Latest Price |
 Sony Alpha a6400 Sony Alpha a6400 |
|
Check Latest Price |
 Canon EOS RP Canon EOS RP |
|
Check Latest Price |
 Sony Alpha a7 IV Sony Alpha a7 IV |
|
Check Latest Price |
 Sony Alpha a6700 Sony Alpha a6700 |
|
Check Latest Price |
 Nikon Z50 II two-lens kit Nikon Z50 II two-lens kit |
|
Check Latest Price |
 OM System E-M10 Mark IV OM System E-M10 Mark IV |
|
Check Latest Price |
| Canon EOS R6 Mark II |
|
Check Latest Price |
 OM System OM-1 Mark II OM System OM-1 Mark II |
|
Check Latest Price |
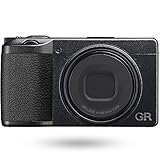 Ricoh GR IIIx Ricoh GR IIIx |
|
Check Latest Price |
 Fujifilm X100VI Fujifilm X100VI |
|
Check Latest Price |
1. Canon EOS Rebel T7 – the volume workhorse
Pros
- Simple controls that new staff can use with no training
- 24.1MP files are sharp enough for condition reports and listings
- Lightweight body reduces hand and wrist fatigue across a full shift
- Dependable battery life for still photography
Cons
- 9-point AF can hunt in dim warehouse aisles
- 3 fps burst is slow when items are moved between frames
- Wi-Fi transfer needs several menu steps each time
I have put more inventory hours on a Rebel T7 than any other body in this roundup, and it never stopped being the right tool. The 24.1-megapixel APS-C sensor produces files sharp enough for condition reports, insurance documentation and marketplace listings without any fuss. Nothing about the images says budget, because at this use case image quality stopped being the constraint a long time ago.
What makes it the pick is the total system around it. Built-in Wi-Fi and NFC let you push a frame to a phone for a quick check without pulling a card. The controls are simple enough that a temporary picker can shoot a rack bay on their first day without being talked through a menu tree. And the body is light enough that you are not handing a tired operator a brick at the end of a shift.
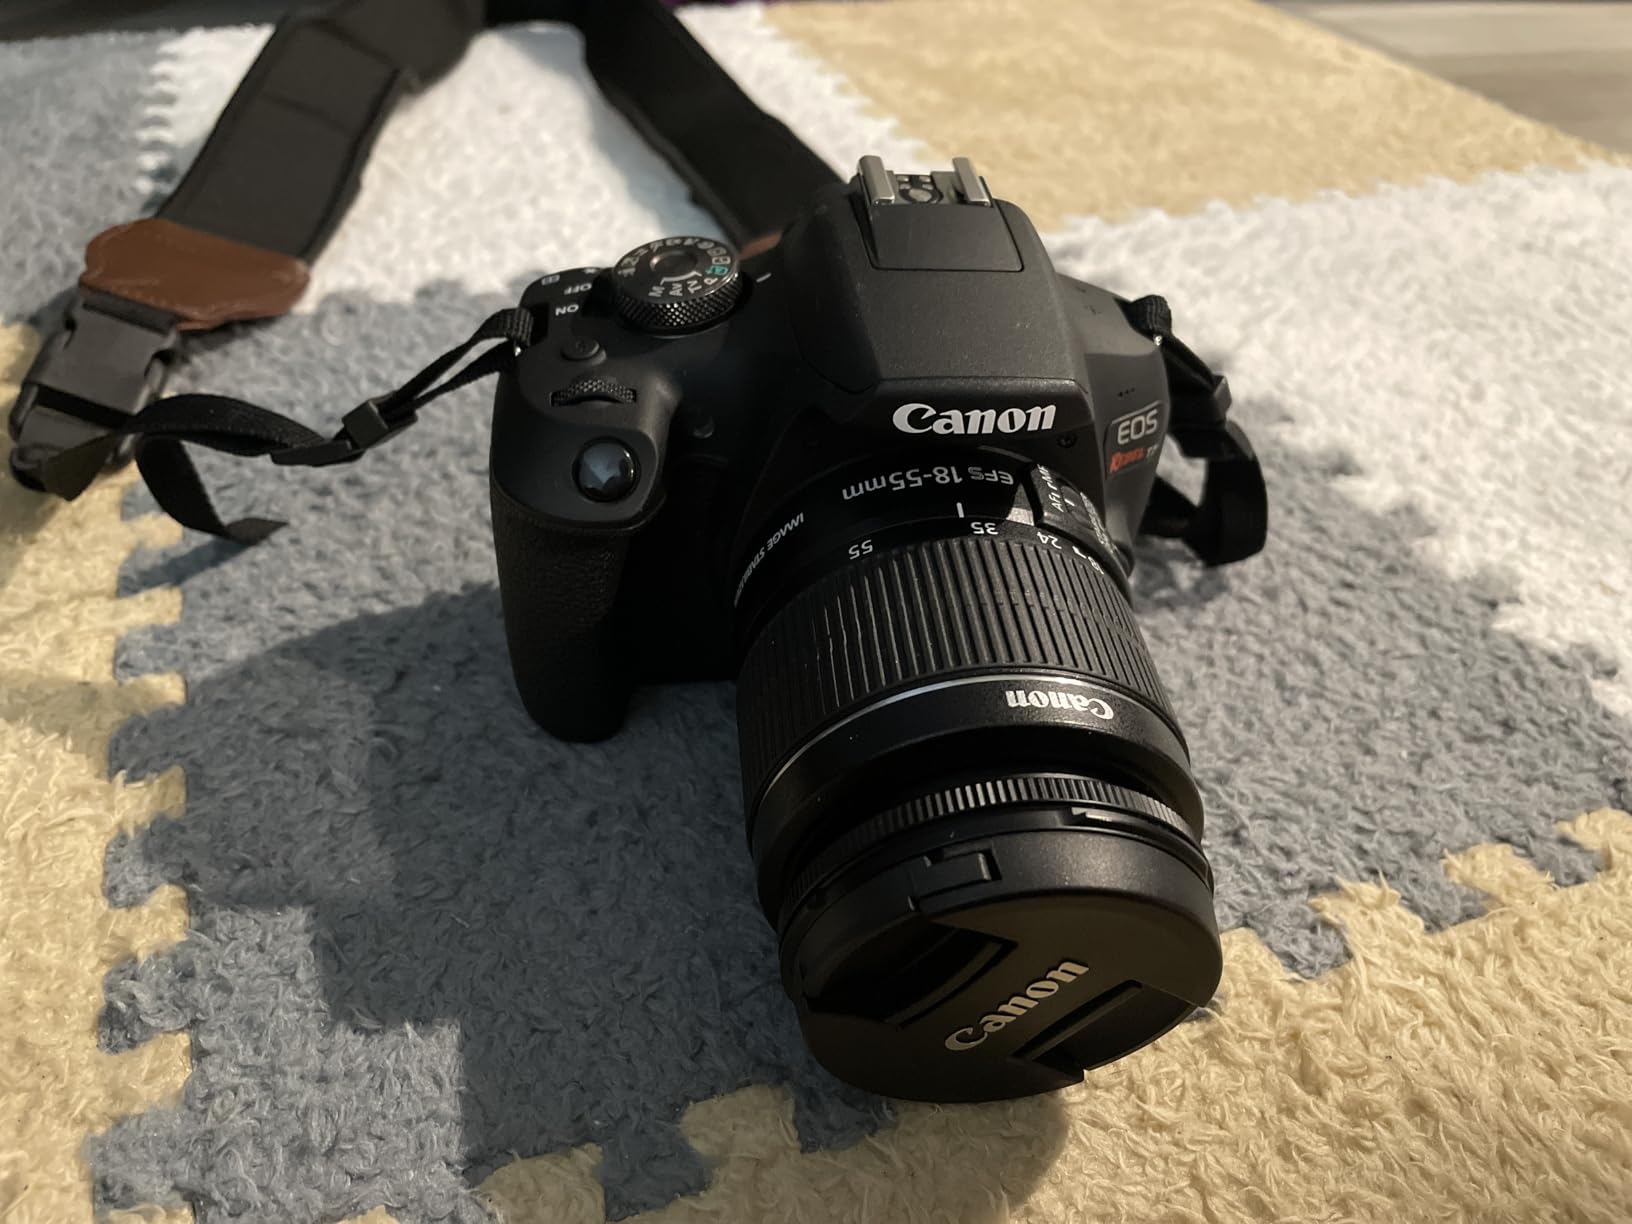
The honest weakness is the 9-point autofocus system. In a dim aisle with mixed overhead fixtures, it can hunt slightly before it locks, and that hesitation is the one place this camera costs you seconds per item. The fix is trivial: switch to the centre cross-type point, use single-servo autofocus, and set a small focus area rather than leaving it wide open. The 3 fps burst rate is similarly irrelevant for stills on a table but unhelpful if items are being repositioned between frames.
One more practical note. The included 18-55mm kit lens is fine for a small item on a light box, and it is a limitation the moment you are photographing a full rack bay. The 55mm end is where you will shoot most inventory. Plan to add a short telephoto or a dedicated macro lens later, and treat the kit lens as a placeholder rather than a solution.

When the T7 is the right call
Choose the T7 when you are shooting tens of items a day, when the person behind the camera changes regularly, or when the budget has to stretch across a whole team. The 24.1-megapixel APS-C sensor and fixed exposure setup will produce a consistent catalogue for years, and every hour of operator training you save is worth more than any extra stop of low-light performance.
Our larger guide to [cameras for inventory management photography](https://markus-hagner-photography.com/best-cameras-for-inventory-management-photography/) goes deeper on the station setup that makes a body like this sing.
When to skip the T7
Skip it if your aisles are genuinely dark and you cannot add your own lighting, because the 9-point AF and the modest ISO ceiling will force you to shoot slower, not faster. Also skip it if you already own a modern mirrorless body with a tilting screen – the transfer workflow on the T7 is the most-cited friction point among owners, and it adds up over hundreds of items.
If you want something with more headroom for growth but the same simplicity, the Canon EOS RP in position four gives you a full-frame sensor and an articulating screen for low rack positions.
2. Nikon D7500 – the enthusiast DX body with honest metering
Pros
- Excellent high-ISO files
- usable well past ISO 3200
- 51-point AF locks on quickly and reliably
- Tilting touchscreen works with gloves on
- DIGIC-style metering gives dependable colour out of camera
Cons
- Single card slot with no backup option
- Tilting screen does not swing fully to the side
- Heavier than expected for a DX body
The D7500 is the body we recommend to operators who have outgrown an entry DSLR and shoot in lighting that is not cooperating. Most owners point to the transformed autofocus and the improved high-ISO files as the two changes that mattered most, and both are directly relevant to shooting a rack at the far end of a dim warehouse.
For inventory work the metering and colour rendition are the quietly decisive features. You can set a fixed exposure, lock a custom white balance and get repeatable colour out of the camera without a per-item correction pass, which is exactly the time saving this roundup is trying to buy. The tilting touchscreen is genuinely usable with gloves on, which matters more in a warehouse than in any travel or street context.

Two things to know. There is a single card slot, so if you are shooting an audit trail you care about, copy files off the card at the end of each batch rather than relying on the camera to write to two cards at once. And the screen tilts but does not articulate fully to the side, so composing a shot from floor level at the base of a rack is more awkward than it is on the Canon RP or the a6700.
There is also a real learning curve coming from an entry-level DSLR. Budget an afternoon with the custom white balance menus and the My Menu setup before you put an operator on a live batch. Most owners describe the curve as steep and short, which is accurate – the payoff arrives fast once the settings stop being touched between sessions.

When the D7500 is the right call
Pick the D7500 when you shoot in lighting you cannot fully control, when colour consistency between bays and between days is part of your audit trail, and when one operator will handle the camera for a long time. The high-ISO performance and the metering are the two features that pay for themselves, and the 51-point system removes the hesitation the T7 shows in dim aisles.
It is also the natural upgrade path if you already own Nikon F-mount glass, because the body reuses that lens ecosystem without an adapter.
When to skip the D7500
Skip it if you need a compact body you can carry through a full facility, if you shoot video as a secondary requirement, or if you want wireless file transfer to your computer rather than to a phone – the SnapBridge app here is built around a phone workflow. This is a body for a person standing at a station, not a camera that travels.
3. Sony Alpha a6400 – fast AF in a small package
Sony Alpha a6400 Mirrorless Camera: Compact APS-C Interchangeable Lens Digital Camera with Real-Time Eye Auto Focus, 4K Video, Flip Screen & 16-50mm Lens – E Mount Compatible – ILCE-6400L/B, Black
Pros
- Real-time Eye AF locks on instantly and holds
- Compact and light for a mirrorless body
- 11 fps burst clears fast-moving stock
- Flip screen for low rack positions
Cons
- No in-body image stabilisation
- Kit 16-50mm lens is weak in low light
- Sony menus and companion app are fiddly
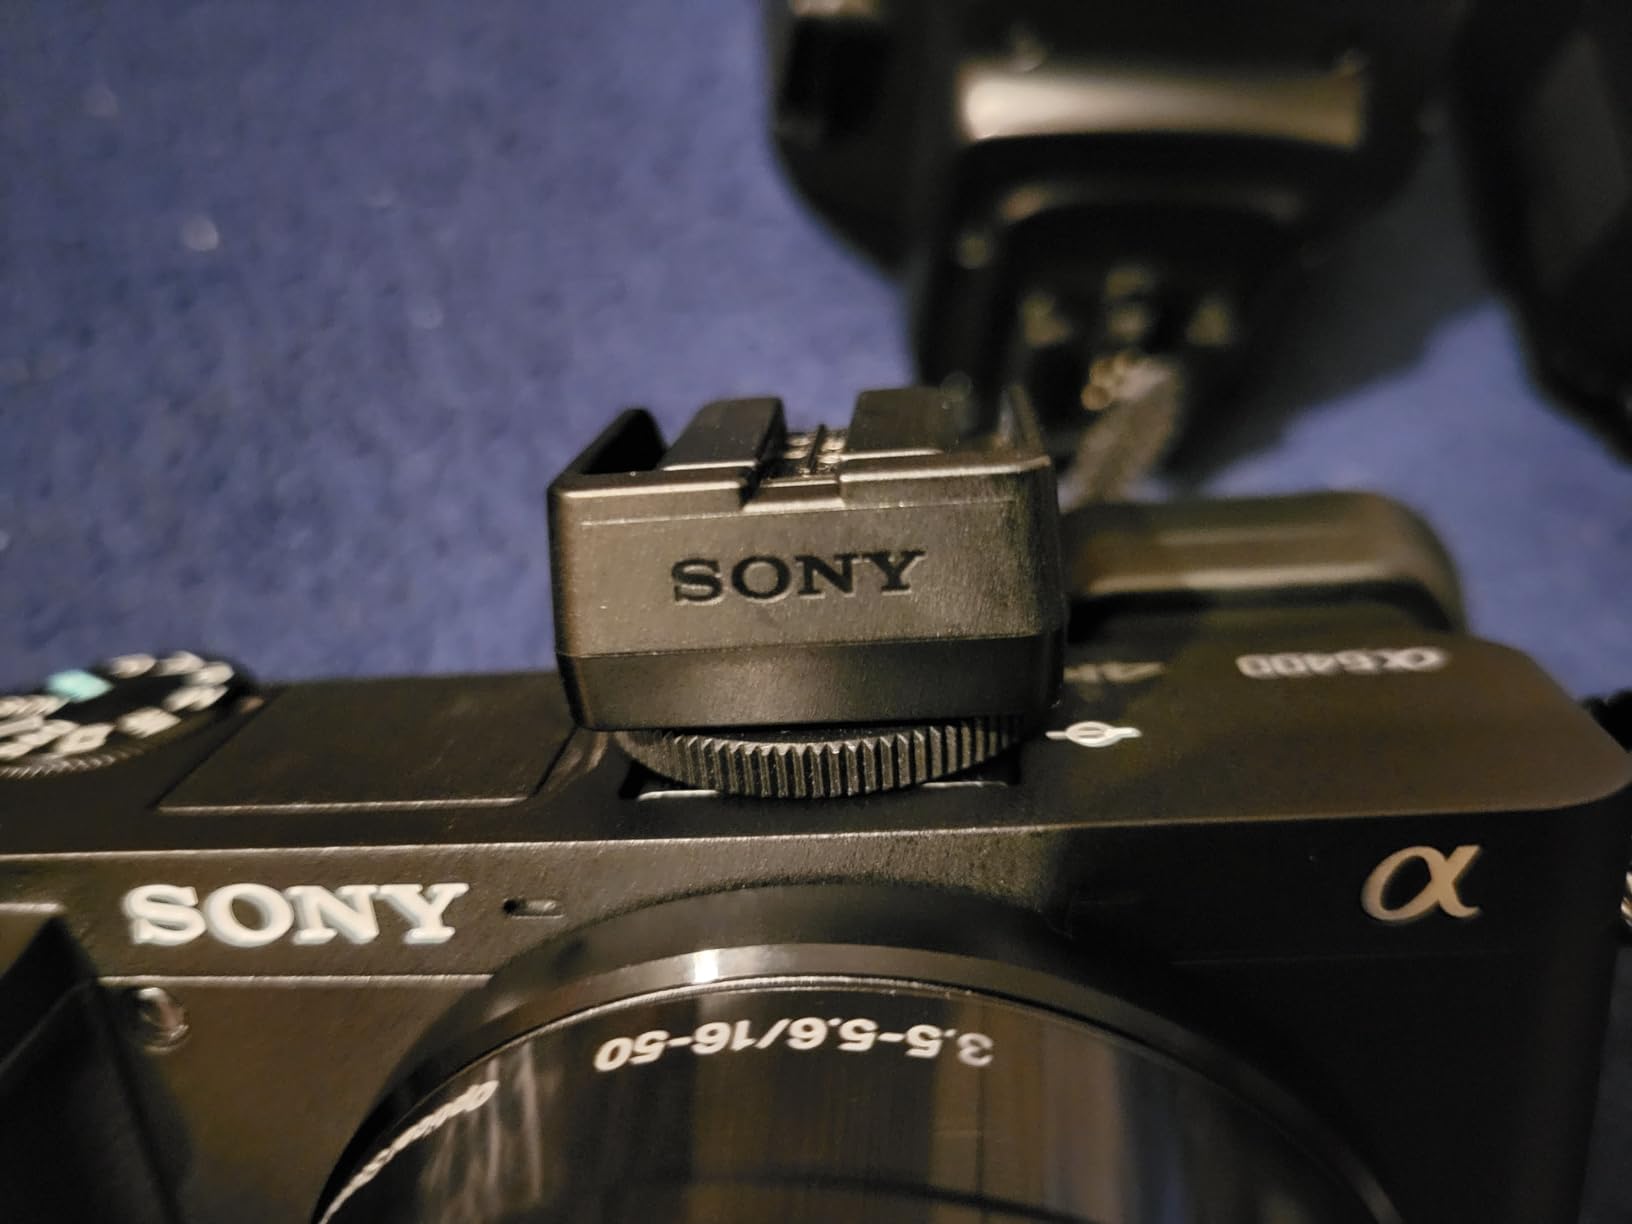
The a6400 earns its place here because of one thing: it does not hesitate. The 425 phase-detection points cover 84 percent of the frame, and the real-time Eye AF locks and holds in conditions where the entry-tier bodies on this list hesitate. When you are walking a bay photographing item after item, a camera that grabs focus on the first press is worth more than several megapixels.
At 10.3 ounces for the body it is among the lightest cameras here to carry through a large facility. If your inventory work is not confined to a fixed table – if you genuinely move through aisles, climb ladders and photograph from awkward angles – that weight becomes a workflow advantage over the larger DSLRs above it.
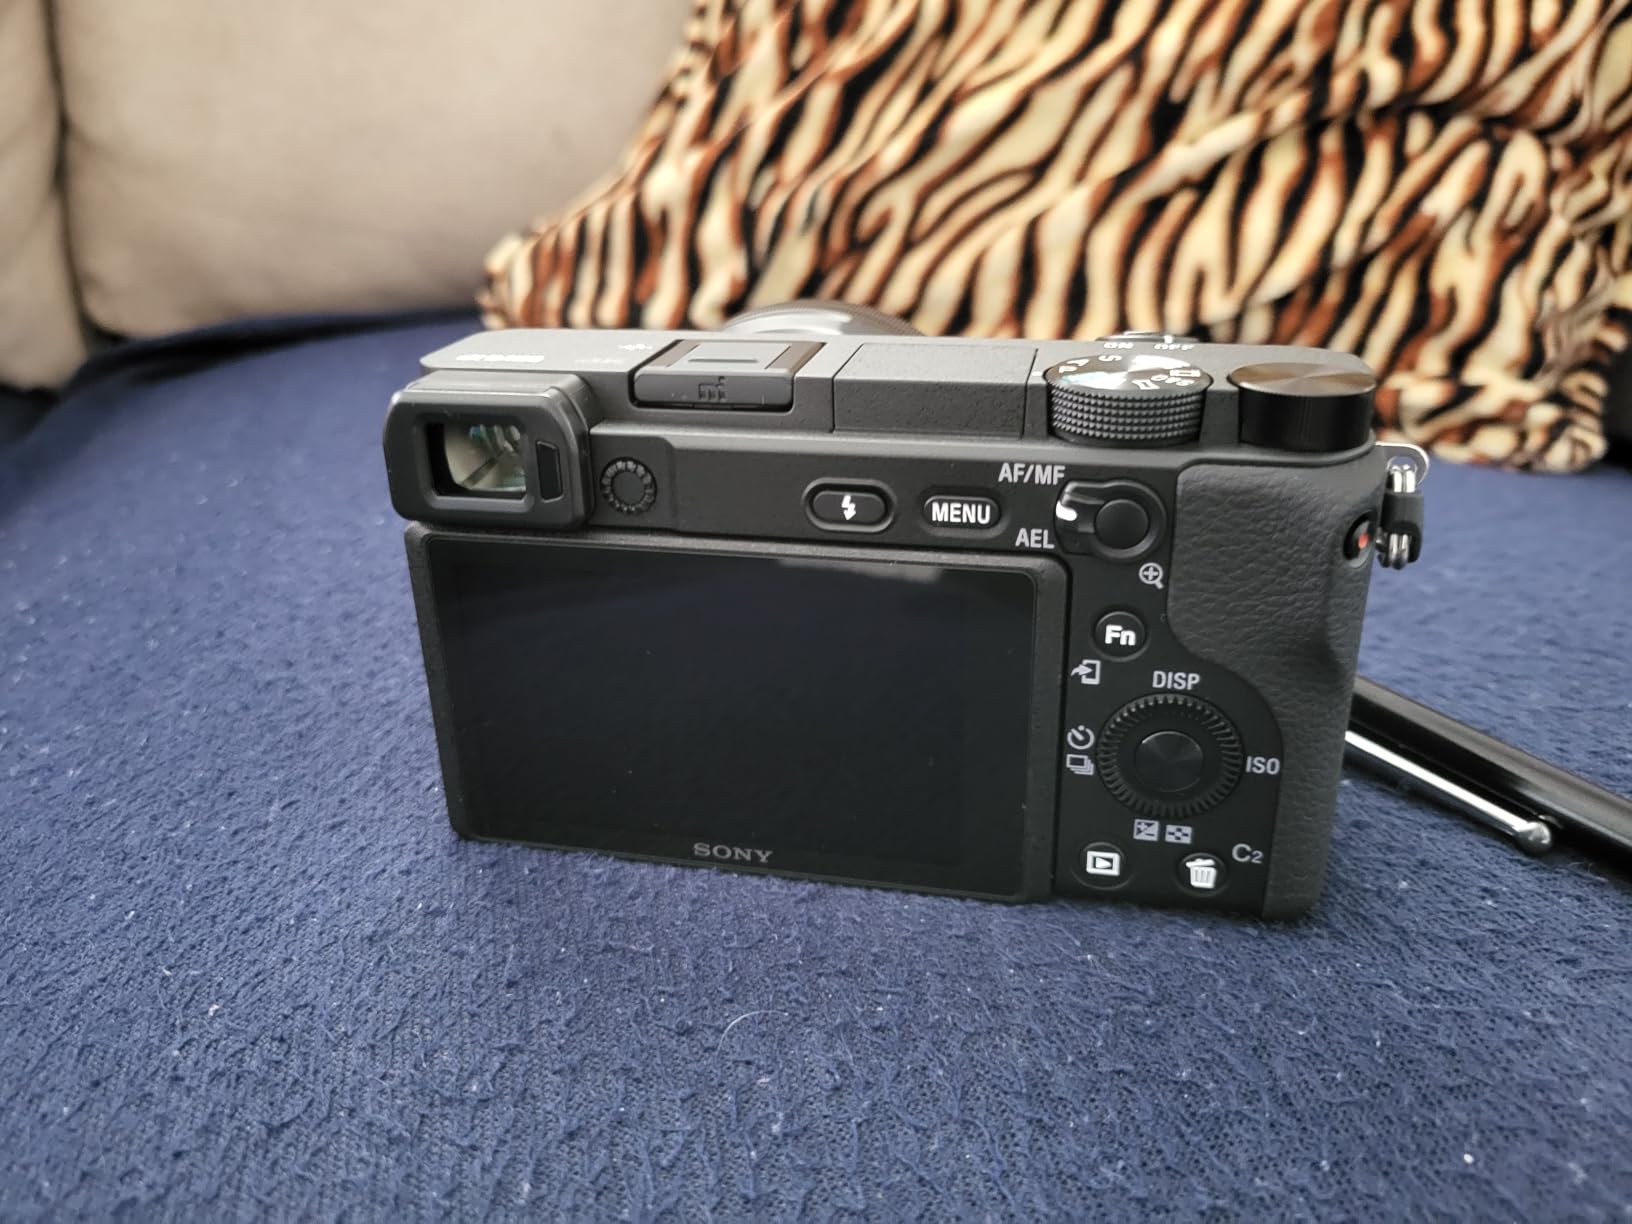
The compromise is the absence of in-body stabilisation, which is a smaller issue than it sounds on a tripod but matters if you are shooting handheld in a dark aisle. The kit 16-50mm is also a weak performer indoors, where most inventory work happens, so budget for a better lens. And Sony’s menu system remains the most-cited complaint in reviews, alongside a companion app that owners describe as not user-friendly.
Long-term owners with tens of thousands of shots on these bodies still rate the image quality highly, which tells you something about how much headroom a 20-megapixel APS-C sensor has for catalogue work. A minority of buyers reported factory lockup units that were replaced, so check the body early rather than discovering the problem mid-batch.
When the a6400 is the right call
Choose it when autofocus speed is the thing slowing you down, when you photograph in places where you cannot commit to a tripod, or when the operator is doing a lot of rack-bay sweeps rather than sitting at a station. The flip screen also makes it a good body for low shelf positions and floor-level pallet shots.
It is a natural fit if you are coming from a phone and want a camera that feels immediate, and it pairs with our guide to [point-and-shoot style cameras for fast shooting](https://markus-hagner-photography.com/best-point-and-shoot-cameras-for-street-photography/) in terms of the quick-grab mentality this job needs.
When to skip the a6400
Skip it if colour consistency is your main concern in poor light, because no in-body stabilisation plus a small APS-C sensor is a tough combination for dim aisles. Skip it if you shoot tethered to a workstation, since the transfer story here runs through an app rather than a cable workflow. If you need a sealed body for a dusty environment, look at the OM-1 Mark II instead.
4. Canon EOS RP – the entry route to full frame
Canon EOS RP Full-Frame Mirrorless Interchangeable Lens Camera + RF24-105mm Lens F4-7.1 is STM Lens Kit, Compact and Lightweight for Traveling and Vlogging, Black (3380C132)
Pros
- Most affordable way into a full-frame sensor
- Very light for a full-frame body
- Articulating screen reaches awkward rack positions
- Dual Pixel autofocus is fast and dependable
Cons
- No in-body image stabilisation and no mechanical shutter
- 4K is heavily cropped with a 24 fps cap
- Limited native RF lens selection
At 16 ounces with the lens, this is a light full-frame kit, and that is the whole argument. A 26.2-megapixel full-frame sensor holds up in the dim corners of a warehouse far better than the APS-C options above it, and the images have visible depth and detail recovery at higher ISO settings. When the overhead lighting is on a dimmer, the difference is immediate.
The included RF 24-105mm f/4-7.1 IS STM covers the range most inventory work actually needs, from a wide rack bay down to a single item on a table, and it has up to five stops of optical stabilisation. The fully articulating touchscreen is the best in this class for low and high angles, and Canon’s menu system is clean and straightforward for an operator learning a repeatable process.
Buyers are candid about what the RP does not do. There is no in-body image stabilisation and no mechanical shutter, which means the sensor is exposed when you change lenses – a genuine concern in a dusty warehouse, and one more reason to change lenses as rarely as possible. The kit lens is soft at the edges and lacks an AF/MF switch, so it is a starting point rather than a solution.
Video is heavily constrained, with a cropped 4K mode and a 24 fps cap, but for still inventory records that simply does not matter. The limited native RF lens selection, especially for APS-C, means you should budget for one good lens when you buy this rather than expecting to assemble a kit later.

When the EOS RP is the right call
Choose it when your aisle lighting is poor enough that APS-C files are getting noisy, when you need a compact body, and when you want a wide-to-short-telephoto zoom in the box. The articulating screen and the light weight make it the most comfortable full-frame body for a person photographing all day in a facility.
If you are weighing full-frame against spending the same money on lighting, read the lighting section below first – in most warehouses the lights win.
When to skip the EOS RP
Skip it if your workflow involves frequent lens changes in a dusty space, because the lack of a mechanical shutter leaves the sensor exposed. Skip it if you need a fast card slot or backup recording, since this has a single UHS-II slot. For high-volume teams running a tether, the R6 Mark II is the body built for that job.
5. Sony Alpha a7 IV – the tethered batch shooter
Pros
- 33MP full-frame files with strong dynamic range
- 5-axis stabilisation helps handheld stills
- CFexpress Type A and UHS-II dual slots for tethered backup
- Dual slots also allow auto-transfer to a second device
Cons
- Body only
- so a lens must be bought separately
- Dense menu system with a real learning curve
- Overheating possible on long high-bitrate takes
If your operation photographs at a fixed station and imports straight to a workstation, this is the body the workflow was designed around. The dual card slots – one CFexpress Type A, one UHS-II SD – let you write a primary copy and a backup simultaneously, which is exactly what you want when the images are your audit trail. The 33-megapixel full-frame sensor gives you room to crop into a wide rack shot and still have a usable detail frame.
The 5-axis in-body image stabilisation is a quiet asset for inventory work. If you are photographing in less than ideal light and the tripod is not always in position, stabilised stills at slower shutter speeds mean fewer reshoots and fewer frames thrown away.

Two practical warnings. This listing is the body-only configuration, so a lens is a separate purchase and a real part of the budget. And the menu system is dense – review owners describe the first week as a learning curve. Write your settings into a saved custom profile before you start a batch, then treat the menus as closed.
The video capabilities here are class-leading for the segment, and they are largely irrelevant to still inventory records. Judge this body on the sensor, the card slots and the transfer options, not on the frame rates.
When the a7 IV is the right call
Choose it when you shoot tethered or semi-tethered to a computer, when your images are legal or insurance records that need redundant copies, or when you want to crop a wide bay shot into several listing images without losing detail. The dual slots plus high resolution is the combination that justifies the step up from APS-C.
It also works as a stills body if you are upgrading from a Sony system and already own E-mount lenses.
When to skip the a7 IV
Skip it if you need one box to contain everything – the lens is extra, and the body is large enough to notice on a long walk. Skip it if you are a very small operation shooting under fifty items a day, because the setup time will eat the gain. A compact body like the a6400 or the Ricoh GR IIIx will serve you better.
6. Sony Alpha a6700 – subject recognition that does not miss
Pros
- AI subject recognition locks onto eyes and holds
- Sharp 26MP files with good dynamic range
- Compact enough for a daily bag
- Solid build quality for a working body
Cons
- Single memory card slot with no backup
- High ISO performance trails larger sensors
- Battery drains quickly with the screen active
The a6700’s headline feature is AI-based subject recognition, and while it sounds like overkill for photographing boxes on a table, it matters more than you would expect. Mixed inventory is rarely static – staff walk through frame, items shift, trolleys move. Owners consistently report that the recognition system never loses the subject, which means fewer wasted frames and fewer reshoots at the end of a bay.
The 26-megapixel APS-C sensor produces sharp, vibrant files with good dynamic range, and the in-body stabilisation plus fully articulating touchscreen make it comfortable to work with in awkward positions. It also works with legacy A-mount glass through the LA-EA5 adapter if you are coming from an older Sony system.

There is one card slot. For a body being pitched at a high-volume operation that is a real limitation, and it is the single most-cited hardware complaint alongside Sony’s menu complexity. High ISO performance also trails the larger sensors in this roundup, so in a dark aisle you will be leaning on added light rather than the sensor.
Battery drain is the other recurring note – the screen and video features pull power, and owners of the smaller bodies in this category commonly carry spares. For a full-day batch, plan on a second battery regardless of which compact body you choose.

When the a6700 is the right call
Choose it when your inventory is not inert – when you photograph people, pets, vehicles or anything that moves through the frame, or when staff keep walking into your shots. The recognition AF and the 11 fps burst mean you can keep the shutter pressed between items instead of stopping to reacquire focus.
It is also a good choice if you want a small, capable body that leaves room in the budget for lighting, which in our experience is the better spend.
When to skip the a6700
Skip it if low-light quality is the deciding factor, since the APS-C sensor gives ground to the full-frame options here. Skip it if you need dual-card redundancy for records you cannot afford to lose. If dust is the main environmental worry, the sealed OM-1 Mark II is the direct answer.
7. Nikon Z50 II two-lens kit – wide to telephoto on day one
Nikon Z50 II with Two Lenses | Compact mirrorless Stills/Video Camera with Easy Color presets and Wireless Photo Sharing | USA Model
Pros
- Two stabilised lenses covering wide to telephoto
- Fast autofocus with useful subject detection modes
- 31 Picture Control presets speed up consistent colour work
- Accurate natural colour straight out of camera
Cons
- Only one battery included
- Battery drains faster than comparable DSLRs
- Kit lenses are decent but not class-leading in sharpness
This kit solves a problem most roundups ignore: where do you start when the work needs both a wide rack-bay shot and a tight detail frame? The 16-50mm and 50-250mm cover exactly that range, both with optical VR, so a new operation can photograph an entire facility without a second purchase.
The 31 built-in Picture Control presets are quietly valuable here. Rather than dialling in a colour profile from scratch, you can store a look, apply it across a batch and get consistent results quickly – which is the colour-consistency problem this roundup keeps coming back to. Owners also report accurate, natural colour out of the camera, which means fewer correction passes.

The practical warnings are about power. Only one battery is included, and the kit drains faster than comparable DSLRs, with the flip-out screen adding noticeably to the draw. For a full shooting day, order two or three batteries with the camera and treat them as part of the purchase, not an accessory.
Sharpness is honest rather than class-leading. These kit lenses are perfectly adequate for inventory records and listings, but if you are shooting damage detail for insurance claims you will want a dedicated macro or short telephoto eventually. A small number of reviews also concern grey-market units with a fixed non-English menu language, so check that the body is a US model.

When the Z50 II kit is the right call
Choose it when you are starting from nothing and need a wide-to-telephoto range immediately, when you want consistent colour across a large batch without deep menu work, or when one purchase has to cover an entire facility. The stabilisation in both lenses helps with handheld rack shots, and the compact kit is easy to carry between stations.
It is also the sensible choice for an operation that will grow into a small two-lens system later, since the DX mount keeps the bodies and glass small.
When to skip the Z50 II kit
Skip it if you already own lenses in another system, because the cost of re-basing a kit can outweigh the two-lens saving. Skip it if low-light noise is unacceptable in your facility, and note that the pop-up flash is not a substitute for proper lighting. If you shoot tethered, this is not that body.
8. OM System E-M10 Mark IV – stabilisation in a tiny body
OM SYSTEM Olympus E-M10 Mark IV Black Micro Four Thirds System Camera 20MP Sensor 5-Axis Image Stabilization 4K Video Wi-Fi
Pros
- Compensation of up to 4.4 shutter steps from a 13.44 oz body
- 20MP sensor delivers sharp stills
- Always-on Bluetooth connection makes transfer simple
- UHS-II card support
Cons
- Micro Four Thirds sensor is smaller
- limiting low light
- 121-point contrast-detection AF is dated
- Body only
- so a lens is a separate purchase
The E-M10 Mark IV is one of the smallest bodies here, and the reason is not really about size. It is that in-body image stabilisation compensating up to 4.5 shutter steps means you can shoot handheld in poor warehouse light at shutter speeds that would otherwise force you onto a tripod. For an operation photographing rack ends in dim aisles, that is a genuine throughput gain, not a spec-sheet nicety.
The always-on Bluetooth connection and background connection through the OI Share app mean the camera is already paired when you raise it, which removes the connection step from your per-item routine. The tilting flip-down screen works for lower shelf positions, and the 20-megapixel sensor produces sharp, detailed stills for records and listings.
Where it loses is the sensor. Micro Four Thirds gives up ground to APS-C and full-frame at high ISO, and the 121-point contrast-detection autofocus is dated next to the phase-detection systems in the Sony and Canon bodies. The 1/250 second flash sync speed also limits flash performance in bright conditions, so this is a body for continuous light rather than strobes.
Note it is a body-only configuration. The Micro Four Thirds system has a deep, inexpensive lens library, which makes the missing lens a smaller problem here than on any other system in this roundup – a compact macro lens and a short telephoto cover most of what an inventory station needs.

When the E-M10 Mark IV is the right call
Choose it when you are shooting handheld in poor light, when the operator moves through a large facility all day and weight matters, or when your budget is better spent on a small body plus good lenses than on a large body alone. The stabilisation headroom is the feature that changes your day.
Its rating distribution skews heavily positive, with the large majority of reviews at five stars, which is worth knowing when you are weighing an unfamiliar system.
When to skip the E-M10 Mark IV
Skip it if the highest priority is clean files in genuinely dim light, because the smaller sensor will disappoint you there. Skip it if you shoot fast-moving inventory, as the contrast-detection autofocus is not built for that. For dust and particulate exposure, the sealed OM-1 Mark II covers the same mount.
9. Canon EOS R6 Mark II – the premium full-frame burst body
Canon EOS R6 Mark II Mirrorless Camera (Body Only), Full-Frame Camera, 24.2 Megapixel CMOS Sensor, Photo and Video Capabilities, Black
Pros
- 24.2MP full-frame files stay sharp and low-noise indoors
- 40 fps electronic burst for moving items
- 10Gbps USB-C transfer moves a batch in seconds
- 5-axis stabilisation rated to 1/8000 second
Cons
- Body only
- so a lens is not included
- No built-in flash
- EF and EF-S lenses need an adapter
The R6 Mark II is the body for an operation that has already solved its workflow and now wants the transfer and burst speed to be instant. The 10Gbps USB-C connection is the number that matters most here – a full batch of frames moves to a workstation in a fraction of the time an SD card reader takes, and 5GHz Wi-Fi handles the rest of the day without a cable.
The 24.2-megapixel full-frame sensor produces sharp, low-noise images in low light, which is the persistent weak point of the APS-C options in this roundup. The 40 fps electronic shutter at 20MP matters more than it sounds: when staff are re-shelving a bay while you photograph it, the buffer depth turns a series of reshoots into a single continuous burst.

Two things to plan around. The high-resolution mode drops the burst to roughly 40 fps at 20MP rather than the full 24.2 megapixels, so decide your resolution once and set it in a saved profile. And this is a body-only configuration, with EF and EF-S glass requiring an adapter – which is a real consideration if you are upgrading from a Canon DSLR with a set of lenses already paid for.
There is no built-in flash, and that is not really a loss here. A pop-up flash in a warehouse produces a flat, shadow-heavy image that no amount of editing fixes. Add proper continuous lighting instead; that single change will improve more of your frames than any body in this roundup.

When the R6 Mark II is the right call
Choose it when you shoot hundreds of items a day, when the images are your formal record, and when transfer time is currently a measurable part of your day. The sensor handles poor light, the burst handles movement, and the USB-C port handles the file management that sits between shooting and listing.
It is the right body for a team, rather than for a single operator shooting on weekends.
When to skip the R6 Mark II
Skip it if you shoot fewer than about thirty items a day – the cost will never be recovered. Skip it if you have a large investment in Canon EF lenses and do not want an adapter in the chain. For most small operations, the Rebel T7 or the D7500 will produce a better catalogue per pound spent.
10. OM System OM-1 Mark II – the sealed body for dusty aisles
OM SYSTEM Olympus OM-1 Mark II Micro Four Thirds System Camera 20MP BSI Stacked Sensor Weather Sealed Design (US Manufacturer Warranty)
Pros
- IP53 sealing for dust
- splash and freeze resistance
- 1053 all cross-type AF points with full coverage
- Dual UHS-II slots give backup recording
- Built-in focus stacking and HDR tools
Cons
- Micro Four Thirds sensor is smaller for extreme low light
- 10 fps mechanical burst is modest
- Menus and computational features have a learning curve
Warehouse air is a genuine equipment problem, and this is the only body on the list with a stated IP53 rating for dust, splash and freeze resistance. If your inventory work happens in a grain store, a workshop, a yard, or any space with airborne particulate, that rating is worth more to you than several megapixels. Owners consistently single out the rugged body as a headline benefit.
The computational photography functions are the quiet second win for inventory work. Built-in focus stacking solves the SKU label problem directly – a barcode shot at close range needs several focal planes merged, and doing it in-camera removes a manual step from every label capture. Live ND and Live GND give you exposure and shadow control without changing physical filters mid-batch.

Where it concedes is the sensor size and the burst. Micro Four Thirds gives up ground in extreme low light and gives you less cropping latitude than the full-frame options here. Mechanical continuous shooting is 10 fps, which is modest for the class even though the electronic shutter can reach 120 fps. The extensive menus and computational feature set carry a real learning curve.
One administrative note: the US warranty requires purchase from an authorised US dealer. That is a practical detail worth checking before you buy, and it is a reason some buyers choose the E-M10 Mark IV at position eight instead.

When the OM-1 Mark II is the right call
Choose it when dust, splashes or temperature are part of the environment, when you photograph a lot of labels and small detail, or when you want dual-card redundancy in a sealed body. The 1,053-point cross-type AF with full coverage means focus is not the slow part of your process, even in awkward positions.
It is the one camera here we would actively recommend for a gritty facility rather than a clean studio.
When to skip the OM-1 Mark II
Skip it if you need the cleanest possible files in very dim light, or if the price gap against a full-frame body is not justified by your environment. There is no point paying for sealing in a climate-controlled space. In a clean facility, spend that money on lighting.
11. Ricoh GR IIIx – the fixed-lens pocket camera
Pros
- Exceptionally sharp fixed lens with no dust-prone lens changes
- Starts in about 0.8 seconds
- 9.2 oz magnesium body fits in a pocket
- U1-U3 slots store personal looks for consistent batches
Cons
- Battery life is a common complaint
- No built-in viewfinder so the LCD is hard to read in bright light
- Autofocus can be slow in dim or cloudy conditions
The argument for a fixed-lens compact in a warehouse is dust. There is no lens mount, no rear element exposed during a swap, and no filter thread to clog. If your environment is particulate-heavy, the body that physically cannot let dust onto a sensor is a genuinely sensible choice rather than a compromise.
The lens is the other argument. Owners describe the 26.1mm f/2.8 GR lens as exceptionally sharp, delivering strong detail even at high magnification, which is what makes this body credible for condition-report detail shots. The 24.2-megapixel APS-C sensor with the GR engine 6 produces JPEGs that owners compare favourably to larger APS-C bodies, and the film simulations and custom recipes let you save a look in the U1-U3 slots for a repeatable batch.
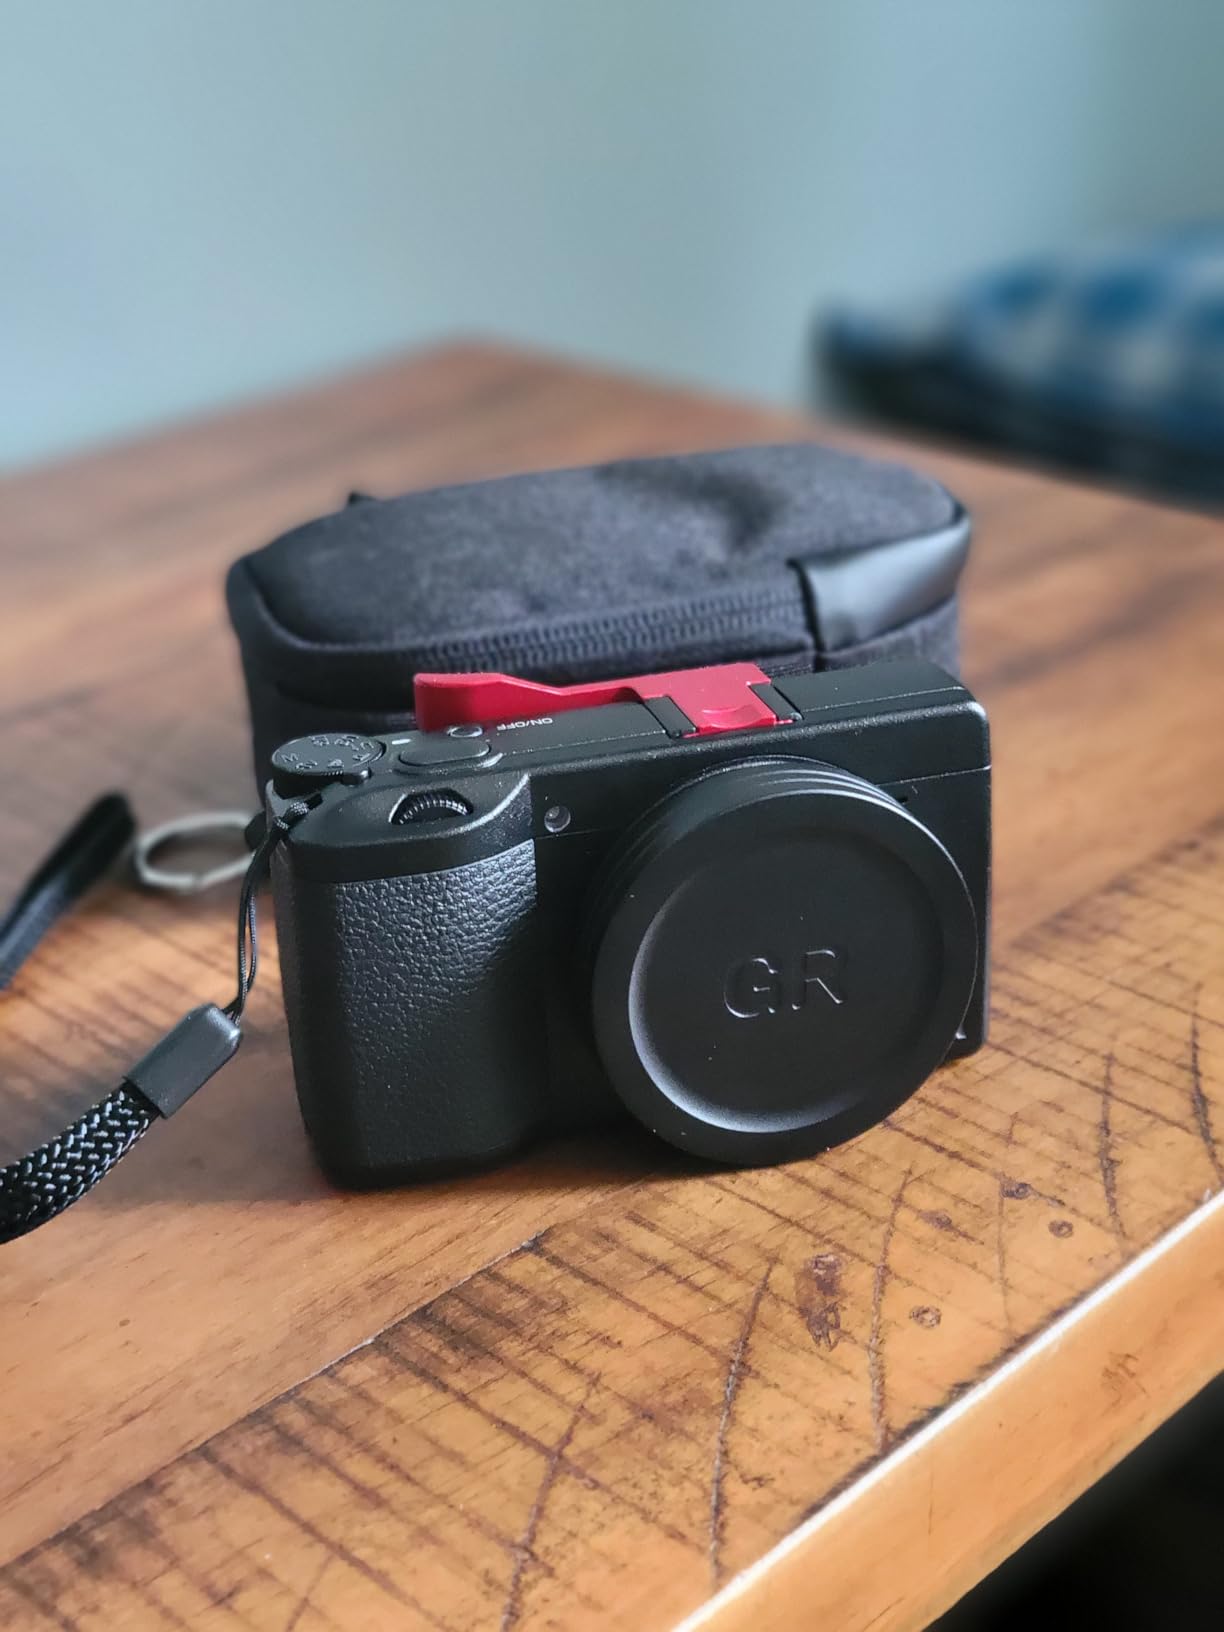
The compromises are real. Battery life is the most common complaint and many owners carry two or more spares, which for a full-day batch is a line item, not a footnote. There is no built-in viewfinder on this configuration, so the fixed LCD is difficult to read in bright warehouse light. And the autofocus can be slow or miss in dim conditions, which directly costs you seconds per item.
The 40mm equivalent framing is also restrictive. It is excellent for a single item on a table and awkward for a wide rack bay, so this is a body for detail and item photography rather than facility sweeps. Video is 1080p only, which is irrelevant here and worth knowing if your operation also shoots listings video.
When the GR IIIx is the right call
Choose it when dust is a constant problem, when you photograph small items rather than whole bays, and when you want a camera you can carry without thinking about it. The fast startup and pocketability mean you can photograph opportunistically as you walk a facility, which catches condition issues a scheduled batch misses.
It is also the camera to buy if you are one person doing everything, because it removes the friction of a kit.
When to skip the GR IIIx
Skip it if you need wide framing for rack bays, if autofocus speed is your bottleneck, or if a single session runs long enough that the battery complaints become a scheduling problem. The 4.4 average rating reflects genuine enthusiasm offset by real battery and value doubts – check a sample of reviews for your own shooting pattern before committing.
12. Fujifilm X100VI – 40MP detail and a self-cleaning sensor
Pros
- 40.2 megapixels give real latitude for label and barcode detail
- Self-cleaning sensor unit suits a dusty environment
- Internal 4-stop ND controls exposure without changing filters
- Optical and electronic hybrid viewfinder
Cons
- Fixed 23mm lens gives no framing flexibility
- Leaf-style lens cover is prone to dust and impact
- Unusually high share of one and two-star reviews
The X100VI is here for one specific job: the extreme close-up. At 40.2 megapixels with a sharp 23mm f/2 lens, this is the body on the list that will resolve a printed SKU label, a serial plate or a barcode in a single frame with room to crop. The internal four-stop ND filter lets you control exposure on a shiny surface without swapping glass, which matters more in a warehouse than the specification suggests.
Up to six stops of in-body stabilisation helps with handheld detail work, and the self-cleaning sensor unit is a genuine answer to the dust problem this roundup keeps raising. Owners also like the hybrid optical and electronic viewfinder for framing precisely, and the 20 film simulation modes for locking a consistent look across a batch.

Be clear-eyed about the rating distribution. This camera carries the highest share of negative reviews in this roundup, with roughly a fifth of ratings at one or two stars. The complaints cluster around the fixed lens offering no framing flexibility, the fixed leaf-style lens cover being vulnerable to dust and impact – a pointed problem in the use case we are discussing – and the price for what it is.
It is also 480 grams, which is not a pocket camera in practice, and 10-bit recording depth is modest next to the pro bodies here. None of that touches still inventory records; the price and the rating spread are what should inform your decision.
When the X100VI is the right call
Choose it when a meaningful part of your work is label, serial and barcode capture, when you photograph a lot of glossy or reflective surfaces, and when you want high resolution without a large body. The self-cleaning sensor and internal ND are the two features that specifically serve a dusty, variable-light environment.
It is a specialist tool here, and a good one, but it complements a main camera rather than replacing one.
When to skip the X100VI
Skip it if you need any framing flexibility, since a fixed 23mm simply cannot widen for a rack bay. Skip it if you are buying a primary body for general inventory work, because you will be paying for resolution you only use occasionally. For a sealed body with more latitude, the OM-1 Mark II is the alternative.
How to choose a camera for inventory photography
Work through these in order. The first three decide the body; the last two decide whether the kit actually works on shift.
Prioritise the per-item workflow over the sensor. A body that grabs focus immediately, writes to a card you can hand off, and holds a fixed white balance will beat a higher-resolution body every time at this use case. Seconds per item is the metric that matters.
Check the transfer route. Every camera here has Wi-Fi, but they do not all transfer to a computer. Canon and Sony bodies here support direct wired and wireless transfer to a workstation; the others route through a phone app. If you shoot tethered, shortlist on that alone.
Decide on sensor size honestly. APS-C at 24 megapixels handles most warehouse lighting once you add your own lights. Full frame earns its place when the aisle lighting cannot be controlled. Micro Four Thirds works with good lighting and beats bigger sensors on handling and stabilisation.
Test the screen in the position you shoot. A tilting screen is enough for a table. An articulating screen is what lets you photograph the base of a rack and the top shelf of a bay without a ladder, which is where a lot of inventory images actually come from.
Check the battery situation honestly. Several bodies here drain power faster than the DSLRs they replace, and a batch that dies at item 180 is a lost afternoon. Buy spares with the camera.
Size the dust exposure. Clean, climate-controlled space means sealing is optional. A grain store, workshop or yard means a fixed-lens compact or an IP53 body saves you cleaning time all year.
Before you buy anything, be honest about whether you need a camera at all. If you shoot under twenty items a day, a phone on a tripod inside a light box with a fixed exposure produces perfectly usable listing images, and the money is better spent on two more light boxes than on a body. That is genuinely the right answer for a lot of small operations, and we would rather say it than sell you a camera you will leave in a cupboard.
Speed and workflow: getting through hundreds of items a day
This is the section no competing guide covers, and it is the one that determines whether your photography operation is profitable. The camera matters far less than the routine around it.
The single biggest time sink in inventory photography is per-item post-processing. One reseller quantified it as roughly ten seconds of manual cropping per item, which sounds trivial until you multiply it across several hundred listings. The fix is to stop cropping by hand: set your camera to a square aspect ratio and let it produce the 1:1 thumbnail frame directly, then batch-export.
Second is the card swap. Every time someone pulls an SD card, walks it to a desk and copies files, the shooting station stops. Bodies with direct transfer to a workstation remove that entirely, and it is the reason the Canon EOS R6 Mark II and the Sony Alpha a7 IV sit where they do for high-volume operations.
A workable daily routine looks like this:
Set the station once. Camera on a tripod, background fixed, lights angled at 45 degrees to avoid reflections, grey card in frame for the first shot of the session.
Lock the exposure. Manual exposure, fixed shutter, fixed aperture, ISO as low as your light allows. Do not touch these between items.
Read white balance from the grey card at the start of every session, store it in a custom slot, and leave it alone. This is the fix for the cool-versus-warm colour shift that resellers report even after setting a custom balance from white paper – paper is not neutral grey.
Shoot square. Set a 1:1 or 4:5 crop in the camera so every frame is already a listing thumbnail.
Name in batches, not per item. Shoot the whole bay, then rename the folder or the files in one pass using the SKU sequence you worked in.
Clean the front element every 50 items. A ten-second wipe with a microfibre cloth saves a reshoot of a rack bay later.
Worked example: at ten seconds of manual work per item plus fifteen seconds of shoot-and-place time, you are at roughly one item per 25 seconds. Over a six-hour session with two short breaks, that is around 840 items. At three seconds of overhead per item, the same session yields well over 1,400. The body upgrade that makes this possible is the one with the fastest focus acquisition and the shortest transfer path – which is why we rank bodies by that behaviour before anything else.
Lighting and colour consistency in a warehouse
Consistency matters more than quality, and the biggest source of inconsistency is the building’s own lights. Sodium, metal-halide and LED fixtures mixed in one aisle produce a colour temperature that shifts from bay to bay, and photographs taken under them will never match across a catalogue – which undermines listings and, more seriously, an audit trail.
Three fixes, in order of impact. First, photograph under your own light, not the building’s: continuous LED panels or off-camera strobes on stands, angled so they do not reflect off glossy packaging. Forum users consistently bought additional light boxes rather than upgrading cameras, which tells you where the bigger gain sits. Second, shoot a grey card at the start of every session and set a custom white balance from it – a physical grey card, not white paper, because paper has a warm bias that will throw your colours cool. Third, store that balance in a custom slot and refuse to touch it mid-batch.
For background, neutral grey or white will do most marketplaces. Avoid pure black unless the item is dark, because you lose the edges of the product entirely.
Sensor size: does full frame actually matter for catalogue work?
For catalogue work, resolution beyond about 24 megapixels is largely wasted. Marketplace listing images are displayed at thumbnail size, and even a full-screen gallery view will not resolve the difference between 24 and 33 megapixels. What megapixels do buy you is cropping latitude – turning one wide rack shot into several usable detail images.
Where sensor size does matter is light. A full-frame sensor holds usable detail at higher ISO settings, which matters when the aisle is dim and you cannot add fixtures. If you can light the space properly, APS-C at 24 megapixels produces files that are indistinguishable in your final use, and you can spend the difference on lighting instead.
Micro Four Thirds is a legitimate third option. It loses in low light and in cropping latitude, and it wins decisively on stabilisation, handling and lens cost. The f/2.8 versus f/4 question resolves the same way: for inventory, depth of field at f/4 to f/8 keeps a whole pallet acceptably sharp, which beats subject separation at f/2.8 every time.
Cost per listing and payback
Frame the purchase as cost per listing rather than cost per camera. If a body plus a lens and lighting setup lets your operator clear 200 more listings a month, the payback window is short. If it saves five minutes of cropping per item across 1,000 items a month, that is over 80 hours a month returned to productive work – which is the argument that survives a budget meeting.
Two rules keep this honest. Exclude video capability and subject-recognition autofocus from your business case entirely; they do not add a single listing. And count the accessories in the same line – a second battery, a card, a grey card and a light panel are part of the system, not extras, because a body that dies mid-batch costs you more than it saved.
Frequently Asked Questions
Which camera is best for commercial photography?
For commercial catalogue work, a 24-megapixel APS-C or full-frame mirrorless body on a tripod with a fixed exposure and a stored custom white balance is the right answer. Sensor size matters less than repeatability, so buy the body your operator can set up once and leave alone.
What is the best camera for eBay photos?
The Canon EOS Rebel T7 is the most common answer for eBay sellers because it is cheap, simple and reliable across hundreds of listings. A Nikon D7500 or Canon EOS RP is the better answer if your lighting is poor or you need to shoot faster per item.
How many megapixels do I need for product photos?
Around 24 megapixels is the practical minimum that gives you both sharp listing images and room to crop a wide bay shot into detail frames. Going beyond 33 megapixels rarely improves what a buyer sees, so spend the difference on lighting.
Should I shoot inventory photos in RAW or JPEG?
For high-volume listing work, shoot JPEG with a stored custom white balance, because RAW adds a conversion step to every single frame. Shoot RAW only for condition reports and insurance records, where the file may be examined long after the fact.
What is the best way to take photos of items in batches?
Set the camera on a tripod once, lock manual exposure, read white balance from a grey card, set a square aspect ratio, then shoot the whole bay before renaming and exporting in one batch. Per-item handling is what makes batch photography slow.
Is f/2.8 or f/4 better for product photography?
For inventory work, f/4 to f/8 is better. Deeper depth of field keeps an entire pallet or rack bay acceptably sharp, and shallow depth of field at f/2.8 mostly creates reshoots on the items at the back.
What cameras do vendors and sellers actually use?
High-volume sellers tend to run a mid-tier APS-C DSLR or mirrorless body with two off-camera strobes or light boxes, and to prioritise speed over sensor size. Bridge cameras and value APS-C bodies are the common pairing, and lighting is usually the bigger part of the spend.
Conclusion: the pick that matches your daily volume
Under roughly twenty items a day, a phone inside a light box is genuinely enough, and we would rather you know that than buy a body you do not need. Between twenty and a hundred items, the Canon EOS Rebel T7 is the pick – simple, light, and proven across thousands of catalogue sessions. It is our editor’s choice because it makes the whole job faster for the least money.
Between one hundred and three hundred items a day, step up to the Nikon D7500 for its high-ISO files and dependable metering, or the Canon EOS RP if the lighting is poor and weight matters. Above three hundred, the Canon EOS R6 Mark II is the answer: the 10Gbps USB-C transfer and 40 fps electronic burst remove the two bottlenecks that cap throughput on every cheaper body here.
Our 2026 picks below have not moved much in a year, because the criteria that matter here – transfer speed, focus acquisition and sealed build – change slowly. Whatever you buy, spend the difference on lighting and a second battery. Those two items improve more of your frames than any camera on this page, and they are what turns the best cameras for warehouse inventory photography from a nicer camera into a faster operation. Our wider [still camera roundups](https://markus-hagner-photography.com/best-still-cameras-for-photography/) cover the same bodies for general shooting if you need the context.