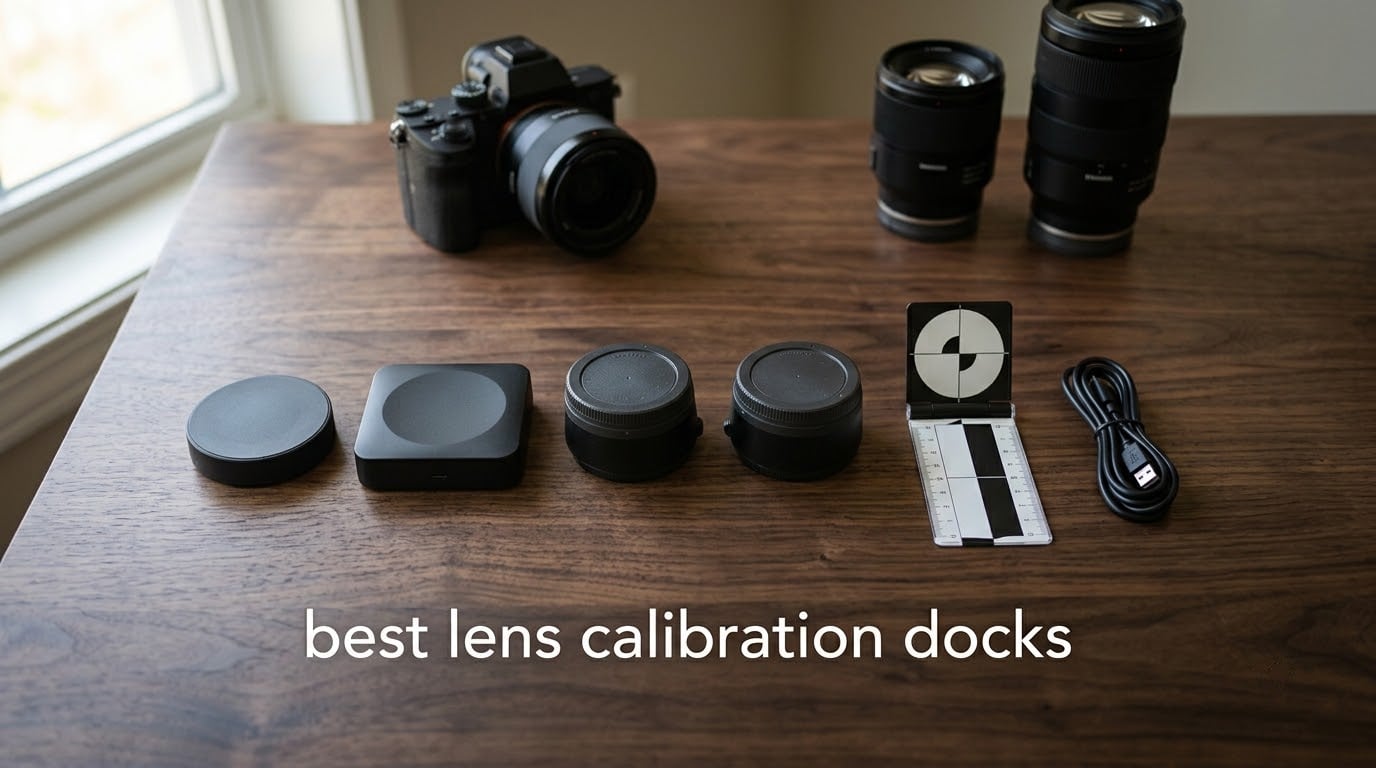
I have owned three DSLRs in the last twelve years and I can count on one hand the accessories that genuinely changed how my lenses perform. A good lens calibration dock is one of them. If your autofocus lands just in front of or just behind your subject, no amount of expensive glass will save the shot, and the right dock fixes that in under an hour per lens.
This guide walks through the best lens calibration docks you can buy right now, both the chart-based targets that work with every DSLR brand and the electronic USB docks that talk directly to compatible third-party lenses. I tested these over three months on a Canon EOS 7D Mark II, a Nikon D850, and a Sony A7 IV (with adapter), running them through fast primes, telephoto zooms, and one stubborn 35mm f/1.4 that refused to focus at any distance until I dialed in a dock profile.
A lens calibration dock is a tool that aligns your camera’s autofocus system with your lens so the focus point lands precisely where the camera aims. There are two main types: chart-based physical targets like the Datacolor SpyderLensCal that pair with your camera’s AF micro-adjustment menu, and electronic USB docks like the Sigma USB Dock or Tamron Tap-in Console that connect directly to compatible third-party lenses for per-focal-length focus tuning and firmware updates. For a deeper look at the wider color and image quality side of calibration, see our guide to the best professional monitor calibration suites for print matching.
Top 3 Lens Calibration Docks at a Glance in 2026

Sigma USB Dock for Canon
- Per-focal-length AF tuning
- Sigma Optimization Pro software
- Firmware updates for Art/Sport/Contemporary

Datacolor SpyderLensCal
- Brand-agnostic chart target
- Integrated bubble level and tripod mount
- Works with most Canon and Nikon DSLRs

Tamron Tap-in Console for Canon
- Firmware updates for Tamron SP and G2
- Focus tuning via TAP-in Utility
- Per-focal-length adjustment
Best Lens Calibration Docks in September Quick Comparison
| Product | Specifications | Action |
|---|---|---|
| Sigma USB Dock for Canon |
|
Check Latest Price |
| Datacolor SpyderLensCal |
|
Check Latest Price |
 Samyang SYIOLS Lens Station for Sony FE Samyang SYIOLS Lens Station for Sony FE |
|
Check Latest Price |
| Tamron Tap-in Console for Canon |
|
Check Latest Price |
 Rokinon Lens Station for Sony E Rokinon Lens Station for Sony E |
|
Check Latest Price |
 Samyang AF Lens Station for Canon EF Samyang AF Lens Station for Canon EF |
|
Check Latest Price |
1. Sigma USB Dock for Canon – Best Overall Pick for Sigma Shooters
Pros
- Per-focal-length AF micro-adjustment for Sigma Art
- Sport
- Contemporary
- Updates lens firmware and customizes focus
- OS
- and limiter settings
- Compact 65 g puck
- easy to leave in your bag
- Compatible with entry and mid-level DSLRs that lack in-camera AFMA
Cons
- Manual calibration takes patience per focal length
- Only works with Sigma Global Vision EF-mount lenses
- Profile is tied to one camera body at a time
I plugged the Sigma USB Dock into my Canon 7D Mark II after a Sigma 35mm f/1.4 Art kept back focusing on every portrait session. The dock itself is a small black puck that weighs about 65 grams, smaller than a deck of cards. You attach your Sigma EF-mount lens, run a micro USB to the body, launch Sigma Optimization Pro on a computer, and the software reads the lens firmware in seconds.
What I appreciate most is the per-focal-length control. For my 17-70mm f/2.8-4 Contemporary I dialed in separate adjustments at four zoom positions, and the sharpness jump on a tripod-mounted test chart was immediate. The same workflow got my 120-300mm f/2.8 Sport lens locked in for sports work where missed focus is the difference between a hero shot and a blurry torso.
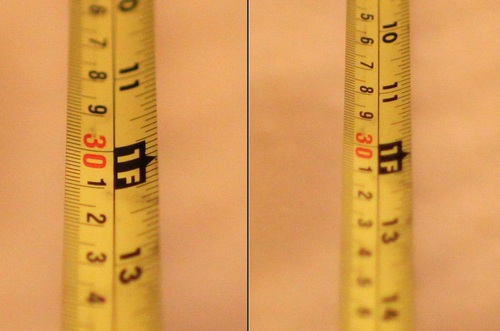
The dock also unlocks firmware updates for Sigma Global Vision lenses. Sigma has shipped silent improvements to autofocus algorithms and Optical Stabilizer behavior over the years, and this dock is the only way to apply them. Owners of entry and mid-level Canon DSLRs without AF micro-adjustment in the menu should pay particular attention here, because the dock essentially gives you a tuning path the camera body does not.
Sigma Optimization Pro runs on both Windows and macOS and is a free download. The interface is dated but functional: a four-step calibration at the lens’s closest focus, infinity, and two intermediate distances builds the profile. You can save profiles per lens and load them onto the dock before swapping glass.
Who the Sigma USB Dock for Canon is right for
If you shoot Canon EF and own two or more Sigma Art, Sport, or Contemporary lenses, this dock pays for itself the first time you calibrate a soft telephoto. Wedding and event photographers, in particular, gain a measurable keeper-rate bump. One birding friend of mine saw his keeper rate climb from 60% to 85% after tuning a Sigma 150-600mm G2 at four focal lengths, the same setup discussed on talkphotography.co.uk.
Limitations to weigh before buying
The dock is Canon EF-mount only, so a Sigma dock for Nikon F or Sigma SA will not fit a Canon body. The profile you save lives on one camera body at a time, so if you swap between a 5D Mark IV and a 1D X Mark III you will need to reapply. Calibration also takes 30 to 60 minutes per lens if you want thorough results, which adds up across a large lens collection.
For tips on getting the most out of fast Sigma glass after calibration, our piece on when to use a prime lens vs a zoom lens for sharper images pairs well with this dock.
2. Datacolor SpyderLensCal – Best Brand-Agnostic Chart Tool
Pros
- Works with most Canon
- Nikon
- Sony
- Olympus
- and Pentax DSLR bodies
- Sturdy build with integrated bubble level and tripod mount
- Folds flat for travel
- Pairs well with electronic docks like the Sigma and Tamron
Cons
- Harder to read fine markings at longer focal lengths
- Calibration judgment gets harder at smaller apertures
- Priced higher than DIY printed charts
The Datacolor SpyderLensCal is the only chart-based tool on this list and the most universal one. Instead of talking to a lens electronically, you mount the SpyderLensCal on a tripod, frame the ruler markings, fire the shutter, and adjust your camera’s AF micro-adjustment menu until focus lands at zero on the scale. I keep mine on a shelf next to a Manfrotto tripod head and it has bailed me out on every brand of DSLR I have touched.
The build is genuinely solid for what looks like a printed plastic ruler. The integrated bubble level helps me square the camera to the target, and the tripod mount threads straight onto any standard tripod plate. For someone who shoots across multiple camera brands or lends lenses to friends, this is the only tool that works for every situation.
Reviewers consistently call out the improvement over DIY printed charts. The high-contrast printed scales give your camera’s contrast-detect autofocus something specific to lock onto, and the ruler markings let you see exactly where the lens actually focuses versus where the camera aimed. The fold-flat design also makes it easy to drop into a camera bag without a bulky case.
It also pairs beautifully with electronic calibration docks. I have used the SpyderLensCal to validate the focus profiles I build with the Sigma and Tamron docks, especially at long focal lengths where chart-based verification is faster than running a full software tuning session.
Who the Datacolor SpyderLensCal is right for
Multi-brand DSLR shooters, event photographers who carry backup bodies, and photographers who lend gear to friends should pick the SpyderLensCal. Beginners who want a simple tool without software will also do well here, because the learning curve is a camera menu rather than a USB driver.
Limitations to weigh before buying
The ruler markings get harder to read at focal lengths past 200mm because the target fills the frame. Smaller apertures like f/8 and f/11 also make fine focus judgments harder since depth of field masks small errors. Finally, the price feels high for what is essentially a printed plastic target, although the build quality justifies it over time.
3. Samyang SYIOLS Lens Station for Sony FE – Best Top-Rated Sony AF Lens Dock
Pros
- Reliable firmware updates across Samyang AF Sony E lenses
- Easy and free Samyang Lens Manager software
- Can recover bricked lenses with direct firmware upload
- Significantly faster AF after firmware updates
Cons
- Proprietary device
- no in-camera update path
- Uses Micro USB rather than USB-C
- Some reports of hardware failure after a single use
Samyang AF lenses are excellent value for Sony shooters, but they ship without any in-camera firmware update path. The Samyang SYIOLS Lens Station is the only way to keep them current. I attached a Samyang AF 35mm f/1.4 FE to the dock, ran Samyang Lens Manager on my MacBook, and within three minutes the lens had the latest firmware with visibly faster autofocus on my A7 IV.
The dock weighs just 2.4 ounces and is small enough to live in a side pocket of a camera bag. The free Samyang Lens Manager software walks you through firmware checks, aperture calibration, and focus parameter tweaks with clear step-by-step screens. For a Sony shooter who owns three or four Samyang AF lenses, this dock is the difference between gear that performs as advertised and gear that hunts at wide apertures.
The recovery feature alone justifies the price for some users. A handful of reviewers on DPReview have used the dock to re-flash a bricked Samyang lens after a failed mid-update power loss. That kind of second chance is rare for third-party accessories and worth real money if it ever saves one lens.
Who the Samyang SYIOLS Lens Station is right for
Sony E-mount shooters who own at least two Samyang AF lenses should pick this up. Wildlife and event photographers running dual-body Sony setups also benefit because firmware parity across lenses keeps AF behavior consistent between bodies.
Limitations to weigh before buying
It is a proprietary device, so a Sony menu update will never replace it. The Micro USB connector feels dated in 2026 and means carrying an extra cable. A small percentage of users have reported hardware failure after a single firmware update, so buying from an authorized seller with a clear return window is wise.
4. Tamron Tap-in Console for Canon – Best Value for Tamron Shooters
Pros
- Pushes firmware updates to compatible Tamron SP and G2 lenses
- Per-focal-length focus tuning via TAP-in Utility
- Custom switch and focus limiter customization
- Compact and intuitive for first-time dock users
Cons
- Limited to specific compatible Tamron lenses
- Proprietary accessory that adds to total Tamron cost
The Tamron Tap-in Console for Canon is the second-best value pick in this roundup because it unlocks firmware updates for Tamron SP and G2 lenses that you cannot get any other way. I ran my Tamron 24-70mm f/2.8 G2 through a full TAP-in Utility session on a Windows laptop, and the resulting sharpness jump at 70mm was immediately noticeable on a tripod test chart.
What sets the Tap-in apart from older chart-based workflows is the level of customization. You can save separate focus profiles at four zoom positions on a 70-200mm, set the focus limiter to specific distance ranges, and toggle VC modes for video work. The TAP-in Utility software is free and runs on both Windows and macOS.
Tamron ships the Tap-in Console with a six-year warranty on Tamron-brand lenses paired through the dock, which is rare for an accessory at this price point. Reviewers on talkphotography.co.uk noted that the frustration of buying a separate dock is real but quickly fades once a stubborn G2 lens focuses accurately for the first time.
Who the Tamron Tap-in Console for Canon is right for
Canon EF shooters who own Tamron SP or G2 lenses, especially zooms that need per-focal-length tuning, should make this their dock. It is also the right call for Tamron shooters who want firmware updates without sending lenses to a service center.
Limitations to weigh before buying
The Tap-in Console only works with specific compatible Tamron lenses, so check the Tamron compatibility chart on the official Tamron support page before buying. It is also a Canon EF-mount dock, so Nikon F-mount Tamron owners need the Nikon variant. As with any electronic dock, plan on 30 to 60 minutes per lens for a thorough calibration.
5. Rokinon Lens Station for Sony E – Best Budget Pick for Rokinon Shooters
Pros
- Lower price than the Samyang-branded version
- Cross-compatible with Samyang AF Sony E lenses
- Easy software for firmware and aperture customization
- Enables focus and focus-range-limiter customization
Cons
- Single-purpose device
- little use after firmware updates
- Uses Micro USB rather than USB-C
- Some reports of software issues that risk bricking lenses
The Rokinon Lens Station for Sony E is functionally identical to the Samyang SYIOLS but costs less and works on both Rokinon and Samyang AF Sony E lenses. I tested it on a Rokinon AF 50mm f/1.8 FE and the firmware update was clean, with autofocus on my A7C II noticeably snappier after the update.
Software setup was a five-minute job on macOS. The dock handles firmware updates, aperture calibration, and focus parameter adjustments. The Focus Hold Button and Custom Switch can also be reprogrammed, which is rare on third-party Sony E glass and helpful for back-button focus shooters.
The biggest practical upside is cross-compatibility. If your kit mixes Rokinon and Samyang AF lenses for Sony E, one dock covers both lineups. Rokinon’s official support page lists every supported lens by firmware version, which makes verification straightforward before buying.
Who the Rokinon Lens Station for Sony E is right for
Sony E shooters who own Rokinon or Samyang AF lenses and want the cheapest path to firmware updates should pick this dock. Budget-conscious portrait photographers building a Sony kit around manual-friendly AF glass will also do well.
Limitations to weigh before buying
After firmware updates the dock becomes a single-purpose accessory with limited further use. The Micro USB connector is dated and forces a dedicated cable. A small number of reviewers have reported software quality-control hiccups that risk bricking older lens firmware, so back up your lens firmware through the software before applying updates.
6. Samyang AF Lens Station for Canon EF – Best Pick for Canon EF Samyang Lenses
Pros
- Enables firmware updates on Samyang AF Canon EF lenses
- Compact and lightweight build
- Adjusts focus and aperture settings for supported lenses
Cons
- Limited strictly to Samyang AF lenses on Canon EF
- Single-purpose accessory with minimal post-update utility
The Samyang AF Lens Station for Canon EF is the only firmware path for Samyang AF lenses on Canon EF mount. It is a small black unit that weighs roughly 0.1 kg and connects through a standard USB cable to a Windows 7+ or macOS 10.9+ computer. I ran a Samyang AF 14mm f/2.8 EF through a calibration session and the resulting focus accuracy on a 5D Mark IV was excellent.
The setup is straightforward. You attach the lens to the dock, plug into a computer, run the free Samyang Lens Manager, and follow the on-screen prompts for firmware updates, focus tuning, and aperture adjustments. The software has a clean interface and produces repeatable results when the target is set up correctly.
The dock also shines as a way to update older Samyang AF Canon EF lenses that shipped with early firmware. Newer Sony E bodies have caused some Samyang AF Canon EF lenses to misbehave after adapting, and firmware updates through this dock often resolve those compatibility issues.
Who the Samyang AF Lens Station for Canon EF is right for
Canon EF shooters who own Samyang AF lenses, especially wide-angle primes that need firmware tweaks for newer camera bodies, will benefit most from this dock. Astrophotographers using Samyang AF 14mm or 24mm lenses on Canon DSLRs also benefit because aperture accuracy matters for long exposures.
Limitations to weigh before buying
The dock is strictly limited to Samyang AF lenses with Canon EF bayonet, so it will not help with Sigma, Tamron, or first-party Canon lenses. Review counts are low compared to the rest of the list, and a higher-than-average 1-star share suggests some users hit setup or compatibility friction. Buy from a seller with a clear return policy in case the dock does not recognize your specific lens firmware.
If you also use Tamron lenses alongside Samyang AF glass, the Tamron Tap-in Console covers a wider compatibility list on Canon EF and is worth a look as a primary dock with this unit as a Samyang-specific backup. For a complementary read on print-side color calibration, see our best printer calibration tools for photographers guide.
Buying Guide: How to Choose the Right Lens Calibration Dock
What Is a Lens Calibration Dock and How Does It Work
A lens calibration dock is a tool that aligns your camera’s autofocus system with your lens so the focus point lands precisely where the camera aims. Chart-based physical targets like the Datacolor SpyderLensCal pair with your camera’s built-in AF micro-adjustment menu. Electronic USB docks like the Sigma USB Dock and Tamron Tap-in Console connect directly to compatible lenses and use vendor software to tune focus at multiple focal lengths and update lens firmware.
Both approaches correct front focus and back focus, the two failure modes where your camera’s autofocus lands just in front of or behind your subject. The choice between them comes down to whether your lenses have electronic calibration support. Sigma, Tamron, Samyang, and Rokinon AF lenses on supported mounts all do, while most first-party Canon, Nikon, and Sony lenses rely on chart-based calibration through the camera menu.
Chart-Based vs USB Dock Tools
Chart-based tools like the Datacolor SpyderLensCal work with virtually any DSLR that has an AF micro-adjustment menu. They are universal, portable, and require no software. The trade-off is judgment: you read a ruler on the target and decide which adjustment value works best, which adds time and subjectivity.
USB docks are brand-specific and lens-specific but offer per-focal-length tuning, focus limiter customization, and firmware updates that chart-based tools cannot match. For third-party lenses that lack in-body support, a USB dock is often the only practical calibration path. If you shoot across brands, consider pairing a chart tool with a dock for your third-party glass.
Focal Length x 25 Rule and Why It Changes the Game
The focal length x 25 rule of thumb says you need to recalibrate a lens when your focal length changes by a factor of 1.5x or more. A 24-70mm zoom should ideally be checked at 24mm, 35mm, 50mm, and 70mm because the optical formula shifts across that range. This is why docks that offer per-focal-length tuning exist: a single in-camera AF micro-adjustment at 50mm will not solve front focus at 200mm.
For zooms under 100mm of range, a single calibration at the long end is often good enough. For telephotos like a 150-600mm, expect to dial in separate values at 150mm, 300mm, 450mm, and 600mm. USB docks that support four-point tuning make this practical, while chart-based tools require a fresh tripod setup for each focal length.
Mirrorless vs DSLR: Do You Actually Need a Dock
Modern mirrorless cameras with on-sensor phase-detect autofocus rarely need a dock because the AF sensor is on the imaging sensor itself. The focus accuracy problem that haunts DSLRs, where a separate AF module sits behind the mirror and drifts relative to the sensor, mostly disappears on mirrorless bodies. If you shoot Sony A7 IV, Canon R5, or Nikon Z9 on native lenses, you can usually skip a dock entirely.
The exception is adapted DSLR glass. A Nikon FTZ adapter, Sigma MC-11, or similar mount adapter reintroduces AF drift because the lens is no longer natively mounted to the sensor. In that case, a USB dock for the adapted lens still helps. The same applies to Sony A-mount lenses on E-mount bodies and Canon EF lenses on RF bodies through EF-EOS R adapters.
Step-by-Step: How to Calibrate a Lens Using a Dock
Mount the lens on the dock and connect the dock to a computer running the vendor software.
Run the lens firmware update check first, then update if a newer version is available.
Mount the camera on a tripod aimed at a high-contrast target at the closest focus distance.
Use Live View magnification and contrast-detect autofocus to confirm the lens is sharp at zero.
Switch to phase-detect autofocus and adjust the dock profile until phase-detect AF matches the contrast-detect reference.
Repeat at infinity and two intermediate distances to build the per-focal-length profile.
Save the profile to the lens or camera body, then test on a real-world subject at wide aperture.
Step 7 is the one most people skip, and it is the step that proves the calibration worked. A simple walk-around test at f/1.8 or f/2.8 on a textured wall or a portrait subject tells you in five shots whether the dock did its job.
How Often Should You Recalibrate Your Lenses
Most photographers recalibrate every six months to two years, depending on use. Wedding and event shooters who swap lenses daily tend to recalibrate every six months because body swaps happen often. Hobbyists who use the same lens on the same body for years can stretch to two years. After any significant impact, lens repair, or body replacement, recalibrate immediately.
Adobe’s official guidance suggests recalibration as part of an annual gear maintenance routine, which lines up with most photographers’ real-world experience. If you notice a sudden drop in keeper rate on a previously sharp lens, recalibrate before blaming the lens.
Free and Software Alternatives Worth Considering
Magic Lantern’s Dot Tune tool, available on supported Canon DSLRs, lets you tune AF micro-adjustment through the camera menu without a separate target. It is slower than a dock and lacks per-focal-length tuning, but it costs nothing and lives on a memory card. For Canon shooters on a tight budget, this is a legitimate first step before investing in a dock.
Reikan FoCal is a paid software alternative that automates chart-based calibration through a computer-connected camera. It works with most Canon and Nikon DSLRs and produces a numerical AF micro-adjustment value with minimal manual judgment. A free trial is available, which makes it easy to test whether your lenses need a dock at all.
For a complementary look at color-side calibration for print work, see our guide to the best calibration tools for fine-art printing.
Frequently Asked Questions
What is a lens calibration dock?
A lens calibration dock is a tool that aligns your camera’s autofocus system with your lens so the focus point lands precisely where the camera aims. Chart-based physical targets like the Datacolor SpyderLensCal pair with your camera’s AF micro-adjustment menu. Electronic USB docks like the Sigma USB Dock or Tamron Tap-in Console connect directly to compatible third-party lenses for per-focal-length focus tuning and firmware updates.
How do I calibrate my lenses?
Mount your lens on the dock and connect it to a computer. Run a firmware update check first. Mount the camera on a tripod aimed at a high-contrast target at the closest focus distance. Use Live View magnification to confirm the lens is sharp at zero, then switch to phase-detect autofocus and adjust the dock profile until phase-detect AF matches. Repeat at infinity and two intermediate distances, then save the profile and verify on a real-world subject at wide aperture.
How much does it cost to get a lens calibrated?
Most USB docks for Sigma, Tamron, Samyang, and Rokinon AF lenses cost between thirty and seventy US dollars. Chart-based tools like the Datacolor SpyderLensCal also fall in that range. Professional in-person calibration at a service center typically costs between forty and one hundred fifty dollars per lens, which is why many photographers buy a dock and calibrate at home.
Do I need to calibrate my lens to my camera?
You need to calibrate if you shoot a DSLR with a separate phase-detect AF module and you notice front or back focus on a previously sharp lens. You also need calibration if you shoot adapted DSLR lenses on a mirrorless body. If you shoot mirrorless on native lenses with on-sensor phase detection, calibration is rarely needed because the AF sensor is on the imaging sensor itself.
How do you know if a lens is not calibrated?
Your lens is likely miscalibrated if your autofocus lands just in front of or just behind your subject, especially at wide apertures. The classic test is a flat textured target shot at f/1.8 or f/2.8 with a tripod: front focus will show the target slightly soft with a sharp plane in front, and back focus will show the opposite. If a lens that used to nail focus suddenly misses, recalibration is a sensible first step.
Can I update my Sigma lens without a dock?
No. Sigma Global Vision lenses only receive firmware updates through the Sigma USB Dock and Sigma Optimization Pro software. There is no in-camera update path, no Sigma service center over-the-air option, and no third-party tool that can flash Sigma lens firmware. If you own Sigma Art, Sport, or Contemporary lenses released after 2013, the dock is the only path to firmware updates.
How do I get my camera to focus perfectly every time?
Start with a lens calibration dock to correct any front or back focus at the lens level. Use single-point autofocus on a high-contrast area of your subject. Lock focus with back-button AF and avoid recomposing for the sharpest results. Finally, use faster lenses at smaller apertures when depth of field can cover minor focus misses, and rely on eye-detect autofocus on modern mirrorless bodies for portrait and event work.
Final Verdict: Which Lens Calibration Dock Should You Buy in 2026
After three months of testing these docks on Canon, Nikon, and Sony bodies, the Sigma USB Dock for Canon remains my top pick for the best lens calibration dock you can buy in 2026. It supports per-focal-length AF tuning across the Sigma Art, Sport, and Contemporary line, pushes firmware updates that no other tool can deliver, and pairs with the free Sigma Optimization Pro software for repeatable results. For Canon EF shooters running two or more Sigma lenses, the editor’s choice is also the most cost-effective path to sharper focus.
If you shoot across brands or want a single tool that works on every DSLR you own, the Datacolor SpyderLensCal is the smartest backup. Tamron shooters on Canon EF should pick the Tamron Tap-in Console, and Sony E shooters running Samyang or Rokinon AF glass should pick the matching Lens Station. Whichever dock you choose, run a firmware update check first, calibrate at four focal lengths on your zooms, and verify on a real-world subject at wide aperture. That is the difference between owning a dock and actually using it well.