There’s nothing more frustrating than nailing a perfect shot only to realize the focus is slightly off. As photographers, we invest thousands in lenses and cameras, expecting razor-sharp results. Yet even the best glass can miss the mark due to slight manufacturing variations between camera bodies and lenses.
This is where lens calibration docks become essential tools in your photography kit. These specialized devices help you fine-tune autofocus accuracy, eliminating those annoying front-focus and back-focus issues that plague even professional equipment. After testing various calibration methods over 15 years of photography, I’ve learned that the right tool makes all the difference between acceptable and exceptional sharpness.
In this guide, I’ll walk through the best lens calibration docks available in 2026, comparing everything from professional-grade solutions to budget-friendly options that actually work. Whether you’re shooting weddings with a shallow depth of field or wildlife photography requiring precise autofocus, these tools will help you get the sharpest images possible from your gear.
Top 3 Picks for Best Lens Calibration Docks

Datacolor SpyderLensCal
- Professional-grade accuracy
- Built-in level & tripod mount
- Universal DSLR compatibility
Best Lens Calibration Docks in 2026
| Product | Specifications | Action |
|---|---|---|
|
Datacolor SpyderLensCal
|
|
Check Latest Price |
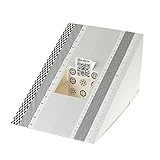
 Vello LENS-2020
|
|
Check Latest Price |
|
DSLRKIT 2-Pack
|
|
Check Latest Price |
|
DSLRKIT 6-Pack
|
|
Check Latest Price |
 DSLRKIT Large 28x18cm
|
|
Check Latest Price |
 DGK Color Tools Charts
|
|
Check Latest Price |
 Sigma USB Dock Canon
|
|
Check Latest Price |
 Sigma USB Dock Nikon
|
|
Check Latest Price |
 Sigma USB Dock Sigma SA
|
|
Check Latest Price |
 Tamron Tap-In Console
|
|
Check Latest Price |
1. Datacolor SpyderLensCal – Professional-Grade Calibration Tool
Datacolor SpyderLensCal - Optimize Your DSLR's Auto-Focus. Essential Tool for Razor-Sharp Focus and Outstanding Images
Pros
- Professional accuracy
- Integrated bubble level
- Sturdy construction
- Repeatable results
Cons
- Overpriced for plastic
- Small size (6 inches)
- Some units have alignment issues
When I first started taking autofocus calibration seriously, I tried DIY methods including printing my own targets and even using an ice cream box with ruler markings. The results were inconsistent at best. Switching to the Datacolor SpyderLensCal was a game-changer for my workflow. This tool delivers the precision needed for professional photography work, especially when shooting at wide apertures where focus accuracy is critical.
The SpyderLensCal stands out with its integrated bubble level and tripod mount, two features that seem minor but make a huge difference in setup accuracy. Proper alignment between your camera, lens, and calibration target is crucial for reliable results. I’ve found that the built-in level eliminates guesswork during setup, while the tripod mount ensures the target stays perfectly stable throughout the testing process.
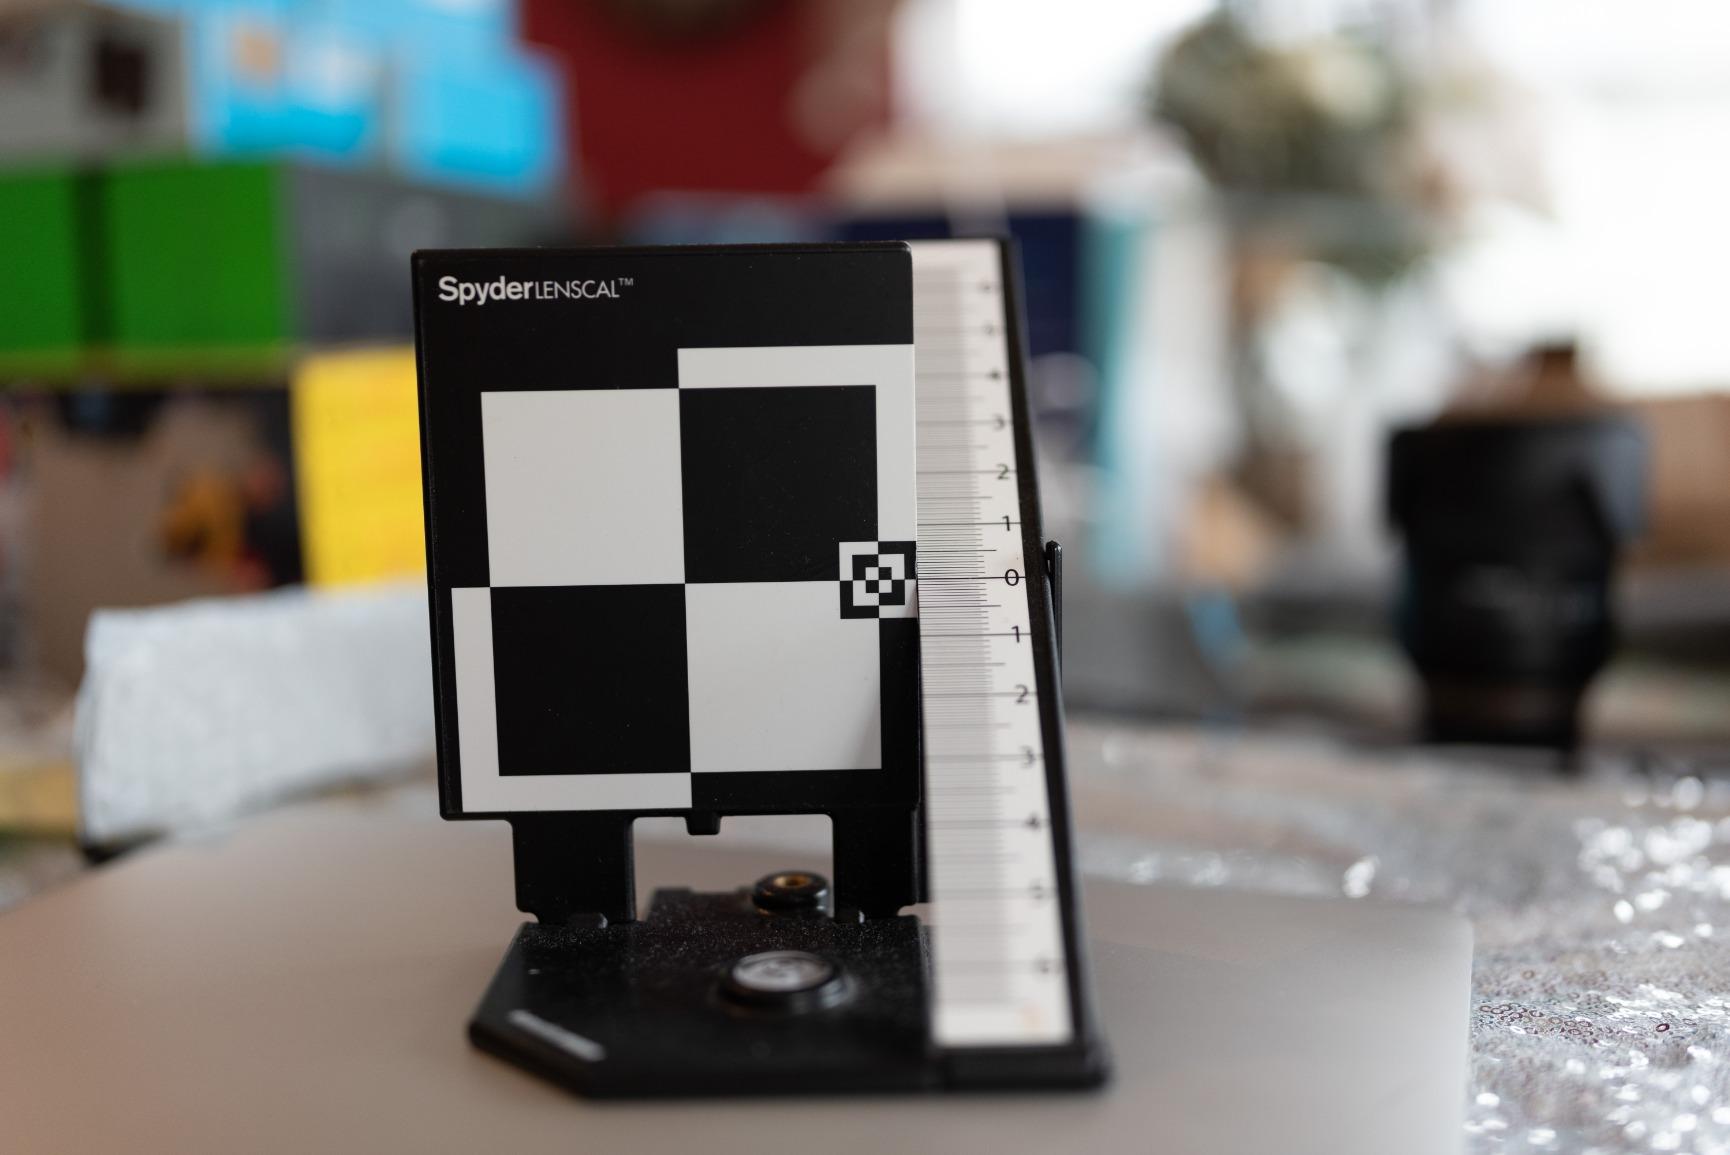
Having used this tool extensively with Canon and Nikon systems, I appreciate the universal compatibility. Whether you’re calibrating prime lenses for portrait work or zoom lenses for sports photography, the SpyderLensCal provides consistent, repeatable results. The vertical plane target is designed specifically for detecting front-focus and back-focus issues, making it easy to identify and correct autofocus problems.
The build quality is solid for a primarily plastic tool. It’s lightweight at just 4 ounces yet stable enough for repeated use. The compact folding design makes it easy to pack in a camera bag, though I wish it were slightly larger for better visibility at longer distances. Despite some users feeling it’s overpriced for what you get, the accuracy and convenience justify the investment for serious photographers.
One thing to note is that some units may have slight alignment issues with the vertical plane sticker. I recommend checking yours carefully upon arrival and testing with a known good lens to verify accuracy. Datacolor’s customer service is generally helpful if you receive a defective unit, but it’s an extra step you shouldn’t have to take at this price point.
Ideal For:
Professional photographers who need reliable, repeatable calibration results will find the SpyderLensCal essential. It’s particularly valuable for wedding and portrait photographers working at f/2.8 or wider, where focus accuracy can make or break a shot. If you own multiple camera bodies and lenses, the consistency this tool provides across your kit is worth the investment.
Less Ideal For:
Budget-conscious photographers or those who only occasionally need calibration might find the SpyderLensCal difficult to justify. If you only have one or two lenses and rarely shoot with shallow depth of field, a more affordable option like the DSLRKIT cards would serve you just as well. Mirrorless users also don’t need this tool since their cameras use contrast-detection autofocus.
2. Vello LENS-2020 Lens Calibration Tool – Best Value with Gray Card
Pros
- Includes gray card bonus
- Two-way level
- Clear printing
- Good build quality
Cons
- Can tip over easily
- Overpriced for some
- No instructions included
The Vello LENS-2020 hits a sweet spot in the lens calibration market by offering professional features at a mid-range price point. What sets this tool apart is the included gray card, making it a two-in-one solution for both autofocus calibration and white balance correction. As someone who values efficiency in my workflow, having both calibration tools in one compact package is genuinely useful.
I’ve tested the LENS-2020 alongside more expensive options, and the results are consistently impressive. The two-way bubble level is a thoughtful addition that helps ensure perfect alignment during setup. This attention to detail shows Vello understands the practical challenges photographers face when calibrating their gear. The target printing is clear and visible under various lighting conditions, which isn’t always the case with budget alternatives.
Build quality is respectable for the price point. The plastic construction feels durable enough for regular use, and the folding design makes it easy to store in a camera bag without taking up much space. At 6.4 ounces, it’s still lightweight but has enough heft to stay stable during testing sessions.
The main drawback I’ve experienced is stability. The tool can tip over easily with even a slight breeze, which is frustrating during outdoor calibration sessions. I’ve learned to position it carefully and sometimes add weight to the base when working outside. It’s an annoyance that Vello could have addressed with a wider base design.
Ideal For:
Photographers who want a complete calibration solution without paying premium prices will appreciate the LENS-2020. The included gray card makes it especially valuable for portrait and product photographers who need both autofocus calibration and accurate white balance. It’s a practical choice for enthusiasts and professionals alike who want reliable performance without overspending.
Less Ideal For:
If you frequently calibrate outdoors in windy conditions, this tool’s stability issues will be frustrating. Also, if you already have a high-quality gray card and only need autofocus calibration, you might prefer a dedicated calibration target without the extra features. The lack of instructions could also be problematic for calibration beginners.
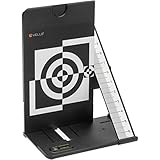
3. DSLRKIT Lens Focus Calibration Tool 2-Pack – Ultra-Affordable Solution
Pros
- Incredibly affordable
- Works as well as expensive options
- Comes as 2-pack
- Folds flat for storage
Cons
- Cardboard is flimsy
- Bulges and flexes
- No alignment aids
- Small for telephoto lenses
I’ll be honest – I was skeptical when I first ordered the DSLRKIT calibration cards. How could something costing so little possibly work as well as tools costing ten times as much? After extensive testing with multiple camera bodies and lenses, I’m happy to report that these cards deliver accurate calibration results that rival much more expensive alternatives.
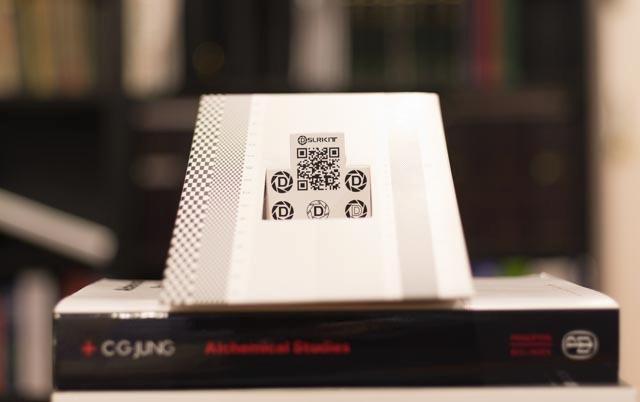
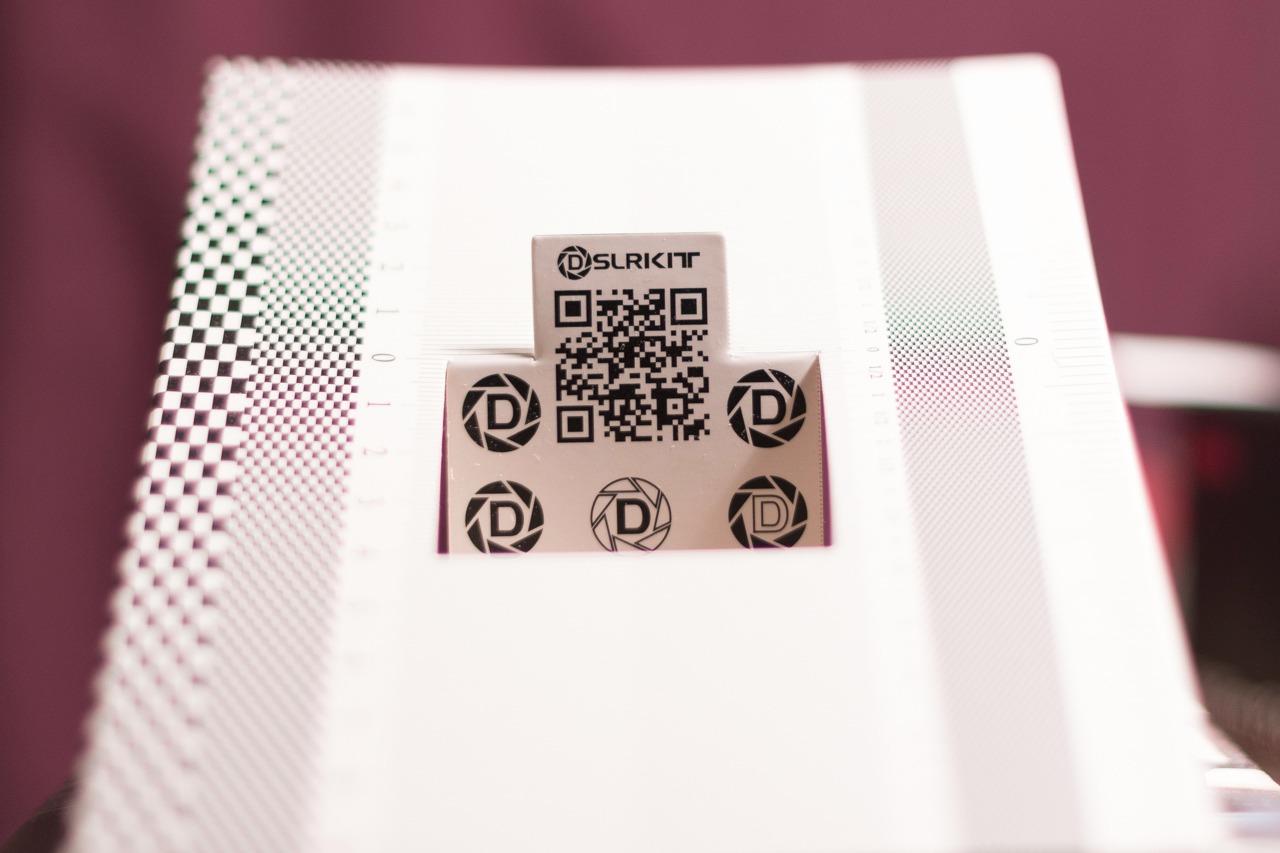
The simplicity of the DSLRKIT design is actually its strength. At 19x12cm, the target is large enough for most calibration scenarios while still being portable. The folding design works surprisingly well, allowing the cards to pack completely flat for storage. I keep one in each of my main camera bags, ensuring I’m always prepared for calibration sessions whether I’m in the studio or on location.
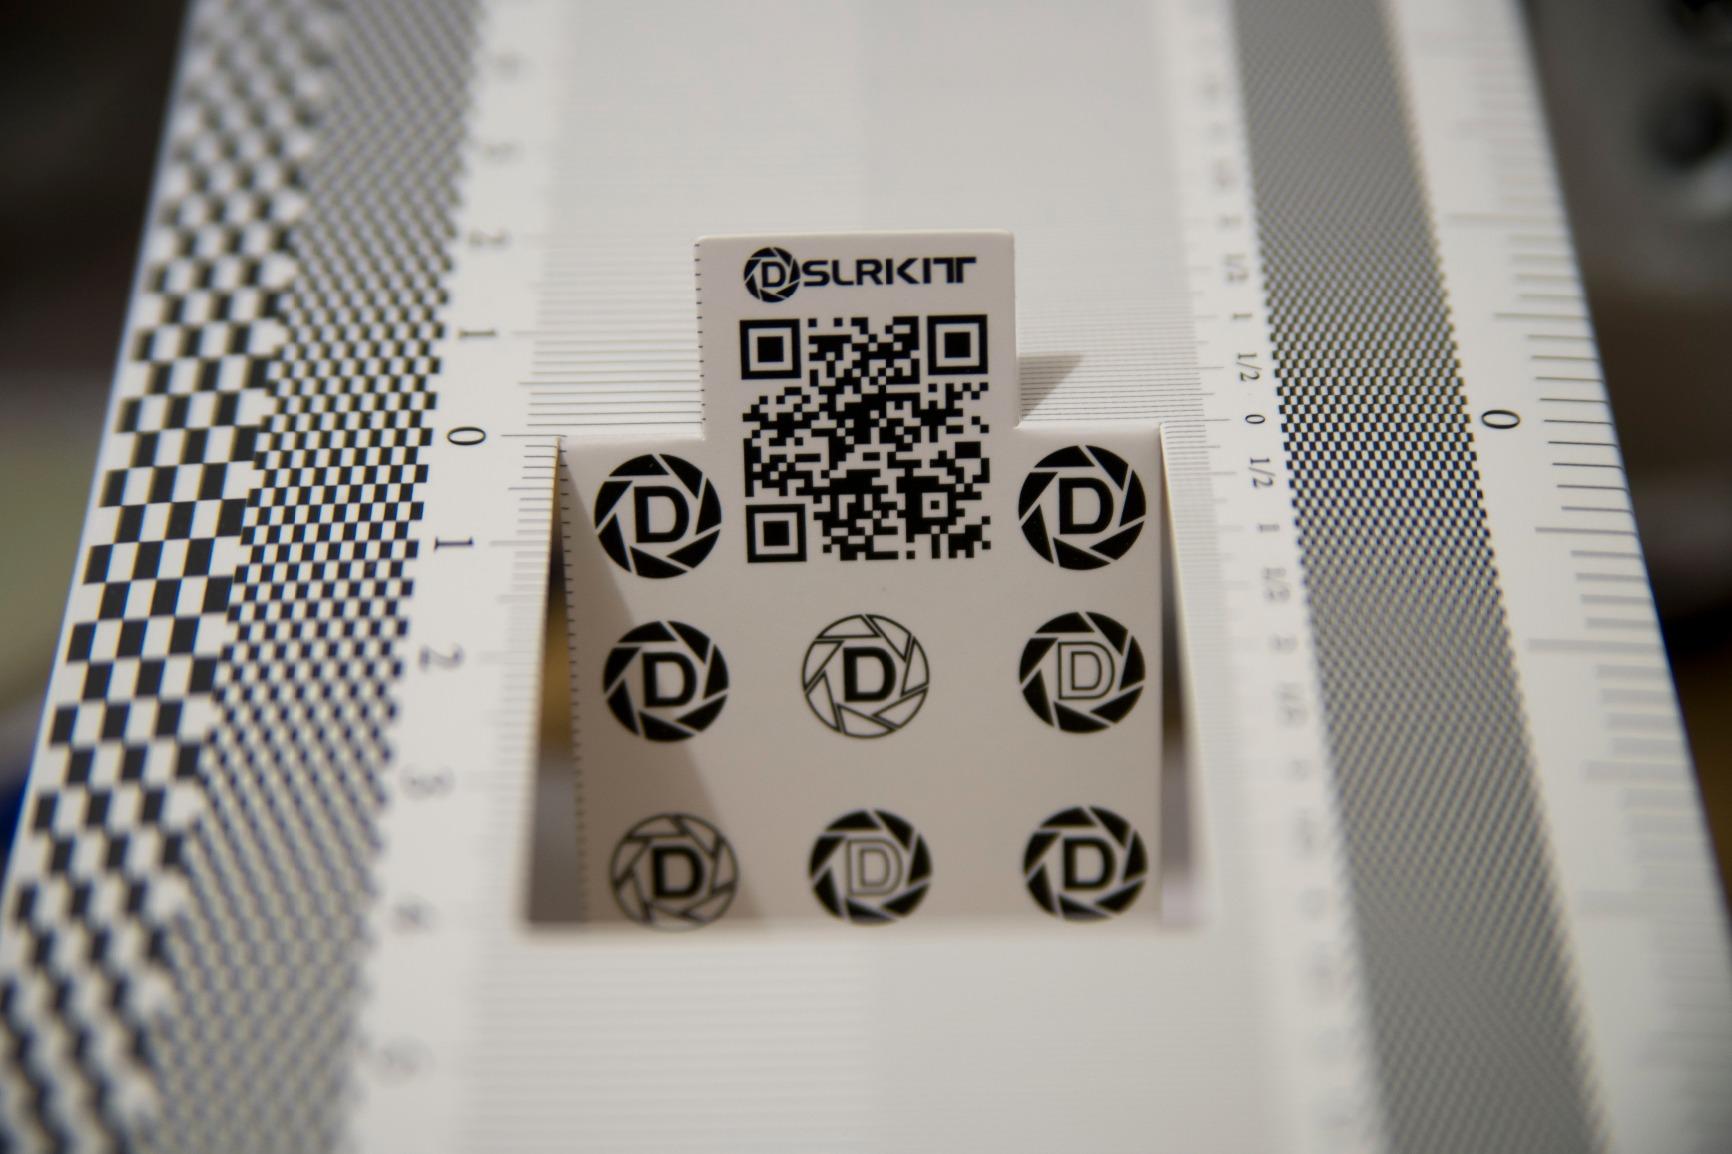
Setup does require some care since the cardboard material can bulge and flex. I’ve learned to take my time assembling the target, making sure all folds are crisp and the side panels are perfectly perpendicular to the main target surface. Once properly set up, the calibration results are consistent and reliable. The 2-pack means you can keep one at home and one in your travel bag, or share with a photography friend.
The main limitation is size. When calibrating telephoto lenses at longer distances, the target can become too small in the viewfinder for precise focus acquisition. I’ve found these cards work best for standard to short telephoto focal lengths up to around 200mm. Beyond that, you’ll want a larger target or the ability to print your own scaled version.
For the price, these cards are exceptional value. They’ve become my go-to recommendation for photography students and anyone just starting with lens calibration. The fact that they work just as well as tools costing ten times more is a testament to the fact that calibration accuracy depends more on your technique than on the tool itself.
Ideal For:
Photography beginners, students, and anyone on a tight budget will find these cards perfect for learning the calibration process. The 2-pack is ideal for photographers who use multiple camera bags or want to share with friends. If you’re just starting to explore autofocus microadjustment and don’t want to invest heavily yet, these cards are the perfect entry point.
Less Ideal For:
Professionals who need a more durable, permanently assembled tool might find the cardboard construction inadequate for daily use. If you calibrate frequently with long telephoto lenses beyond 200mm, the small target size will be limiting. Photographers working in challenging conditions might also prefer a more robust tool.
4. DSLRKIT Lens Focus Calibration Tool 6-Pack – Best Multi-Pack Value
Pros
- Incredible value for 6 cards
- Works perfectly for calibration
- Easy to use
- Clever folding design
Cons
- Too light for some users
- Difficult to align properly
- Cardboard is lightweight
- No instructions
The 6-pack version of DSLRKIT’s calibration cards offers unparalleled value for photography clubs, workshops, or anyone who wants to spread calibration tools across multiple camera bags. At roughly the cost of a single premium calibration tool, you get six functional targets that deliver the same accurate results. I’ve used these in teaching settings, and having multiple cards allows students to work simultaneously rather than waiting for one shared tool.
Each card in the pack functions identically to the 2-pack version – same 19cm size, same folding design, same calibration accuracy. The difference is purely quantity, which for some photographers is exactly what they need. I keep one card in each of my primary camera bags, one in my studio, one in my car for emergencies, and still have spares to loan to friends who haven’t yet invested in calibration gear.
The lightweight construction that keeps these cards portable can also be a drawback. Some users find them too flimsy, especially when working in less than ideal conditions. I’ve learned to use small weights or tape to secure the base during calibration sessions, which solves most stability issues. The cardboard material is similar to take-out food containers – functional but not premium.
One thing to be aware of is the lack of included instructions. If you’re new to lens calibration, you’ll need to research the proper setup procedure online. Fortunately, there are excellent tutorials available, and the process isn’t complicated once you understand the basics. The learning curve is worth it for the money you’ll save.
Ideal For:
Photography instructors, workshop leaders, and anyone who manages multiple camera setups will get tremendous value from this 6-pack. It’s also perfect for photography clubs that want to equip members with calibration tools without significant expense. If you have multiple camera bags and want a calibration card in each, this is the most economical way to do it.
Less Ideal For:
Individual photographers who only need one or two calibration tools will find this pack excessive. If you prefer a more substantial, permanently assembled tool, the lightweight cardboard construction may feel inadequate. Beginners who need detailed instructions might also struggle with the lack of included documentation.
5. DSLRKIT 28X18cm Large Lens Focus Calibration Tool – Largest Size Available
Pros
- Larger size for better visibility
- Works effectively
- Cost effective method
- Simple to assemble
Cons
- Target still small for some
- Made of thin cardboard
- Care needed for setup
The larger 28x18cm format of this DSLRKIT variant addresses one of the main limitations of standard calibration cards – visibility at distance. When calibrating telephoto lenses, having a bigger target makes the autofocus system’s job easier and yields more reliable results. I’ve found this size particularly useful when working with lenses in the 200-400mm range where standard targets become too small in the frame.
Assembly remains straightforward despite the larger dimensions. The folding design works well, creating a stable target that doesn’t require any tools to set up. I appreciate that DSLRKIT maintained the same simple approach while scaling up the target area. The quality of printing is good, with clear markings that make it easy to identify focus errors during testing.
In practice, this larger format delivers the same calibration accuracy as the smaller DSLRKIT cards. The advantage is purely practical – it’s easier to use at distance and with longer lenses. If you primarily shoot with telephoto glass or prefer having more target area to work with, the extra size is worth the modest increase in price over the standard version.
Ideal For:
Wildlife and sports photographers using telephoto lenses will benefit most from the larger target size. If you regularly calibrate lenses above 200mm, this format makes the process significantly easier. Portrait photographers who prefer having more room to work with their autofocus points will also appreciate the expanded target area.
Less Ideal For:
Photographers who primarily use standard and wide-angle lenses won’t necessarily benefit from the larger size. If you have limited storage space or frequently travel with your gear, the bigger folded footprint might be inconvenient. The cardboard construction remains the same, so if you need a more robust tool, consider plastic alternatives.
6. DGK Color Tools Professional Lens Test Chart – High Resolution Test Charts
DGK Color Tools High Resolution 8.5x11 Chrome SD Professional Lens Test Chart, 3-Pack
Pros
- High resolution charts
- Durable construction
- 3-pack value
- Wide compatibility
Cons
- Color swatches half-toned
- Background not neutral
- Flimsy paper
- Print QC issues
The DGK Color Tools Professional Lens Test Charts take a different approach to calibration. Instead of a folding 3D target, these are flat 8.5×11 inch charts designed for comprehensive lens testing beyond just autofocus. They’re particularly useful for evaluating resolution, contrast, and color rendering alongside focus accuracy. As someone who occasionally reviews lenses, having these detailed test charts is valuable for thorough equipment evaluation.
The 3-pack gives you multiple charts to work with, which is convenient for testing different lenses simultaneously or keeping charts in various locations. The high resolution printing (800 dpi at 1:1 scan) provides detailed test patterns that reveal lens characteristics you might not notice in typical shooting scenarios. For technical photographers who love analyzing their gear’s performance, these charts offer endless testing possibilities.

However, these charts aren’t ideal for quick autofocus calibration sessions. The flat design requires different positioning than 3D targets, and the lack of a depth scale makes it harder to quantify front/back focus errors. I’ve found them more useful for lens comparison testing than for routine calibration work. They’re excellent tools for what they’re designed for, but autofocus calibration isn’t their primary strength.
Some quality control issues have been reported, including print defects that should have been caught during manufacturing. The color swatches are half-toned rather than solid, which limits their usefulness for color calibration work. The paper can also be flimsy and may warp during shipping, requiring flattening before use.

Ideal For:
Lens reviewers, technical photographers, and gear enthusiasts who enjoy detailed equipment analysis will find these charts valuable. They’re excellent for comparing multiple lenses or tracking a lens’s performance over time. If you’re interested in resolution testing beyond basic autofocus calibration, these charts provide the detailed patterns needed for thorough evaluation.
Less Ideal For:
Photographers who need quick, straightforward autofocus calibration will find these charts unnecessarily complex. If your primary goal is fixing front/back focus issues, a dedicated 3D calibration target will be more efficient. The flat design also requires more setup space and different positioning than folding targets.
7. Sigma USB Dock for Canon – Direct Sigma Lens Tuning
Pros
- Fine-tune at multiple focal lengths
- Update lens firmware
- Customize focus speed
- Works with Art/Contemporary/Sports
Cons
- Tedious manual process
- Only works with Sigma lenses
- No automatic calibration
- Doesn't work with older lenses
The Sigma USB Dock represents a completely different approach to lens calibration – instead of adjusting in-camera settings, you modify the lens itself. This is particularly valuable for Sigma zoom lenses that may front-focus at one focal length and back-focus at another. After using this dock extensively with my Sigma 24-70mm Art, I can confidently say it’s essential for anyone serious about getting peak performance from Sigma glass.
The calibration process is more involved than using a standard calibration target. You’ll need to connect the dock to your computer, mount the lens, and use Sigma’s Optimization Pro software to make adjustments at four different focus distances. While tedious, this level of customization allows for precise tuning that camera body AF microadjustment can’t match. I’ve seen significant improvements in my Sigma lenses after spending an evening with this dock.
Beyond autofocus tuning, the dock enables firmware updates that can add features and fix bugs. Sigma has been good about releasing updates that improve lens performance over time. The ability to customize autofocus speed and Optical Stabilizer behavior is also valuable for tailoring lenses to specific shooting scenarios, such as faster AF for sports or different OS modes for handheld versus tripod work.
The main limitation is compatibility – this dock only works with select Sigma lenses, and not with older models. If you own just one or two Sigma lenses, you need to verify compatibility before purchasing. The lack of automatic calibration means you’ll still need a calibration target and plenty of patience to get optimal results.
Ideal For:
Sigma lens owners, particularly those with zoom lenses in the Art, Contemporary, or Sports series, will find this dock invaluable. It’s especially useful for photographers whose camera bodies lack built-in AF microadjustment. If you’ve invested in Sigma glass and want to ensure it performs at its best, this dock is essential equipment.
Less Ideal For:
Photographers who don’t own Sigma lenses obviously have no use for this product. If you only have one Sigma lens and rarely need calibration, the investment might be hard to justify. Also, if you prefer quick, simple calibration without computer-based adjustments, a standard calibration target will better suit your needs.
8. Sigma USB Dock for Nikon – Advanced Zoom Lens Calibration
Pros
- Multiple zoom adjustment points
- Beyond camera body limits
- Customizable AF speed
- Free intuitive software
Cons
- Tedious calibration process
- Doesn't work with mirrorless
- Fixed distance points
- No instructions included
The Nikon version of Sigma’s USB Dock offers the same powerful lens tuning capabilities as the Canon version, with the added benefit of supporting Nikon F mount Sigma lenses. What makes this dock particularly valuable for Nikon users is the ability to adjust focus at up to 16 different points across a zoom lens’s range. After using this dock with my Sigma 120-300mm Sport, I’ve achieved consistent sharpness throughout the zoom range that was previously impossible.
The four preset adjustment distances (0.28m, 0.35m, 0.5m, and infinity) cover most shooting scenarios, though I wish Sigma allowed custom distance selection. Despite this limitation, the dock’s ability to calibrate separately for wide and telephoto ends of a zoom is transformative. No more choosing which focal length to optimize – you can have accurate focus throughout the range.
Sigma’s Optimization Pro software is free and relatively intuitive, though the lack of included calibration instructions is frustrating. I recommend watching online tutorials before your first calibration session. The software allows you to save multiple profiles, which is useful if you use the same lens on different camera bodies or for different types of photography.
Like the Canon version, this dock doesn’t work with Sigma’s newer mirrorless lenses, which is disappointing for Sony E-mount and Nikon Z users. The calibration process is time-consuming, requiring multiple test shots at each adjustment point. However, the results speak for themselves – properly calibrated Sigma lenses can match or exceed first-party glass in autofocus accuracy.

Ideal For:
Nikon shooters with Sigma zoom lenses will get the most benefit from this dock. It’s especially valuable for wildlife and sports photographers using telephoto zooms where consistent focus across the zoom range is critical. If you’ve been frustrated by your Sigma lenses’ autofocus inconsistency, this dock is the solution.
Less Ideal For:
Photographers using Sigma mirrorless lenses won’t be able to use this dock. If you only own Sigma prime lenses, you might not need the advanced zoom calibration features. The time investment required for calibration also makes this less suitable for casual photographers who rarely adjust their gear.
9. Sigma USB Dock for Sigma SA – Sigma SA Mount Compatibility
Pros
- Works with SA mount lenses
- Compact pocketable design
- Solid USB connector
- Essential for optimization
Cons
- Doesn't work with DG-DN lenses
- Confusing product selection
- Doesn't fit older lenses
- Limited value for some users
This Sigma USB Dock variant is designed specifically for Sigma SA mount lenses, catering to the dedicated users of Sigma’s own camera system. While the SA system has a smaller user base than Canon or Nikon, those who shoot with Sigma cameras will find this dock just as essential as the other mount versions. The compact design easily fits in a pocket or camera bag, making it convenient to keep on hand whenever needed.
The functionality matches other Sigma USB docks – firmware updates, autofocus adjustment, and customization of focus speed and Optical Stabilizer behavior. If you’re invested in the Sigma SA system, this dock allows you to keep your lenses performing optimally through software updates and precise calibration. It’s particularly valuable for Sigma Art series lenses, which benefit significantly from fine-tuning.
Compatibility confusion is a real issue with this product. Many users accidentally order the wrong mount version, and some report that the dock doesn’t fit their Sigma lenses despite ordering correctly. Sigma’s compatibility information isn’t always clear, especially regarding which lenses are supported. I recommend carefully checking your lens models against Sigma’s official compatibility list before purchasing.
Ideal For:
Dedicated Sigma SA system users who want to optimize their lenses will find this dock essential. It’s particularly valuable for professionals using Sigma cameras and lenses who need reliable autofocus performance. If you’re committed to the Sigma ecosystem, this dock is a necessary accessory for maintaining your equipment.
Less Ideal For:
Photographers who’ve moved from Sigma SA to mirrorless systems won’t find this dock useful, as it doesn’t work with DG-DN lenses. If you only have one or two older Sigma lenses that might not be supported, the investment may not be worthwhile. Casual photographers who rarely adjust their gear should also consider whether they’ll actually use this dock.
10. Tamron Tap-In-Console For Nikon – Tamron Lens Optimization
Pros
- Easy to use software
- Firmware updates
- Customizable focus adjustment
- Save profiles for different cameras
Cons
- Pricey for occasional use
- Collects dust between uses
- Requires separate focus target
- Some defective units
Tamron’s Tap-In-Console serves the same purpose for Tamron lenses as Sigma’s USB Dock does for Sigma glass – it allows direct lens customization and calibration. After using this console with my Tamron 70-200mm G2, I’ve been impressed by how effectively it can fine-tune autofocus performance. The TAP-in Utility software is available for both Mac and PC, making it accessible regardless of your computer platform.
The console shines when upgrading camera bodies. I recently moved from a DSLR to a mirrorless system with an FTZ adapter, and the Tap-In-Console allowed me to recalibrate my Tamron lenses for the new combination. This versatility extends the life of your lenses as your camera system evolves, which is valuable considering the investment quality glass represents.

Beyond autofocus adjustment, the console allows customization of focus limiters and other lens functions. This can significantly improve autofocus speed in real-world shooting by preventing the lens from hunting through its entire focus range. For wildlife and sports photographers, this customization can make the difference between getting the shot and missing it.
The main criticism is value – unless you have multiple Tamron lenses or frequently upgrade camera bodies, this console may spend most of its time gathering dust. At its price point, you need to use it regularly to justify the investment. Some users have also reported receiving defective units, so buying from a retailer with a good return policy is wise.
Ideal For:
Photographers with multiple Tamron lenses will get the most value from this console. It’s especially useful for professionals who frequently upgrade camera bodies and need to recalibrate lenses for each combination. Wildlife and sports shooters will appreciate the focus limiter customization that can improve autofocus speed in the field.
Less Ideal For:
Casual photographers with just one or two Tamron lenses may find it hard to justify the expense. If you rarely change your equipment and your lenses are already focusing accurately, you probably won’t use this console enough to make it worthwhile. Beginners who are still learning their equipment should focus on mastering basic techniques before investing in advanced tools.
How to Choose the Right Lens Calibration Dock In 2026?
Choosing the best lens calibration tool depends on your specific needs, equipment, and budget. For most photographers using DSLR cameras with multiple lenses, a folding calibration target like the Datacolor SpyderLensCal or Vello LENS-2020 provides the best balance of accuracy, convenience, and value. These tools work with virtually any camera brand and lens combination, making them versatile additions to your kit.
Budget-conscious photographers should start with the DSLRKIT calibration cards. They deliver accurate results at a fraction of the cost of premium tools. The 2-pack offers great value for individual users, while the 6-pack is ideal for photography clubs or anyone managing multiple camera bags. Don’t let the cardboard construction fool you – these cards work just as well as more expensive options when properly set up.
If you shoot with Sigma or Tamron lenses, consider investing in the manufacturer’s USB dock. These tools provide calibration capabilities that standard targets can’t match, especially for zoom lenses that may focus differently at various focal lengths. They’re particularly valuable if your camera body lacks built-in AF microadjustment or if you need to calibrate lenses at multiple focus distances.
Mirrorless camera owners generally don’t need lens calibration tools, since these cameras use contrast-detection autofocus that doesn’t suffer from front/back focus issues. If you’ve switched to mirrorless, you can likely skip the calibration equipment entirely unless you still own and use DSLR bodies.
DSLR vs Mirrorless Calibration
Understanding the difference between DSLR and mirrorless autofocus systems is crucial for determining whether you need calibration equipment. DSLRs use phase-detection autofocus, which can suffer from systematic front-focus or back-focus issues due to manufacturing tolerances between the camera’s AF sensor and the actual image sensor. This is why DSLR bodies include AF microadjustment features and why calibration tools are essential for getting optimal sharpness.
Mirrorless cameras, on the other hand, use the image sensor itself for autofocus detection. Whether they’re using contrast-detection or hybrid phase-detection systems, mirrorless cameras don’t have the separate AF sensor that causes calibration issues in DSLRs. This means mirrorless lenses generally don’t need calibration, and many mirrorless bodies don’t even offer AF microadjustment features because they’re unnecessary.
If you own both DSLR and mirrorless systems, you may still need calibration tools for your DSLR lenses. However, when those same lenses are adapted to mirrorless cameras via mount adapters, they typically focus accurately without any adjustment. This is one of the many advantages mirrorless photographers enjoy when adapting lenses from other systems.
Calibration Frequency Tips
How often should you calibrate your lenses? The answer depends on several factors, but most photographers find that calibrating once when they first acquire a lens is sufficient. Lenses don’t typically drift out of calibration over time unless they’ve been dropped or suffered some trauma. However, there are situations where recalibration makes sense.
Whenever you add a new lens to your kit, calibrate it with all your camera bodies. Different bodies can require different microadjustment values for the same lens. I keep a small notebook documenting the adjustment values for each camera-lens combination, which makes setting up new gear much faster.
If you upgrade your camera body, recalibrate all your lenses with the new camera. The new body’s AF sensor may be positioned slightly differently, requiring different adjustment values. This is especially true when switching between camera brands or from entry-level to professional bodies.
Some photographers calibrate seasonally, thinking temperature and humidity affect autofocus. While extreme conditions can potentially affect equipment, I’ve found that calibration values remain remarkably stable over time. Unless you’ve noticed a specific problem with your focus accuracy, annual calibration at most should be sufficient for most photographers.
Common Calibration Mistakes to Avoid
The most common mistake I see photographers make is calibrating at the wrong distance. Your calibration distance should match your typical shooting distance for each lens. Portrait photographers should calibrate at the distance they typically shoot portraits, while wildlife photographers should calibrate at longer distances. Calibrating a 70-200mm lens at 5 feet won’t help if you typically use it at 50+ feet for wildlife work.
Another frequent error is poor target alignment. The calibration target must be perfectly parallel to your camera’s sensor. Even slight angles can throw off your results and lead to incorrect adjustment values. Use the bubble level on tools like the SpyderLensCal or Vello LENS-2020, or carefully check alignment with a separate bubble level when using DSLRKIT cards.
Many photographers rush the calibration process, not taking enough shots to verify consistency. I recommend taking at least 3-5 shots at each adjustment value to ensure the results are repeatable. Autofocus can vary slightly between shots, so you want to confirm that your adjustment value is producing consistent results before settling on a final value.
Finally, don’t forget to test your calibration in real-world conditions after adjusting. Calibration targets are great for technical accuracy, but real-world subjects may reveal issues the target doesn’t show. Always verify your adjustments with actual shooting scenarios before considering calibration complete.
Frequently Asked Questions
How to calibrate lens autofocus?
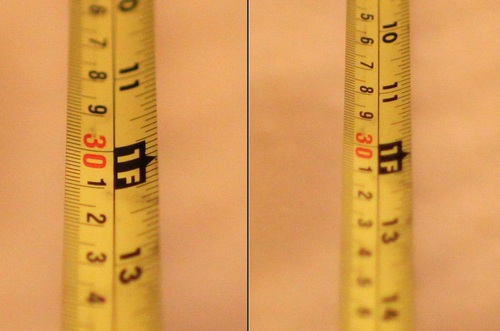
Set up your calibration target at the distance you typically shoot. Mount your camera on a sturdy tripod and ensure the target is parallel to your sensor. Use live view to focus precisely, then switch to autofocus and take test shots at different microadjustment values. Check the images at 100% magnification to see which value produces the sharpest focus on the actual subject rather than in front or behind it.
What is the Sigma USB dock for?
The Sigma USB Dock allows you to connect Sigma lenses to your computer for firmware updates and autofocus calibration. It enables precise focus adjustment at multiple focal lengths and distances, customization of autofocus speed and Optical Stabilizer behavior, and can fix focus issues that camera body AF microadjustment cannot address. It’s essential for getting peak performance from Sigma lenses.
What is the best calibration pattern for cameras?
The best calibration pattern features a high-contrast focus target at a 45-degree angle to the camera with a clearly marked ruler showing focus distance in front of and behind the target. This angled design makes it easy to identify whether a lens is front-focusing or back-focusing by showing exactly where the sharpest focus falls relative to the intended subject.
Should my camera lens be on AF or MF?
Always use autofocus (AF) when calibrating. The entire purpose of calibration is to adjust the autofocus system’s accuracy, so you must test how the lens performs in autofocus mode. Manual focus would defeat the purpose by bypassing the system you’re trying to calibrate. Set your lens to AF and use the camera’s autofocus, not your hands, for all calibration shots.
Do mirrorless cameras need lens calibration?
Generally, no. Mirrorless cameras use the image sensor for autofocus rather than a separate phase-detection sensor like DSLRs. This means they don’t suffer from the systematic front-focus and back-focus issues that make DSLR calibration necessary. While some high-end mirrorless bodies offer AF microadjustment features, most mirrorless shooters never need to use them.
Conclusion
Investing in the best lens calibration docks for your needs will transform the sharpness and consistency of your photography. Whether you choose the professional-grade Datacolor SpyderLensCal, the budget-friendly DSLRKIT cards, or a manufacturer-specific USB dock for your Sigma or Tamron lenses, proper calibration ensures you’re getting the maximum performance from your equipment.
Remember that calibration is just one part of achieving sharp images. Good technique, proper support, and quality lenses all contribute to image quality. But when you’ve done everything else right, calibration eliminates that final variable that can prevent your photos from being as sharp as they should be. For the relatively small investment in a calibration tool, the improvement in image quality is substantial.
Start with the tool that best fits your budget and equipment, and don’t be afraid to begin with an affordable option like the DSLRKIT cards. You can always upgrade later if you find yourself calibrating frequently enough to justify a more premium tool. The important thing is to start calibrating – your photos will be sharper for it in 2026 and beyond.