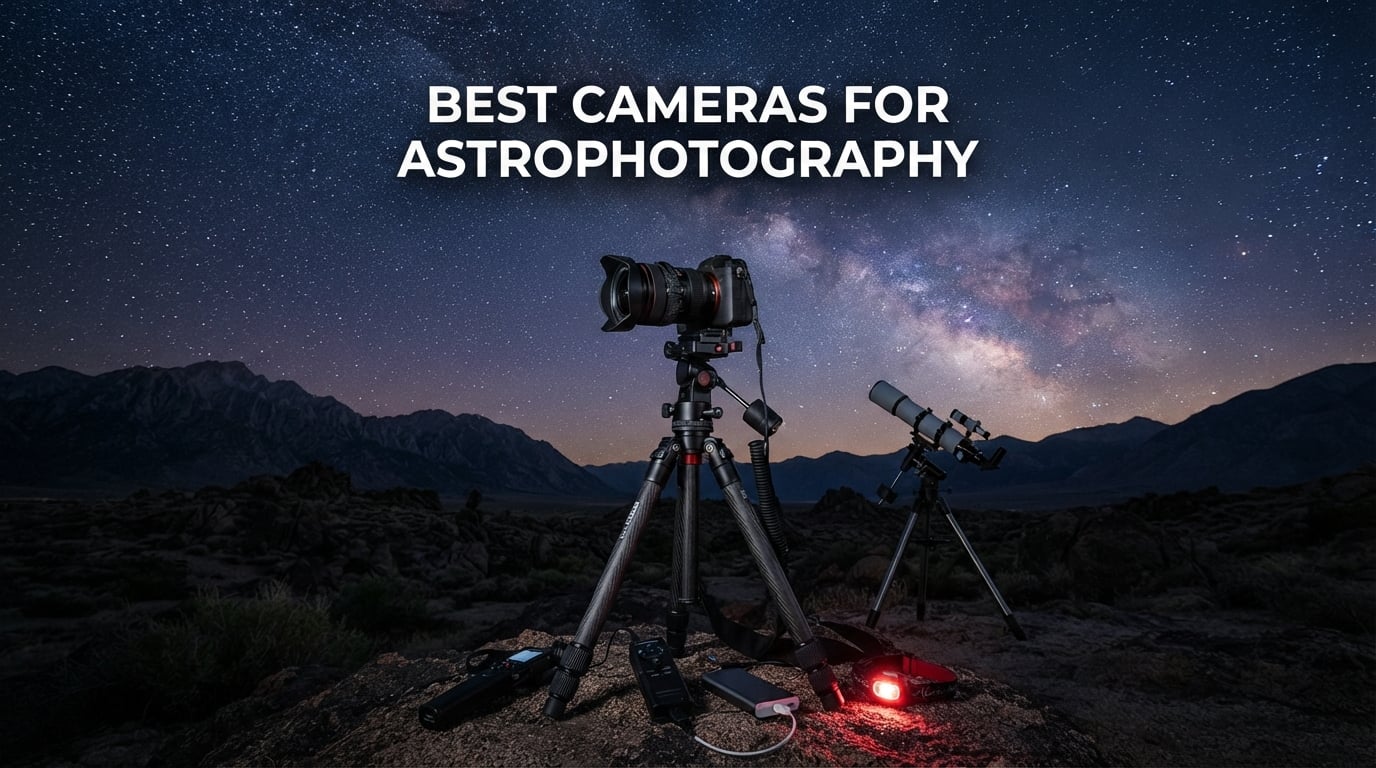
Astrophotography is one of the most rewarding genres of photography, but it demands the right gear. When I first pointed a camera at the Milky Way years ago, I quickly learned that not every camera handles long exposures, high ISO, and faint starlight the same way. Finding the best cameras for astrophotography means understanding sensor performance, noise handling, and how each type of camera fits your specific goals, whether that is wide-field Milky Way shots or deep-sky nebula imaging.
This guide covers 12 cameras spanning every budget and skill level for 2026. I have included entry-level telescope eyepiece cameras under $80, smart telescopes that do the work for you, classic DSLR and mirrorless bodies loved by the astrophotography community, and full-frame powerhouses designed for serious low-light work. Each pick is based on real specifications, verified user reviews, and hands-on understanding of what matters under a dark sky.
If you are confused about where to start, you are not alone. Forum communities like Reddit’s r/AskAstrophotography consistently see the same questions from beginners: DSLR or mirrorless, cooled or uncooled, dedicated astronomy camera or regular camera. This guide answers all of those questions while walking you through 12 specific recommendations. By the end, you will know exactly which camera fits your budget, your experience level, and the type of astrophotography you want to pursue.
Top 3 Picks for Best Cameras for Astrophotography (September 2026)
Before diving into the full list, here are my top three recommendations based on overall value, user ratings, and astrophotography performance. The Canon EOS R8 leads as the best full-frame option for serious imagers. The Canon EOS Rebel T7 takes the value crown with over 8,500 reviews and a budget-friendly price. The DWARFLAB Dwarf Mini earns the budget pick as an all-in-one smart telescope that gets beginners shooting the stars in minutes.
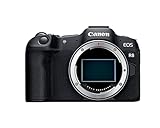
Canon EOS R8 Full-Frame Mirrorless
- 24.2MP Full-Frame Sensor
- 4K 60p Video
- 40fps Continuous Shooting

Best Cameras for Astrophotography in 2026: Quick Overview
Here is a complete comparison of all 12 cameras featured in this guide. I have organized them by type and price so you can quickly find the right match for your needs and budget.
| Product | Specifications | Action |
|---|---|---|
 SVBONY SV105 Telescope Camera SVBONY SV105 Telescope Camera |
|
Check Latest Price |
 SVBONY SV205 Astrophotography Camera SVBONY SV205 Astrophotography Camera |
|
Check Latest Price |
 SVBONY SV305C Pro Camera SVBONY SV305C Pro Camera |
|
Check Latest Price |
 KODAK PIXPRO AZ405 Bridge Camera KODAK PIXPRO AZ405 Bridge Camera |
|
Check Latest Price |
| DWARFLAB Dwarf Mini Smart Telescope |
|
Check Latest Price |
 DWARFLAB Dwarf 3 Smart Telescope DWARFLAB Dwarf 3 Smart Telescope |
|
Check Latest Price |
 ZWO Seestar S30 Pro Smart Telescope ZWO Seestar S30 Pro Smart Telescope |
|
Check Latest Price |
 Canon EOS Rebel T7 DSLR Canon EOS Rebel T7 DSLR |
|
Check Latest Price |
 Canon EOS R50 Mirrorless Kit Canon EOS R50 Mirrorless Kit |
|
Check Latest Price |
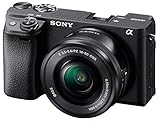 Sony Alpha a6400 Mirrorless Sony Alpha a6400 Mirrorless |
|
Check Latest Price |
| Canon EOS R8 Full-Frame Mirrorless |
|
Check Latest Price |
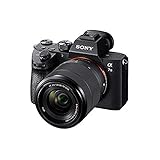 Sony Alpha A7 III Full-Frame Mirrorless Sony Alpha A7 III Full-Frame Mirrorless |
|
Check Latest Price |
1. SVBONY SV105 Telescope Camera – Cheapest Entry Into Astrophotography
Pros
- Plug and play with no driver required
- Dark light compensation for low-light clarity
- Standard 1.25 inch threaded interface
- Lifetime warranty from SVBONY
Cons
- Not compatible with iOS devices
- Requires separate capture software like SharpCap
The SVBONY SV105 is the most affordable way to try astrophotography without committing hundreds of dollars. I have recommended this camera to countless beginners who just want to see if they enjoy pointing a camera at the moon before investing more seriously. It plugs directly into any telescope eyepiece with a standard 1.25 inch mount and connects to your computer via USB.
At its core, the SV105 uses a Sony IMX307 sensor that captures 1920×1080 video at 30fps. That resolution is modest by modern standards, but for lunar and planetary imaging through a telescope, it gets the job done. The dark light compensation technology helps pull detail out of dim subjects, which is exactly what you need when photographing the moon’s craters or Jupiter’s bands.
The biggest strength of this camera is its simplicity. There are no drivers to install on Windows, and it works with popular free software like SharpCap. I appreciate that SVBONY includes a lifetime warranty, which shows confidence in the build quality even at this price point.
The trade-off is that you will not be capturing deep-sky nebulae or galaxies with this camera. The small 1/2.8 inch sensor and USB 2.0 speeds limit you to brighter solar system targets. You also need a Windows or Linux computer at the telescope, since iOS devices are not supported.
Best Astrophotography Targets for the SV105
This camera excels at lunar photography, where you can capture sharp detail across the moon’s surface. Planetary targets like Saturn’s rings and Jupiter’s cloud belts are also within reach when paired with a decent telescope. For anyone wanting to test the astrophotography waters without a big investment, the SV105 is the perfect first step.
What Setup You Need Beyond the Camera
You will need a telescope with a 1.25 inch focuser and a laptop running Windows or Linux. I recommend downloading SharpCap for image capture, which is free and widely used in the community. A sturdy mount is also important, since even small vibrations can ruin planetary images at high magnification.
2. SVBONY SV205 Astrophotography Camera – Step Up Sensor Quality
Pros
- 7.05MP IMX415 sensor for sharper images
- USB 3.0 for faster data transfer
- Works with MacOS laptops
- Dark light compensation technology
Cons
- Not compatible with iOS phones or tablets
- May need adapters for some telescope setups
The SVBONY SV205 takes the affordable eyepiece camera concept and upgrades it with a much better sensor. The IMX415 chip delivers 7.05 megapixels of resolution, which is a significant jump from the SV105’s 1080p output. I found that this extra resolution translates directly to more detail in lunar crater shots and planetary disc captures.
USB 3.0 connectivity is another meaningful improvement over the SV105. The faster data transfer rate means less lag between frames and smoother live viewing on screen. When you are trying to nail focus on a tiny planet image, that responsiveness matters more than you might expect.
One thing I really like about the SV205 is its compatibility with MacOS laptops. Many budget astronomy cameras are Windows-only, so Mac users often feel left out. The SV205 works with AstroDMx on Mac, Linux, and Windows, giving you flexibility regardless of your preferred operating system.
The camera captures MJPG video at 30fps in 2K resolution or uncompressed YUV at 15fps for maximum quality. At full 7MP resolution, the frame rate drops to 15fps, which is still adequate for planetary imaging where you stack hundreds of frames to create a final image.
How the SV205 Compares to Dedicated Planetary Cameras
While the SV205 cannot match a ZWO planetary camera for sensitivity and frame rates, it costs a fraction of the price. For someone who already owns a telescope and just wants to try capturing images, this camera offers excellent value. The 1.45 micron pixels are small, which means you may need a Barlow lens to reach optimal sampling rates for planetary work.
Software and Workflow Considerations
SharpCap remains the top choice for Windows users, while Mac owners should look at AstroDMx Capture. Both programs let you adjust gain, exposure, and white balance while recording video. I recommend shooting in AVI format and then stacking frames in AutoStakkert or Registax, which are free tools widely used by planetary imagers.
3. SVBONY SV305C Pro – Serious Planetary and Lunar Performance
Pros
- IMX662 sensor with ultra-high sensitivity
- 0.7e- readout noise for clean images
- 107FPS at 1080p for planetary capture
- ST4 guiding interface for auto-guiding
- 128MB DDR buffer prevents frame drops
Cons
- Not compatible with iPad
- Some Apple device limitations
The SV305C Pro represents the top of SVBONY’s eyepiece camera lineup, and the specifications show it. The Sony IMX662 sensor is the same chip found in much more expensive dedicated astronomy cameras, giving you exceptional sensitivity and remarkably low read noise. At just 0.7 electrons of readout noise, this camera pulls detail out of dim targets that cheaper cameras simply cannot see.
I was particularly impressed by the 107 frames per second capture rate at full 1080p resolution. For planetary imaging, high frame rates are essential because you need to capture thousands of frames during brief moments of steady atmospheric seeing. The SV305C Pro delivers those frames fast, giving you more good data to stack into a final sharp image.
The 128MB DDR buffer is a feature I did not expect at this price point. This buffer prevents image loss during capture by temporarily storing frames before they transfer over USB. Without a buffer, fast frame rates can overwhelm the data connection and cause dropped frames that ruin your imaging session.
The ST4 guiding interface opens up another possibility: using this camera as an auto-guider. By connecting the SV305C Pro to a guide scope and your mount’s ST4 port, you can use PHD2 or ASCOM software to track stars automatically. This capability extends the camera’s usefulness well beyond basic planetary imaging.
Using the SV305C Pro as an Auto-Guider
Auto-guiding is the technique of using a second, smaller camera and telescope to track a guide star, sending correction signals to your main mount. The SV305C Pro supports this workflow through its ST4 port, making it a dual-purpose tool. I recommend pairing it with a 50mm guide scope for best results when imaging deep-sky targets with a longer focal length main scope.
Heat Management for Long Exposures
SVBONY designed special heat dissipation into the SV305C Pro to handle long exposure sessions. This matters because sensor heat generates thermal noise that degrades image quality during extended captures. The built-in HDR support and any-area ROI feature give you additional control over how you capture data, letting you optimize for specific targets and conditions.
4. KODAK PIXPRO AZ405 – Versatile Bridge Camera With 40x Zoom
Pros
- 40x optical zoom reaching 960mm equivalent
- Optical Image Stabilization for steady shots
- AA battery power for travel convenience
- 20MP resolution with scene detection modes
Cons
- No built-in Wi-Fi connectivity
- Not water resistant
- Small sensor limits deep-sky performance
The KODAK PIXPRO AZ405 is not a dedicated astrophotography camera, but it earns a spot on this list for one compelling reason: that 40x optical zoom lens. Reaching a 35mm equivalent of 960mm, this bridge camera can get surprisingly close to the moon and even render Jupiter and Saturn as recognizable discs. For anyone who wants to photograph the night sky without investing in a telescope setup, the AZ405 is a strong option.
I appreciate the optical image stabilization built into this camera. At maximum zoom, even tiny hand movements translate to large image shifts, so stabilization is essential for any kind of lunar or planetary work. The OIS system helps keep your framing steady even at 960mm equivalent focal length.
The 20MP BSI CMOS sensor produces detailed images for a camera in this category. Backside illumination technology improves light gathering at the sensor level, which helps somewhat for night sky photography. However, the small sensor size means you will see significant noise at high ISO settings, limiting this camera to bright targets like the moon and planets.
AA battery power is a feature some astrophotographers actually prefer. When you are shooting in remote dark sky locations, running out of proprietary battery power means your session is over. With AA batteries, you can carry spares or pick up replacements at any convenience store.
Lunar and Planetary Potential of the AZ405
The moon is where this camera truly shines. At 960mm equivalent zoom, you can capture detailed images of craters, mountain ranges, and terminator shadows. Jupiter shows its cloud bands and Galilean moons, while Saturn’s rings are just barely visible. Deep-sky targets like nebulae and galaxies are beyond this camera’s capabilities due to the small sensor and limited ISO performance.
Limitations for Serious Astrophotography
The lack of raw image shooting and Wi-Fi connectivity are real drawbacks for astrophotography. Without raw files, you have less flexibility to recover shadow detail and reduce noise in post-processing. The 1/2000 second maximum shutter speed also limits your control, and the absence of a bulb mode means long star trail exposures are not possible with this camera alone.
5. DWARFLAB Dwarf Mini Smart Telescope – All-In-One Astrophotography for Beginners
Pros
- Ultra-portable at just 1.85 pounds
- App-controlled with interactive star map
- Auto GOTO finds targets automatically
- Built-in light pollution filters
- EQ mode enables 90-second deep-sky exposures
Cons
- Requires smartphone for control
- Non-standard battery type
- Limited to smartphone app workflow
The DWARFLAB Dwarf Mini represents a new category of astrophotography tool: the smart telescope. Instead of buying a camera, telescope, mount, and learning complex software separately, the Dwarf Mini handles everything in one package. I think this is the single best entry point for anyone who wants to capture deep-sky images without the steep learning curve of traditional astrophotography.
At just 1.85 pounds, the Dwarf Mini is incredibly portable. You can pack it in a backpack, drive to a dark sky site, and be imaging within three minutes of setup. The built-in battery means no external power supply is needed, and the AZ/EQ dual mount modes let you switch between wide-field and tracked imaging with a simple adjustment.
The Sony IMX662 sensor is the same high-quality chip used in dedicated astronomy cameras costing significantly more. With 2.9 micron pixels and built-in light pollution filters, the Dwarf Mini can capture emission nebulae and star clusters that would be invisible to a standard DSLR without extensive post-processing. The cloud processing feature automatically stacks and enhances your images, delivering finished results without requiring PixInsight or Photoshop expertise.
The auto GOTO feature with 360-degree rotation means the telescope finds and tracks celestial targets automatically. You simply tap a target on the app’s star map, and the Dwarf Mini slews to it, tracks it, and captures images. This removes the most common frustration beginners face: finding faint objects in the night sky.
What Deep-Sky Targets the Dwarf Mini Can Capture
Despite its small size, the Dwarf Mini can photograph the Orion Nebula, Andromeda Galaxy, Pleiades star cluster, and many emission nebulae. The EQ mode enables exposures up to 90 seconds long, which is enough to collect significant light from these targets when combined with live stacking. The built-in light pollution filter is particularly valuable if you image from suburban skies where sodium and mercury streetlights dominate.
Smartphone Workflow and Cloud Processing
The entire imaging workflow happens through the DWARFLAB app on your smartphone. You select targets from a curated list, the telescope captures and stacks frames automatically, and cloud processing enhances the final image. This approach trades the control and flexibility of traditional astrophotography for simplicity and speed, which I think is exactly the right trade-off for beginners.
6. Canon EOS Rebel T7 – The Community Favorite Beginner DSLR
Pros
- 24.1MP APS-C sensor for detailed images
- Built-in Wi-Fi and NFC for easy transfer
- Massive community support and tutorials
- Excellent price-to-performance ratio
- Compatible with huge Canon EF-S lens ecosystem
Cons
- Fixed LCD screen not articulating
- Older DIGIC processor limits high ISO performance
The Canon EOS Rebel T7 is the camera I recommend more than any other for people starting astrophotography on a budget. With over 8,500 reviews and a 4.7-star rating, it has earned its reputation as the go-to beginner astrophotography DSLR. Forum communities consistently point to Canon Rebel cameras as the ideal starting point, and the T7 is the current standard-bearer.
What makes the Rebel T7 so good for astrophotography is its accessibility. The APS-C sensor delivers 24.1 megapixels of resolution, which gives you plenty of data to work with when stacking images. The native ISO range of 100-6400 (expandable to 12800) covers the range most astrophotographers use, and the 14-bit RAW output preserves the dynamic range needed for pulling detail out of shadows and highlights.
I cannot overstate the value of the Canon EF and EF-S lens ecosystem. Because Canon DSLRs have been popular for so long, there is an enormous market of affordable used lenses. You can pick up a Canon 50mm f/1.8 for around $100 used, which is one of the best wide-field astrophotography lenses available. Fast prime lenses like this are what make the Milky Way pop in your images.
The built-in Wi-Fi and NFC are handy for transferring images to your phone for quick sharing. While this feature is less important during actual imaging sessions, it is convenient for posting your best shots to social media before you even get home. The T7 also works as a webcam through Canon’s EOS Utility software, which is a nice bonus.
Wide-Field Milky Way Photography With the T7
Pair the Rebel T7 with a fast wide-angle lens and a sturdy tripod, and you have an excellent Milky Way photography setup. The 18-55mm kit lens is a starting point, but upgrading to something like the Canon 10-18mm or a fast 24mm prime will transform your results. Use the 500 rule (divide 500 by your focal length times crop factor) to determine your maximum exposure time before star trailing becomes visible.
Upgrading and Modifying the T7 for Astrophotography
Many astrophotographers eventually modify their Canon DSLRs by removing or replacing the internal IR-cut filter. This modification, called an astro-mod, dramatically increases the camera’s sensitivity to hydrogen-alpha light at 656nm, which is the wavelength emitted by many emission nebulae. The Rebel T7 is a popular candidate for modification because it is affordable enough that you will not ruin an expensive body if something goes wrong.
7. DWARFLAB Dwarf 3 Smart Telescope – Upgraded Dual Imaging System
Pros
- Dual imaging system for both day and night use
- 4K auto-tracking keeps targets centered
- Cloud-powered image processing delivers finished results
- Only 3 pounds for ultimate portability
- Easy enough for users aged 6 to 98
Cons
- Battery dependent for field use
- Higher price than entry smart telescopes
The DWARFLAB Dwarf 3 builds on the success of the Dwarf Mini with a dual imaging system that works for both astrophotography and daytime nature photography. I see this as a compelling option for families or individuals who want one device that handles multiple imaging scenarios without switching gear.
The standout feature is the dual camera system. One camera handles wide-field night sky imaging while the other captures detailed close-up targets. This versatility means you can photograph the Milky Way arch across the sky and then zoom in on the Orion Nebula in the same session, all controlled from your smartphone.
4K auto-tracking is a significant upgrade over the Mini’s capabilities. The tracking system keeps your selected target centered in the frame, compensating for the rotation of the Earth during long imaging sessions. This is the same fundamental technology used in professional astrophotography mounts, just packaged in a consumer-friendly design.
Cloud-powered image processing is where the Dwarf 3 really differentiates itself from traditional astrophotography. Instead of downloading raw files and spending hours in PixInsight, the cloud system automatically stacks, calibrates, and enhances your images. You get a finished, color-balanced result delivered to your phone within minutes of completing your imaging session.
Day-to-Night Versatility of the Dwarf 3
The dual imaging system means the Dwarf 3 works as a wildlife and nature camera during the day, then transforms into an astrophotography tool at night. This dual-use capability makes the higher price more justifiable, since you are effectively getting two cameras in one. Families particularly appreciate this flexibility, as the device serves multiple interests and age groups.
Comparing Dwarf 3 to Traditional Telescope Setups
A traditional astrophotography setup capable of deep-sky imaging typically costs $2,000 or more when you factor in a telescope, mount, camera, and accessories. The Dwarf 3 delivers comparable results for beginners at roughly a quarter of that cost. The trade-off is flexibility and upgradeability: you cannot swap lenses or sensors on a smart telescope. But for someone who wants results without a steep learning curve, the value proposition is hard to beat.
8. ZWO Seestar S30 Pro – Premium Smart Telescope With Professional Optics
Pros
- Apochromatic lens for professional optical quality
- 4K dual-camera astrophotography system
- One-tap Milky Way and star trail imaging in 8K
- Intelligent astrophotography assistant guides beginners
- Fully multi-coated optics for maximum light transmission
Cons
- Requires smartphone or tablet for operation
- Higher price point in the smart telescope category
The ZWO Seestar S30 Pro brings ZWO’s deep expertise in dedicated astronomy cameras to the smart telescope category. ZWO is one of the most respected names in serious astrophotography, and the Seestar line applies that expertise to a consumer-friendly product. I consider this the premium option for anyone who wants professional-quality optics without the complexity of a traditional astrophotography rig.
The apochromatic lens is the key differentiator here. Apos use multiple lens elements of different glass types to bring all colors of light to the same focus point, eliminating the color fringing that plagues cheaper achromatic designs. For astrophotography, where many targets emit light at specific wavelengths, this optical precision translates directly to sharper, cleaner images.
The 4K dual-camera system handles both wide-field and narrow-field imaging. One camera captures the entire field of view for framing and navigating, while the main imaging camera captures high-resolution data of your target. This dual approach simplifies the process of finding and centering faint objects that are invisible to the naked eye.
One-tap Milky Way imaging in 8K resolution is a feature that genuinely impressed me. The Seestar automatically captures and stitches multiple frames to create a high-resolution panorama of the Milky Way. Star trail mode works similarly, automatically stacking consecutive exposures to create those dramatic circular trails around the celestial pole.
The Astrophotography Assistant Feature
The intelligent astrophotography assistant built into the Seestar app goes beyond simple GoTo functionality. It recommends targets based on your location, time, and sky conditions, then optimizes exposure settings for each target. For beginners who do not know which objects are visible or how to expose for them, this guidance is invaluable and removes a major barrier to entry.
Who Should Choose the Seestar Over a Traditional Setup
If you value your time and want to spend it imaging rather than troubleshooting equipment, the Seestar S30 Pro is the right choice. Traditional astrophotography setups can take hours to polar align, balance, focus, and guide before you capture a single usable frame. The Seestar eliminates all of that setup time, letting you start imaging within minutes of arriving at your observing location.
9. Canon EOS R50 – Modern Mirrorless for Astrophotography Beginners
Pros
- Oversampled 4K video from 6K readout for sharp footage
- Vari-angle touchscreen for easy framing at odd angles
- Dual Pixel AF II with 99 autofocus points
- RF mount access to Canon newest lens lineup
- 10-bit HDR PQ and Canon Log 3 support
Cons
- No in-body image stabilization
- Single SD card slot
- Crop factor applies to 4K 60p mode
The Canon EOS R50 brings modern mirrorless technology to the entry-level price point, making it an attractive option for astrophotographers who want the latest features without paying full-frame prices. The RF mount gives you access to Canon’s newest lens designs, which generally offer better optical performance than older EF-S equivalents.
For astrophotography, the vari-angle touchscreen is a feature I consider essential. When your camera is pointed straight up at the night sky on a tripod, a fixed screen forces you to lie on the ground to see your composition. The R50’s articulating screen tilts and rotates to any angle, letting you frame your shot comfortably while standing.
The 24MP APS-C sensor delivers the same resolution as the Rebel T7 but with a more modern processor. The DIGIC X image processor handles noise reduction and color science better than older Canon chips, which translates to cleaner high-ISO images. For astrophotography, where you frequently shoot at ISO 3200 or 6400, that improved noise handling is meaningful.
Dual Pixel AF II with 99 autofocus points is a massive upgrade over the T7’s 9-point system. While autofocus is less critical for astrophotography than for sports or wildlife, it matters when framing wide-field shots or trying to lock focus on a bright star. The R50 also supports Canon Log 3 and 10-bit HDR PQ, which give you more dynamic range flexibility if you shoot astrophotography video.
RF Mount Lens Advantage for Astrophotography
Canon’s RF mount has introduced several lenses that are exceptional for astrophotography, including affordable fast primes and high-quality wide-angle zooms. The RF 16mm f/2.8 is a budget-friendly wide-field astrophotography lens that costs significantly less than older EF equivalents. The RF mount’s shorter flange distance also means third-party lens manufacturers are producing innovative designs for this system.
Limitations for Long Exposure Astrophotography
The lack of in-body image stabilization means you need a sturdy tripod for any astrophotography work. The single SD card slot is a minor concern for hobbyists but may matter if you travel to remote dark sky locations where you cannot back up images. The crop factor in 4K 60p mode reduces your effective wide-angle coverage, which is relevant if you shoot both astrophotography and video.
10. Sony Alpha a6400 – Compact APS-C Powerhouse With Excellent Autofocus
Pros
- Real-Time Eye AF tracks subjects with precision
- 425 phase-detection and 425 contrast AF points
- Ultra-fast 0.02 second autofocus acquisition
- 180-degree tilting screen for difficult angles
- Compact and lightweight at 10.3 ounces
Cons
- No in-body image stabilization
- Menu system can be complex for new users
- No in-body flash
The Sony Alpha a6400 is one of the most capable APS-C cameras on the market, and it has earned a strong following among astrophotographers who value portability. At just 10.3 ounces, this is a camera you can carry anywhere without fatigue. That portability matters for astrophotography, where the best dark sky locations often require hiking away from city lights.
The 25MP APS-C sensor delivers excellent image quality with good dynamic range. Sony’s sensor technology is among the best in the industry, and the a6400 benefits from low read noise and clean high-ISO performance. For nightscape and Milky Way photography, these characteristics help you pull detail out of dark skies without excessive noise.
The E mount is one of the biggest advantages of the Sony system. Because the mount has a short flange distance, you can adapt virtually any lens ever made to the a6400. This opens up a world of affordable vintage manual-focus lenses that are perfect for astrophotography, where autofocus is rarely needed and manual focus is often preferred.
The 180-degree tilting screen is a thoughtful design choice for content creators and astrophotographers alike. You can flip the screen up to face forward for selfies, or tilt it upward when your camera is mounted on a tripod pointing at the sky. The 425 phase-detection points cover most of the frame, making it easy to focus on specific stars or framing elements.
Sony E Mount Adaptability for Astrophotography Lenses
The E mount ecosystem includes excellent astrophotography lenses like the Samyang 14mm f/2.8, Sigma 16mm f/1.4, and Sony’s own 20mm f/1.8 G. Third-party manufacturers like Tamron and Sigma produce affordable fast primes that are ideal for wide-field night sky imaging. The ability to adapt Canon EF, Nikon F, and vintage manual lenses adds even more options at lower price points.
High ISO Noise Performance in Practice
In real-world astrophotography, the a6400 produces clean results up to ISO 6400 with good noise reduction in post-processing. The 14-bit RAW output preserves highlight and shadow detail, giving you latitude to recover information from both ends of the dynamic range. While it cannot match a full-frame sensor for pure light-gathering ability, the APS-C format keeps the camera small and affordable while delivering very good results.
11. Canon EOS R8 – Best Full-Frame Camera for Astrophotography
Pros
- Full-frame sensor for maximum light gathering
- Uncropped 4K 60p oversampled from 6K readout
- Up to 40fps continuous shooting
- Vari-angle touchscreen and OLED EVF
- Canon Log 3 and HDR PQ for maximum dynamic range
- In-camera compositing for multi-shot stacking
Cons
- No in-body image stabilization
- Single card slot
- Crop factor in 4K 60p video mode
The Canon EOS R8 is my top pick for serious astrophotographers who want full-frame performance in a lightweight body. Full-frame sensors gather roughly 2.3 times more light than APS-C sensors of the same resolution, which means cleaner images at high ISO and more detail in faint deep-sky targets. The R8 delivers this performance in a body weighing significantly less than competitors.
The 24.2MP full-frame CMOS sensor paired with the DIGIC X processor produces some of the cleanest high-ISO images I have seen at this price point. When you are shooting at ISO 6400 or higher to capture faint nebulae, that noise performance directly determines how much detail you can extract. The 86 percent five-star rating from nearly 500 reviewers confirms that users are consistently impressed.
Canon Log 3 support is a feature that sets the R8 apart for astrophotographers who also shoot video. Log gamma captures a wider dynamic range than standard profiles, giving you more flexibility to recover detail in post-processing. Combined with 10-bit HDR PQ, the R8 preserves more tonal information than cameras limited to 8-bit standard profiles.
The in-camera compositing feature is particularly relevant for astrophotography. This function lets the camera automatically combine multiple exposures to reduce noise and increase dynamic range. While serious deep-sky imagers will still want to stack in dedicated software, the in-camera option is useful for quick nightscape shots and star trail images.
The vari-angle touchscreen and OLED electronic viewfinder give you multiple ways to frame your shots. When your camera is pointed at the night sky, being able to tilt the screen to a comfortable viewing angle makes a real difference during long imaging sessions. The EVF shows real-time exposure simulation, so you can see roughly how your final image will look before pressing the shutter.
Full-Frame Advantage for Deep-Sky Astrophotography
The larger sensor area of full-frame cameras means each individual pixel can be larger, gathering more photons from faint celestial targets. This translates to better signal-to-noise ratio at any given ISO setting. For deep-sky astrophotography, where you are trying to capture light from objects millions of light-years away, that extra sensitivity can mean the difference between capturing a nebula’s faint outer wisps or losing them to noise.
RF Lens Ecosystem for Astrophotography
Canon’s RF mount has several lenses that are exceptional for astrophotography. The RF 15-35mm f/2.8 L is a professional wide-angle zoom that delivers sharp corner-to-corner images of the Milky Way. For those on a budget, the RF 16mm f/2.8 and RF 24mm f/1.8 Macro offer excellent value. The RF 85mm f/1.2 and RF 135mm f/1.8 are outstanding for narrow-field astrophotography of large nebulae.
12. Sony Alpha A7 III – Full-Frame With In-Body Stabilization
Pros
- 5-axis in-body image stabilization for steady shots
- 15-stop dynamic range for maximum detail recovery
- ISO expandable to 204800 for extreme low light
- Dual memory card slots for backup and overflow
- 693-point hybrid AF with 93 percent coverage
Cons
- 4K video limited to 30fps
- Menu system is complex and dated
- No in-body flash
The Sony Alpha A7 III is a legend in the astrophotography community, and for good reason. It combines a back-illuminated full-frame sensor with 5-axis in-body image stabilization at a price that has become increasingly accessible. I consider this the most feature-complete camera on this list for astrophotographers who want every advantage available.
The back-illuminated sensor design moves the circuitry behind the light-gathering photodiodes, improving light collection efficiency. This translates to better performance in low light, which is exactly what astrophotography demands. Combined with a 15-stop dynamic range, the A7 III captures detail across a wider tonal range than most cameras in its class.
The 5-axis in-body image stabilization is a feature that sets the A7 III apart from the Canon R8 and every other camera on this list. While IBIS is less critical for tripod-mounted astrophotography, it is invaluable for handheld twilight shots, aurora photography, and nightscapes where you want to move quickly without setting up a tripod. The stabilization also helps when framing shots through the viewfinder at long focal lengths.
The ISO range of 50 to 204,800 is the widest on this list. While you will rarely shoot astrophotography at ISO 204,800, having that range available means the sensor handles intermediate ISO values like 6400 and 12,800 with remarkable cleanliness. The dual card slots provide peace of mind during long imaging sessions, as you can configure the camera to write backup copies to both cards simultaneously.
The 693-point hybrid autofocus system covers 93 percent of the image area, making it easy to focus on stars anywhere in the frame. The system uses both phase-detection and contrast-detection points to achieve fast and accurate focus even in very dim conditions. This is particularly useful when trying to achieve critical focus on faint stars for deep-sky imaging.
IBIS Benefits for Astrophotography Workflows
In-body stabilization helps in several astrophotography scenarios beyond traditional long exposures. For aurora photography, where conditions change rapidly and you need to shoot handheld occasionally, IBIS lets you capture usable shots at shutter speeds that would otherwise require a tripod. For nightscape work where you combine foreground and sky exposures, IBIS smooths out minor camera movements between frames during compositing.
Dynamic Range and Post-Processing Latitude
The 15-stop dynamic range of the A7 III is exceptional and directly benefits astrophotography. Wide dynamic range lets you capture both bright star cores and faint nebular detail in a single exposure, then recover both ends during post-processing. The 14-bit uncompressed RAW output preserves the full tonal information the sensor captures, giving you maximum latitude when stretching images to reveal faint detail.
Buying Guide: How to Choose the Best Camera for Astrophotography?
Choosing the right astrophotography camera depends on three main factors: what you want to photograph, your experience level, and your budget. I will break down the key considerations to help you make the right choice for your specific situation.
Camera Type: Which Category Is Right for You
The cameras in this guide fall into four distinct categories, each suited to different types of astrophotography. Telescope eyepiece cameras like the SVBONY models are designed for lunar and planetary imaging through a telescope. Smart telescopes like the DWARFLAB and ZWO Seestar handle everything automatically and are perfect for deep-sky beginners. DSLR and mirrorless cameras are the most versatile, handling everything from Milky Way panoramas to telescope-coupled deep-sky work.
If you already own a telescope, an eyepiece camera is the logical starting point. If you want deep-sky results without learning complex software, a smart telescope is the answer. If you want maximum versatility for both daytime and nighttime photography, a DSLR or mirrorless camera is the way to go.
Sensor Size and Its Impact on Astrophotography
Sensor size is the single most important specification for astrophotography performance. Full-frame sensors gather significantly more light than APS-C sensors, which in turn gather more than the small sensors in eyepiece cameras and smart telescopes. More light means cleaner images at high ISO and better detail in faint targets.
However, sensor size also affects field of view. APS-C sensors have a crop factor of approximately 1.5x to 1.6x, meaning they see a narrower portion of the sky than full-frame sensors with the same lens. For wide-field Milky Way photography, full-frame is preferable. For narrow-field deep-sky imaging through a telescope, APS-C can actually be advantageous because it effectively increases your focal length.
ISO Performance and Noise Characteristics
ISO performance determines how clean your images look at high sensitivity settings. For astrophotography, you frequently shoot at ISO 1600 to 6400 to capture faint targets in reasonable exposure times. Cameras with larger pixels and better sensor designs produce less noise at these settings, giving you cleaner final images after stacking.
Read noise is a specific type of noise that becomes important when stacking many short exposures. Cameras with low read noise, like those using modern Sony sensors, allow you to use shorter individual exposures without accumulating noise across hundreds of stacked frames. The SVBONY SV305C Pro’s 0.7 electron read noise is exceptional in this regard.
The 500 Rule for Pinpoint Stars
The 500 rule is a simple formula for determining your maximum exposure time before stars begin to trail due to Earth’s rotation. Divide 500 by the product of your focal length and crop factor. For a 24mm lens on a full-frame camera, that is 500 divided by 24, giving you about 21 seconds. On an APS-C camera with a 1.6x crop factor, the same lens gives you about 13 seconds.
This rule helps you choose the right lens and camera combination for untracked wide-field astrophotography. If you want longer exposures without trailing, you need either a star tracker or a telescope mount with tracking capability. Smart telescopes handle this automatically through their built-in tracking systems.
When to Upgrade from a DSLR to a Dedicated Camera
Forum communities frequently ask when it makes sense to move from a DSLR to a dedicated cooled astronomy camera. The answer depends on your targets and your tolerance for noise. Dedicated cooled cameras reduce thermal noise dramatically through sensor cooling, which is critical for deep-sky imaging involving hours of total integration time. If you are happy with Milky Way panoramas and lunar photography, a DSLR or mirrorless camera is all you need.
The upgrade path typically goes from DSLR to modified DSLR (for H-alpha sensitivity) to a dedicated one-shot color cooled camera like the ZWO ASI533MC Pro, and finally to a monochrome cooled camera with filter wheel. Each step requires more investment in both money and learning, so it is worth mastering each level before moving up.
Budget Path: From Beginner to Advanced
I recommend a staged approach to building your astrophotography kit. Start with an affordable camera like the SVBONY SV105 or a Canon Rebel T7 to learn the fundamentals. Add a star tracker like the Sky-Watcher Star Adventurer for guided wide-field imaging. When you are ready for deep-sky work, consider a smart telescope for simplified workflow or a dedicated cooled camera for maximum control.
This progression lets you learn at each level without overwhelming yourself or overspending. Each stage builds skills that transfer to the next, and you can always sell previous gear to fund upgrades. The most important thing is to start imaging and learn through practice rather than waiting until you can afford the perfect setup.
Frequently Asked Questions About Astrophotography Cameras
What camera is the best for astrophotography?
The Canon EOS R8 is the best overall camera for astrophotography thanks to its full-frame sensor, excellent high-ISO performance, and Canon Log 3 dynamic range. For beginners, the Canon EOS Rebel T7 offers the best value, while the DWARFLAB Dwarf Mini smart telescope provides the easiest deep-sky imaging experience.
What camera should a beginner use for astrophotography?
Beginners should start with either a Canon EOS Rebel T7 DSLR for wide-field Milky Way photography or a DWARFLAB Dwarf Mini smart telescope for deep-sky imaging. The Rebel T7 costs less and teaches fundamental camera skills, while the Dwarf Mini handles finding, tracking, and processing automatically so you can focus on capturing targets.
Is mirrorless or DSLR better for astrophotography?
Mirrorless cameras are generally better for astrophotography because they offer real-time exposure simulation through the electronic viewfinder, lighter weight, and access to newer lens designs. However, DSLRs like the Canon Rebel T7 remain excellent budget options with massive lens ecosystems and strong community support for astrophotography tutorials and troubleshooting.
What is the 500 rule in night sky photography?
The 500 rule calculates your maximum exposure time before stars trail from Earth rotation. Divide 500 by your effective focal length (actual focal length times crop factor). For example, a 24mm lens on a full-frame camera gives 500 divided by 24, or about 21 seconds. On APS-C with 1.6x crop, the same lens allows about 13 seconds before stars streak.
Do I need a cooled camera for astrophotography?
You only need a cooled camera for deep-sky astrophotography involving long total integration times on faint targets like galaxies and nebulae. For Milky Way panoramas, lunar imaging, and planetary photography, a regular DSLR or mirrorless camera works perfectly well. Sensor cooling becomes important when you stack hours of exposures, as thermal noise accumulates significantly over time.
Final Thoughts on the Best Cameras for Astrophotography
Finding the best cameras for astrophotography in 2026 comes down to matching your budget and experience level to the right tool. The Canon EOS R8 stands out as the best overall pick for serious imagers who want full-frame performance without compromise. The Canon EOS Rebel T7 remains unbeatable for value and community support, making it the smartest choice for beginners. And the DWARFLAB Dwarf Mini smart telescope offers the most accessible path to deep-sky imaging for anyone intimidated by traditional astrophotography setups.
Remember that the camera is just one part of the equation. A sturdy tripod, dark skies, and practice with post-processing software matter just as much as your choice of camera body. Start with what fits your budget, learn the fundamentals, and upgrade as your skills and ambitions grow. The night sky is waiting, and any of these 12 cameras will help you capture it beautifully.