Shooting RAW plus JPEG mode has become my go-to approach for event photography and client work where speed matters. Over the past few years, I have tested this workflow across weddings, sports events, and portrait sessions. The ability to deliver quick previews while retaining full editing flexibility changed how I handle post-processing. In this guide, I will walk you through everything you need to know about the RAW plus JPEG shooting mode workflow, from camera setup to file organization and software-specific techniques.
You will learn when this dual-format approach makes sense, how to configure your camera for optimal results, and practical strategies for managing twice as many files without losing your mind. I will also share specific tips for Lightroom, Capture One, and even AI culling tools that can speed up your selection process.
What is RAW Plus JPEG Shooting Mode?
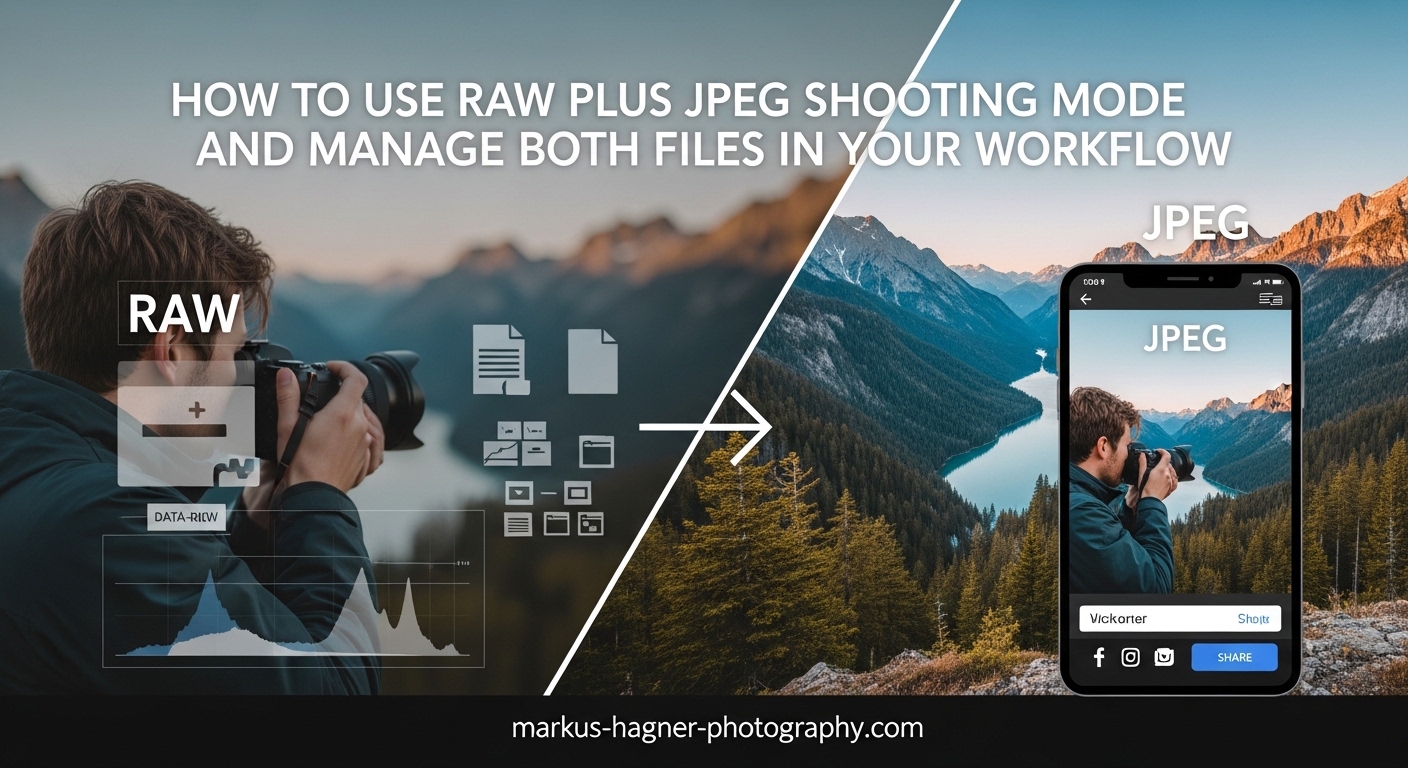
RAW plus JPEG shooting mode is a camera setting that captures two versions of every photo simultaneously. When you press the shutter, your camera writes one RAW file containing unprocessed sensor data and one JPEG file with in-camera processing already applied. This gives you both an editable master file and a ready-to-share image in a single shot.
RAW files contain all the data your camera sensor captured, including extra highlight and shadow detail that gets discarded during JPEG processing. Think of a RAW file as a digital negative. You can adjust white balance, exposure, and color long after you took the shot without losing quality.
JPEG files, on the other hand, are processed and compressed by your camera. The camera applies your chosen picture style or profile, adjusts contrast and saturation, sharpens the image, and discards data to create a smaller file. The result is a finished image that looks good straight out of camera but has limited editing headroom.
When you shoot in RAW plus JPEG mode, your camera creates both files in a fraction of a second. The RAW file preserves maximum flexibility for serious editing, while the JPEG provides an immediate preview of how the final image might look with your current camera settings applied.
Benefits and Drawbacks of Shooting RAW Plus JPEG
Understanding both sides of this approach helped me decide when to use it. Here is what I have learned from real-world shooting.
Benefits of RAW Plus JPEG Mode
Instant Shareability: The JPEG files are ready to post on social media or send to clients within minutes of shooting. During a recent corporate event, I delivered 30 preview images to the marketing team before I even packed up my gear. They used these for same-day internal communications while I processed the full set of RAW files later.
Reference for Editing: The JPEG shows how your camera interpreted the scene with its picture style applied. I often use JPEGs as a starting point when editing RAW files, especially for skin tones or landscapes where the camera’s processing looks appealing.
Backup Security: Having two file formats provides redundancy. If a RAW file becomes corrupted, you still have a usable JPEG. This saved me once when a memory card developed errors mid-shoot.
Client Preview Delivery: Wedding and event photographers can show clients JPEG proofs immediately while reserving RAW files for final edits. This speeds up the approval process significantly.
Fujifilm JPEG Quality: If you shoot Fujifilm, their JPEG output is exceptional. Many photographers shoot RAW plus JPEG specifically to use the Fujifilm film simulations straight out of camera while keeping RAW files as backup.
Drawbacks of RAW Plus JPEG Mode
Doubled Storage Requirements: You will need twice the memory card space and hard drive storage. A typical 24-megapixel RAW file runs 25-35 MB, plus another 8-12 MB for the JPEG. A 64 GB card that holds 1,800 RAW files drops to about 1,400 shots in RAW plus JPEG mode.
Longer Import Times: Transferring twice as many files takes more time. After a full-day wedding shoot with 2,000 images, I waited an extra 15 minutes for the import to complete compared to RAW-only.
Culling Complexity: You have to review duplicate files during selection. Some photographers accidentally edit JPEGs instead of RAWs, losing the flexibility they paid for with extra storage.
Write Speed Impact: Writing two files can slow down burst shooting on older cameras. My previous body dropped from 8 frames per second to 6 when shooting both formats continuously.
Organization Challenges: Keeping track of which files to edit and which to archive requires a clear system. Without one, your folders become cluttered with duplicate versions.
When to Use RAW Plus JPEG vs RAW Only
Use RAW plus JPEG mode for events with quick turnaround requirements, client preview delivery, social media photography, or when transitioning from JPEG to RAW editing. Switch to RAW-only when storage is limited, shooting fast action with long bursts, doing landscape work with no time pressure, or when you already have a streamlined export workflow.
How to Set Up RAW Plus JPEG Shooting on Your Camera?
Setting up your camera for dual format shooting takes just a few menu selections. The exact steps vary by brand, but the concept remains the same across all manufacturers.
Step-by-Step Camera Setup
Step 1: Access Image Quality Settings
Open your camera’s menu and navigate to the image quality or image size section. This is typically found under the shooting menu or photo shooting menu on most cameras.
Step 2: Select RAW Plus JPEG Option
Look for an option labeled “RAW+JPEG,” “RAW+JPG,” or similar. Some cameras display this as two separate selections where you choose both RAW and JPEG simultaneously. The option might show file size indicators like “RAW + L” for large JPEG.
Step 3: Choose JPEG Quality and Size
Select your preferred JPEG quality level. I recommend Fine or Extra Fine quality for preview images. You can also choose JPEG size, though I keep mine at full resolution to maintain maximum flexibility.
Step 4: Configure Picture Style or Profile
Set your desired picture style, film simulation, or creative look. The JPEG will reflect these settings, so choose something that matches your typical editing style. For neutral results that show maximum dynamic range, select a flat or neutral profile.
Step 5: Check Buffer and Card Write Speed
Take a few test shots in burst mode to ensure your memory cards can handle the data rate. If you notice the buffer filling quickly, consider using faster cards or limiting RAW plus JPEG to slower shooting situations.
Brand-Specific Setup Notes
Canon: Press the Q button to access the quick control screen, then navigate to image quality. Select RAW and JPEG simultaneously from the list. Canon cameras show this as separate quality settings that you toggle on together.
Nikon: Press the QUAL button or access through the photo shooting menu. Select NEF (RAW) + JPEG from the image quality options. Nikon Z cameras place this in the photo shooting menu under image quality.
Sony: Access the camera settings menu, then image quality. Select RAW+JPEG from the list. Sony Alpha cameras allow different JPEG sizes for the dual format option.
Fujifilm: Press the drive button or access image quality settings. Select RAW+JPEG and choose your preferred film simulation. Fujifilm cameras make excellent use of their JPEG engine, so experiment with different simulations.
Dual Card Slot Configuration
If your camera has dual card slots, you have additional options for organizing the two formats. Many photographers write RAW files to the faster card slot and JPEGs to the second slot. This separates the formats physically and provides another layer of backup.
To configure dual slot recording, access your camera’s card slot settings menu. Choose the option for separate recording by format or card overflow depending on your preference. Writing different formats to different cards makes file separation easier during import.
For maximum safety, configure one slot as an exact backup of the other. This duplicates all files across both cards, providing protection against card failure at the cost of doubled card consumption.
Memory Card Considerations
Use high-speed cards rated UHS-II or V90 for optimal performance when shooting dual formats. Slower cards increase buffer clear times and may limit your burst shooting duration. I use 128 GB or larger cards to avoid running out of space during events.
Consider carrying more cards than you think you need. Shooting RAW plus JPEG consumes storage faster than expected, especially during extended events. Having backup cards prevents the stress of watching your space dwindle mid-shoot.
File Management and Organization Workflow
Managing twice as many files requires a consistent system. After years of trial and error, I developed a workflow that keeps my files organized without extra effort.
Import Workflow Recommendations
Start by importing to a dated folder structure. I use year, month, and date folders like “2026/03/2026-03-13_EventName.” This keeps everything chronological and makes finding older work simple. Import both RAW and JPEG files to the same folder initially.
Some photographers prefer separating RAW and JPEG files during import. If you choose this approach, create parallel folder structures like “2026-03-13_RAW” and “2026-03-13_JPEG.” Most importing software can automate this separation based on file type.
Use your importing software to apply metadata during transfer. Add copyright information, keywords, and location data to every file at once. This saves time later and ensures consistent metadata across all your work.
Lightroom Preferences for RAW Plus JPEG
Adobe Lightroom Classic handles RAW plus JPEG files with specific preference settings. Open Lightroom preferences, navigate to the General tab, and look for the “Treat JPEG files next to RAW files as separate photos” option.
If you check this box, Lightroom imports RAW and JPEG as separate images. You see both in your catalog and can edit them independently. This approach gives maximum control but doubles your visible catalog entries.
If you uncheck this box, Lightroom treats the pair as a single image. The JPEG becomes invisible within Lightroom, but you can access it for export or external editing. This keeps your catalog cleaner but limits direct JPEG access.
I prefer keeping them separate for preview delivery purposes. I can quickly export JPEGs for client proofs while editing the RAW versions for final delivery.
Separation vs Keeping Together
Keeping RAW and JPEG files together simplifies folder management and reduces confusion about where files live. The paired files share the same filename with different extensions, making their relationship obvious.
Separating the formats works better if you primarily use JPEGs for quick delivery and archive them after. Create a temporary “JPEGS_TO_DELIVER” folder for each shoot, export or copy the JPEGs there, deliver them, and delete the folder once finished.
Folder Organization Strategies
My preferred structure uses date-based primary folders with descriptive subfolders:
– 2026/03/2026-03-13_SmithWedding/
– RAW (archived RAW files)
– JPEG (delivered previews)
– EDIT (processed final images)
– EXPORT (client delivery files)
This structure keeps everything from a single shoot together while separating different stages of the workflow. I can quickly locate original RAW files, delivered JPEGs, or final edits without searching through mixed content.
Software-Specific Workflows
Different photo applications handle RAW plus JPEG files differently. Here is how to optimize your workflow in the most popular programs.
Adobe Lightroom Classic
Lightroom excels at cataloging dual format files. Use the Smart Collections feature to create views that show only RAW files or only JPEG files. This speeds up culling by letting you review one format at a time.
For culling, I review JPEGs first since they load faster. I mark rejects and picks on the JPEGs, then sync these selections to the corresponding RAW files. This approach combines the speed of JPEG review with the quality of RAW editing.
When editing, always work on the RAW file for maximum flexibility. The JPEG serves as a reference for the camera’s interpretation but lacks the data for significant adjustments.
Capture One
Capture One groups RAW and JPEG pairs automatically when they share the same filename. You see one thumbnail that represents both files, with the RAW taking priority for editing. This keeps your catalog clean while preserving access to both formats.
Right-click any image and choose “Select JPEG/RAW” to toggle between versions. This makes comparison easy without cluttering your browser view.
Capture One’s superior color handling makes it especially popular among Fujifilm shooters who want to match their JPEG film simulation output in RAW processing.
Photo Mechanic for Culling
Photo Mechanic displays RAW and JPEG files side by side, making rapid culling efficient. The program loads image previews almost instantly, letting you scroll through thousands of images in minutes.
I use Photo Mechanic for initial selection, marking keepers and rejects before importing to my editing software. This pre-culling step saves time in Lightroom or Capture One by reducing the number of images that need cataloging.
AI Photo Culling Integration
Modern AI culling tools like Narrative Select, FilterPixel, and AfterShoot can process your RAW plus JPEG files intelligently. These tools analyze images for sharpness, composition, and expression, then suggest the best shots from each sequence.
Some AI tools prefer working with JPEGs for speed, while others can process RAW files for higher accuracy. Check your specific tool’s recommendations, but most handle both formats without issue.
Using AI culling reduced my selection time from hours to minutes for large events. The tools work especially well for weddings and portrait sessions where you capture many similar shots.
Storage Optimization and Backup Strategies
Dual format shooting doubles your storage needs, making efficient backup strategies essential. Here is how I manage the increased data load.
Storage Space Calculations
Plan for approximately 35-45 MB per image pair when shooting 24-megapixel cameras. Higher resolution sensors produce larger files. A 45-megapixel camera generates 60-80 MB per RAW plus JPEG pair.
For a typical wedding shoot with 2,000 images, expect 70-90 GB of storage. Annual storage needs for a busy event photographer can exceed 4 TB. Budget for external drives and cloud storage accordingly.
Backup Best Practices
Follow the 3-2-1 backup rule: three copies of your data, on two different media types, with one copy offsite. For RAW plus JPEG files, this becomes even more important given the doubled data volume.
My backup workflow copies files to an external hard drive immediately after import. A second copy goes to a network attached storage device. Critical client work also syncs to cloud storage for offsite protection.
Consider what to archive long-term. I keep all RAW files permanently but may delete JPEGs after final delivery if the RAW files have been fully processed. This reduces storage needs while preserving editing capability.
Frequently Asked Questions
Should I shoot in RAW plus JPEG?
Shoot RAW plus JPEG when you need immediate shareable files, want to deliver quick client previews, or are transitioning from JPEG to RAW editing. Skip this mode if storage is limited, you shoot fast action with long bursts, or your workflow already handles RAW exports efficiently. Most photographers eventually switch to RAW-only as their editing skills improve.
What is RAW JPEG mode?
RAW JPEG mode is a camera setting that saves two files for every photo you take: a RAW file containing unprocessed sensor data and a JPEG file with in-camera processing applied. The RAW preserves maximum editing flexibility while the JPEG provides an immediately usable image that reflects your camera’s picture style settings.
Does shooting RAW plus JPEG slow down my camera?
Shooting RAW plus JPEG can slow burst shooting on older cameras because the processor writes twice as much data. Modern cameras with fast processors and UHS-II cards handle dual format shooting with minimal impact. Test your specific camera to determine the real-world effect on your shooting style.
Can I delete JPEGs and keep only RAW files?
Yes, you can safely delete JPEG files after importing if you have no immediate need for camera-processed versions. The RAW file contains all the original image data and can generate new JPEGs through export. Many photographers keep JPEGs temporarily for preview purposes but delete them after final RAW edits are complete.
How much storage do I need for RAW plus JPEG?
Plan for 35-45 MB per image pair on 24-megapixel cameras, or 60-80 MB on 45-megapixel bodies. A typical event shoot with 2,000 images requires 70-90 GB. Annual storage for a busy photographer can exceed 4 TB. Invest in fast memory cards and maintain multiple backup drives.
Conclusion
The RAW plus JPEG shooting mode workflow offers a practical compromise between flexibility and convenience. For event photographers, wedding shooters, and anyone needing quick turnaround, this approach provides the best of both worlds: editable master files and instantly shareable images.
Setting up dual format shooting takes just a few menu selections on most cameras. The real challenge lies in developing a consistent file management system that handles twice the data without becoming overwhelming. By following the folder structures and software workflows I have outlined, you can streamline your process and focus on what matters: creating great images.
Remember that this mode is a tool, not a permanent requirement. Many photographers start with RAW plus JPEG for the security it provides, then transition to RAW-only as their confidence and editing skills grow. Experiment with different approaches to find what works best for your specific shooting style and client needs.
Start by testing RAW plus JPEG on a single shoot. Configure your camera, set up your import workflow, and experience the benefits firsthand. You might find that this hybrid approach solves problems you did not realize you had.