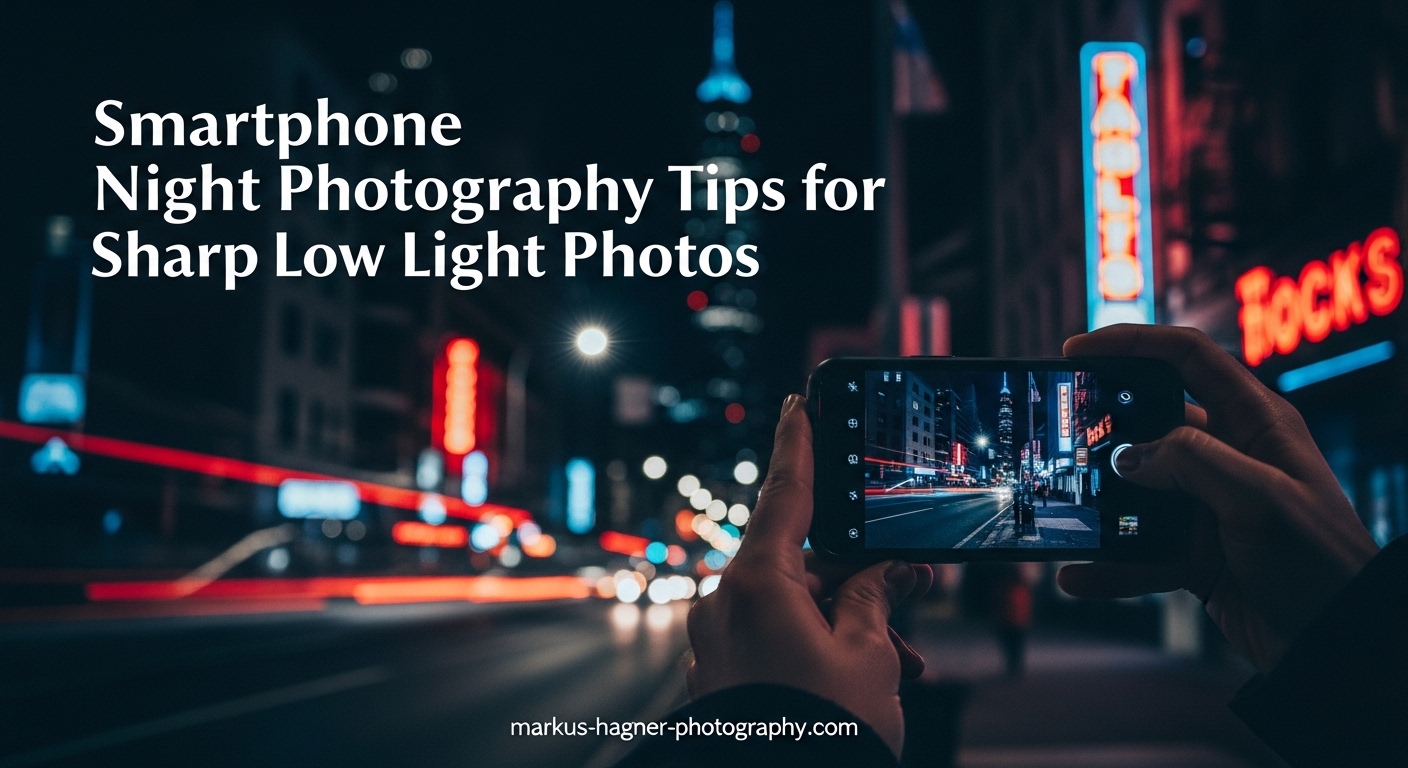
You pull out your phone to capture a beautiful night scene – city lights reflecting on wet streets, a campfire glow, or stars scattered across the sky. You tap the shutter, and the result is a grainy, blurry mess that looks nothing like what your eyes saw. Sound familiar?
Getting sharp low light photos with a smartphone frustrates even experienced photographers. The tiny sensor struggles. Your hands shake during long exposures. And Night Mode sometimes creates an artificial, over-processed look.
After testing techniques across iPhone, Samsung, and Google Pixel devices over the past three years, I have identified what actually works. This guide covers the complete system for smartphone night photography tips that produce crisp, natural-looking results.
You will learn the camera settings that matter, stabilization methods that work, when to trust Night Mode versus manual controls, and editing workflows that bring out the best in your night captures. Whether you shoot street scenes, concerts, or astrophotography, these techniques will transform your after-dark photography.
Understanding Smartphone Low Light Challenges
Before diving into solutions, understanding why phones struggle at night helps you work around the limitations.
The Physics Problem
Light is the raw material of photography. Your phone’s sensor captures photons and converts them into image data. At night, photons become scarce. The sensor receives dramatically less information to work with, forcing it to amplify signals and introducing noise in the process.
Smartphone sensors measure roughly 1/2.5 inches diagonally – about 1/20th the size of a full-frame camera sensor. This tiny surface area captures far fewer photons than larger sensors, making low light inherently challenging regardless of software tricks.
Small Sensor Limitations
The small sensor creates three specific problems for night photography:
Noise and grain: When the sensor amplifies weak signals, it amplifies electronic noise too. This appears as colored speckles across dark areas of your image. Higher ISO settings increase this noise exponentially.
Limited dynamic range: Night scenes often contain extreme brightness contrasts – bright streetlights against deep shadows. Small sensors struggle to capture this range, leading to blown-out highlights or crushed blacks.
Fixed aperture: Most phone cameras have fixed apertures around f/1.7 to f/2.2. You cannot open the aperture wider to let in more light, limiting your creative control compared to dedicated cameras.
What Computational Photography Does
Modern phones compensate for hardware limitations through computational photography – sophisticated algorithms that process multiple frames into a single optimized image.
Night Mode captures anywhere from 3 to 30 frames at different exposures, then aligns and combines them. This multi-frame stacking reduces noise while recovering shadow detail and preserving highlights. The phone’s neural processor handles alignment corrections for slight hand movement.
However, computational photography has limits. Moving subjects create ghosting artifacts. Aggressive processing can produce unnatural textures. Understanding when to rely on automation versus manual control separates mediocre night photos from exceptional ones.
Essential Camera Settings for Sharp Low Light Photos
Whether you use Night Mode or Manual/Pro mode, understanding these settings gives you control over your night photography results.
ISO Settings Explained
ISO controls your sensor’s sensitivity to light. Higher ISO values amplify the signal but also amplify noise. For smartphone night photography, this trade-off becomes critical.
Recommended ISO ranges:
For Night Mode shooting, let the phone handle ISO automatically – the computational processing optimizes this for you. For manual shooting, start at ISO 100-400 for tripod work with exposures of 1-4 seconds. For handheld shots in moderate low light, ISO 800-1600 provides a workable balance between brightness and noise.
Avoid pushing past ISO 3200 on most phones unless absolutely necessary. The noise at these levels degrades image quality significantly, and aggressive noise reduction during processing creates smeared, artificial textures.
Shutter Speed Fundamentals
Shutter speed determines how long your sensor collects light. Longer exposures capture more light but require rock-solid stability.
Shutter speed guidelines:
For handheld shots, keep shutter speed faster than 1/15 second if you have steady hands, or 1/30 second for more reliable sharpness. With a tripod, experiment with 1-10 second exposures for cityscapes and light trails. For astrophotography, exposures of 15-30 seconds work well, though some phones limit Night Mode to 10 seconds maximum.
The key insight: longer shutter speed almost always produces better quality than higher ISO. If you can stabilize your phone, slow down the shutter rather than cranking up ISO sensitivity.
White Balance for Night Scenes
Night scenes typically contain mixed lighting – warm streetlamps, cool moonlight, neon signs, and window displays. Automatic white balance often fails, creating inconsistent colors or unnatural casts.
Practical white balance approach:
For city scenes dominated by sodium vapor streetlights (the orange-yellow type), manually set white balance to 3200K-4000K to warm the image intentionally. For scenes with mixed lighting, shoot in RAW format and adjust white balance during editing – this gives you complete control without degrading quality.
If your phone lacks manual white balance, tap on neutral-colored objects in the scene (concrete, white signs) to set a custom reference point. This often produces more natural results than full auto.
Focus Lock and Exposure Control
Low light confuses autofocus systems. The camera hunts, fails to lock, or focuses on the wrong distance. Taking manual control solves this.
Focus lock technique:
Tap and hold on your subject until you see “AE/AF Lock” or similar confirmation. This locks both focus and exposure, preventing the camera from refocusing or changing exposure mid-capture. For distant subjects like cityscapes or stars, focus on a distant light source, then lock it.
Exposure compensation:
After locking focus, slide the sun icon that appears next to the focus box. Drag down to darken the exposure – this prevents bright light sources from blowing out and often produces more dramatic, moody night images. Slightly underexposed night photos look more natural and retain more highlight detail for editing.
Stabilization Techniques for Crisp Night Images
Camera shake ruins more night photos than any other factor. Even tiny movements during exposure blur details that no amount of editing can recover.
Using a Tripod Properly
A tripod transforms smartphone night photography. It enables longer exposures at low ISO, dramatically improving image quality.
Tripod recommendations:
For smartphones, you need two components: a tripod itself and a phone mount. Mini tripods (6-10 inches tall) work well for tabletops, ledges, and low angles. Full-size tripods provide more flexibility for composition. Gorilla-style tripods with flexible legs wrap around poles, branches, and railings for unique perspectives.
Critical tripod technique:
Set up your tripod on solid ground – avoid surfaces that vibrate from traffic or footsteps. Extend legs fully only when necessary; keeping legs short increases stability. Never touch the phone during exposure – even light taps introduce shake.
Handheld Stabilization Methods
Without a tripod, proper handheld technique minimizes shake for sharper results.
The elbow brace method:
Tuck your elbows firmly against your sides. This creates three points of contact – both elbows and your body – forming a stable triangle. Breathe out slowly, then capture during the natural pause before your next breath.
The wall lean:
Press your shoulder and arm against a wall, doorframe, or tree. This braced position eliminates much of the sway that causes blur. Rest your phone hand against the surface for additional support.
The knee rest:
For low angles, kneel and rest your elbows on your knee. This improvised bipod stabilizes the camera while allowing quick repositioning.
Timer and Remote Shutter Options
Pressing the shutter button introduces shake even with a tripod. Timer and remote options eliminate this.
Timer settings:
Use a 3-5 second timer. This delay allows any vibrations from touching the phone to settle before exposure begins. The 10-second timer works too but feels interminable when you are waiting.
Remote shutter alternatives:
Volume button headphones work as remote shutters on most phones – press the volume up button to trigger capture. Bluetooth remote shutters cost under $15 and provide reliable wireless control. Voice commands (“Cheese,” “Capture”) work on newer phones without additional hardware.
Built-in Image Stabilization Features
Modern phones include optical image stabilization (OIS) or sensor-shift stabilization. Understanding these helps you work within their limits.
OIS capabilities:
OIS physically moves lens elements to counteract shake. It works brilliantly for handheld shots at moderate shutter speeds (1/15 to 1/60 second). However, OIS cannot compensate for exposures longer than about 1/4 second – the mechanical range simply cannot travel far enough.
For exposures beyond 1/4 second, you need a tripod regardless of OIS. Some phones detect tripod mounting and automatically adjust Night Mode algorithms for longer capture times.
Night Mode vs Manual Mode: When to Use Each?
Both approaches have strengths. Choosing the right tool for each situation maximizes your results.
How Night Mode Works
Night Mode captures multiple frames in rapid succession – typically 3-30 images depending on light levels and phone model. The phone aligns these frames, averages them to reduce noise, and applies tone mapping to recover shadows while protecting highlights.
The entire process takes 1-10 seconds of hold time. You see a progress indicator and sometimes a live preview that improves as processing continues. The phone’s processor handles alignment corrections for minor hand movement.
When Night Mode Excels
Ideal Night Mode scenarios:
Static scenes without moving subjects – cityscapes, architecture, still life. Handheld shots when you cannot carry a tripod. Quick captures where you need results fast. Scenes with moderate dynamic range where highlights and shadows both matter.
Night Mode produces consistent results with minimal effort. The computational processing handles alignment, exposure blending, and noise reduction automatically. For most casual night photography, Night Mode delivers excellent results.
When to Switch to Manual Mode
Manual/Pro Mode advantages:
Scenes with moving subjects – cars creating light trails, people walking, concert performers. When you want creative control over exposure time and noise levels. Astrophotography where precise shutter speed matters. Situations where Night Mode processing creates artifacts or unnatural textures.
Manual mode gives you control over the exposure triangle: ISO, shutter speed, and focus. Combined with RAW capture and a tripod, manual mode produces the highest technical quality possible from your phone.
Quick Decision Guide
Use Night Mode when:
You are shooting handheld. The scene is mostly static. You want quick, consistent results. You are shooting in moderate low light (city streets, indoor events).
Use Manual Mode when:
You have a tripod available. You want creative light painting or light trail effects. The scene contains moving subjects. You need RAW files for extensive editing. You are shooting extreme low light (astrophotography).
Maximizing Your Phone’s Built-in Features
Beyond basic settings, several phone-specific features and techniques improve night photography results.
Main Lens vs Ultra-Wide at Night
Your phone’s main camera typically has a larger sensor and wider aperture than the ultra-wide lens. This matters enormously at night.
Main lens advantages:
The main camera captures 2-3 stops more light than ultra-wide equivalents. Noise levels remain lower. Night Mode processing works better with the larger sensor data. Focus performance improves in low light.
When ultra-wide works:
Use ultra-wide only when the composition demands it – tight spaces, dramatic perspectives, environmental context. Accept that image quality will be lower, with more visible noise and potential focus issues. Some newer flagship phones have improved ultra-wide night performance significantly.
RAW vs JPEG Shooting
RAW files contain unprocessed sensor data with maximum editing flexibility. JPEG files have processing baked in.
RAW benefits for night photography:
You can adjust white balance after capture without quality loss. Shadow and highlight recovery has more latitude. Noise reduction can be applied selectively during editing. You control the final look rather than accepting phone’s processing.
When JPEG suffices:
For quick social media sharing where extensive editing is not planned. When storage space is limited. For casual snapshots where convenience matters more than maximum quality.
Enable RAW capture in your camera settings or use a third-party app. Combine RAW with Manual mode and a tripod for the best technical results.
Lens Cleaning Importance
This sounds obvious, but dirty lenses cause more night photo problems than most photographers realize.
Why it matters more at night:
Fingerprints and smudges scatter light, creating flare and reducing contrast. In daylight, this effect is minimal. At night, bright point sources (streetlights, neon signs) create dramatic flare artifacts from dirty lenses. The effect cannot be fixed in editing.
Before every night shoot, wipe your lens with a microfiber cloth. Check for dust, lint, and residue. This 5-second habit improves more night photos than any other single action.
Third-Party Camera App Recommendations
Stock camera apps prioritize ease of use over control. Third-party apps unlock professional features.
Recommended apps:
For iPhone, Halide offers excellent manual controls, RAW capture, and focus peaking. Lightroom Mobile provides full manual controls plus integrated editing. For Android, Camera FV-5 delivers DSLR-like controls. Open Camera is a free alternative with extensive manual options.
These apps allow precise ISO, shutter speed, and focus control that stock apps often hide. They also support RAW capture on phones where the stock app does not.
Creative Techniques for Stunning Night Photos
Once you master the technical fundamentals, creative techniques elevate your night photography from competent to compelling.
Light Painting with Your Smartphone
Light painting uses moving light sources to “paint” through the frame during long exposure. Your phone becomes both camera and light source.
Basic light painting technique:
Mount your phone on a tripod. Set Manual mode with ISO 100-400 and shutter speed of 3-10 seconds. Have a second light source (flashlight, sparkler, phone screen) ready. Start the exposure, then move your light source through the frame. Experiment with patterns, shapes, and colors.
Your phone’s flashlight works as a painting tool. Colored cellophane over the light adds creative effects. Keep the light moving to avoid hot spots.
Capturing Light Trails
Vehicle light trails create dynamic city night images. The technique requires timing and the right location.
Light trail setup:
Find a location with steady traffic flow – overpasses, busy intersections, curved roads work well. Use a tripod and Manual mode. Set ISO 100-200 and shutter speed of 2-8 seconds. Capture as vehicles pass through the frame.
Red taillights produce warm trails; white headlights create cooler lines. Curved roads generate more interesting patterns than straight roads. Rush hour provides the most traffic for extended trails.
Working with Ambient and Artificial Light
Rather than fighting mixed lighting, use it creatively. Different light sources create mood and atmosphere.
Finding good light:
Look for scenes where multiple light types interact – storefronts spilling warm light onto cool blue streets, neon reflecting in puddles, streetlamps creating pools of illumination. Position yourself to include both lit and shadowed areas for contrast.
Silhouettes against bright backgrounds create dramatic night images. Expose for the bright background and let foreground subjects fall into shadow.
Composition Tips for Night Scenes
Night composition differs from daytime. Contrast, light sources, and mood become primary elements.
Effective night compositions:
Include light sources as compositional elements, not just illumination. Use reflections in wet surfaces, windows, and water to double visual impact. Frame through foreground elements to add depth. Lead the eye with lines of light – roads, walkways, building edges. Embrace negative space – dark areas add mystery and mood.
Editing Night Photos: From RAW to Polished
Post-processing transforms good night captures into exceptional images. The workflow differs from daylight editing.
Basic Editing Workflow
Step 1: White balance correction
Start by setting accurate white balance. For RAW files, this adjustment is non-destructive. Target neutral tones – gray pavement, white signs – as reference points. Some color cast adds atmosphere; complete neutrality can look sterile.
Step 2: Exposure adjustment
Night photos often benefit from subtle exposure increases. Push shadows up moderately, but avoid crushing them completely – some darkness adds mood. Protect highlights carefully – once clipped, they cannot be recovered.
Step 3: Contrast and clarity
Add contrast to restore depth that flat lighting removes. Clarity and texture adjustments enhance detail without increasing noise. Apply these conservatively – over-processing creates artificial looks quickly.
Noise Reduction Techniques
All night photos contain noise. The question is how much reduction to apply without destroying detail.
Effective noise reduction:
Apply luminance noise reduction first – this affects grayscale noise without smearing color. Keep the radius moderate. Color noise reduction can be more aggressive since color speckles are less visually important than luminance detail.
Modern editing apps like Lightroom Mobile, Snapseed, and Google Photos offer effective noise reduction. Apply selectively to problem areas rather than globally when possible.
Mobile Editing App Recommendations
For comprehensive editing:
Adobe Lightroom Mobile offers the most complete toolset including RAW editing, selective adjustments, and professional noise reduction. The free tier covers most needs.
For quick edits:
Google Photos provides intelligent auto-enhancement plus manual controls. Snapseed offers powerful selective editing and filter effects. Both are free and effective for JPEG editing.
For noise reduction focus:
Specialized apps like Noise Reducer Pro and Remini target noise specifically. These work well for rescuing particularly noisy captures but can produce plastic-looking results if over-applied.
Troubleshooting Common Issues
Even with proper technique, specific problems arise. Here are solutions for the most common night photography frustrations.
Why Photos Are Grainy
Grain (noise) results from high ISO settings, underexposure pushed in editing, or small sensor limitations.
Solutions:
Lower ISO and use longer shutter speed with stabilization. Expose properly in-camera rather than brightening dark captures later. Use Night Mode for its multi-frame noise reduction. Shoot RAW and apply noise reduction selectively during editing.
Fixing Blurry Night Photos
Blur comes from camera shake, subject movement, or missed focus.
Solutions:
For shake blur, use a tripod or stabilize against a solid surface. Enable timer or remote shutter to eliminate touch-induced vibration. For moving subjects, increase shutter speed and accept higher ISO, or time your shot for moments of stillness. For focus blur, lock focus on a contrasty edge or use manual focus if available.
Dealing with Overexposed Highlights
Bright light sources blow out easily, losing all detail.
Solutions:
Underexpose deliberately – darken the image in-camera using exposure compensation. Protect highlights during capture, then brighten shadows in editing. Enable HDR if available (some phones offer HDR in Night Mode). Frame compositions to minimize direct light sources when possible.
Phone-Specific Troubleshooting Tips
iPhone users:
Night Mode activates automatically in low light but can be forced on by tapping the icon. Use Deep Fusion and Smart HDR by keeping settings enabled. For astrophotography, third-party apps bypass Apple’s 10-second Night Mode limit.
Samsung users:
Pro mode offers extensive controls. Some models apply aggressive processing – reducing clarity in settings can help. Night Mode sometimes creates watercolor effects – try Pro mode with lower sharpening for more natural results.
Google Pixel users:
Night Sight produces natural-looking results but can over-brighten. Reduce exposure compensation for moodier images. Astrophotography mode activates automatically on tripods after several seconds.
Frequently Asked Questions
How to get sharp photos at night?
To get sharp photos at night, stabilize your phone using a tripod or bracing against solid surfaces. Use a 2-5 second timer to eliminate shake from pressing the shutter. Lower ISO to 100-400 and extend shutter speed rather than increasing sensitivity. Lock focus on a bright point or use manual focus. Enable Night Mode for static scenes, or switch to Manual mode with a tripod for moving subjects and creative effects.
How to get sharp photos in low light?
Sharp low light photos require three elements: stability, proper settings, and good technique. Use image stabilization features for handheld shots at 1/15 second or faster. For slower shutter speeds, mount on a tripod. Keep ISO below 1600 to minimize noise. Lock exposure and focus to prevent hunting. Clean your lens before shooting – smudges cause flare and reduce sharpness dramatically in low light conditions.
What is the 500 rule for night photography?
The 500 rule helps prevent star trails in astrophotography. Divide 500 by your focal length (in 35mm equivalent) to find the maximum shutter speed before stars streak. For example, with a 24mm equivalent phone lens, 500 divided by 24 equals about 20 seconds maximum exposure. Smartphone cameras with wide lenses (24-28mm equivalent) can typically use 15-20 second exposures for stars without trailing.
What is the 20 60 20 rule in photography?
The 20-60-20 rule is a post-processing guideline suggesting that 20% of your editing effort produces 60% of the improvement, while the final 20% of improvement requires 80% of your effort. For night photography, this means getting exposure, white balance, and basic noise reduction right provides most of the quality improvement. Chasing perfection through extensive editing yields diminishing returns.
How to take good photos with phone at night?
Start by cleaning your lens and enabling Night Mode for automatic optimization. Find stable support – a tripod is ideal, but walls, tables, or bracing against your body work too. Lock focus and exposure by tapping and holding on your subject. Slightly underexpose to protect highlights. For best quality, use Manual mode with low ISO (100-400) and longer shutter speed on a tripod. Shoot RAW for maximum editing flexibility, and apply noise reduction during post-processing.
Conclusion
Sharp smartphone night photography comes down to mastering three fundamentals: stabilization eliminates blur, proper settings balance light sensitivity against noise, and editing refines the captured data into polished images.
The techniques in this guide work across iPhone, Samsung, Google Pixel, and other modern smartphones. Start with Night Mode for handheld shots, then graduate to Manual mode with a tripod for maximum control. Clean your lens before every session, lock focus and exposure, and slightly underexpose to protect highlights.
These smartphone night photography tips will transform your after-dark captures from grainy disappointments into sharp, atmospheric images worth sharing. The best night photos come from practice – so get out tonight and start shooting.