Learning how to manually control exposure and focus on an iPhone camera transforms your mobile photography from casual snapshots to intentional, professional-looking images. While the iPhone’s automatic settings work well for everyday shots, they often struggle with challenging lighting, creative compositions, and specific artistic effects.
In this guide, I’ll show you exactly how to take charge of your iPhone camera settings, from the simple tap-to-focus technique to the powerful AE/AF Lock feature and the new Camera Control button on iPhone 16 models. You’ll also learn when manual controls make the biggest difference and how to troubleshoot common issues that frustrate many iPhone photographers.
Quick Answer: How to Manually Control Exposure and Focus on an iPhone Camera In 2026?
To manually control exposure and focus on your iPhone camera, tap anywhere on the screen to set your focus point (a yellow square appears). Then swipe up to brighten the image or swipe down to darken it. For more control, tap and hold until you see “AE/AF LOCK” to lock both settings in place. On iPhone 16 and later, you can also use the Camera Control button on the side of your device.
Understanding iPhone Camera Focus
The iPhone camera uses sophisticated autofocus technology that analyzes contrast in your scene to determine sharpness. By default, it continuously adjusts focus as you move the camera or as subjects change position in the frame. This works great for most situations, but it can become problematic when you want consistent results.
Tap to Focus: The Foundation of Focus Control
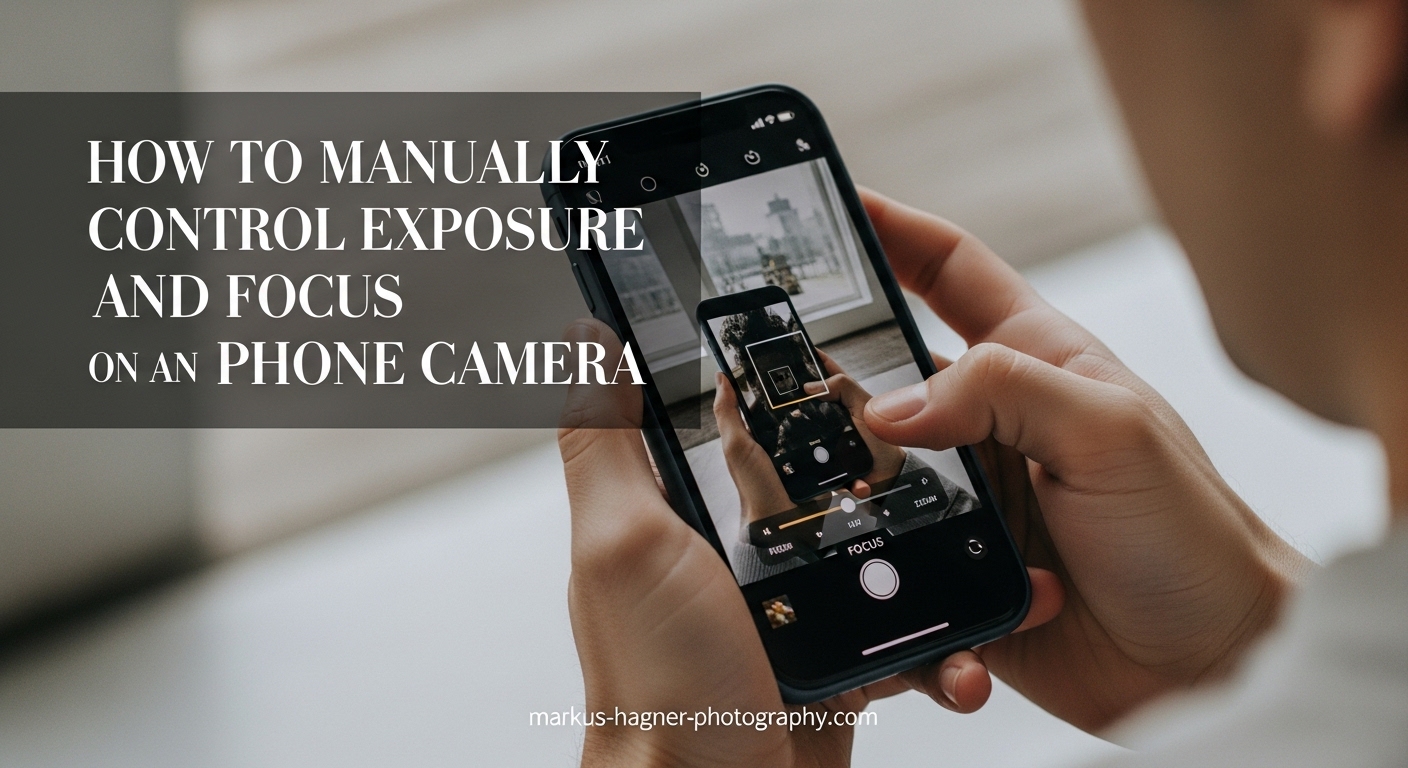
The simplest way to control focus on your iPhone is the tap-to-focus method. When you open the Camera app, tapping anywhere on the screen tells the camera exactly where you want sharpness prioritized. A yellow square appears around your tap point, confirming the camera understood your intent.
This yellow square serves as both a visual indicator and a functional control. The area inside becomes the sharpest part of your image, while the surrounding areas gradually soften based on depth of field. For portraits, tap on your subject’s eyes. For landscapes, tap on the main point of interest in your composition.
Why the Yellow Square Matters
That yellow square does more than show focus location. It also determines where the camera meters exposure. This means your tap controls two settings simultaneously: focus point and initial exposure calculation. Understanding this connection helps you predict how your final image will look.
If you tap on a bright area like the sky, the camera exposes for that brightness, potentially underexposing your subject. Conversely, tapping on shadows can overexpose highlights. This interplay between focus and exposure is why learning to control them separately becomes valuable.
Focus Priority in Different Scenarios
Different shooting situations require different focus strategies. In Portrait mode, the iPhone prioritizes your subject while creating background blur. For close-up macro shots, focus becomes critical because depth of field shrinks dramatically at short distances. Action and sports photography benefit from continuous autofocus, which tracks moving subjects automatically.
The key insight is that tap-to-focus works well for static subjects, but it doesn’t lock settings. If you recompose your shot after tapping, the camera may refocus on the new area under your original focus point. This common frustration leads many photographers to discover the AE/AF Lock feature.
How to Lock Focus and Exposure on iPhone?
The AE/AF Lock feature is perhaps the most powerful tool for iPhone photographers who want consistent results. AE stands for Auto Exposure, and AF stands for Autofocus. When locked, these settings remain fixed regardless of how you move the camera or what enters the frame.
Step-by-Step: Activating AE/AF Lock
Follow these steps to lock focus and exposure on your iPhone:
Step 1: Open the Camera app and frame your shot roughly.
Step 2: Tap and hold on the area where you want to set focus and exposure.
Step 3: Keep holding until you see “AE/AF LOCK” appear at the top of the screen (usually takes about 1-2 seconds).
Step 4: Now you can recompose your shot without the focus or exposure changing.
Step 5: To unlock, simply tap anywhere on the screen once.
The beauty of AE/AF Lock is that it separates your settings from your composition. You can set focus and exposure on your subject, lock them, then reposition the camera for a more interesting composition without losing your carefully chosen settings.
When to Use AE/AF Lock
AE/AF Lock shines in several specific situations. When shooting backlit subjects, lock exposure on your subject’s face to prevent them from becoming a silhouette (unless that’s your creative intent). For close-up photography, lock focus at the exact distance you need, then fine-tune your composition. In challenging mixed lighting, lock exposure on a mid-tone area to balance highlights and shadows.
I’ve found AE/AF Lock particularly valuable for concert and event photography. Stage lighting creates extreme contrast, and automatic exposure often overcompensates. By locking exposure on a performer’s face, I maintain consistent brightness even as lights flash and change color.
Adjusting Exposure After Locking
Here’s a technique many iPhone photographers overlook: you can still adjust exposure after activating AE/AF Lock. Once locked, swipe up or down next to the yellow sun icon that appears. This lets you fine-tune brightness while keeping your focus point locked. The camera remembers this exposure offset even as you recompose.
This combination of locked focus with adjustable exposure gives you tremendous creative control. You can darken a scene for moody atmosphere or brighten it for high-key effects, all while maintaining sharp focus exactly where you want it.
How to Adjust Exposure Manually on iPhone In 2026?
Exposure determines how bright or dark your image appears. The iPhone’s automatic exposure tries to balance the entire scene, but this doesn’t always match your creative vision. Manual exposure control lets you override these automatic decisions.
The Exposure Slider Gesture
After tapping to set focus (which also sets initial exposure), you’ll see a sun icon appear next to the yellow focus square. Place your finger on this sun icon and swipe up to increase brightness or swipe down to decrease it. A slider appears visually confirming your adjustment.
The adjustment range is typically about plus or minus two stops of exposure compensation. Each swipe changes exposure in small increments, allowing precise control. The setting remains active until you tap elsewhere on the screen or close the Camera app.
Exposure Compensation Slider (iPhone 11 and Later)
On iPhone 11 and newer models, Apple introduced a more sophisticated exposure control. After setting your focus point, look for a vertical slider that appears on the right side of the focus area. This dedicated exposure compensation slider provides clearer visual feedback and a wider adjustment range.
This feature integrates with the Camera app’s intelligence, so your adjustments are interpreted relative to what the camera detects in the scene. For example, the same slider position might produce different absolute brightness levels depending on whether you’re shooting indoors or in bright sunlight.
Creative Uses of Exposure Control
Underexposing intentionally creates moodier, more dramatic images. This technique works beautifully for portraits in soft window light, architectural details with deep shadows, and atmospheric landscapes. By darkening the exposure, you also preserve more highlight detail, which gives you more flexibility in post-processing.
Intentional overexposure creates high-key images with a bright, airy feel. This approach suits fashion photography, product shots on white backgrounds, and dreamy portrait styles. The key is watching your histogram or highlight warnings to avoid clipping important details to pure white.
Using the Camera Control Button (iPhone 16 and Later)
The iPhone 16 series introduced a dedicated Camera Control button on the right side of the device. This physical button provides quick access to camera functions and offers a new way to control focus and exposure settings.
What the Camera Control Button Does
The Camera Control button serves multiple functions. A single press launches the Camera app from any screen or lock state. A light press and hold activates a control overlay with exposure and depth adjustments. Swiping across the button cycles through different camera modes and lenses. This contextual control adapts based on what you’re shooting.
For photographers accustomed to physical camera controls, this button provides a more tactile shooting experience. Instead of tapping on the touchscreen, you can make adjustments while keeping your eye on the scene through the viewfinder.
Lock Focus and Exposure Setting in iOS 18
iOS 18 introduced a dedicated Lock Focus and Exposure setting specifically for the Camera Control button. To enable it, go to Settings, then Camera, then Camera Control. Toggle on “Lock Focus and Exposure.” With this enabled, clicking the Camera Control button locks both settings at their current values.
This setting addresses a common complaint from forum users: the difficulty of maintaining consistent focus and exposure while shooting. Previously, this required the tap-and-hold gesture on screen. Now, iPhone 16 users can lock settings with a simple button press, keeping their screen free for composition.
When to Use Camera Control vs. Touch Controls
Each control method has advantages. The Camera Control button excels for street photography and candid shots where speed matters. One press launches the camera, another locks settings, and you’re ready to shoot. Touch controls offer more precision for carefully composed images where you need to specify exact focus points.
I recommend experimenting with both approaches. The tactile feedback of the physical button can feel more satisfying and intentional. However, for macro work or precise product photography, the traditional tap-to-focus method still offers superior accuracy.
Manual Controls for iPhone Video Recording
Video recording presents unique challenges for focus and exposure. While the same basic controls work, their behavior and implications differ significantly from still photography.
Video-Specific Focus Considerations
In video mode, focus changes are visible in the final recording. If the camera hunts for focus during a shot, that awkward moment becomes permanent. This makes AE/AF Lock especially valuable for video. Lock focus on your subject before recording to prevent distracting focus shifts.
For moving subjects, you can use Cinematic mode, which automatically tracks focus while creating depth-of-field effects. However, for traditional video recording, locked focus typically produces cleaner results. If you need focus to change during a shot, plan the transition carefully and practice before recording.
Locking Exposure During Video
Exposure changes during video recording create noticeable brightness jumps that look unprofessional. Before hitting record, set your exposure and activate AE/AF Lock. This maintains consistent brightness throughout your clip, even as subjects move through different lighting conditions.
Professional videographers often use third-party apps like Filmic Pro for more advanced video exposure controls. These apps allow separate control of shutter speed, ISO, and frame rate, which affects the motion characteristics of your video beyond just brightness.
Cinematic Mode and Depth Control
Cinematic mode, available on iPhone 13 and later, automatically manages focus transitions while creating a shallow depth of field effect. You can tap to change focus points during recording, and the iPhone smoothly transitions between subjects. After recording, you can even adjust focus points in the Photos app.
While Cinematic mode handles focus automatically, you still have exposure control. Tap to set your initial exposure point before recording, then use the exposure slider to fine-tune. The camera maintains these settings throughout the clip.
Third-Party Camera Apps for Full Manual Control
The native Camera app provides excellent basic manual controls, but serious photographers often want more. Third-party camera apps unlock professional features like independent shutter speed control, ISO adjustment, manual white balance, and true manual focus sliders.
Why Consider Third-Party Apps
The iPhone’s stock Camera app intentionally limits manual controls to keep photography accessible. While this philosophy serves casual users well, it frustrates photographers who understand exposure relationships and want precise control. Third-party apps bridge this gap by exposing the full capabilities of the iPhone’s camera hardware.
Forum discussions consistently show that experienced photographers use third-party apps for about 20% of their shooting, typically in challenging lighting or for specific creative effects. The other 80% of shots work fine with the native app’s intelligent automation.
Popular Manual Camera Apps Compared
Camera+ 2 offers a comprehensive feature set including manual focus and exposure controls, macro mode, and RAW capture. The app provides a dedicated manual focus slider that lets you smoothly adjust focus from near to far. Its interface prioritizes photography-focused controls over filters and effects.
Halide positions itself as a professional camera app with an elegant interface. It features focus peaking (highlighting in-focus areas), live histogram, and detailed EXIF data display. The manual focus control uses a swipe gesture that feels natural and responsive. Halide excels at making complex controls feel approachable.
ProCamera offers extensive manual controls plus advanced video features. Its separate exposure and focus controls let you adjust brightness without affecting focus point. The app includes anti-shake stabilization, night mode, and extensive customization options for the control layout.
When to Use Third-Party vs. Native Camera
Use third-party apps when you need independent control over shutter speed and ISO, want RAW files for maximum editing flexibility, require manual white balance for consistent color, or need focus peaking for macro work. The native Camera app remains best for quick shots, computational photography features like Night mode and Deep Fusion, and situations where speed matters more than precision.
The learning curve for third-party apps varies. Camera+ 2 feels most approachable for beginners transitioning from the native app. Halide appeals to photographers who appreciate thoughtful design and detailed feedback. ProCamera suits those who want maximum control and don’t mind a steeper learning curve.
When to Use Manual Focus and Exposure In 2026?
Understanding when manual controls improve your photos helps you decide which techniques to apply. Not every shot benefits from manual intervention, but specific scenarios almost always require it.
Low Light Photography
In dim conditions, the iPhone’s automatic systems struggle. Focus may hunt continuously because low light reduces contrast, the primary signal autofocus uses. Exposure might overcompensate, brightening shadows at the cost of introducing noise and losing highlight detail.
For low light, lock focus on your subject using AE/AF Lock. Then reduce exposure slightly to maintain shadow integrity. If using a third-party app, lower ISO and extend shutter speed (use a tripod or stable surface for sharpness). Night mode in the native app handles many low-light situations automatically, but manual control helps when you want specific creative effects.
Backlit Subjects and Silhouettes
Backlighting creates extreme dynamic range that challenges automatic exposure. If your subject stands in front of a bright window or sunset, the camera typically exposes for the bright background, leaving your subject dark. For properly exposed subjects, lock exposure on their face, then optionally boost exposure slightly to compensate for backlighting.
For intentional silhouettes, do the opposite. Lock exposure on the bright background, then optionally reduce exposure further to deepen the silhouette effect. Position your subject between you and the light source for the strongest silhouette.
Macro and Close-Up Shots
At close distances, depth of field becomes extremely shallow. Tiny focus errors result in soft images. Lock focus at the exact point you want sharp, typically the most interesting feature of your subject. For flowers, this might be the stamen. For insects, focus on the eyes if visible.
Macro photography also benefits from manual exposure. Lock exposure on the subject to prevent the background from influencing brightness. A dark background can cause overexposure if the camera meters globally, while a bright background can underexpose your subject.
High Contrast Scenes
Scenes with both bright highlights and deep shadows challenge any camera system. The iPhone’s HDR helps, but you may want more control. Decide what’s most important in your scene and expose for that. Lock that exposure, then recompose. In post-processing, you can often recover some shadow or highlight detail, but getting exposure right in-camera gives you the best starting point.
Long Exposure Techniques
The iPhone’s Live Photos feature includes a Long Exposure effect that blurs moving elements. For more control, use third-party apps that allow actual long shutter speeds. Lock focus on stationary elements, then adjust exposure for the effect you want. Moving water, clouds, and traffic all create interesting long exposure subjects.
Troubleshooting Common Focus and Exposure Issues
Even with proper technique, focus and exposure problems sometimes occur. Understanding common issues and their solutions helps you recover quickly when things go wrong.
Focus Keeps Changing When Recomposing
This is the most common complaint from iPhone photographers. You tap to focus, then move the camera for better composition, and focus shifts to whatever is now under your original focus point. The solution is simple: use AE/AF Lock before recomposing. Tap and hold until you see the lock indicator, then freely adjust your composition.
If this happens frequently during your shooting, make AE/AF Lock part of your standard workflow. Develop the habit of locking settings before every significant recomposition. With practice, this becomes second nature and takes only a moment.
AE/AF Lock Not Working
Several factors can prevent AE/AF Lock from activating. First, ensure you’re holding long enough. The lock requires about 1-2 seconds of continuous contact. If you lift too soon, the camera interprets it as a simple tap. Second, check that you’re not accidentally touching another part of the screen with another finger.
In some cases, a software glitch may prevent the lock from working. Try force-closing the Camera app and reopening it. If problems persist, restart your iPhone. Rare cases may require checking for iOS updates, as Apple occasionally fixes camera bugs in system updates.
Exposure “Fighting Back”
Some users report that exposure adjustments seem to revert or “fight back” after a moment. This typically happens when the camera’s intelligence system tries to compensate for what it perceives as incorrect settings. The exposure slider adjustment is relative, not absolute, so the camera may adjust the baseline.
To maintain your exposure setting, activate AE/AF Lock after making your adjustment. This prevents the camera from continuously recalculating exposure. For critical shots, consider using a third-party app that provides absolute exposure control rather than relative adjustment.
iPhone Camera Focus Stuck
If focus seems stuck or unresponsive, several solutions exist. First, tap on a high-contrast area of your scene. Autofocus needs contrast to work, so a flat, textureless surface may not trigger proper focus. Second, try switching to a different camera (front to back or between lenses) and back. This forces the focus system to reset.
If focus remains stuck, the lens might need cleaning. Fingerprints and oils can interfere with autofocus performance. Use a microfiber cloth to clean all camera lenses. In rare cases, hardware issues may require professional service, but software solutions resolve most focus problems.
Overexposed or Underexposed Photos
Consistent exposure problems suggest a settings issue. Check whether you have any exposure adjustments saved. The Camera app sometimes retains settings from previous sessions. Tap the screen to reset to automatic exposure, then try your adjustment again.
For challenging scenes, use the exposure compensation after setting your focus point. Remember that the iPhone’s HDR captures multiple exposures and combines them. If HDR is enabled, your manual exposure adjustment applies to the base exposure, which the HDR system then uses for its calculations. For full manual control, consider disabling HDR temporarily.
Third-Party App Focus Issues
If manual focus in a third-party app isn’t working correctly, check the app’s settings. Some apps have different focus modes that need to be activated. Also ensure you’ve granted the app full camera permissions in iOS Settings. Some focus features require these permissions to function properly.
App-specific issues may require checking for updates. Developers frequently fix bugs and improve focus performance. If problems persist, try the native Camera app to determine whether the issue is app-specific or affects the system-wide camera functionality.
Frequently Asked Questions
Is there a way to manually focus an iPhone camera?
Can you manually adjust exposure on an iPhone?
How do you lock the exposure and focus with the camera control?
How do I manually turn on focus on my iPhone?
Take Control of Your iPhone Photography
Mastering manual exposure and focus on your iPhone camera opens creative possibilities that automatic settings simply cannot achieve. The techniques in this guide, from basic tap-to-focus to the powerful AE/AF Lock feature and the new Camera Control button on iPhone 16, give you the tools to capture images that match your vision.
Start by practicing AE/AF Lock in various lighting conditions. This single technique solves the most common frustration iPhone photographers face: settings that change when you recompose. Once that becomes comfortable, experiment with intentional underexposure and overexposure for creative effects. Then explore third-party apps when you need the advanced controls they provide.
Remember that knowing how to manually control exposure and focus on an iPhone camera isn’t about abandoning automatic features. The iPhone’s computational photography excels in many situations. Manual control simply gives you options when automation falls short or when you have a specific creative intent. Use both approaches thoughtfully, and your mobile photography will continue to improve.