Have you ever watched clouds race across the sky in seconds, or seen a flower bloom in fast-forward? That is the magic of time-lapse photography, and your smartphone can create these captivating videos right now. I have spent countless hours testing time-lapse techniques on both iPhone and Android devices, and I will show you exactly how to get stunning results without expensive equipment.
In this guide to time-lapse photography with a smartphone, you will learn how to find the time-lapse mode on your phone, choose the right settings for different subjects, avoid common mistakes that ruin footage, and capture professional-looking time-lapses that will impress anyone who sees them. Whether you want to document a sunset, create engaging social media content, or simply explore a new creative technique, this guide has everything you need.
What is Time-Lapse Photography?
Time-lapse photography is a technique where your camera takes photos at set intervals over time, then plays them back at normal video speed. The result compresses hours of real-time action into seconds or minutes of video, making slow changes visible to the human eye. Think of it as a time machine that speeds up reality.
Here is how it works technically: your phone captures individual frames at regular intervals (every second, every 5 seconds, or even every minute), then stitches them together at 24-30 frames per second. A 2-hour recording might become just 20 seconds of final video, depending on your interval settings.
Time-Lapse vs Hyperlapse: What is the Difference?
Many people confuse these terms, but there is a clear distinction. Time-lapse keeps the camera stationary while capturing images at intervals. The camera does not move during recording. Hyperlapse is a specific type of time-lapse where the camera moves through space over a long distance, creating both time compression and a traveling effect. All hyperlapses are time-lapses, but not all time-lapses are hyperlapses.
Samsung phones actually call their time-lapse feature “Hyperlapse” in the camera app, which adds to the confusion. For stationary time-lapses on Samsung, you still use the Hyperlapse mode, but without moving the phone. iPhone uses the more accurate “Time-Lapse” label for its feature.
Getting Started: Finding Time-Lapse Mode on Your Phone
The first step to time-lapse photography with a smartphone is locating the feature in your camera app. Most modern smartphones have this built-in, though the location varies between devices.
How to Find Time-Lapse on iPhone
iPhone makes this simple. Open your Camera app and swipe horizontally through the modes at the bottom until you see “Time-Lapse.” The icon looks like a clock. Tap it once to select it, then press the red record button to start capturing. Your iPhone will automatically handle the interval selection based on how long you record.
How to Find Time-Lapse on Android
Android phones vary by manufacturer, but most follow a similar pattern. Open your Camera app and look for one of these options:
Samsung Galaxy phones: Open Camera, tap “More” in the mode selector, then select “Hyperlapse.” Samsung offers preset speeds from 5x to 300x, which correspond to different intervals.
Google Pixel phones: Open Camera, swipe to “Time Lapse” in the mode carousel. Pixels give you more control over interval settings than iPhones.
Other Android devices: Look for “Time Lapse,” “Hyperlapse,” or “More” in your camera modes. If your stock camera lacks this feature, third-party apps like Lapse It or Framelapse provide excellent alternatives.
Can My Phone Do Time-Lapse Photography?
Yes, virtually every smartphone made in the last 5-6 years can shoot time-lapse video. If your phone was purchased after 2018, it almost certainly has this capability. Older phones might need a third-party app, but even budget smartphones now include time-lapse as a standard camera feature.
Essential Equipment for Smartphone Time-Lapse
While your phone has everything technically needed for time-lapse, a few accessories dramatically improve your results. I learned this the hard way after ruining several promising shots with shaky footage and dead batteries.
A Stable Tripod is Non-Negotiable
Stability is the single most important factor for quality time-lapses. Any movement during recording creates jarring jumps in your final video. Hand-holding your phone simply does not work for time-lapse photography with a smartphone.
You need a tripod and a smartphone mount. Any basic tripod will work, but make sure it can hold your phone securely at various angles. A small tabletop tripod works for many situations, while a full-size tripod gives you more flexibility for outdoor shoots.
For the phone mount, look for a clamp-style holder that grips your phone firmly. Spring-loaded mounts tend to be more secure than magnetic options. You want something that will not slip or rotate during a 2-hour recording session.
Power Banks for Extended Recording
Time-lapse recording drains batteries quickly. A 3-hour time-lapse might use 40-60% of your battery, depending on your phone. For anything longer than 2 hours, connect your phone to a power bank.
I recommend keeping your phone plugged into a portable charger during any time-lapse longer than 90 minutes. This also prevents your phone from entering sleep mode and stopping the recording. Some phones automatically dim their screens or reduce performance to save power, which can affect your time-lapse quality.
Storage Space Considerations
Time-lapse videos consume significant storage, especially at higher resolutions. A 4K time-lapse can use 1-2 GB per hour of recording. Before starting a long shoot, check your available storage and clear space if needed.
As a rough guide: plan for about 1 GB of storage per hour of time-lapse recording at 4K, or 500 MB per hour at 1080p. If you are shooting an all-day project, you might need 8-12 GB of free space.
Camera Settings Explained: Intervals, Resolution, and Exposure Lock
Understanding camera settings separates mediocre time-lapses from stunning ones. Let me break down the technical aspects in practical terms.
Interval Selection: The Most Important Setting
The interval is the time between each photo your phone captures. This determines how much time passes in your final video. Choose the wrong interval, and your time-lapse will either look choppy or barely show any movement.
Here is a practical guide to intervals for different subjects:
Fast-moving subjects (traffic, people walking, clouds on windy days): Use 1-2 second intervals. This captures enough frames to show smooth motion.
Medium-speed subjects (clouds on calm days, shadows moving, crowds): Use 3-5 second intervals. This works well for most outdoor daytime time-lapses.
Slow-moving subjects (sunsets, sunrises, tide changes): Use 5-10 second intervals. These changes happen gradually, so longer intervals still capture meaningful movement.
Very slow subjects (construction projects, plant growth, day-to-night transitions): Use 30 seconds to several minutes between shots. These require much longer recording times.
How iPhone Handles Intervals Differently
iPhone time-lapse mode automatically adjusts intervals based on recording duration. Apple’s algorithm captures more frequently at the start and reduces frequency for longer recordings. For a 30-minute recording, iPhone might capture every 1.5 seconds. For a 2-hour recording, it captures every 4 seconds.
This automation is convenient but limits your control. You cannot manually set intervals on iPhone’s stock camera app. If you need precise interval control on iPhone, third-party apps like Lapse It Pro give you full manual settings.
Samsung Interval Presets Explained
Samsung’s Hyperlapse mode offers presets: 5x, 10x, 15x, 30x, 60x, 120x, and 300x. These multipliers indicate how much time is compressed. At 30x, 30 minutes of recording becomes 1 minute of video. At 300x, 5 hours becomes 1 minute.
For most situations, 15x to 60x works well. Use higher speeds (120x, 300x) for very long events like a full day or sunset through nightfall.
Resolution: FHD vs UHD/4K
Higher resolution means more detail but larger file sizes. Most phones offer 1080p (FHD) and 4K (UHD) options for time-lapse. If storage allows, shoot in 4K for the flexibility to crop and stabilize in post-production.
For social media posts that will be compressed anyway, 1080p is sufficient. For archival quality or large display viewing, 4K is worth the extra storage.
Why Exposure Lock is Critical
Auto-exposure is your enemy in time-lapse photography. As lighting changes during recording, your phone adjusts exposure automatically, creating noticeable flicker in your final video. This problem ruins more time-lapses than any other single factor.
Always lock your exposure before starting a time-lapse. Here is how:
On iPhone: Tap and hold on your subject until you see “AE/AF LOCK” appear at the top of the screen. This locks both exposure and focus.
On Android: Tap and hold on your subject to lock focus and exposure. On Samsung phones in Hyperlapse mode, tap the screen once to set focus and exposure, then look for a lock icon to confirm it is locked.
For scenes with dramatic light changes (sunsets, day-to-night), locked exposure creates another problem: your image will become too dark or too bright as light changes. This is where advanced techniques or third-party apps with “holy grail” exposure ramping features become necessary.
Focus Lock Prevents Hunting
Just as important as exposure lock is focus lock. If your phone refocuses during recording, you will see distracting focus shifts in your video. Lock focus on your main subject before recording.
On both iPhone and Android, the same tap-and-hold gesture that locks exposure also locks focus. Do this every time before you press record.
Best Subjects for Smartphone Time-Lapse Photography
Not all subjects work well for time-lapse. The best subjects show visible change over time, have consistent or interesting light, and fit within your phone’s technical limitations.
Easy Subjects for Beginners
Clouds: The classic time-lapse subject. Clouds move constantly and create mesmerizing patterns. Shoot for 20-40 minutes with 2-3 second intervals for best results.
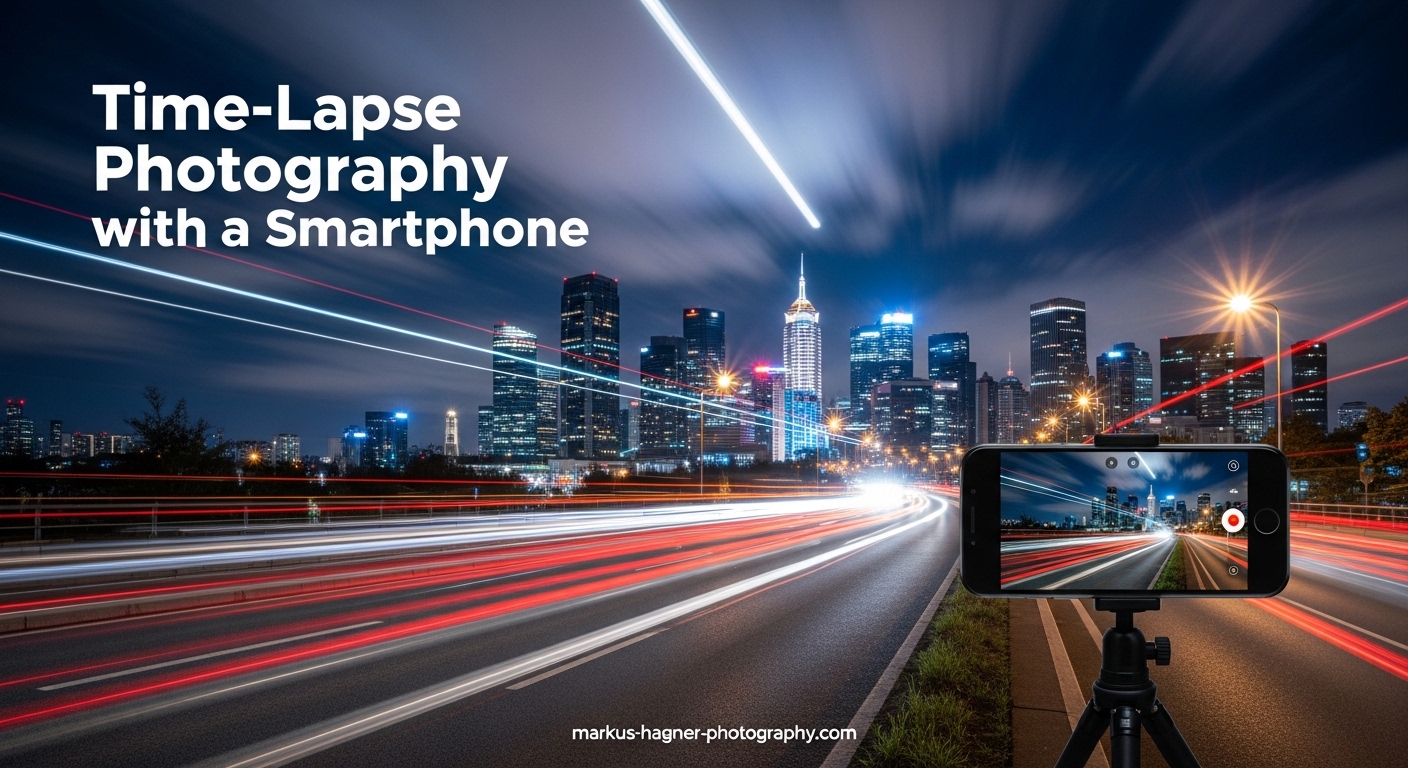
Traffic: Car headlights and taillights create beautiful light trails at dusk or dawn. Find an elevated position overlooking a busy road. Record for 30-60 minutes during the transition from day to night.
People in public spaces: Crowds moving through parks, plazas, or streets compress into fascinating patterns. Stationary elements provide contrast to the flow of people.
Medium-Difficulty Subjects
Sunsets and sunrises: These are rewarding but challenging because light changes dramatically. Lock exposure on a mid-toned area of the sky, not the bright sun. Record for 45-90 minutes to capture the full color transition.
Tides and water: Ocean tides moving in or out create satisfying time-lapses. Position your camera safely above the water line and record for 2-4 hours.
City skylines at night: City lights coming on at dusk offer striking visuals. Start recording 30 minutes before sunset and continue into full darkness.
Advanced Subjects
Night sky and stars: Capturing star movement requires very dark locations away from city lights. Your phone’s sensor limitations make this challenging, but newer phones with night mode capabilities can capture reasonable results with 15-30 second exposures. Use a third-party app that allows longer exposures.
Day-to-night transitions: Also called “holy grail” time-lapses, these capture a full day transitioning into night. They require exposure adjustments during recording or post-processing to balance the extreme light range. Stock phone apps struggle with this; dedicated apps with exposure ramping work better.
Long-term projects: Documenting construction, plant growth, or seasonal changes over days or weeks requires planning and consistent camera positioning. Some photographers use old phones as dedicated time-lapse cameras for these projects.
Step-by-Step Guide to Shooting Your First Time-Lapse
Follow this process to capture your first successful smartphone time-lapse:
Step 1: Choose Your Subject
Pick something with visible movement over time. Clouds or traffic work perfectly for your first attempt. Position yourself where you have an unobstructed view.
Step 2: Set Up Your Tripod
Mount your phone on the tripod at the desired angle. Make sure the tripod is on stable ground and will not shift during recording. Check that your phone is level.
Step 3: Open Camera and Select Time-Lapse Mode
Navigate to the time-lapse or hyperlapse mode on your phone. On iPhone, swipe to Time-Lapse. On Samsung, go to More > Hyperlapse.
Step 4: Frame Your Shot
Compose your image carefully. Consider how movement will flow through the frame. Leave space for subjects to move into rather than out of the frame.
Step 5: Lock Exposure and Focus
Tap and hold on a mid-toned area of your scene to lock AE/AF. Wait for the lock confirmation. This prevents flicker and focus shifts during recording.
Step 6: Select Your Interval or Speed
On Samsung, choose 15x or 30x for general scenes. On iPhone, the app handles this automatically. On other Android phones, select 2-3 second intervals for clouds and traffic.
Step 7: Check Battery and Storage
Verify you have at least 50% battery and several GB of free storage. Connect a power bank if recording for more than 2 hours.
Step 8: Start Recording
Press the record button and step away. Do not touch the phone or tripod during recording. Even small vibrations affect the video.
Step 9: Wait Patiently
Let the recording continue for at least 20-30 minutes for your first attempt. Longer recordings produce more interesting results.
Step 10: Stop and Review
Press stop when finished. Play back your time-lapse to see the results. Note what worked and what needs improvement for next time.
Common Time-Lapse Mistakes to Avoid
After reviewing hundreds of time-lapse attempts, these mistakes appear most frequently:
1. Not using a tripod. Handheld time-lapse never works. The slight movements between frames create jarring, unwatchable video. Always use a stable mount.
2. Forgetting to lock exposure and focus. Auto-adjustments create flicker and focus hunting that ruins footage. Lock both before every recording.
3. Choosing the wrong interval. Intervals that are too fast waste storage on barely changing scenes. Intervals too slow make movement appear choppy. Match your interval to your subject’s speed.
4. Running out of battery mid-recording. Long time-lapses drain power quickly. Connect external power for anything over 90 minutes.
5. Poor composition. Static composition that works for photos often fails for time-lapse. Consider how movement will flow through your frame over time.
6. Not accounting for changing light. Dramatic light changes during sunset time-lapses can leave you with overexposed or underexposed footage if you do not plan for the transition.
7. Recording for too short a time. Many beginners stop after 5-10 minutes, resulting in just a few seconds of compressed video. Commit to longer recording sessions for satisfying results.
Pro Tips for Better Smartphone Time-Lapses (2026)
Once you master the basics, these techniques elevate your time-lapse photography with a smartphone to the next level:
Composition Techniques
Apply the rule of thirds, but consider how your subject will move through the frame over time. Place stationary elements at intersection points and leave space for moving subjects to travel through. Diagonal lines created by roads, rivers, or cloud patterns add visual energy.
Foreground elements add depth and context. A time-lapse of clouds becomes more interesting when framed through trees or against a city skyline rather than empty sky.
Battery and Storage Optimization
Enable airplane mode during recording to prevent calls and notifications from interrupting. Dim your screen to minimum brightness to conserve power. Some phones allow recording with the screen off, which significantly extends battery life.
For maximum storage efficiency, shoot in 1080p unless you specifically need 4K resolution. The quality difference is often negligible for social media sharing.
Third-Party App Recommendations
Stock camera apps limit your control. For more advanced features, consider these apps:
Lapse It Pro (iOS and Android): Offers full manual interval control, resolution options, and export settings. The pro version unlocks 4K recording and advanced features.
Framelapse (Android): Provides detailed interval control, video duration calculation, and exposure adjustment options not available in stock apps.
Moment Camera (iOS): Gives manual control over focus, exposure, and white balance with a clean interface designed for serious mobile videographers.
Creative Techniques
Try shooting through objects like fences, windows, or foliage to add foreground interest. Reflections in water or glass create compelling double-layer compositions.
For unique perspectives, mount your phone in unusual locations: inside a car facing forward, on a moving object, or pointed straight up at the sky. These angles produce time-lapses that stand out from typical landscape shots.
Frequently Asked Questions
Can my phone do time-lapse photography?
Yes, virtually all modern smartphones including iPhones and Android devices have built-in time-lapse functionality. On iPhone, open the Camera app and swipe to Time-Lapse mode. On Android, open the camera app, look for ‘More’ or ‘Modes’, then select Time-Lapse or Hyperlapse. Phones purchased after 2018 almost certainly include this feature.
What is the difference between time-lapse and hyperlapse?
Time-lapse keeps the camera stationary while capturing images at set intervals. Hyperlapse is a type of time-lapse where the camera moves through a scene over a long distance, creating both time compression and a traveling effect. All hyperlapses are time-lapses, but not all time-lapses are hyperlapses. Samsung uses ‘Hyperlapse’ as the name for its time-lapse feature, which adds to confusion.
How many minutes is 20 seconds in time-lapse?
The recording time needed depends on your interval setting. At 1-second intervals, 20 seconds of time-lapse video requires approximately 10 minutes of recording. At 2-second intervals, you need about 20 minutes. Use this formula: Recording Time = Video Length (seconds) x Interval (seconds) x Frame Rate / Frame Rate.
What is the best camera setting for time-lapse?
For smartphone time-lapse, lock both exposure and focus by tapping and holding on your subject, shoot in the highest quality available (4K if possible), and choose the right interval for your subject. Use 1-2 seconds for fast movement like clouds and traffic, 5-10 seconds for sunsets and slow changes. Manual mode or third-party apps give you more control than stock camera apps.
What are common time-lapse mistakes?
Common mistakes include: not using a tripod causing shaky footage, forgetting to lock exposure and focus leading to flicker, choosing wrong intervals for the subject, running out of battery during recording, poor composition that does not account for movement, not planning for changing light conditions, and recording for too short a time to see meaningful results.
How long is a 2-hour time-lapse on iPhone?
iPhone’s Time-Lapse mode automatically adjusts intervals based on recording duration. For a 2-hour recording, iPhone typically captures one frame every 4 seconds, resulting in approximately 20-30 seconds of final video. The app handles interval calculation automatically, but you have limited control over the final result.
How long should I shoot a time-lapse?
For most subjects, record for at least 20-40 minutes to produce 10-15 seconds of satisfying time-lapse video. Sunsets and sunrises benefit from 45-90 minutes of recording. Long-term projects might span hours or days. Longer recordings compress more time and create more dramatic results, but require more battery and storage.
Conclusion
Time-lapse photography with a smartphone opens up creative possibilities that seemed impossible just a few years ago. Your phone has everything needed to capture stunning compressed-time videos, from clouds racing across the sky to city lights flickering on at dusk.
Remember these key points: always use a tripod for stability, lock exposure and focus before recording, match your interval to your subject, and commit to longer recording sessions for satisfying results. Start with easy subjects like clouds and traffic, then progress to more challenging projects as your skills improve.
The best way to learn time-lapse is to practice. Grab your phone, find an interesting subject, and start recording. Each attempt teaches you something new about timing, composition, and the technical aspects of this fascinating technique. Your next great time-lapse is waiting to be captured.