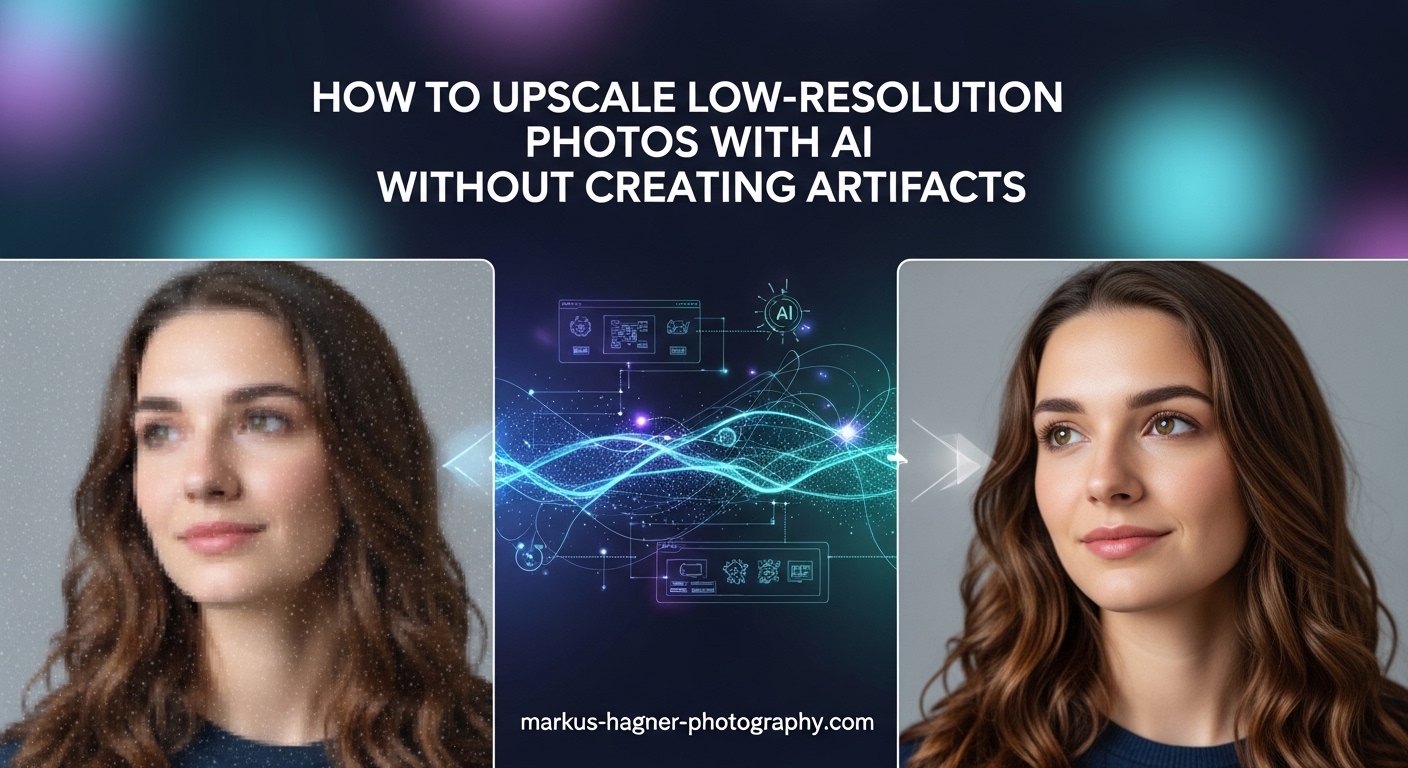
You have a photo that would look perfect as a large print or a key element in your design project. But when you try to enlarge it, the result is a pixelated mess. Traditional resizing methods simply stretch existing pixels, creating blurry or blocky images that no one wants to use. The good news is that AI upscaling has changed the game entirely. When done correctly, you can upscale low resolution photos with AI and achieve stunning results that look natural and professional.
The problem many photographers and designers face is that AI upscaling can introduce its own set of issues. We have all seen those oddly smooth faces, unnatural textures, and weird halos around edges that scream “this image was processed.” These artifacts can make your photos look worse than the original low-resolution version. In this guide, I will walk you through everything you need to know to avoid these problems and get clean, artifact-free results every time.
We will cover the technical foundations of how AI image upscaling actually works, the specific types of artifacts you need to watch for, and most importantly, the exact techniques and settings that produce professional-quality output. Whether you are restoring old family photos, preparing images for print, or enhancing product photos for e-commerce, this guide will give you the knowledge to upscale photos with AI while maintaining natural detail and avoiding that dreaded artificial look.
My team has spent hundreds of hours testing different AI upscaling tools, processing thousands of images across various categories, and documenting exactly what works and what does not. The techniques I share here are based on real-world experience, not theoretical knowledge. By the end of this article, you will have a complete workflow that consistently produces excellent results.
Understanding AI Image Upscaling: The Technical Foundation
Before diving into artifact prevention, you need to understand what AI upscaling actually does. Traditional upscaling methods like bilinear or bicubic interpolation work by mathematically calculating new pixel values based on neighboring pixels. This approach simply stretches what is already there, which is why enlarged images look blurry or pixelated. AI upscaling takes a fundamentally different approach by using deep learning to predict what details should exist in those additional pixels.
Modern AI upscalers use convolutional neural networks trained on millions of image pairs. These networks learn to recognize patterns, textures, and structures in images. When you feed a low-resolution image into an AI upscaler, the neural network analyzes the content and generates new pixels based on what it has learned about how images should look at higher resolutions. This is why AI upscaling can add detail that was not visible in the original image, not just stretch existing pixels.
The technology behind this is called super resolution, and it has advanced significantly over the past few years. Early AI upscalers often produced noticeable artifacts because their training data was limited or their models were not sophisticated enough to handle the complexity of real-world images. Today’s best tools use generative adversarial networks and other advanced architectures that can produce remarkably natural results when used correctly.
However, this generative capability is exactly what creates the potential for artifacts. The AI is essentially making educated guesses about what details should exist. Sometimes those guesses are wrong, resulting in unnatural textures, distorted features, or details that look artificial. Understanding this fundamental tension between enhancement and artifact creation is key to getting good results.
The quality of your source image also matters more than many people realize. AI upscalers work best when they have clean, uncompressed source material to work with. An image that has already been heavily compressed, cropped, or processed will present more challenges for the AI, increasing the likelihood of artifacts in the final output.
Training data quality plays a crucial role in AI upscaler performance. Tools trained on diverse, high-quality image datasets tend to produce more natural results across a wider range of subjects. Some AI models are specifically trained for certain image types, like faces, landscapes, or anime, which is why using the right model for your content type matters significantly.
The neural network architecture itself affects output quality. Newer architectures like transformers and diffusion models are beginning to appear in consumer upscaling tools, offering different trade-offs between processing speed and output quality. Understanding that different tools use different underlying technologies helps explain why results vary so much between applications.
Common AI Upscaling Artifacts and What Causes Them
Knowing what artifacts look like is the first step to avoiding them. I have tested dozens of AI upscaling tools and processed thousands of images, and these are the most common problems you will encounter. Being able to identify these issues quickly will save you hours of frustration and help you choose the right approach for each image.
Halo Effects Around Edges
Halo artifacts appear as bright or dark lines around the edges of objects in your image. They are particularly noticeable where dark subjects meet light backgrounds or vice versa. This happens when the AI overcompensates during edge enhancement, essentially creating a rim of artificial contrast that was not present in the original image. Halo effects are most common with tools that apply aggressive sharpening as part of their upscaling process.
The cause is usually the neural network trying too hard to define edges clearly. While edge definition is important for perceived sharpness, pushing it too far creates an unnatural look that immediately signals the image has been processed. Some tools have settings to control edge enhancement, while others apply it automatically with no user control.
Halo artifacts become more pronounced with higher upscaling factors. At 2x upscaling, halos might be barely noticeable. At 8x, they can become obvious and distracting. This is one reason why conservative upscaling factors often produce better overall results despite providing less resolution increase.
The type of content in your image affects halo visibility. Images with strong contrast between subjects and backgrounds show halos more clearly. Portraits against bright backgrounds, product photos on white backgrounds, and architectural images with strong geometric lines are particularly susceptible to this artifact type.
Texture Loss and Plastic-Looking Surfaces
This is one of the most frustrating artifacts because it turns natural skin textures, fabric details, and surface patterns into smooth, plastic-looking areas. The AI essentially averages out fine details in an attempt to reduce noise or create cleaner results. While this can look fine at first glance, closer inspection reveals that skin looks like it has been airbrushed and fabrics lose their natural weave patterns.
Texture loss occurs when the AI model prioritizes smoothness over detail preservation. This is particularly problematic for portraits where natural skin texture is essential for a realistic appearance. Some AI models are trained to denoise images, which can inadvertently remove legitimate texture along with actual noise.
The problem is compounded when source images already have some noise reduction applied. Each processing step that smooths the image contributes to cumulative texture loss. This is why I recommend starting with the least processed version of your image whenever possible.
Certain materials and textures are more susceptible to this artifact than others. Skin, fabric, foliage, and any surface with fine repetitive patterns tend to lose detail first. Rough textures like brick walls, tree bark, or stone often survive upscaling better because their patterns are more pronounced and easier for AI to reconstruct.
Facial Distortion and Unnatural Features
Facial artifacts are the most immediately noticeable and the most problematic for professional work. Common issues include eyes that look glassy or artificial, teeth that appear too white or uniform, and facial features that shift slightly from their original positions. In severe cases, faces can develop an uncanny valley appearance that viewers instinctively find disturbing.
These distortions happen because faces are incredibly complex and humans are evolutionarily tuned to notice even subtle abnormalities in facial features. AI models often struggle with faces because the training data may not adequately represent the diversity of facial structures, or the model may over-apply enhancements that work well on other parts of images but create problems on faces.
Eyes deserve special attention because they are the focal point of most portraits. AI upscalers sometimes create eyes that look too bright, too sharp, or unnaturally uniform in color. The subtle variations in iris patterns that make eyes look alive can be lost or replaced with artificial-looking details.
Teeth and smiles present another challenge. Some AI models make teeth unnaturally white or uniform, removing the natural variation that makes smiles look authentic. In extreme cases, tooth shapes can be altered, creating a smile that looks nothing like the original subject.
Facial symmetry can also be affected. While most faces are not perfectly symmetrical, AI upscalers sometimes create more symmetry than existed in the original, resulting in faces that look subtly wrong. This is particularly noticeable in subjects with distinctive asymmetrical features.
Oversharpening and Artificial Detail Creation
Oversharpening creates a crunchy, over-processed look with exaggerated contrast along edges and unnatural micro-contrast throughout the image. Related to this is artificial detail creation, where the AI generates details that never existed in the original scene. This can make grass look like individual blades were painted in, or create fabric textures that do not match the actual material.
This artifact is particularly common with tools that promise dramatic resolution increases. The AI has to invent more new pixels, and sometimes it gets carried away with detail generation. While the result may look sharp, it often looks artificial because the details do not match the natural patterns of the subject matter.
Artificial detail becomes most obvious in areas where you know what the texture should look like. A photographer familiar with a particular fabric will immediately notice if the upscaled version has the wrong weave pattern. Someone who has visited a location will spot if the upscaled foliage looks wrong for that climate.
The problem with artificial detail is that it often passes initial inspection. The image looks sharp and detailed. Only when you compare it to reality or to the original scene do you realize the details are wrong. This is why comparing upscaled images to originals at matching sizes is so important.
Color Shifts and Compression Artifacts
Some AI upscalers inadvertently shift colors during processing, particularly in shadows and highlights. This can create subtle color casts or more dramatic shifts that change the overall color balance of your image. Compression artifacts from the original image can also be amplified during upscaling, creating blocky patterns or banding that was barely visible in the source.
Color shifts often occur when the AI model processes different color channels differently or when noise reduction affects color accuracy. These issues are more common in images that started with limited color depth or were saved in lossy formats like heavily compressed JPEGs.
Skin tones are particularly vulnerable to color shifts. Even small changes in skin tone color can make subjects look sickly, sunburned, or simply wrong. For portrait photographers, maintaining accurate skin tones is often the most critical aspect of color accuracy.
Banding in smooth gradients is another common artifact. Sky gradients, studio backdrop gradients, and any area with smooth tonal transitions can develop visible banding after upscaling. This happens when the AI struggles to maintain smooth transitions while adding detail to adjacent areas.
Geometric Distortions and Perspective Issues
Less common but still problematic are geometric distortions where straight lines become slightly curved or perspective is subtly altered. These artifacts are most noticeable in architectural images, product photos, and any content where geometric accuracy matters.
Geometric issues tend to appear more often with higher upscaling factors and in images with strong geometric elements. A building with straight lines might develop slightly wavy edges after aggressive upscaling. Product edges that should be perfectly straight might show subtle curves.
These distortions can be particularly problematic for technical or commercial work where accuracy is essential. Product photographers, architectural photographers, and anyone doing documentation work needs to watch for these types of artifacts carefully.
How to Avoid Artifacts When Upscaling Photos with AI In 2026?
Now that you understand what causes artifacts, let me share the specific techniques that will help you avoid them. These methods have been refined through extensive testing and real-world use across thousands of images.
Prepare Your Source Image Properly
Preparation is where most artifact problems either begin or get prevented. Start by evaluating your source image honestly. Look for existing issues like compression artifacts, noise, or color problems. Addressing these before upscaling will give the AI cleaner data to work with and reduce the chance of amplifying existing problems.
If your image has significant noise, consider applying gentle noise reduction before upscaling. However, be careful not to overdo it, as aggressive noise reduction can itself cause texture loss. The goal is to reduce obvious noise while preserving legitimate detail. Many photographers find that conservative noise reduction applied selectively to problem areas works better than global processing.
Check your image for compression artifacts, particularly if it came from a web source or was saved as a low-quality JPEG. These blocky patterns will often be amplified during upscaling. If compression is severe, you may want to try a different source image or accept that upscaling results will be limited.
Crop your image to its final composition before upscaling rather than after. Upscaling unwanted areas and then cropping them away wastes processing time and can introduce artifacts at crop edges. Get your composition right first, then upscale exactly what you need.
Convert your image to a high bit-depth format if possible before upscaling. Working with 16-bit files gives the AI more information to work with and reduces the chance of banding and posterization artifacts in smooth gradients. If your source is an 8-bit JPEG, converting to 16-bit will not add information, but it prevents additional degradation during processing.
Make basic exposure and color corrections before upscaling. Correcting major exposure problems, white balance issues, or color casts on the source image gives the AI better data to work with. However, avoid heavy processing that might introduce its own artifacts or reduce image quality.
Choose the Right Upscaling Factor
One of the biggest mistakes I see is automatically choosing the maximum upscaling factor. Just because a tool offers 8x upscaling does not mean you should use it. Higher upscaling factors require the AI to invent more pixels, which increases the risk of artifacts.
For most images, 2x upscaling produces the cleanest results with minimal artifact risk. The AI only needs to fill in a moderate amount of detail, and there is usually enough information in the source image to guide accurate reconstruction. Use 2x when you need to increase resolution for moderate print sizes or web display at higher resolutions.
4x upscaling works well for images with good source quality and moderate detail requirements. This is a good choice when you need significant resolution increases for larger prints. However, pay extra attention to faces and textures at this level, as artifacts become more likely.
Reserve 8x upscaling for situations where you absolutely need the resolution increase and can tolerate some risk. This level of upscaling is best suited for images with simple subjects, minimal fine detail, or cases where some artifact risk is acceptable. Avoid using 8x for critical portrait work or images where texture accuracy is essential.
Consider your final output size when choosing an upscaling factor. There is no point upscaling beyond what your output needs. If you are printing at 8×10 inches, calculate the resolution you actually need and choose the upscaling factor that gets you there without excessive overhead.
Multiple smaller upscaling passes can sometimes produce better results than a single large jump. Some users report that doing 2x upscaling twice produces cleaner results than a single 4x upscale. This varies by tool and image type, so test both approaches if quality is critical.
Select the Right Tool for Your Image Type
Not all AI upscalers perform equally across all image types. Through extensive testing, I have found that certain tools excel at specific tasks while struggling with others. Choosing the right tool for your content type is one of the most important decisions you will make.
For portraits and images with faces, prioritize tools that have specific face enhancement modes or that are known for natural facial processing. Many users report that tools like Aiarty Image Enhancer and 4DDiG AI Photo Enhancer produce cleaner facial results without the weird eye artifacts that plague some other options. Always test portrait upscaling at 100% zoom to check for facial distortion before committing to the result.
Landscape and nature photos benefit from tools that excel at texture preservation. Look for upscalers that maintain natural foliage, water, and sky textures without creating artificial-looking details. Some tools tend to oversaturate greens or create unnatural cloud formations, so compare results carefully.
Product photos require accurate detail reproduction without artificial enhancement. The goal is usually to make the product look clean and professional without making it look fake or over-processed. Conservative upscaling with minimal additional enhancement usually works best.
For anime, illustrations, and digital art, different AI models may be more appropriate. These image types have different characteristics than photographs, and some tools offer specific modes designed for non-photographic content. Using a model designed for photographs on anime can create weird artifacts, and vice versa.
Architectural and technical images need tools that maintain geometric accuracy. Look for upscalers that preserve straight lines and accurate perspective. Some AI models prioritize overall image appeal over geometric accuracy, which can be problematic for this type of content.
Old or damaged photos present unique challenges. Tools with restoration features can help, but be aware that aggressive restoration can sometimes remove authentic historical character from vintage images. Test carefully and compare results to find the right balance.
Optimize Settings for Artifact-Free Results
Most AI upscalers offer settings that affect output quality. Understanding these controls is essential for minimizing artifacts and achieving natural-looking results.
If your tool offers noise reduction, use it conservatively. Start with the lowest setting and only increase if your source image has obvious noise problems. Aggressive noise reduction is a primary cause of texture loss and plastic-looking results. In many cases, you are better off doing noise reduction as a separate step before upscaling with full control over the process.
Sharpening controls should also be approached with caution. Some sharpening can help counter the slight softness that sometimes occurs with AI upscaling, but too much creates oversharpening artifacts. If possible, apply sharpening as a separate step after upscaling so you have full control over the effect and can see exactly what it does to your image.
Face enhancement modes can be helpful for portraits, but they can also cause problems if over-applied. Test with face enhancement both on and off to see which produces more natural results for your specific images. Some tools apply face enhancement too aggressively, creating the artificial look you are trying to avoid.
If your tool offers different AI models, experiment with them on test images. Models optimized for different content types can produce dramatically different results. A model designed for general photographs might struggle with faces, while a face-specific model might over-process landscapes.
Output format settings matter too. Save your upscaled images in high-quality formats to avoid introducing new compression artifacts. For archival or print work, consider lossless formats. For web use, use high-quality JPEG settings or modern formats like WebP with minimal compression.
Implement a Testing Workflow
Never process your only copy of an image without testing first. I recommend creating a small test crop from a critical area of your image, particularly if it contains faces or important textures. Process this test crop with your intended settings and examine the results carefully at 100% zoom.
Look specifically for the artifact types discussed earlier. Check edges for halos, zoom in on faces to examine eye and skin detail, and look at texture areas to ensure natural appearance. If you see problems, adjust your settings or try a different tool before processing the full image.
For important projects, consider processing your image with multiple tools and comparing results. Different AI models produce different results, and you may find that one tool works better for certain aspects of your image while another excels elsewhere. This approach takes more time but can produce superior results for critical work.
Create a consistent testing protocol for yourself. Always check the same areas in the same way for every image. This consistency helps you develop an eye for artifacts and makes it easier to compare results across different tools and settings.
Keep notes on what works and what does not. Different image types may require different approaches, and documenting your findings helps you build expertise over time. What works for portraits might not work for landscapes, and vice versa.
Perform Post-Upscaling Quality Assessment
After upscaling, take time to evaluate your results before considering the job complete. View your image at various zoom levels to check for different types of issues. At 100% zoom, look for texture problems, facial artifacts, and edge issues. At 50% zoom, check overall color balance and tonal smoothness. At print size, evaluate how the image will appear in its final use.
Compare your upscaled image to the original at matching sizes. This comparison will reveal whether the upscaling has introduced color shifts, changed the overall character of the image, or created artifacts that were not present before. Sometimes the original image, despite its lower resolution, actually looks better than a poorly upscaled version.
Pay particular attention to skin tones, sky gradients, and any areas with fine repetitive patterns. These areas are where artifacts are most likely to appear and most likely to be noticed by viewers. A systematic check of these areas should be part of every quality assessment.
View your image on different displays if possible. Color accuracy and artifact visibility can vary significantly between monitors. What looks fine on one screen might show obvious problems on another. For critical work, viewing on a calibrated display is essential.
Consider how the image will be used when evaluating quality. An image destined for small web use might tolerate more artifacts than one intended for large print. Match your quality standards to your output requirements.
AI Upscaling Tools: Which Ones Produce Fewer Artifacts
The tool you choose significantly impacts your results. While I cannot cover every option in detail, here is what you should know about the current landscape of AI upscaling tools based on my testing and community feedback.
Free Options Worth Considering
Upscayl has become one of the most recommended free options in the photography community. As an open-source tool, it processes images locally on your computer, which means no uploading your photos to external servers. Users consistently report that Upscayl produces natural-looking results without the aggressive processing that plagues some commercial tools. It offers multiple AI models optimized for different image types, including specific models for photos, artwork, and general use.
The local processing aspect of Upscayl is important for privacy-conscious users and those working with sensitive images. Your photos never leave your computer, which is not the case with cloud-based upscalers. The trade-off is that processing speed depends on your hardware, particularly your GPU.
Several online tools offer free AI upscaling with varying quality. These browser-based options are convenient for occasional use but typically have limitations on file size, resolution, or number of processed images. Quality can vary significantly between services, so test with non-critical images first.
Some photo editing applications now include AI upscaling as a built-in feature. These integrated options may not offer the same quality as dedicated upscaling tools, but they can be convenient for users who already have the software and do not want to add another application to their workflow.
Commercial Tools and Their Characteristics
Topaz Gigapixel AI is perhaps the most well-known commercial option and is used by many professional photographers. It offers sophisticated controls and generally produces excellent results, though some users report that it can over-process certain images. The tool offers different AI models for different use cases, allowing you to choose the best approach for your specific image type.
The strength of Gigapixel AI lies in its specialized models and extensive controls. You can choose models optimized for different content types and fine-tune settings to match your specific needs. The downside is that the learning curve is steeper than simpler tools, and the software requires a significant investment.
Pixelbin and similar platforms offer cloud-based processing with enterprise features like batch processing and API integration. These services are often geared toward businesses processing large volumes of images and may offer different quality trade-offs than desktop tools designed for individual images.
Adobe has integrated AI upscaling into Photoshop and Lightroom through features like Super Resolution. These integrated options offer convenience and good quality for many use cases, though they may not match the specialized capabilities of dedicated upscaling tools for challenging images.
Choosing Based on Your Needs
For occasional personal use, free tools like Upscayl often provide excellent results without investment. The quality difference between free and paid tools has narrowed significantly, and many users find free options perfectly adequate for their needs.
For professional work where consistency and quality are critical, commercial tools with more sophisticated AI models and better support may be worth the cost. The ability to batch process with consistent settings and access to specialized models can justify the investment for working professionals.
Consider your typical image types when choosing a tool. If you primarily process portraits, prioritize tools known for natural facial processing. If you work with product photos, look for tools that maintain accurate detail without artificial enhancement. Many tools offer free trials, so take advantage of these to test with your typical image types before committing.
Hardware requirements should factor into your decision. Some tools require powerful GPUs for reasonable processing times, while others are optimized for CPU processing. Cloud-based tools offload processing entirely but require internet connectivity and may have privacy implications.
Batch Processing Considerations
If you need to process multiple images, batch processing capability becomes important. However, batch processing introduces additional considerations that single-image processing does not have.
Different images may respond differently to the same settings, and a configuration that works well for one image might produce artifacts in another. This variability makes batch processing riskier than individual processing, particularly for mixed collections of images.
For batch processing, use conservative settings that work well across a variety of images rather than aggressive settings optimized for a single image. The goal is consistent acceptable results across all images rather than perfect results on some and poor results on others.
Consider sorting your images by type and processing similar images together with settings optimized for that category. Portraits, landscapes, and product photos might each get their own batch with different settings. This approach requires more organization but produces more consistent quality.
Always review batch-processed images individually before considering them complete. Automated processing is convenient, but human review catches problems that automated quality checks miss. Build review time into your workflow for any batch processing operation.
Step-by-Step Guide: Upscale Low Resolution Photos with AI Without Creating Artifacts
Here is the complete workflow I use for artifact-free AI upscaling. Follow these steps for consistent, professional results across all your upscaling projects.
Step 1: Assess Your Source Image
Before any processing, examine your source image carefully. Note the current resolution, any existing artifacts or quality issues, and the type of content in the image. Images with faces, fine textures, or high detail will require more careful processing than simple images with large smooth areas.
Determine your target resolution based on your intended use. For print, calculate the resolution needed based on print size and viewing distance. For web use, consider the display size and whether viewers will examine the image closely. There is no point creating resolution you do not need.
Identify any problem areas that might cause issues during upscaling. Heavy compression, noise, or existing artifacts will likely be amplified. Note these areas for special attention during quality assessment.
Consider whether upscaling is actually the right approach for your image. Sometimes a low-resolution image is better left alone, or you might need to find a higher-resolution source. Upscaling cannot create detail that never existed.
Step 2: Prepare the Image for Upscaling
Make any necessary exposure, color, or contrast adjustments before upscaling. These adjustments are easier to make on the original image and will be preserved in the upscaled version. However, avoid heavy processing that might introduce its own artifacts.
If your image has significant noise, apply gentle noise reduction. If it has compression artifacts, consider whether a different source image might be available. Crop to your final composition so you are only upscaling what you need.
Convert to a high bit-depth format if your workflow supports it. This gives the AI more information to work with and reduces the chance of banding in gradients. Save your prepared image as a new file to preserve your original.
Document your preparation steps. If you need to reprocess later, knowing exactly what you did to prepare makes it easier to reproduce or modify your workflow.
Step 3: Choose the Right Tool and Settings
Select an AI upscaling tool appropriate for your image type. For portraits, choose a tool known for natural facial processing. For general photos, select a tool with good texture preservation. Match the tool to the content for best results.
Set your upscaling factor based on your needs. Start with 2x unless you specifically need more resolution. Configure any additional settings conservatively, particularly noise reduction and sharpening. Less is usually more when it comes to these adjustments.
Select the appropriate AI model if your tool offers multiple options. Models optimized for your content type will generally produce better results than general-purpose models. Read the documentation to understand what each model is designed for.
Save your settings as a preset if you will be processing similar images. Consistency in settings makes it easier to compare results and reproduce successful outcomes.
Step 4: Process and Preview Results
If possible, process a test crop from a critical area first. Examine this result at 100% zoom for any artifacts. Look specifically at faces, edges, and texture areas. This step catches problems before you commit to processing the full image.
If the test looks good, process the full image. If you see artifacts, adjust your settings or try a different tool before proceeding with the full image. Do not skip this validation step for important images.
Processing time varies by tool, image size, and hardware. Be patient and let the processing complete. Interrupting processing can produce incomplete or corrupted results.
Save your processed image with a clear filename that indicates the upscaling factor and tool used. This documentation helps you track what works and makes it easier to reprocess later if needed.
Step 5: Evaluate and Refine
After upscaling, compare your result to the original at matching sizes. Check for color shifts, texture problems, and any artifacts that were not present before. View the image at different zoom levels to catch different types of issues.
If problems are minor, you may be able to correct them with post-processing. Local adjustments can sometimes fix isolated artifact areas without affecting the rest of the image. For more serious artifacts, consider reprocessing with different settings or a different tool.
Evaluate the image at its intended output size and viewing distance. Some artifacts visible at 100% zoom disappear at normal viewing distances. Do not over-correct for problems that viewers will never notice.
Get a second opinion if possible. Fresh eyes often catch problems you have become blind to after extended work on an image. A colleague or client review can identify issues you missed.
Step 6: Export for Your Intended Use
Save your upscaled image in an appropriate format for your use case. For print, use a high-quality format like TIFF or PNG to preserve all the detail you worked to create. For web use, JPEG is usually appropriate, but use high quality settings to avoid introducing new compression artifacts.
Consider saving your working file with layers if you made additional adjustments after upscaling. This preserves your workflow in case you need to make changes later. A layered TIFF or PSD file gives you maximum flexibility for future modifications.
Create appropriately sized versions for different outputs. A single upscaled image might need separate exports for print, web, and social media. Each output has different requirements for resolution, color space, and file format.
Archive your original image alongside the upscaled version. Future improvements in AI technology might allow better upscaling later, and having the original preserves that possibility.
Frequently Asked Questions
Can AI enhance a low resolution photo?
Yes, AI can significantly enhance low resolution photos by using neural networks trained on millions of images to predict and generate missing details. Unlike traditional upscaling that simply stretches pixels, AI upscaling analyzes patterns, textures, and structures to reconstruct what the image would look like at higher resolution. However, results vary based on source image quality and the AI tool used.
How to upscale image resolution with AI?
To upscale image resolution with AI, start by preparing your source image with any necessary noise reduction and cropping. Choose an AI upscaling tool appropriate for your image type, select a conservative upscaling factor (2x is safest), and process the image. Always preview results at 100% zoom to check for artifacts before finalizing. Save your result in a high-quality format appropriate for your intended use.
What causes artifacts in AI upscaling?
AI upscaling artifacts occur when neural networks make incorrect predictions about missing details. Common causes include aggressive noise reduction that removes legitimate texture, over-zealous edge enhancement creating halo effects, and AI models trained to generate details that do not match the original subject matter. Higher upscaling factors and lower quality source images increase artifact risk.
How to enhance picture quality with AI free?
Free AI image enhancement is available through tools like Upscayl, which runs locally on your computer and offers multiple AI models for different image types. Several online services also provide free AI upscaling with limitations on file size or processing volume. For best free results, use conservative settings, prepare your source image properly, and always preview results at full resolution before finalizing.
Is AI upscaling better than traditional methods?
AI upscaling generally produces superior results compared to traditional interpolation methods like bilinear or bicubic resizing. While traditional methods simply stretch existing pixels, AI can reconstruct missing details based on learned patterns. However, AI upscaling requires more processing time and can introduce artifacts if not used carefully. For simple resolution increases where detail preservation is not critical, traditional methods remain viable.
What is the best upscaling factor to avoid artifacts?
For minimal artifact risk, 2x upscaling is generally the safest choice. At this level, the AI only needs to fill in a moderate amount of detail, and there is usually enough information in the source image to guide accurate reconstruction. Higher factors like 4x and 8x require the AI to invent more pixels, increasing the chance of unnatural textures and distortions.
How do I fix artifacts after upscaling?
Minor upscaling artifacts can sometimes be corrected with local adjustments in photo editing software. Use healing or clone tools to fix isolated problem areas, apply subtle texture to plastic-looking surfaces, or use local color corrections to fix shifted tones. For serious artifacts, the best solution is often to reprocess the image with different settings or a different upscaling tool.
Conclusion
Successfully upscaling low resolution photos with AI without creating artifacts requires understanding both the technology and its limitations. The key is working with the AI rather than expecting it to work miracles on its own. Prepare your source images properly, choose appropriate upscaling factors, select tools suited to your image type, and always evaluate results carefully before considering the job complete.
Remember that conservative settings typically produce better results than aggressive processing. A clean 2x upscale will almost always look more natural than an artifact-ridden 8x upscale. Take time to test your settings, compare results, and refine your approach based on what you see. The extra time invested in quality control will be apparent in your final images.
The techniques in this guide come from extensive real-world experience across thousands of images. Different images require different approaches, and developing your expertise takes practice. Start with conservative settings, build your skills gradually, and always prioritize natural-looking results over maximum resolution.
As AI upscaling technology continues to improve, the gap between upscaled and natively high-resolution images continues to narrow. By following the techniques in this guide, you can achieve professional results that maintain natural detail and avoid the artificial look that plagues poorly processed images. Whether you are restoring family photos, preparing images for print, or enhancing your professional portfolio, these methods will help you get the most from AI upscaling technology.