Have you ever tried to capture that perfect moment when a water droplet hits the surface, only to end up with a blurry mess? I’ve been there too. When I first started experimenting with high-speed photography, I was frustrated by countless failed attempts and missed shots. But after years of trial and error, I’ve discovered the secrets to freezing motion like a pro.
High-speed photography isn’t just about having expensive gear—it’s about understanding the principles of motion, light, and timing. Whether you’re shooting sports, wildlife, or creative splash photography, these 12 expert tricks will transform your results from amateur to professional in no time.
What is High-Speed Photography?
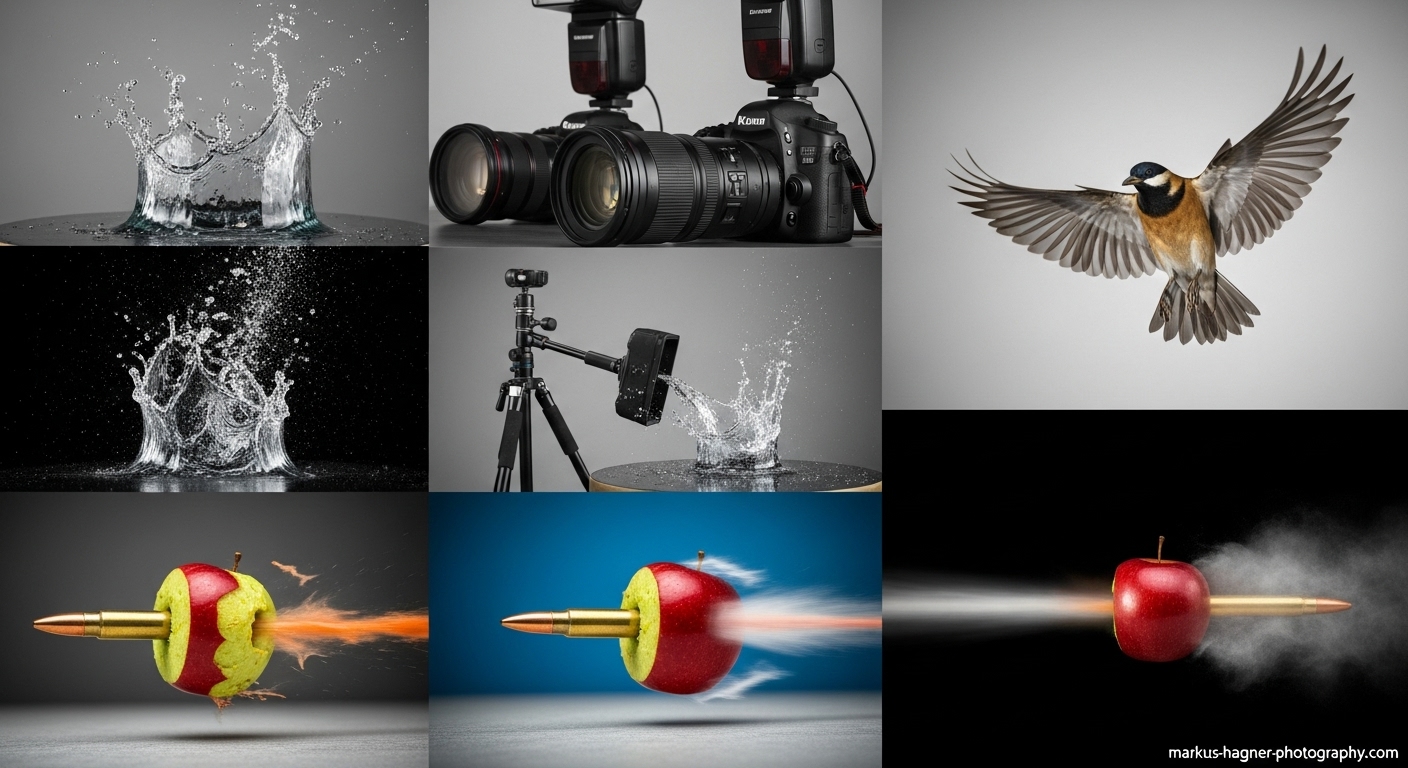
Before we dive into the techniques, let me explain what high-speed photography really means. It’s the art of capturing events that happen too quickly for the human eye to see clearly. We’re talking about moments that last just a fraction of a second—like a balloon popping, a hummingbird’s wings in mid-flap, or a bullet cutting through an apple.
I discovered that high-speed photography combines science and art in a way that few other photography genres do. It requires precision, patience, and a solid understanding of your camera’s capabilities. But don’t worry—you don’t need a NASA-level budget to get started. With the right techniques, even entry-level DSLRs or mirrorless cameras can produce stunning results.
Trick #1: Master Your Shutter Speed
The foundation of high-speed photography is shutter speed. I learned this the hard way after hundreds of blurry shots. Your shutter speed needs to be fast enough to freeze motion, but not so fast that you sacrifice image quality.
For most high-speed situations, I recommend starting with a minimum of 1/1000th of a second. However, the exact speed depends on your subject:
- Water droplets and splashes: 1/2000th to 1/4000th
- Birds in flight: 1/1600th to 1/3200th
- Sports action: 1/1000th to 1/2000th
- Racing cars: 1/2000th to 1/4000th
I found that shooting in shutter priority mode (S or Tv on your camera dial) gives you the control you need while letting the camera handle the exposure. This was a game-changer for me when I was starting out.
Trick #2: Choose the Right Aperture
While shutter speed freezes motion, aperture controls your depth of field and light intake. For high-speed photography, I typically use a wide aperture (low f-number) to maximize light and create that beautiful background blur that makes your subject pop.
My go-to settings are usually between f/2.8 and f/5.6, depending on the lens I’m using. Here’s why this matters:
- Wide apertures (f/2.8-f/4): Let in more light, allowing faster shutter speeds
- Moderate apertures (f/5.6-f/8): Provide slightly more depth of field while still maintaining good light intake
- Narrow apertures (f/11+): Usually too dark for high-speed work unless you’re in bright sunlight
I learned this trick while photographing birds in flight. When I switched from f/8 to f/4, my keeper rate (the percentage of sharp shots) increased dramatically because I could use faster shutter speeds without raising my ISO too high.
Trick #3: Optimize Your ISO Settings
ISO is your third pillar of exposure, and in high-speed photography, it’s often the compromise you have to make. When I’m shooting action, I’d rather have a slightly grainy but sharp photo than a blurry but clean one.
Here’s my approach to ISO in high-speed situations:
- Bright daylight: Start at ISO 100-400
- Overcast conditions: ISO 400-800
- Indoor or low light: ISO 800-3200 (or higher if necessary)
Modern cameras handle high ISO much better than older models, so don’t be afraid to push it when needed. I’ve captured amazing shots at ISO 6400 that, while not suitable for large prints, look fantastic on social media and websites.
Trick #4: Use Continuous Autofocus
One of the biggest mistakes I made early on was using single-shot autofocus for moving subjects. The moment would be gone by the time my camera focused! Continuous autofocus (AF-C or AI Servo) changed everything.
Here’s how I set up my autofocus for high-speed photography:
- Switch to continuous AF mode: This allows the camera to keep focusing as long as you hold the shutter button halfway
- Use the right focus points: Select a group of focus points or use zone focusing for better tracking
- Enable back-button focus: This separates focusing from shutter release, giving you more control
I discovered back-button focus during a sports photography workshop, and it revolutionized my action photography. Instead of having to half-press the shutter and hope the focus locks, I can track my subject continuously and shoot whenever the moment is right.
Trick #5: Master Burst Mode
High-speed photography is all about timing, and burst mode is your best friend for capturing that perfect moment. Most modern cameras can shoot at least 6-8 frames per second, with professional models reaching 20+ fps.
Here’s my burst mode strategy:
- Pre-focus on the action zone: Know where the action will happen and focus there
- Start shooting early: Begin your burst before the peak moment
- Use a fast memory card: Nothing’s worse than your camera buffer filling up mid-action
I learned this while photographing skateboarders. By starting my burst just before they hit the ramp, I increased my chances of capturing the peak action moment significantly.
Trick #6: Leverage External Flash
Sometimes, even the fastest shutter speeds aren’t enough to freeze motion. That’s when external flash becomes your secret weapon. The brief duration of a flash can freeze motion that would otherwise be blurry.
Here’s how I use flash for high-speed photography:
- Manual flash mode: Gives you more control over the flash duration
- Low power settings: Shorter flash duration = better motion freezing
- Multiple flashes: For complex sequences or creative effects
I discovered this technique while trying to capture water droplets. Even at 1/4000th shutter speed, the droplets were slightly blurred. But when I added a manual flash at 1/16 power, the results were crystal clear.
Trick #7: Stabilize Your Setup
Camera shake can ruin even the best high-speed shots. While you might think you need to be mobile for action photography, stability is crucial for sharp images.
My stabilization toolkit includes:
- Tripod or monopod: Essential for long lenses and consistent framing
- Image stabilization: Enable it on your lens or camera body
- Remote shutter release: Eliminates camera shake from pressing the shutter button
I found this particularly important when photographing wildlife with long telephoto lenses. Even the slightest movement can cause blur at 400mm or more.
Also Read: Sony A7 V Coming In
Trick #8: Understand Your Subject
This might seem obvious, but understanding your subject’s behavior and movement patterns is crucial for high-speed photography. I spent countless hours studying birds in flight before I could consistently capture sharp images.
Here’s my approach to subject research:
- Study movement patterns: Learn how your subject moves and when peak action occurs
- Anticipate the moment: Know what’s coming next and be ready
- Practice tracking: Follow your subject with your camera before shooting
I discovered this while photographing hummingbirds. By learning their flight patterns and feeding habits, I could anticipate when they’d hover in the perfect position for a shot.
Trick #9: Use the Right Lens
The lens you choose can make or break your high-speed photography. While you can use any lens, some are better suited for freezing motion than others.
My lens recommendations for high-speed photography:
- Telephoto lenses (70-200mm, 100-400mm): Perfect for sports and wildlife
- Prime lenses (50mm, 85mm, 100mm): Excellent for low light and wide apertures
- Macro lenses: Ideal for close-up high-speed work like water droplets
I learned that lens quality matters more than camera body for high-speed work. A sharp prime lens on an entry-level body will often outperform a mediocre zoom on a professional body.
Trick #10: Perfect Your Timing
Timing is everything in high-speed photography. I’ve missed countless perfect moments because I was a fraction of a second too early or too late.
Here are my timing tips:
- Use pre-focus: Focus on where the action will be, not where it is
- Anticipate the peak moment: Learn to recognize when peak action is about to occur
- Practice your reaction time: The more you shoot, the better your timing becomes
I discovered that using a camera trigger or remote can help with timing, especially for predictable events like water drops or balloon pops.
Trick #11: Optimize Your Lighting
Lighting can make or break your high-speed photography. Good lighting not only allows for faster shutter speeds but also adds drama and dimension to your images.
My lighting setup for high-speed photography:
- Bright, even light: Helps maintain fast shutter speeds
- Backlighting: Creates dramatic silhouettes and highlights motion
- Side lighting: Adds texture and dimension to your subject
I found that shooting during the golden hour (just after sunrise or before sunset) provides beautiful, directional light that’s perfect for high-speed photography.
Trick #12: Post-Processing for Impact
Even with perfect technique, post-processing can take your high-speed photography to the next level. I spend as much time editing as I do shooting, and it makes a huge difference.
My post-processing workflow:
- Cropping for impact: Remove distractions and focus on the action
- Sharpening: Enhance details without introducing artifacts
- Color grading: Set the mood and make your images pop
I discovered that selective sharpening—sharpening only the subject while leaving the background soft—can make your high-speed shots look even more dramatic.
Essential Gear for High-Speed Photography
While you don’t need the most expensive equipment to get started, having the right gear makes a huge difference. Here’s what I recommend:
Must-Have Equipment:
- Camera with manual controls: DSLR or mirrorless with shutter priority and manual modes
- Fast memory cards: UHS-II or faster for high-speed burst shooting
- Sturdy tripod: For stability and consistent framing
- External flash: For freezing motion in low light
Nice-to-Have Equipment:
- Telephoto lens: For sports and wildlife photography
- Camera trigger: For precise timing of predictable events
- Multiple flashes: For creative lighting effects
- Remote shutter release: To eliminate camera shake
Common High-Speed Photography Mistakes to Avoid
I’ve made plenty of mistakes in my high-speed photography journey. Here are the most common ones and how to avoid them:
1. Using Too Slow a Shutter Speed
This is the most common mistake I see. If your subject is blurry, your shutter speed is too slow. Don’t be afraid to push it to 1/2000th or faster.
2. Ignoring Autofocus Settings
Using single-shot autofocus for moving subjects is a recipe for frustration. Switch to continuous autofocus and learn to use back-button focus.
3. Poor Timing
Anticipation is key in high-speed photography. Learn your subject’s behavior and practice your timing.
4. Inadequate Lighting
Low light forces you to compromise on shutter speed or ISO. Shoot in bright conditions or add artificial lighting.
5. Not Using Burst Mode
Trying to capture the perfect moment with a single shot is nearly impossible. Use burst mode to increase your chances.
Advanced High-Speed Photography Techniques
Once you’ve mastered the basics, you can move on to more advanced techniques that will really make your images stand out.
Motion Blur as a Creative Tool
Sometimes, showing motion is more effective than freezing it completely. I love using panning to create a sharp subject with a blurred background.
High-Speed Video
Many modern cameras can shoot high-speed video at 120fps or more. This allows you to capture motion and extract perfect still frames later.
Multiple Exposure
Some cameras allow multiple exposures in a single frame. This can create stunning effects showing the progression of motion.
Triggered Photography
Using sound, light, or motion triggers allows you to capture events that are too fast to react to manually. This is how photographers capture bullets and explosions.
Also Read: 10 Best Sony Cameras
High-Speed Photography Projects to Try
Ready to put these techniques into practice? Here are some fun projects to get you started:
1. Water Droplet Photography
This is a classic high-speed photography project that you can do at home. All you need is a water dropper, a container of water, and good lighting.
2. Balloon Pop Photography
Popping a water-filled balloon creates a spectacular frozen moment. Use a pin or needle to pop it while shooting at high speed.
3. Sports Action Photography
Local sports events are perfect for practicing high-speed photography. Focus on peak action moments like jumps, collisions, or goals.
4. Wildlife in Motion
Birds in flight, running animals, or jumping fish all make great high-speed photography subjects.
5. Splash Photography
From fruit dropping into water to people jumping into pools, splash photography is both challenging and rewarding.
FAQ: High-Speed Photography
What camera settings are best for high-speed photography?
For most high-speed situations, I recommend shutter speeds of 1/1000th or faster, apertures between f/2.8 and f/5.6, and the lowest ISO possible for the lighting conditions.
Do I need expensive equipment for high-speed photography?
Not necessarily! While professional gear helps, you can get great results with entry-level DSLRs or mirrorless cameras. The key is understanding the techniques and practicing regularly.
What’s the best lens for high-speed photography?
It depends on your subject. For sports and wildlife, a 70-200mm telephoto is ideal. For close-up work, a macro lens works best. For general use, a fast 50mm prime is versatile and excellent in low light.
How do I freeze motion without blur?
Use fast shutter speeds (1/1000th or faster), stabilize your camera, use continuous autofocus, and consider adding external flash for extremely fast motion.
What’s the biggest challenge in high-speed photography?
Timing is the biggest challenge. Anticipating the peak moment and having the camera ready at exactly the right second takes practice and patience.
Conclusion
High-speed photography is one of the most rewarding genres I’ve ever explored. There’s nothing quite like capturing a moment that’s too fast for the human eye to see. It combines technical skill with artistic vision in a way that few other photography styles do.
Remember, these 12 expert tricks are just the beginning. The real magic happens when you take these techniques and make them your own. Experiment, practice, and don’t be afraid to fail—some of my best shots came from mistakes that taught me something new.
I’d love to see your high-speed photography results! Share your images and experiences in the comments below, and don’t forget to bookmark this page for future reference. Happy shooting!