That frustrating grainy look in your photos can turn an otherwise great shot into a disappointment. You captured the moment perfectly, but when you zoom in, your image is covered in speckles and colored dots that destroy detail. I have been there, and it is especially maddening when you thought you did everything right. Understanding why your camera photos look grainy is the first step to fixing the problem permanently.
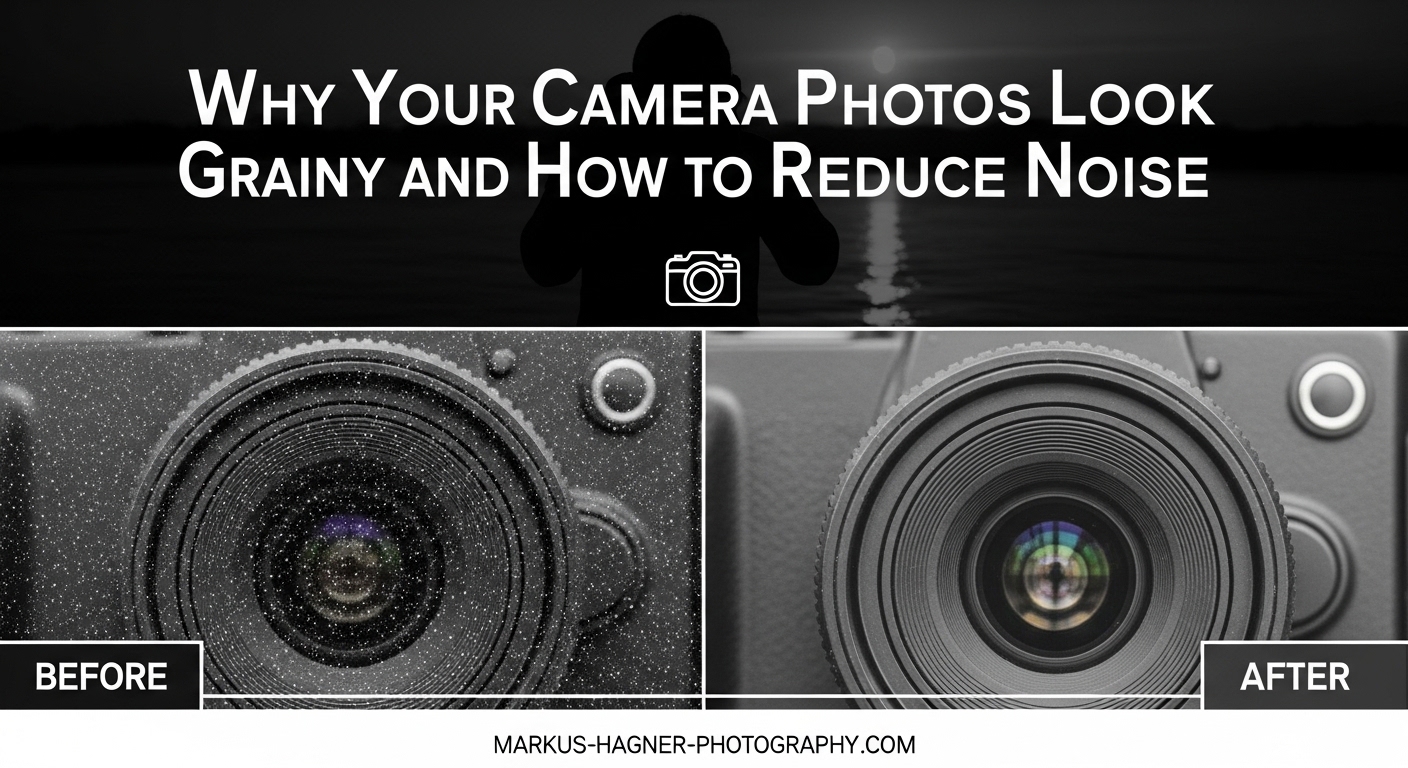
Photo noise (commonly called grain) is visual distortion that appears as random speckles in your images. It shows up most often in low-light situations, but can also plague photos shot in seemingly good conditions. The good news is that most grainy photos can be prevented with the right in-camera techniques, and existing noise can be significantly reduced in post-processing.
In this guide, I will explain exactly what causes grain in your photos and walk you through proven methods to prevent it during capture. You will also learn a complete post-processing workflow for reducing noise in Lightroom and other editing tools. Whether you shoot with a DSLR, mirrorless camera, or smartphone, these techniques will help you capture cleaner, sharper images.
What is Photo Noise and Grain?
Photo noise is random variation in brightness and color that appears in digital images, creating that unwanted grainy texture. Think of it like static on an old television screen, but appearing across your photograph. This digital noise manifests as tiny speckles that obscure fine details and make images look muddy or unclear.
Digital noise comes in two distinct forms, and understanding the difference helps you treat each type effectively. Luminance noise appears as gray or black speckles across your image and generally looks like film grain. It affects the brightness values of pixels while keeping colors intact. This type of noise is generally more acceptable because it mimics the aesthetic quality of traditional film photography.
Color noise (also called chrominance noise) shows up as random colored dots, typically red, green, or blue speckles that have no relation to the actual colors in your scene. This type of noise is far more distracting and problematic because it distorts the actual color information in your image. Color noise is usually easier to remove in post-processing but indicates a more serious exposure or sensor issue.
To understand why noise happens, you need to know how your camera captures light. Your camera sensor contains millions of tiny light-sensitive areas called photosites (one for each pixel in your final image). When light hits these photosites, they convert that light into electrical signals that your camera processes into a digital photograph.
In bright conditions, each photosite receives plenty of light data, producing a clean, accurate signal. But in low light, each photosite receives very little information. Your camera must then amplify this weak signal to produce a usable image. This amplification process introduces random variations, much like turning up the volume on a quiet audio recording also amplifies background hiss and static.
This concept is called the signal-to-noise ratio. When you have a strong signal (lots of light), the random noise is proportionally small. When the signal is weak (low light), that same amount of random variation becomes a much larger percentage of your total data, making noise visibly prominent in your final image.
What Causes Grainy Photos
The primary cause of grainy photos is high ISO settings, but there is a hidden culprit many photographers overlook: underexposure. Understanding both causes is essential because one often leads to the other in confusing ways.
High ISO Settings
ISO controls how sensitive your camera sensor is to light. Base ISO (typically 100 or 200, depending on your camera) produces the cleanest images with minimal noise. As you increase ISO to shoot in darker conditions, you are essentially telling your camera to amplify the light signal more aggressively.
This amplification introduces noise because the sensor is working harder to extract information from limited light. At ISO 1600 and above, most cameras start showing visible noise. At ISO 3200 and higher, noise becomes increasingly problematic, especially in shadow areas and solid colors like skies.
Different cameras handle high ISO differently. Full-frame sensors generally produce cleaner high-ISO images than crop sensors because their larger photosites capture more light. A modern full-frame camera might produce usable images at ISO 6400, while an older crop-sensor model might struggle at ISO 1600.
Underexposure: The Hidden Noise Culprit
Here is something that surprised me when I first learned it: an underexposed photo at ISO 100 often has MORE noise than a properly exposed photo at ISO 800. This discovery changed how I approach low-light photography entirely.
When you underexpose an image, you are not capturing enough light data. Then during post-processing, you must brighten the image, which amplifies not just the signal but also the noise that was hiding in the shadows. This shadow noise was always there, but it becomes painfully obvious when you push exposure in editing.
I see this mistake constantly with photographers who religiously keep their ISO low without considering exposure. They shoot at ISO 100 with a fast shutter speed in dim light, ending up with a severely underexposed image. When they brighten it later, they discover more noise than if they had simply raised ISO and exposed properly in the first place.
Sensor Size and Quality
Your camera sensor size and quality significantly impacts noise performance. Larger sensors have larger individual photosites that capture more light, resulting in cleaner images. A full-frame sensor produces noticeably less noise than a crop sensor at the same ISO setting.
Sensor technology also matters. Modern sensors from the last few years significantly outperform older designs. A current entry-level camera often matches or exceeds the high-ISO performance of professional cameras from just five years ago.
Long Exposure Noise
Long exposures introduce a different type of noise caused by sensor heat. As your sensor remains active for extended periods (typically exposures longer than several seconds), it generates heat that introduces additional noise into your image.
This thermal noise appears as hot pixels (brightly colored dots) and general graininess across the frame. Astrophotographers and night photographers deal with this constantly, shooting exposures of 30 seconds or longer that can produce significant thermal noise.
Post-Processing Amplification
Certain editing adjustments can make existing noise much worse or reveal hidden noise that was not initially visible. The Clarity and Texture sliders in Lightroom are notorious noise multipliers. These tools increase local contrast, which also increases the visibility of any grain in your image.
Shadow recovery is another common culprit. When you lift shadows to reveal detail in dark areas, you are also lifting the noise that lives in those shadows. What looked like a clean image can suddenly become grainy when you push shadow recovery too far.
How to Prevent Grainy Photos In-Camera
The best way to deal with noise is to prevent it before you press the shutter. These in-camera techniques will help you capture cleaner images that require minimal noise reduction in post-processing.
1. Expose Properly First
Proper exposure is your most powerful tool against noise. A correctly exposed image at a higher ISO often contains less visible noise than an underexposed image you must brighten later. Do not be afraid to raise ISO when necessary to achieve proper exposure.
Check your histogram while shooting. A properly exposed histogram shows data distributed across the graph without clipping on either end. If your histogram is bunched toward the left (shadows), you are underexposing and will pay the price in noise later.
2. Use ETTR (Expose to the Right)
Exposing to the Right (ETTR) is an advanced technique that pushes your exposure as bright as possible without clipping highlights. This approach captures maximum light data, giving you the cleanest possible file to work with in post-processing.
The idea is to shift your histogram toward the right side without letting highlights clip off the edge. You then reduce exposure in post-processing, which actually reduces visible noise. This technique works best when shooting RAW, as JPEG files have less latitude for exposure adjustments.
ETTR requires practice because pushing exposure too far destroys highlight detail permanently. Start conservatively and gradually push further as you learn your camera limits.
3. Use Your Lowest Practical ISO
While proper exposure trumps low ISO, you should still use your base ISO (usually 100 or 200) whenever lighting permits. This gives you the maximum image quality your camera can deliver.
When light is limited, raise ISO as needed to maintain proper exposure and acceptable shutter speeds. Modern cameras handle higher ISOs much better than older models, so do not hesitate to use ISO 1600, 3200, or even higher when the situation demands it.
4. Open Your Aperture
A wider aperture (lower f-number) lets more light reach your sensor, allowing you to use lower ISO settings. If you are shooting at f/8 in low light, try opening to f/2.8 or your lens maximum aperture to capture more light.
Keep in mind that wider apertures reduce depth of field, which may not suit every subject. But for many low-light situations, accepting shallower depth of field is worth the cleaner image quality.
5. Stabilize for Longer Shutter Speeds
Using a tripod or other stabilization lets you use longer shutter speeds without camera shake, which means you can keep ISO lower. Image stabilization in lenses and camera bodies also helps, allowing handheld shots at slower speeds than previously possible.
For static subjects, a tripod plus longer exposure at low ISO will always produce cleaner results than a faster handheld shot at high ISO. This approach is ideal for landscapes, architecture, and still life photography.
6. Add More Light When Possible
The simplest solution to low-light noise is adding light. Use off-camera flash, continuous LED lights, or simply move your subject toward existing light sources like windows or open doorways. Every bit of additional light reduces the need for high ISO settings.
I often see photographers struggle with grainy indoor photos when simply repositioning their subject a few feet toward a window would solve the problem entirely. Look for light sources and use them strategically.
7. Enable Long Exposure Noise Reduction
Most cameras offer a long exposure noise reduction feature specifically designed to combat thermal noise. When enabled, your camera takes a second exposure with the shutter closed after your main shot, capturing the current noise pattern. It then subtracts this noise from your image.
This feature doubles your exposure time (a 30-second shot takes 60 seconds total), so it is not practical for every situation. But for long exposure work like night photography or astrophotography, it can significantly reduce hot pixels and thermal noise.
8. Shoot in RAW Format
RAW files contain significantly more data than JPEGs, giving you much more flexibility for noise reduction in post-processing. RAW files typically offer 12-14 bits of data per channel compared to 8 bits for JPEG, meaning you can push and pull exposure without destroying image quality.
RAW also allows you to apply more aggressive noise reduction without the artifacts that appear when reducing noise in already-processed JPEG files. If noise is a concern in your photography, shooting RAW is essential.
How to Reduce Noise in Post-Processing
Even with perfect technique, some photos will benefit from noise reduction in post-processing. Here is a complete workflow for reducing noise while preserving detail.
Lightroom and Adobe Camera Raw Workflow
Lightroom and Adobe Camera Raw (ACR) offer powerful noise reduction tools in the Detail panel. Understanding how these tools work helps you apply effective noise reduction without destroying image detail.
Luminance Noise Reduction
The Luminance slider reduces the gray speckles of luminance noise. This is generally safe to apply moderately, but pushing it too far creates a plastic, smoothed appearance that looks unnatural.
Start with a value between 20-40 for moderately noisy images. Zoom to 100% (double-click the zoom tool) to see the actual effect. Apply enough to reduce obvious noise but stop before skin or textures start looking waxy.
Color Noise Reduction
The Color slider targets colored speckles and is surprisingly effective at very low values. Most images only need a setting of 15-25 to eliminate color noise completely. Unlike luminance reduction, color noise reduction rarely damages detail.
The Color Smoothness slider (under Color) helps blend color variations for smoother results. A setting of 25-50 often helps with stubborn color noise without negative effects.
The Detail and Contrast Sliders
Under the Luminance slider, you will find Detail and Contrast controls. Detail preserves fine texture at the cost of keeping some noise visible. Contrast attempts to preserve local contrast while reducing noise.
For most images, leave Detail at 50 (default) and Contrast at 0. Increasing Detail helps when you need to preserve fine textures like fabric or foliage. Increasing Contrast can help with heavy noise but may produce a blotchy appearance.
AI Denoise Features
Modern AI-powered noise reduction has revolutionized noise removal. Adobe Lightroom now includes AI Denoise, which uses machine learning to intelligently reduce noise while preserving detail far better than traditional methods.
AI Denoise creates a new DNG file with noise reduced throughout the image. The results are often remarkable, recovering usable images from shots that would have been discarded previously. This feature works best on RAW files but can also process JPEGs.
Third-party AI tools like Topaz Denoise AI and DxO PureRAW offer even more powerful noise reduction. These tools can rescue severely noisy images that traditional noise reduction cannot fix. They analyze each image to apply noise reduction selectively, preserving detail while removing noise.
The Sharpening vs. Noise Tradeoff
Sharpening and noise reduction work against each other. Sharpening increases local contrast at edges, which also increases the visibility of noise. Apply sharpening after noise reduction, and use masking to limit sharpening to actual edges.
In Lightroom, hold the Alt/Option key while sliding the Masking slider in the Detail panel. The image turns white, with black areas showing where sharpening will not be applied. Increase Masking until only actual edges and details remain white, protecting smooth areas like skies and skin from being sharpened.
Selective Noise Reduction with Adjustment Brush
Not every part of your image needs the same amount of noise reduction. Smooth areas like skies and skin benefit from stronger noise reduction, while detailed textures like grass, fabric, and hair need less to preserve detail.
Use the Adjustment Brush to paint stronger noise reduction onto smooth areas while leaving detailed areas relatively untouched. This selective approach produces more natural results than applying heavy noise reduction globally.
When to Accept Grain
Sometimes accepting some grain produces better results than aggressive noise reduction. Heavy noise reduction creates smooth, plastic-looking images that lose the character and detail of the original photograph.
Moderate luminance noise often looks acceptable, especially in black and white images where it mimics the aesthetic of high-ISO film photography. If your image has meaningful grain but retains good detail, consider keeping it rather than over-processing.
Remember that noise becomes less visible at smaller sizes. An image that looks noisy at 100% on your monitor might look perfectly fine when shared on social media or printed at smaller sizes. Always evaluate noise at your intended output size.
Why Smartphone Photos Look Grainy
Smartphone cameras face inherent limitations that make them prone to grainy photos. Understanding these constraints helps you get better results from your phone camera and explains why even expensive phones struggle in certain conditions.
Smartphone sensors are tiny compared to even crop-sensor cameras. These small sensors have correspondingly small photosites that capture less light, resulting in inherently lower signal-to-noise ratios. When light is limited, smartphones must apply aggressive amplification that introduces significant noise.
To compensate, smartphones use heavy software processing and computational photography. They often combine multiple exposures or apply aggressive noise reduction that can leave images looking smeared or artificial. This processing works well in good light but struggles when light is scarce.
If your iPhone or Android photos look grainy, the cause is usually the same as with any camera: not enough light reaching the sensor. The difference is that smartphones have less flexibility to compensate through lens aperture or sensor size.
To reduce grain in smartphone photos, seek better lighting whenever possible. Use your phone night mode for static subjects, which combines multiple exposures to simulate longer shutter speeds. Keep your phone steady during capture to allow the camera to use slower shutter speeds and lower ISO.
Frequently Asked Questions
How to stop camera photos from being grainy?
To stop photos from being grainy, expose properly by letting enough light reach your sensor. Use your lowest practical ISO setting, open your aperture wider, stabilize your camera for slower shutter speeds, and add light to your scene when possible. Proper exposure matters more than low ISO, so raise ISO when needed to avoid underexposure.
How to reduce noise in photos camera?
Reduce noise by capturing more light during exposure (lower ISO, wider aperture, longer shutter speed with stabilization, or adding light). In post-processing, use the Luminance and Color noise reduction sliders in Lightroom, or apply AI Denoise for more powerful results. Apply noise reduction selectively to smooth areas while preserving detail in textured regions.
How to get rid of grainy texture in photos?
Remove grainy texture by applying Luminance noise reduction in Lightroom or Adobe Camera Raw. For best results, use AI-powered tools like Lightroom AI Denoise or Topaz Denoise AI. Apply noise reduction selectively to smooth areas like skies and skin while preserving detail in textured areas using the Adjustment Brush.
How to fix grain on camera?
Fix grain in-camera by exposing properly, using your base ISO when possible, opening your aperture, stabilizing for longer shutter speeds, and adding light to your scene. Enable long exposure noise reduction for shots over several seconds. Shoot in RAW format to preserve maximum data for post-processing noise reduction.
Why are my photos showing up grainy?
Photos appear grainy primarily due to high ISO settings or underexposure. When your camera amplifies a weak light signal (high ISO) or you brighten an underexposed image in post, noise becomes visible. Less common causes include sensor heat during long exposures, small smartphone sensors, or aggressive editing with Clarity and Texture sliders.
What causes the grainy effect in photos?
The grainy effect is caused by digital noise, which occurs when your camera sensor amplifies weak light signals. This amplification introduces random variations in brightness (luminance noise) and color (color noise). The effect worsens with high ISO settings, underexposure, long exposures (thermal noise), small sensors, and aggressive post-processing.
Conclusion
Grainy photos result from a combination of high ISO settings, underexposure, sensor limitations, and sometimes post-processing choices. The most important lesson is that proper exposure trumps low ISO. A correctly exposed image at ISO 1600 will almost always look cleaner than an underexposed image at ISO 100 that you must brighten later.
Prevention starts in-camera: use your lowest practical ISO, but prioritize proper exposure. Open your aperture, stabilize for longer shutter speeds, and add light when possible. Shoot RAW for maximum flexibility in post-processing. When noise does appear, Lightroom and AI-powered tools offer powerful reduction while preserving detail.
Remember that some noise is normal and acceptable. Understanding why your camera photos look grainy helps you make informed decisions about when to prevent noise, when to reduce it, and when to simply accept it as part of the photographic process.