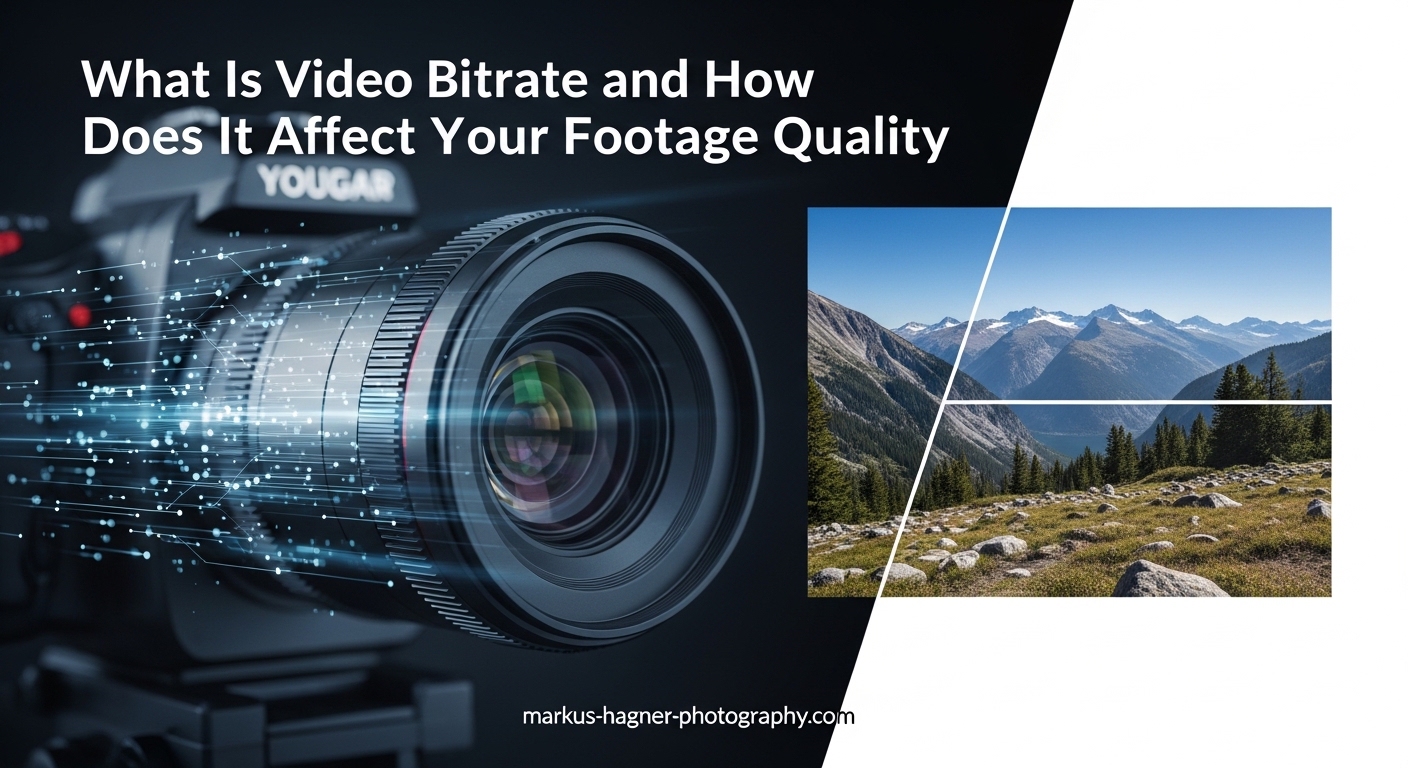
Video bitrate is the amount of data processed per second in a video file, measured in kilobits per second (Kbps) or megabits per second (Mbps). Higher bitrate means more data available for each frame, resulting in better detail and clarity. However, increased bitrate also creates larger file sizes and requires more bandwidth for streaming.
As a photographer who has spent over 15 years capturing images, I understand the transition to video can feel overwhelming. When I first started adding video to my client work, bitrate was one of those technical terms that seemed unnecessarily complicated. But here is the truth: understanding video bitrate transformed my footage from mediocre to professional-looking, and it can do the same for you.
In this guide, I will break down everything you need to know about video bitrate and how it directly impacts your footage quality. We will cover the technical definitions, practical recommendations for different scenarios, and specific considerations for photographers who are adding video to their skillset. By the end, you will have a clear framework for choosing the right bitrate for any project.
What Is Video Bitrate
Video bitrate measures how much digital information your video file contains for every second of playback. Think of it like the resolution of a photograph, but for motion. Just as a 42-megapixel image captures more detail than a 12-megapixel one, a video at 20 Mbps captures more visual information than one at 5 Mbps.
The technical definition is straightforward: bitrate equals the amount of video data divided by duration. A 1-minute video file that is 600 megabytes in size has an average bitrate of approximately 80 Mbps. This calculation gives you a baseline for understanding how much data your footage contains.
Every video file consists of thousands of individual frames played in rapid succession. Each frame contains millions of pixels, and each pixel carries color and brightness information. Multiply all that data by your frame rate, and you start to understand why video files become so large. Bitrate essentially tells you how much of that original visual information survives the compression process.
How Video Bitrate Is Measured
Video bitrate uses two primary units of measurement. Kilobits per second (Kbps) works for lower-quality video like standard definition or highly compressed web video. Megabits per second (Mbps) is the standard for high-definition and 4K content. One megabit equals 1,000 kilobits.
Here is where many people get confused: Mbps is not the same as MBps. The lowercase ‘b’ stands for bits, while the uppercase ‘B’ represents bytes. Since there are 8 bits in a byte, a 100 Mbps video file transfers at 12.5 MB per second. This distinction matters when calculating upload times or storage requirements.
Let me give you a practical example. If you need to upload a 1 GB video file (1,000 MB) and your internet connection has 10 Mbps upload speed, the transfer will take approximately 13 minutes and 20 seconds. The same file on a 50 Mbps connection uploads in under 3 minutes. Understanding these conversions helps you plan your workflow and set realistic expectations.
Understanding Bits Per Pixel (BPP)
Bits per pixel offers a more nuanced way to evaluate video quality. BPP calculates how much data is allocated to each individual pixel in every frame. The formula divides bitrate by resolution and frame rate.
For example, a 1080p video at 30fps with 8 Mbps bitrate has a BPP of approximately 0.13. Professional videographers often target BPP values between 0.1 and 0.2 for high-quality footage. Lower BPP values can still look acceptable for simple content like talking heads, while complex scenes with lots of motion benefit from higher BPP.
Here is how to calculate BPP yourself. Multiply width by height to get total pixels per frame (1920 x 1080 = 2,073,600 for 1080p). Multiply by frame rate to get pixels per second (2,073,600 x 30 = 62,208,000). Divide bitrate in bits by pixels per second to get BPP (8,000,000 / 62,208,000 = 0.128). This number tells you the data density of your video.
The Bitrate-Quality Relationship
Video compression is the key factor here. Raw, uncompressed video contains enormous amounts of data. A single second of uncompressed 4K footage at 60fps would require roughly 12 gigabits. That is why codecs like H.264 and H.265 compress video to manageable file sizes.
Compression works by identifying redundant information and either removing it or representing it more efficiently. Higher bitrate means the codec has more room to preserve detail. Lower bitrate forces more aggressive compression, which discards more visual information.
The relationship is not perfectly linear. Doubling bitrate does not double quality. Beyond a certain point, additional bitrate provides diminishing returns. A 4K video at 50 Mbps might look nearly identical to one at 100 Mbps for most content, but the file size difference is substantial.
Think of bitrate like JPEG compression in photography. A high-quality JPEG at 95% quality looks virtually identical to the original RAW file for most purposes. Dropping to 70% quality shows visible degradation in fine details. Going even lower introduces obvious artifacts. Video bitrate works on similar principles, but applied across time.
How Bitrate Affects Footage Quality
Bitrate directly determines how much visual information your footage retains after compression. When you shoot video or export a project, the encoder makes constant decisions about what data to keep and what to discard. Higher bitrate gives the encoder more budget to work with.
I learned this lesson the hard way on a commercial shoot. I had filmed product b-roll at my camera’s default settings, only to discover later that the low bitrate made fine text details look muddy. The client wanted crisp shots of product labels, and my footage could not deliver. Since then, I always match my bitrate to my content requirements.
The encoder faces an impossible task: represent the same visual information using less data. It uses sophisticated algorithms to identify what the human eye notices most and what it can sacrifice. Higher bitrates give the encoder more flexibility to preserve fine details without visible sacrifice.
Compression Artifacts at Low Bitrates
When bitrate drops too low, visible compression artifacts appear. The most common issues include blockiness, where the image breaks into visible squares or blocks. This happens because the encoder groups pixels together to save space, losing fine detail in the process.
Blockiness is most visible in areas with subtle texture or smooth gradients. A blue sky might show distinct rectangular patches instead of smooth transitions. Skin tones can appear patchy or uneven. Fine details like fabric texture or hair lose their definition and become indistinct.
Color banding appears in gradients like skies or smooth backgrounds. Instead of smooth transitions, you see distinct bands of color. This occurs when there are not enough bits to represent subtle color variations. Banding is particularly noticeable in sunset shots or studio lighting setups with soft gradients.
Mosquito noise creates fuzzy, shimmering artifacts around edges and text. Fine details like hair, grass, or fabric texture become indistinct. Motion can look stuttered or jerky, especially during fast camera movements or action sequences. These artifacts are called mosquito noise because they resemble insects swarming around high-contrast edges.
Macroblocking occurs during rapid motion when the encoder cannot keep up. Large blocks become visible during scene changes or fast pans. You might notice this when watching sports broadcasts during quick camera cuts. The encoder literally runs out of data budget to handle the sudden change.
Quality Ceiling and Diminishing Returns
Higher bitrate does not always mean visibly better quality. Once you reach a certain threshold, additional data provides minimal perceptible improvement. This ceiling depends on resolution, frame rate, codec efficiency, and content complexity.
For most 1080p content, bitrates above 15-20 Mbps rarely show visible quality gains. For 4K footage, the ceiling sits around 50-60 Mbps for H.264 encoded video. More efficient codecs like H.265 can achieve similar quality at lower bitrates, pushing the ceiling down further.
I tested this extensively with my own footage. Comparing 1080p exports at 10, 15, 20, and 30 Mbps side by side, I could barely distinguish between 15 and 30 Mbps for interview content. The 10 Mbps version showed subtle artifacts in fine details. For action footage, the differences became more apparent, with 20+ Mbps showing noticeably cleaner motion.
This ceiling explains why盲目 pursuing maximum bitrate wastes storage and bandwidth. The key is finding the sweet spot where quality is excellent but file sizes remain manageable. That sweet spot varies by content type and delivery requirements.
Content Complexity and Bitrate Requirements
Not all video content needs the same bitrate. A static talking head interview requires far less data than a fast-paced sports sequence. The encoder must work harder to compress complex motion without visible degradation.
Simple content like interviews, product shots, and landscape pans can look excellent at lower bitrates. The lack of rapid motion means each frame is similar to the last, giving the encoder less work to do. I often use 8-12 Mbps for interview footage at 1080p.
Moderate complexity includes gentle camera movements, walking speeds, and scenes with some motion. Corporate videos, tutorials, and most documentary content fall into this category. For these, I typically target 10-15 Mbps at 1080p.
Complex content demands higher bitrate. Sports, action sequences, handheld camera work, and scenes with lots of fine detail like foliage or water all stress the encoder. For these situations, I increase bitrate by 50-100% compared to simple content at the same resolution.
Water presents particular challenges due to its constantly changing surface. Leaves and grass sway unpredictably. Crowds contain hundreds of moving subjects. Any of these elements can push bitrate requirements significantly higher than static scenes.
Frame Rate’s Impact on Bitrate
Higher frame rates require more bitrate to maintain equivalent quality. Each additional frame needs its share of data. A 60fps video contains twice as many frames as 30fps, so it needs roughly 1.5 to 2 times the bitrate for comparable quality.
This relationship explains why 4K at 60fps has such high bitrate requirements. You are dealing with four times the pixels of 1080p and twice the frames of 30fps. The combined effect means bitrate needs can exceed 40-50 Mbps for complex content.
However, the relationship is not exactly linear. Modern encoders use temporal compression, meaning they reference previous and upcoming frames to reduce data requirements. This means doubling frame rate does not quite double bitrate needs. The increase is typically 50-80% rather than 100%.
For photographers accustomed to thinking in still image terms, consider this analogy: shooting 60fps is like capturing 60 full-resolution photos every second. The data requirements add up quickly. But unlike still photos, video frames share information with adjacent frames, reducing the total data needed.
Slow motion footage shot at 120fps or higher requires even more bitrate during capture. However, when you slow it down in editing, the effective frame rate for delivery might be 30fps, so export bitrate does not need to scale with capture frame rate.
Video Bitrate vs Resolution: What Matters More
The bitrate versus resolution question comes up constantly in video forums. My answer might surprise you: bitrate often matters more for perceived quality than resolution, especially at typical viewing sizes.
I have seen 720p footage at 10 Mbps look cleaner and more detailed than 1080p footage compressed to 3 Mbps. The higher bitrate preserves texture and reduces artifacts that make video look amateur. Resolution gives you pixel count, but bitrate determines what those pixels actually contain.
This realization changed how I approach video quality. Before understanding bitrate, I assumed 4K was automatically better than 1080p. Now I know that a well-encoded 1080p file can outperform a poorly compressed 4K file in perceived quality.
Why Both Resolution and Bitrate Matter Together
Resolution and bitrate work in partnership. Higher resolution means more pixels to fill with data. If you increase resolution without proportionally increasing bitrate, each pixel receives less data, and quality can actually decrease.
Think of it this way: 4K resolution gives you four times the canvas of 1080p. If you use the same bitrate for both, that data must stretch across four times as many pixels. The result is lower bits per pixel, which translates to more compression artifacts.
This is why bitrate recommendations scale with resolution. The following table shows typical bitrate ranges that maintain consistent quality across different resolutions.
Recommended Bitrate by Resolution (H.264 codec, 30fps)
720p HD: 3,000 – 5,000 Kbps (3-5 Mbps)
1080p Full HD: 5,000 – 10,000 Kbps (5-10 Mbps)
1440p 2K: 10,000 – 16,000 Kbps (10-16 Mbps)
4K UHD: 15,000 – 30,000 Kbps (15-30 Mbps)
Notice how the bitrate roughly doubles as you move up each resolution tier. This scaling maintains similar bits per pixel across formats, ensuring consistent quality regardless of resolution.
The Low Resolution, High Bitrate Advantage
For streaming and web delivery, I often recommend 720p at higher bitrate over 1080p at lower bitrate. The cleaner, artifact-free image looks more professional than a larger resolution with visible compression issues.
This approach also helps with viewer bandwidth constraints. A 720p stream at 5 Mbps will play smoothly for more viewers than a 1080p stream at 8 Mbps. The quality difference is often negligible on mobile devices or smaller screens.
Many professional broadcasters use this strategy. They prioritize smooth playback and clean images over maximum resolution. A viewer who cannot buffer your 4K stream gets nothing, while a viewer who can smoothly play 720p at least sees your content.
I apply this thinking to client deliverables as well. If a client needs video for email marketing or social media, I often deliver 720p at generous bitrate rather than 1080p that will get compressed anyway by the platform.
When Resolution Should Take Priority
Higher resolution makes sense when you need cropping flexibility, plan to display on large screens, or require the footage for professional delivery. 4K gives you room to reframe shots in post, apply digital stabilization, or deliver to clients who expect maximum quality.
For client work like weddings, commercials, or corporate videos, I shoot 4K whenever possible. The additional resolution provides flexibility in editing, and I can always deliver 1080p output while keeping the 4K master files.
Cropping is where 4K really shines. You can extract a 1080p portion of the frame for close-ups without quality loss. This gives you two shots from one take, enormously valuable for single-camera shoots.
Digital stabilization also benefits from extra resolution. Software can stabilize shaky footage by zooming in slightly and repositioning each frame. Starting with 4K means you have plenty of room for stabilization before dropping below 1080p output quality.
4K Bitrate Considerations
4K video requires substantially more bitrate than 1080p, but the exact amount depends on your codec and content. For H.264 encoding, plan for 20-45 Mbps for most content. H.265 can achieve similar quality at 15-30 Mbps.
Camera recording bitrates vary significantly. Some consumer cameras record 4K at 60-100 Mbps, while professional cinema cameras can exceed 400 Mbps. The higher camera bitrates preserve more data for grading and post-processing flexibility.
Professional cameras often offer multiple bitrate options for the same resolution. A cinema camera might let you choose between 100, 200, or 400 Mbps for 4K recording. Higher bitrates preserve more latitude for color grading and visual effects work.
For delivery rather than capture, you can often use lower bitrates than your source footage. YouTube’s recommended 35-45 Mbps for 4K at 30fps produces excellent results for most content. Going higher rarely improves the final viewer experience after YouTube’s re-encoding.
Bitrate Recommendations by Use Case
Choosing the right bitrate depends entirely on your specific situation. Platform requirements, content type, delivery method, and available bandwidth all factor into the decision. Here are my practical recommendations based on common scenarios.
Platform-Specific Bitrate Recommendations
Different platforms have different optimal bitrates. YouTube, Vimeo, and social media each process your video differently, and understanding their requirements helps you deliver the best possible quality.
YouTube Bitrate Recommendations (H.264)
1080p at 30fps: 8,000 – 12,000 Kbps
1080p at 60fps: 12,000 – 16,000 Kbps
1440p at 30fps: 16,000 – 24,000 Kbps
1440p at 60fps: 24,000 – 32,000 Kbps
4K at 30fps: 35,000 – 45,000 Kbps
4K at 60fps: 45,000 – 60,000 Kbps
YouTube re-encodes all uploads, so slightly higher bitrates than their minimums often preserve more detail through the process. I typically target the upper end of these ranges for important client work.
YouTube also offers different quality tiers to viewers. Someone on a fast connection might watch your 4K upload at full resolution, while someone on mobile data might see a 720p version. YouTube creates all these versions from your upload, so starting with high quality matters.
Vimeo Recommendations
Vimeo tends to preserve upload quality better than YouTube. For 1080p, I recommend 10-15 Mbps. For 4K, 30-50 Mbps works well. Vimeo’s audience often expects higher production values, so the extra bitrate investment makes sense.
Vimeo also offers adaptive streaming that adjusts quality based on viewer bandwidth. Unlike YouTube, Vimeo’s re-encoding is generally gentler, meaning your upload quality more closely matches what viewers see.
Social Media Considerations
Instagram, TikTok, and Facebook compress video aggressively. Upload bitrates between 8-12 Mbps for 1080p content. Higher bitrates will get compressed down anyway, so focus on clean source footage rather than maximizing upload bitrate.
Instagram particularly compresses video in ways that can introduce artifacts. I recommend keeping Instagram content under 60 seconds when possible, as longer videos receive more aggressive compression. Vertical video for Stories and Reels should target 6-8 Mbps.
TikTok has specific technical requirements that favor certain upload parameters. They recommend 1080p resolution with bitrates around 8 Mbps. Going much higher provides no benefit and can actually trigger additional compression.
Content Type Adjustments
The complexity of your content significantly impacts bitrate needs. Here is how I adjust recommendations based on what I am filming.
Talking Head and Interview Footage
Static backgrounds and limited motion mean lower bitrate requirements. 1080p at 5-8 Mbps typically looks excellent. Focus your budget on lighting and audio instead of chasing higher bitrate numbers.
The key for interviews is consistent lighting and a clean background. Compression artifacts are most visible in dark areas and complex textures. Well-lit faces against simple backgrounds compress efficiently and look professional even at moderate bitrates.
B-Roll and Product Shots
Moderate camera movement and detail require mid-range bitrates. For 1080p, target 8-12 Mbps. This range preserves fine product details and smooth camera movements without excessive file sizes.
Product shots deserve extra attention because clients often scrutinize details. A muddy logo or unclear texture can undermine the professional appearance of your work. I never go below 10 Mbps for product b-roll.
Action, Sports, and Fast Motion
Complex motion demands higher bitrate. Increase recommendations by 50-100%. For 1080p action content, 12-20 Mbps prevents visible artifacts during fast movements.
Sports filming presents unique challenges because you cannot predict motion. A relatively static moment can suddenly explode into action. I recommend maintaining higher bitrates throughout rather than hoping variable bitrate handles the transitions smoothly.
Event and Wedding Videography
Mixed content types make bitrate selection challenging. I recommend 15-25 Mbps for 1080p or 35-50 Mbps for 4K. These ranges handle everything from quiet moments to energetic dance floors.
Wedding videos often include low-light reception footage, which is particularly challenging for encoders. Noise and grain in dark footage require more bits to represent accurately. Budget extra bitrate for evening reception coverage.
Streaming vs Recorded Video
Live streaming faces bandwidth constraints that recorded video does not. Your upload speed limits your maximum streaming bitrate. Always leave headroom below your maximum upload to account for fluctuations.
For example, if you have 10 Mbps upload, streaming at 8 Mbps gives you buffer for stability. Many streaming platforms also have maximum bitrate limits. Twitch caps most streams at 6,000 Kbps, while YouTube Live allows higher bitrates for partners.
Network stability matters more than raw speed for streaming. A consistent 5 Mbps connection often produces better results than an inconsistent 15 Mbps connection that fluctuates wildly. Test your upload stability before important streams.
Streaming platforms also have different encoder requirements. Some require CBR encoding for compatibility. Others support VBR for better quality. Check your platform’s documentation before configuring your streaming software.
CBR vs VBR: Understanding Encoding Methods
How bitrate is applied throughout your video matters as much as the number itself. Constant Bitrate and Variable Bitrate represent two different approaches to encoding, each with distinct advantages.
Constant Bitrate (CBR) Explained
CBR maintains the same data rate throughout your entire video. Every second receives the same amount of data, regardless of content complexity. This approach prioritizes predictability over efficiency.
The advantage of CBR is consistency. File sizes are predictable, and streaming bandwidth requirements stay constant. This makes CBR ideal for live streaming where network stability matters.
The disadvantage is inefficiency. Simple scenes receive more data than they need, while complex scenes may not get enough. A talking head segment at 10 Mbps CBR wastes data, while an action sequence at the same rate might show artifacts.
CBR encoding is also faster because the encoder does not need to analyze content complexity. This makes it the default choice for real-time applications like live streaming or game capture.
Variable Bitrate (VBR) Explained
VBR allocates bitrate dynamically based on content complexity. Simple scenes use less data, while complex scenes use more. The encoder analyzes each frame and distributes the data budget intelligently.
Two-pass VBR encoding produces the best results. The first pass analyzes the entire video to identify complex sections. The second pass allocates bitrate accordingly, maintaining an average that meets your target file size.
VBR creates smaller files with equivalent quality, or better quality at the same file size. For recorded video intended for download or playback, VBR is almost always the better choice.
The trade-off is encoding time. Two-pass VBR takes roughly twice as long as CBR encoding. For long projects, this additional time can be significant. However, the quality improvement is usually worth the wait.
CBR vs VBR Comparison
Use CBR When:
Live streaming to platforms with bitrate limits
Broadcast applications requiring constant bandwidth
Real-time encoding where two-pass is not possible
Compatibility with older playback systems is needed
Use VBR When:
Exporting recorded video for upload or delivery
File size optimization matters
Content has varying complexity throughout
Quality is the priority over streaming stability
One-pass VBR exists as a middle ground. It allocates bitrate dynamically without a preliminary analysis pass. Quality is better than CBR but not as good as two-pass VBR. Use one-pass VBR when you need better quality than CBR but cannot wait for two-pass encoding.
Codec Impact on Bitrate Requirements
The codec you choose dramatically affects bitrate needs. Modern codecs achieve better quality at lower bitrates through more efficient compression algorithms.
H.264 (AVC) remains the most widely compatible codec. It works on virtually every device and platform. For most web delivery, H.264 at 8-15 Mbps for 1080p provides excellent quality.
H.264 has been around since 2003 and is supported by virtually every device manufactured in the last decade. This universal compatibility makes it the safest choice for general distribution.
H.265 (HEVC) offers roughly 50% better compression efficiency than H.264. The same quality can be achieved at half the bitrate. However, compatibility is more limited, especially on older devices.
Apple devices have excellent H.265 support. Windows support requires newer hardware. Android support varies by device. For audiences with modern devices, H.265 can significantly reduce file sizes without quality loss.
ProRes and DNxHD are intermediate codecs designed for editing, not delivery. They use much higher bitrates (often 100-400+ Mbps) to preserve quality through multiple generations of editing and effects work.
These codecs minimize generation loss when you apply effects, color grades, and other adjustments. They are essential for professional post-production workflows but overkill for final delivery.
AV1 is the newest major codec, offering even better compression than H.265. However, encoding is slow, and playback support is still developing. It is worth considering for YouTube uploads where processing time is not a concern.
Video Bitrate for Photographers: Special Considerations
Photographers approaching video face unique challenges. Our expectations for image quality come from still photography, where we have total control over every pixel. Video requires a different mindset, and understanding bitrate helps bridge that gap.
Why Photographers Need to Understand Bitrate
Many modern cameras offer impressive video capabilities, but the default settings rarely optimize for quality. Camera manufacturers balance file size, recording time, and heat management, often at the expense of bitrate.
When I first started shooting video on my photography camera, I assumed the highest resolution setting would give the best quality. I was wrong. A 4K mode limited to 60 Mbps can look worse than 1080p at 100 Mbps, especially for detailed scenes.
Understanding bitrate helps you make informed decisions about which camera settings to use, how to configure your export settings, and what quality to expect at each stage of production.
Photographers are accustomed to shooting RAW for maximum flexibility. Video bitrate is similar in concept: higher bitrates preserve more information for post-processing. Just as you would not shoot JPEG for a client project, you should not accept minimum bitrates for important video work.
Hybrid Camera Shooting Considerations
Hybrid cameras that excel at both stills and video have become the norm. However, video capabilities vary dramatically between models. Some cameras offer 10-bit 4:2:2 recording at high bitrates, while others limit you to 8-bit 4:2:0 at modest data rates.
For hybrid shooting, I recommend checking your camera’s maximum bitrate for each resolution and frame rate combination. If your camera offers 4K at 100 Mbps or 1080p at 200 Mbps, the 1080p option might actually preserve more detail for certain content.
Color depth also matters alongside bitrate. 10-bit video captures over 1 billion colors compared to 16 million for 8-bit. This extra color information is invaluable for grading, especially for footage that needs significant color adjustment.
External recorders can bypass internal camera limitations. Many cameras output clean HDMI signals that external recorders can capture at higher bitrates and better color depth. This approach transforms mid-range cameras into professional video tools.
Ninja V and similar external recorders capture ProRes or RAW formats at bitrates exceeding 800 Mbps. This additional data provides extraordinary flexibility in post-production, though file sizes become substantial.
Cinematic Video for Photography Clients
Photography clients increasingly expect video alongside stills. Whether adding short clips to a social media package or producing full video content, bitrate choices affect the professional appearance of your work.
For client delivery, I recommend higher bitrates than the platform minimums. A 1080p video at 15-20 Mbps will survive platform re-encoding better than one at 8 Mbps. The extra quality shows in fine details and smooth gradients.
Keep masters at even higher quality. Archive your edited projects at 50+ Mbps for 1080p or 100+ Mbps for 4K. Storage is affordable, and you never know when a client will request a higher-quality version for a different use.
Clients may not understand bitrate technically, but they notice quality. A clean, artifact-free video reflects professionally on your work. Pixelated or blocky footage undermines even the best composition and lighting.
Wedding and Event Video Bitrate Needs
Wedding videography presents particular challenges. Lighting conditions change constantly, motion ranges from subtle to chaotic, and there are no second takes. These factors all push bitrate requirements higher.
For wedding work, I shoot 4K at the highest bitrate my camera allows, typically 100-200 Mbps. This gives me flexibility in post for color grading, stabilization, and reframing. The resulting files are large, but the quality difference is worth the storage investment.
Wedding ceremonies often occur in churches with dim, mixed lighting. Reception venues frequently have even more challenging lighting with colored LEDs and spotlights. High bitrate captures preserve shadow detail and highlight information essential for balancing these challenging conditions.
Event videography follows similar principles. When you cannot control the environment, maximizing data capture gives you the most flexibility in post-production. The cost of additional storage is minimal compared to the risk of unusable footage.
Storage and Workflow Implications
Higher bitrates mean larger files, which impacts your entire workflow. Storage requirements, backup strategies, and transfer times all scale with file size.
A one-minute 4K clip at 50 Mbps creates roughly 375 MB of data. At 200 Mbps, that same minute grows to 1.5 GB. Over a full day of shooting, the difference can mean hundreds of gigabytes.
Plan your storage accordingly. Fast SSDs for active editing projects, larger HDDs or NAS for archives, and a robust backup strategy. I budget for roughly 2-3 GB per minute of 4K footage at my typical shooting bitrates.
Transfer speeds become a bottleneck with high-bitrate footage. USB 3.0 or Thunderbolt connections are essential for moving large files efficiently. A 128 GB card full of 4K footage can take 20-30 minutes to transfer over slower connections.
Cloud backup of high-bitrate footage requires serious bandwidth and patience. A single wedding shoot might generate 200-500 GB of data. Even on a fast connection, uploading this much data takes hours.
How to Choose the Right Bitrate for Your Footage In 2026?
Selecting the right bitrate becomes straightforward when you follow a systematic approach. Here is the process I use for every project.
Step 1: Identify Your Delivery Requirements
Start with the end in mind. Where will your video be viewed? Platform recommendations provide your baseline. If YouTube is the destination, their recommended bitrates are your starting point.
Consider your audience’s viewing conditions. Mobile viewers on cellular connections benefit from lower bitrates that stream smoothly. Viewers on large screens or fast connections can appreciate higher quality.
Multiple delivery formats complicate this decision. You might need a 4K master for archives, a 1080p version for client review, and a compressed version for social media. Plan for all these outputs from the start.
Step 2: Assess Your Content Complexity
Simple content like interviews can use lower bitrates. Complex content like action sequences needs higher bitrates. Be honest about your footage when making this assessment.
When in doubt, lean toward higher bitrate. You can always re-encode to a smaller file later, but you cannot recover quality that was lost during initial capture or export.
Mixed content is common in longer videos. A 10-minute piece might include static interviews, moderate b-roll, and some action footage. Choose a bitrate that handles your most complex sections adequately.
Step 3: Consider Your Constraints
Practical limitations matter. Storage space, upload bandwidth, and camera capabilities all factor into your decision. The theoretically perfect bitrate is useless if you cannot actually use it.
For streaming, your upload speed is the hard limit. Leave at least 20% headroom below your maximum for stability. A 10 Mbps upload connection should not stream above 8 Mbps.
Storage capacity affects capture decisions. If your memory cards fill quickly, you might need to compromise on bitrate. Plan card capacity based on your expected shooting time and chosen bitrate.
Step 4: Choose Your Encoding Method
Select CBR for streaming, VBR for recorded content. Two-pass VBR encoding provides the best quality-to-file-size ratio for uploads and downloads.
Your codec choice also matters. H.264 for maximum compatibility, H.265 for better efficiency when your audience can play it, ProRes or DNxHD for intermediate editing files.
Consider your export time budget. Two-pass VBR encoding of a one-hour video can take significantly longer than CBR encoding. If you are on a tight deadline, one-pass VBR or CBR might be necessary.
Step 5: Test and Refine
The only way to know if your bitrate choices work is to test. Export short samples at different bitrates and compare them on your target delivery platform. Watch for artifacts, check file sizes, and evaluate how smoothly the video plays.
I always export test clips before committing to a full project render. Five minutes of testing can save hours of re-exporting later.
Test on the actual delivery platform when possible. Upload a test clip to YouTube and watch it on different devices. What looks fine on your editing monitor might show artifacts on a phone or tablet.
Common Bitrate Mistakes to Avoid
Through years of trial and error, I have identified several common mistakes that photographers and videographers make with bitrate settings.
Mistake 1: Prioritizing Resolution Over Bitrate
Shooting 4K at a low bitrate often produces worse results than 1080p at a high bitrate. Match your bitrate to your resolution for consistent quality.
Mistake 2: Using Camera Defaults Without Checking
Camera manufacturers optimize for recording time and heat management, not maximum quality. Check your camera’s bitrate options and choose based on your needs.
Mistake 3: Ignoring Platform Re-Encoding
YouTube and other platforms re-encode your video. Slightly higher upload bitrates help preserve quality through this process.
Mistake 4: Not Leaving Headroom for Streaming
Streaming at your maximum upload speed invites buffering and dropped frames. Always leave buffer for network fluctuations.
Mistake 5: Using CBR When VBR Would Work Better
For recorded video, VBR almost always produces better results. Reserve CBR for live streaming applications.
Mistake 6: Ignoring Content Type
Using the same bitrate for interviews and action footage wastes either quality or storage. Adjust based on content complexity.
Mistake 7: Not Testing Before Final Export
Discovering quality issues after a long export wastes time. Always test with short clips first.
Frequently Asked Questions
What is a good bitrate for video quality?
A good bitrate depends on your resolution and frame rate. For 1080p at 30fps, aim for 5,000-10,000 Kbps. For 1080p at 60fps, use 8,000-15,000 Kbps. For 4K at 30fps, target 20,000-35,000 Kbps. Higher bitrates within these ranges produce better quality but create larger files.
How does bitrate affect video quality?
Bitrate determines how much data is available to represent each second of video. Higher bitrate preserves more detail, reduces compression artifacts like blockiness, and maintains smoother motion. Lower bitrate forces more aggressive compression, which can cause visible quality degradation, especially in complex scenes with fast motion or fine details.
What bitrate should I use for 4K 60fps?
For 4K video at 60fps, use 35,000-60,000 Kbps depending on content complexity. Simple content like interviews can use the lower end (35-45 Mbps). Complex content with fast motion should use higher bitrates (50-60 Mbps). If using H.265 encoding instead of H.264, you can reduce these values by roughly 30-40%.
How much bitrate is good for 1080p video?
For 1080p video, good bitrate ranges from 5,000-15,000 Kbps depending on frame rate and content. At 30fps, 5,000-10,000 Kbps works well. At 60fps, increase to 8,000-15,000 Kbps. Simple content like talking heads can use lower values, while action footage needs higher bitrates to avoid visible artifacts.
Does higher bitrate always mean better quality?
No, higher bitrate does not always mean better quality. Once you reach a certain threshold, additional bitrate provides diminishing returns that may not be visible to viewers. The quality ceiling depends on resolution, codec efficiency, and content type. For most 1080p content, bitrates above 15-20 Mbps rarely show visible improvement.
Final Thoughts on Video Bitrate and Quality
Understanding video bitrate transformed how I approach video work. What once seemed like an impenetrable technical concept became a practical tool for improving my footage quality. I hope this guide provides the same clarity for you.
The key takeaways are straightforward. Bitrate measures how much data your video contains per second. Higher bitrate generally means better quality, but with larger files and higher bandwidth requirements. Resolution and bitrate work together, and prioritizing one over the other often backfires.
For most projects, start with platform recommendations and adjust based on your content complexity. Use VBR encoding for recorded video, CBR for streaming. Test your settings before committing to long renders. And remember that bitrate is just one factor alongside resolution, frame rate, codec choice, and content quality.
What Is Video Bitrate and How Does It Affect Your Footage Quality is no longer a mystery. You now have the knowledge to make informed decisions about your video settings. The next step is applying this knowledge to your next project. Start with the recommendations in this guide, then experiment and observe the results. Your footage will thank you.