Getting sharp focus in video can be tricky, especially when you are shooting manually. Focus peaking is a built-in camera feature that solves this problem by highlighting in-focus areas directly on your display with a colored overlay. This guide explains exactly what focus peaking is, how it works technically, and how to use it effectively for manual focus video work in 2026.
Whether you shoot weddings, interviews, documentaries, or cinematic b-roll, understanding focus peaking will make your manual focusing faster and more accurate. Our team has tested focus peaking across multiple camera brands and real-world video scenarios to bring you practical, field-tested advice.
What Is Focus Peaking?
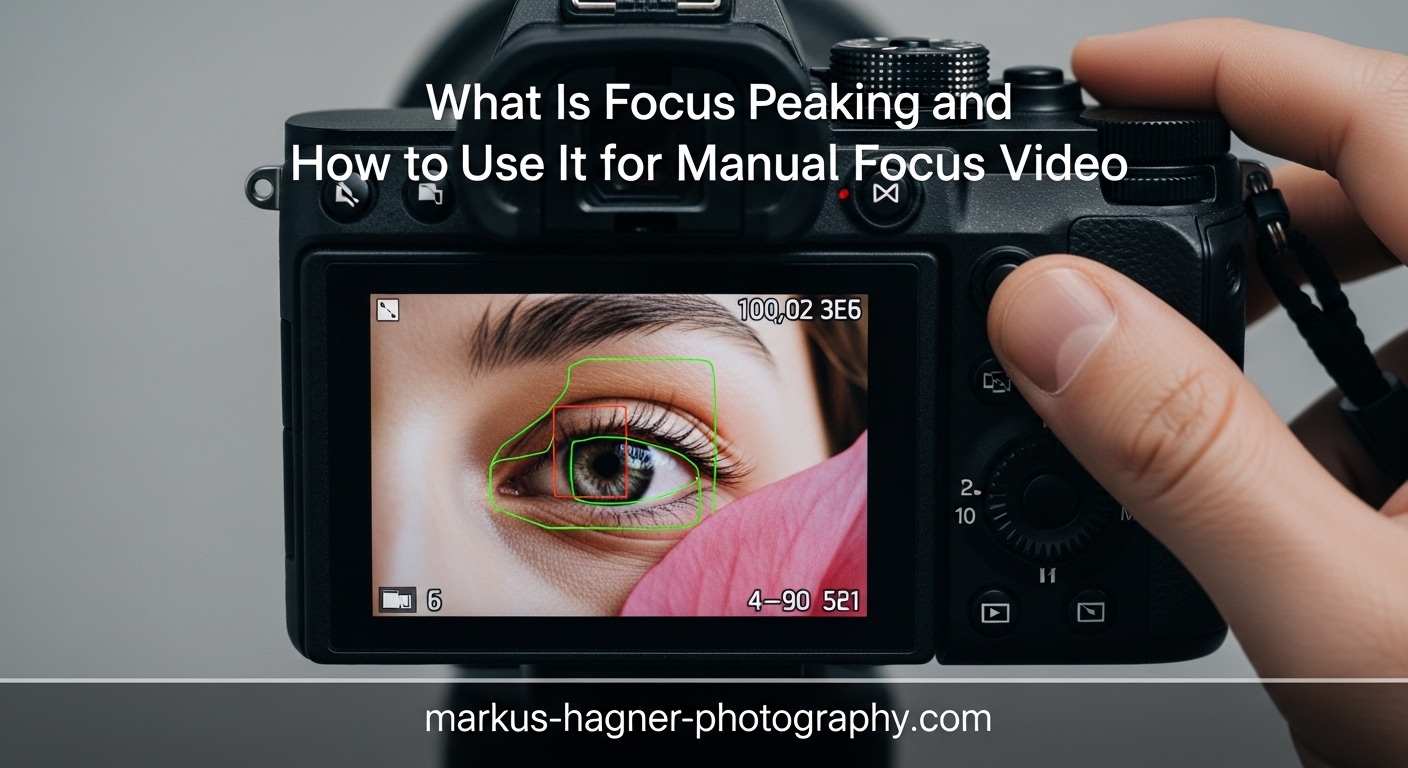
Focus peaking is a real-time manual focus assist tool that overlays a colored highlight on the areas of your image that are in sharpest focus. The feature analyzes your scene continuously and marks high-contrast edges with your chosen color, typically red, yellow, blue, or white. As you turn the focus ring, the overlay updates instantly, showing you exactly which parts of the frame are sharp.
The technology originated in professional video equipment before making its way into consumer mirrorless cameras and DSLRs. Focus peaking was designed specifically for situations where manual focus is necessary or preferred, such as when using manual focus lenses, shooting video where autofocus might hunt, or executing deliberate focus pulls between subjects.
Most modern mirrorless cameras include focus peaking, including models from Sony, Canon, Nikon, Fujifilm, Panasonic, and Olympus. Many external field monitors also offer focus peaking, often with more customizable options than in-camera implementations. The feature works in both live view on your LCD screen and through your electronic viewfinder (EVF).
Focus peaking is particularly valuable for videographers because video autofocus can still hunt, breathe, or switch subjects unexpectedly during recording. Manual focus with focus peaking gives you complete control over your focus plane without the unpredictability of autofocus systems.
How Focus Peaking Works
Focus peaking operates on a simple principle: in-focus areas of an image have higher contrast at their edges than out-of-focus areas. The camera digitally analyzes your scene in real-time, pixel by pixel, looking for these high-contrast transitions.
When the camera detects a sharp edge, it adds a colored overlay to those pixels. The brighter or more intense the overlay, the higher the contrast at that location, and therefore the sharper that area appears to be. This analysis happens continuously, usually at your display’s refresh rate, so the overlay moves dynamically as you adjust focus.
The underlying algorithm measures local contrast by comparing adjacent pixels. Sharp edges create large differences between neighboring pixels, while soft or blurry areas have gradual transitions with smaller differences. The camera highlights pixels where this difference exceeds a threshold determined by your sensitivity setting.
This contrast-based approach explains why focus peaking sometimes highlights areas that are not critically sharp. High-contrast subjects with strong edges, even when slightly soft, may trigger the overlay. This is why many experienced videographers combine focus peaking with focus magnification for the most accurate results.
Focus Peaking Settings Explained
Color Options
Most cameras offer at least three color choices for focus peaking, with some providing four or more. The best color depends entirely on your subject and scene.
Yellow is the most universally visible option and works well across the widest range of scenes. Our team prefers yellow for most video work because it contrasts well with most skin tones, backgrounds, and lighting conditions. If you are unsure which color to choose, start with yellow.
Red offers excellent visibility on cool-toned scenes and works particularly well for landscape video with blue skies or green foliage. However, red peaking disappears against red subjects like brick walls, red clothing, or warm sunset tones, making it a poor choice for those situations.
Blue provides strong contrast against warm-toned scenes and skin tones. Use blue when shooting interviews with warm lighting or golden hour footage where yellow might blend into the background.
White can work but often blends into bright highlights or white backgrounds. Some videographers prefer white for low-contrast scenes where colored overlays feel distracting, but it requires careful attention to avoid losing visibility.
The key is choosing a color that contrasts with your dominant subject tones. Many professionals assign focus peaking color to a custom button or quick menu for fast changes between setups.
Sensitivity Levels
Sensitivity controls how much contrast triggers the focus peaking overlay. Most cameras offer high, medium, and low sensitivity options, though some simplify this to two levels.
High sensitivity shows peaking on more areas, including edges that are only moderately sharp. Use high sensitivity when shooting at wide apertures like f/1.2 or f/1.4 where your depth of field is extremely shallow. High sensitivity also helps in low-contrast scenes where the algorithm needs to detect subtler edges. The tradeoff is more false positives where the overlay shows areas that are not critically sharp.
Low sensitivity restricts the overlay to only the highest-contrast, sharpest edges. Use low sensitivity for landscape video at narrow apertures like f/8 or f/11 where more of the scene is in focus. Low sensitivity reduces false positives but may miss areas that are acceptably sharp.
Medium sensitivity provides a good balance for general-purpose video work. If your camera defaults to medium, this works well for interviews, event coverage, and most standard video scenarios.
Many experienced videographers switch between sensitivity levels depending on their aperture and subject. A good practice is to start at medium and adjust based on how much of your scene the overlay covers.
How to Enable Focus Peaking by Camera Brand
Each camera manufacturer places focus peaking settings in slightly different menu locations. Here are the typical paths for major brands.
Sony cameras usually place focus peaking under Camera Settings (gear icon) in the Focus Assist menu. Look for Peaking Setting, then Peaking Level and Peaking Color. You can also assign focus peaking toggle to a custom button for quick access.
Canon mirrorless cameras typically have focus peaking under the Shooting menu, Focus Assistant section. Enable MF Peaking and select your color and level. Some Canon DSLRs in live view mode also offer this feature under the same menu path.
Nikon Z-series cameras place focus peaking in the Custom Settings menu under Focus, then Peaking Assist. Enable the feature and choose your color and sensitivity. Nikon often calls this Peaking Assist rather than simply focus peaking.
Fujifilm cameras have focus peaking in the Shooting Setting menu under Focus Assist. Select Focus Peaking and choose your color. Fujifilm also allows you to assign focus peaking to a function button for fast toggling.
Panasonic Lumix cameras typically place focus peaking in the Custom menu under Focus Peaking. Panasonic offers extensive customization including multiple colors and detailed sensitivity adjustments on some models.
If your camera does not auto-detect manual lenses, you may need to enable focus peaking manually even when shooting with manual focus engaged. Check your manual for Shoot Without Lens or similar settings that allow focus aids with adapted or manual lenses.
How to Use Focus Peaking for Manual Focus Video
Step-by-Step Guide
Using focus peaking effectively requires more than simply turning it on. Follow these steps for best results.
Step 1: Enable focus peaking in your camera menu using the brand-specific instructions above. Choose a color that contrasts with your subject and set sensitivity to medium as a starting point.
Step 2: Switch your lens to manual focus mode, usually via a switch on the lens barrel or camera body. If using an adapted manual lens, ensure your camera is set to Shoot Without Lens if required.
Step 3: Point your camera at your subject and slowly turn the focus ring while watching the display. The colored overlay will appear and move as focus changes.
Step 4: Adjust focus until the overlay covers your subject, particularly the eyes for people or the main point of interest for objects. The most intense overlay indicates the sharpest point.
Step 5: For critical focus, magnify the image using your camera’s focus magnification feature to verify sharpness at the pixel level. Many videographers use peaking to get close, then magnify to confirm.
Step 6: Once focused, you can turn off focus peaking if the overlay distracts from your composition. Assigning peaking to a custom button makes this fast.
Video Scenarios
Different video situations benefit from slightly different focus peaking approaches.
Interviews require consistent focus on the subject’s eyes. Use yellow peaking at medium sensitivity, focus on the eye closest to camera, and verify with magnification. If your subject moves slightly, the peaking overlay will update in real-time, helping you maintain focus.
Wedding and event videography often involves quick subject changes and unpredictable movement. Focus peaking helps you lock focus fast between setups. Consider assigning peaking toggle to a custom button so you can enable it quickly, focus, then disable it to avoid overlay distractions during recording.
B-roll and product video typically involves static subjects where you can take your time. Use lower sensitivity for more precision and verify critical sharpness with magnification. For product shots at narrow apertures, low sensitivity shows only the true plane of focus.
Documentary filming requires flexibility for changing conditions. Keep focus peaking enabled but practice reading the overlay quickly. Documentary shooters often develop an instinct for how much overlay indicates truly sharp focus on their specific camera.
Cinematic video with shallow depth of field demands precision. Use high sensitivity since less of your image will be in focus. Combine peaking with magnification and consider using an external monitor with enhanced peaking features for critical focus on larger screens.
Focus Pulling Techniques
Focus pulling, or racking focus between subjects, is a cinematic technique that focus peaking makes significantly easier.
To pull focus between two subjects, first identify your start and end focus points. Mark these positions on your follow focus or remember the feel of your focus ring stops. Use focus peaking to confirm each position is sharp before recording.
During the take, turn the focus ring smoothly between your marked positions while watching the peaking overlay transition from one subject to the other. The overlay shows you in real-time when focus has successfully transferred.
Practice focus pulls before important takes. Focus peaking helps you develop muscle memory for how far to turn the ring and at what speed for smooth transitions.
Focus Peaking vs Focus Magnification
Both focus peaking and focus magnification are manual focus aids, but they serve different purposes and work best together.
Focus peaking shows you the overall plane of focus across your entire frame at once. This makes it excellent for quickly identifying what is sharp without zooming in. You can see focus distribution across the scene instantly.
Focus magnification zooms into a portion of your frame, typically 5x to 10x, showing pixel-level detail. This provides the most accurate view of critical sharpness but only in one area at a time.
The limitation of focus peaking is accuracy. Because it relies on contrast detection, it may show areas as sharp that are actually slightly soft. This is especially true at wider apertures and on high-resolution sensors where tolerance for error is smaller.
The limitation of magnification is that you lose context of the full frame. You must pan around to check different areas and cannot see the overall focus distribution.
Most professionals use both together. Focus peaking gets you close quickly by showing the overall focus plane. Focus magnification confirms critical sharpness on your key subject. This combination provides both speed and accuracy.
When to Use Focus Peaking (And When Not To)
Focus peaking excels in many situations but has limitations worth understanding.
Use focus peaking when:
Shooting with manual focus lenses where no autofocus is available. Working quickly where you need fast focus confirmation. Pulling focus between subjects in a single take. Shooting in bright conditions where LCD visibility is challenging. Using shallow depth of field where precise focus placement matters.
Avoid relying solely on focus peaking when:
Shooting at extremely wide apertures like f/1.2 or f/1.4 where depth of field is razor thin. The overlay may show a larger area as sharp than actually is. Working with high-resolution cameras like 4K or 6K where slight softness becomes visible. Capturing critical focus for commercial or client work where mistakes are costly. Shooting low-contrast scenes where the algorithm may struggle to detect edges accurately.
Forum discussions consistently highlight that focus peaking is a guide, not a guarantee. Many professionals treat it as a first step, then verify with magnification or test shots when accuracy is essential.
Troubleshooting Focus Peaking Issues
Several common problems can affect focus peaking performance. Here are solutions based on real user experiences.
Focus peaking not showing: Check that manual focus is engaged on your lens or camera body. Some cameras do not activate focus peaking in autofocus modes. If using a manual lens, ensure Shoot Without Lens or similar setting is enabled. Verify that focus peaking is turned on in your menu and not assigned to a button that is currently off.
Overlay shows too many areas as sharp: Lower your sensitivity setting. High sensitivity on a deep depth of field scene will highlight large portions of the frame. Also consider whether your aperture is too narrow for the effect you want.
Overlay shows too few areas: Raise your sensitivity setting, especially if shooting at wide apertures or in low-contrast scenes. The algorithm may need higher sensitivity to detect subtler edges.
Footage still soft despite peaking: Focus peaking indicates areas of high contrast, not exact critical focus. Combine peaking with magnification for verification. Also check that your sensitivity is appropriate for your aperture setting.
Peaking color invisible on subject: Change your peaking color to one that contrasts with your subject. Red peaking on red clothing or yellow peaking on warm skin tones in golden light will be hard to see.
Peaking not working over HDMI: Some cameras do not output focus peaking over HDMI to external monitors. Check your camera’s HDMI output settings. External monitors often have their own focus peaking features that may work better anyway.
Frequently Asked Questions
Does focus peaking work with manual lenses?
Yes, focus peaking works with manual lenses and is actually designed for this purpose. It helps you focus manual lenses faster and more accurately than traditional methods. Some cameras may not auto-detect manual lenses, so you might need to enable focus peaking manually in your menu settings.
How do you use focus peaking?
Enable focus peaking in your camera menu under focus settings, switch your lens to manual focus, choose a color that contrasts with your scene, set sensitivity to medium, then turn the focus ring until your subject is highlighted with the colored overlay. Verify critical focus with magnification if needed.
Is manual focus better for videography?
Manual focus offers consistent, predictable results without the focus hunting that can occur with autofocus during video recording. It is essential for cinematic techniques like focus pulling. Focus peaking makes manual focus faster and more accurate, combining the control of manual focus with visual guidance.
What is the best color for focus peaking?
Yellow is the most universally visible color and works well across most scenes. Red works great except on red subjects. Blue provides strong contrast against warm-toned scenes and skin tones. Choose the color that contrasts most with your dominant subject and background colors.
What sensitivity should I use for focus peaking?
Use high sensitivity for macro work, wide apertures like f/1.2 or f/1.4, and low-contrast scenes. Use low sensitivity for landscape video at narrow apertures and scenes with deep depth of field. Medium sensitivity works well as a general-purpose starting point for most video scenarios.
Is focus peaking accurate?
Focus peaking shows areas of high contrast, not the exact focus plane, so it may highlight areas that are not critically sharp. It is less accurate at very wide apertures and on high-resolution sensors. For critical work, combine focus peaking with focus magnification to verify sharpness at the pixel level.
Conclusion
Focus peaking transforms manual focus from a guessing game into a visual, intuitive process. By highlighting sharp edges with a colored overlay, it shows you exactly where your plane of focus falls in real-time. For videographers shooting manual focus video, this feature is invaluable for achieving consistent, accurate results.
Remember that focus peaking works best as part of a complete focusing workflow. Use it to quickly identify your focus plane, then verify critical sharpness with magnification when accuracy matters. Adjust your color and sensitivity settings based on your scene and aperture for optimal results.
With practice, reading focus peaking becomes second nature. You will develop an instinct for how much overlay indicates truly sharp focus on your specific camera. Spend time experimenting with different settings and scenarios to build confidence before important shoots.