Have you ever stood outside on a clear, dark night, gazing up at the stars, and wished you could capture that breathtaking beauty with your camera? I know I have. When I first tried night photography, I ended up with nothing but black frames and blurry messes. It was frustrating, to say the least.
But here’s the thing: night photography isn’t as complicated as it seems. It’s just different from daytime photography. Once you understand a few key concepts and techniques, you’ll be capturing stunning night images that will amaze your friends and family.
I’ve spent countless nights under the stars, learning through trial and error (and plenty of mistakes), to master the art of night photography. In this comprehensive guide, I’ll share everything I’ve learned to help you go from frustrated beginner to confident night photographer.
What Makes Night Photography Different?
Before we dive into the tips and techniques, let me explain why night photography is so different from shooting during the day. When I first started, I tried using the same settings I used for daylight photos, and everything turned out black. Here’s why:
Light is scarce: At night, there’s significantly less light available, which means your camera needs to work harder to capture an image.
Longer exposures: To compensate for the lack of light, you’ll need to use longer shutter speeds, which introduces new challenges like camera shake and noise.
Different focusing challenges: Your camera’s autofocus system struggles in low light, so you’ll need to learn manual focusing techniques.
Unique creative opportunities: Night photography opens up creative possibilities you just don’t have during the day, like star trails, light painting, and capturing the Milky Way.
I discovered that embracing these differences rather than fighting them was the key to improving my night photography. Once I stopped trying to make night photography work like daytime photography, everything started to click.
Essential Gear for Night Photography
When I first started, I thought I needed expensive, professional gear to get good night photos. While having the right equipment helps, you don’t need to break the bank to get started. Here’s what I recommend:
Must-Have Equipment
Camera with manual controls: You don’t need the latest full-frame camera, but you do need one that lets you control shutter speed, aperture, and ISO manually. I started with an entry-level DSLR and got great results.
Sturdy tripod: This is non-negotiable for night photography. When you’re using long exposures, any camera movement will result in blurry images. I learned this the hard way after countless ruined shots. Look for a tripod that’s stable enough to handle wind and uneven terrain.
Wide-angle lens: A lens with a focal length between 14mm and 35mm is ideal for most night photography. Wider lenses let you capture more of the night sky and are more forgiving when it comes to camera shake. I started with a basic 18-55mm kit lens and used it at its widest setting.
Remote shutter release or intervalometer: This lets you trigger the shutter without touching the camera, eliminating camera shake. You can also use it for bulb exposures longer than 30 seconds and for creating star trails.
Nice-to-Have Equipment
Fast aperture lens: A lens with a maximum aperture of f/2.8 or wider lets in more light, which is crucial for astrophotography. I upgraded to an f/2.8 lens after mastering the basics, and it made a huge difference.
Headlamp with red light mode: A headlamp keeps your hands free while you’re setting up your gear in the dark. The red light mode helps preserve your night vision, which is essential for seeing and composing your shots.
Extra batteries: Cold temperatures and long exposures drain batteries quickly. I always carry at least two spare batteries, especially on cold nights.
Lens hood: This helps block stray light from streetlights and other sources that can cause lens flare.
Memory cards with plenty of space: Night photography files, especially RAW images, are large. I recommend having at least 64GB of storage.
I discovered that having the right gear makes night photography much more enjoyable and successful. But remember, the best camera is the one you have with you. Don’t let gear limitations stop you from getting started!
Understanding Night Photography Settings
Camera settings can be intimidating when you’re starting with night photography, but I promise they’re not as complicated as they seem. Let me break down each setting and explain how to use them for night photography.
Shutter Speed: The Foundation of Night Photography
Shutter speed is the most critical setting for night photography. It determines how long your camera’s sensor is exposed to light. For night photography, you’ll typically use much longer shutter speeds than during the day.
General guidelines:
- Cityscapes and urban night scenes: 1-30 seconds
- Star trails: Several minutes to hours
- Milky Way and astrophotography: 15-30 seconds
- Light painting: Variable, depending on the effect you want
I learned that the “500 rule” is helpful for astrophotography: divide 500 by your focal length to get the maximum shutter speed before stars start to trail. For example, with a 24mm lens, 500 ÷ 24 = about 20 seconds.
Pro tip: Use bulb mode for exposures longer than 30 seconds. This requires a remote shutter release and lets you keep the shutter open for as long as you want.
Aperture: Controlling Light and Depth of Field
Aperture controls how much light enters your lens and affects your depth of field. For night photography, you generally want to let in as much light as possible.
Recommended settings:
- Astrophotography: f/2.8 or wider (lower f-number)
- Cityscapes: f/8-f/11 for sharpness throughout the frame
- General night scenes: f/4-f/8, depending on your creative vision
I discovered that shooting wide open (at your lens’s widest aperture) is often necessary for astrophotography, but it can lead to soft corners. If you have a fast lens, try stopping down to f/4 for better sharpness while still letting in plenty of light.
ISO: Balancing Light and Noise
ISO determines your camera’s sensitivity to light. Higher ISOs make your camera more sensitive to light but also introduce more noise (graininess).
Starting points:
- Milky Way photography: ISO 3200-6400
- Cityscapes: ISO 100-800
- General night scenes: ISO 800-3200
I learned that modern cameras handle high ISO much better than older models, but there’s always a trade-off between brightness and noise. Start with a moderate ISO and adjust based on your results.
Pro tip: Always shoot in RAW format. This gives you more flexibility to reduce noise and adjust exposure in post-processing.
White Balance: Capturing True Colors
White balance affects how colors appear in your images. Night scenes often have mixed light sources, which can make white balance tricky.
Recommended settings:
- Auto White Balance: A good starting point for most situations
- Daylight/Tungsten: For more accurate colors in specific lighting conditions
- Custom: If you want precise control over colors
I usually start with auto white balance and adjust in post-processing if needed. RAW files give you the flexibility to change white balance without losing quality.
Focus: The Night Photography Challenge
Focusing at night is one of the biggest challenges for beginners. Your camera’s autofocus system struggles in low light, so you’ll need to use manual focus.
Techniques for focusing at night:
- Live View focusing: Use your camera’s live view mode to zoom in on a bright star or distant light and focus manually.
- Infinity mark: Many lenses have an infinity mark (∞) on the focus ring. This can be a starting point, but it’s often not perfectly accurate.
- Focus during daylight: If you know where you’ll be shooting, focus on a distant object during the day and mark the focus position with tape.
- Use a flashlight: Illuminate a foreground object at the distance you want to focus on, then focus manually.
I struggled with focusing at night until I discovered the live view technique. It’s now my go-to method for getting sharp focus in dark conditions.
Step-by-Step Guide to Your First Night Photography Session
Now that you understand the gear and settings, let me walk you through the process of setting up and shooting your first night photos. This is the exact workflow I use when I’m out shooting at night.
Step 1: Scout Your Location During Daylight
I always visit my intended shooting location during daylight hours first. This helps me:
- Identify potential compositions and foreground elements
- Check for safety hazards
- Plan my access route
- Understand how the area will look at night
Look for interesting foreground elements that will add depth to your night photos. Rocks, trees, buildings, and water features all work well.
Step 2: Check the Weather and Moon Phase
Weather and moon conditions can make or break your night photography session. I use several apps to plan my shoots:
Weather apps: Check for clear skies and low wind. Clouds can add drama to cityscapes but will obscure stars.
Moon phase apps: The moon’s brightness affects your ability to see stars. A new moon (no moon visible) is ideal for Milky Way photography, while a quarter moon can provide nice illumination for landscapes.
Light pollution maps: These show you areas with less artificial light, which is crucial for astrophotography.
Step 3: Arrive Early and Set Up
I always arrive at my location at least an hour before sunset. This gives me time to:
- Find my composition while there’s still light
- Set up my tripod and compose my shot
- Check my gear and make sure everything’s working
- Wait for the right light conditions
Step 4: Set Your Camera Settings
Here’s my starting setup for night photography:
- Shooting mode: Manual (M)
- File format: RAW
- ISO: 1600 (adjust as needed)
- Aperture: f/2.8 (or widest available)
- Shutter speed: 20 seconds (adjust using the 500 rule)
- White balance: Auto
- Focus: Manual (using live view)
- Image stabilization: Off (when using a tripod)
- Long exposure noise reduction: On
Step 5: Take Test Shots and Adjust
I always take several test shots and review them carefully:
- Check focus: Zoom in on the preview to make sure stars are sharp
- Check exposure: Look at the histogram, not just the image brightness
- Check composition: Make sure the image looks balanced and interesting
Based on these test shots, I adjust my settings:
- Too dark? Increase ISO, use a wider aperture, or use a longer shutter speed
- Too bright? Decrease ISO, use a smaller aperture, or use a shorter shutter speed
- Too noisy? Decrease ISO and compensate with longer exposure or wider aperture
- Stars trailing? Use a shorter shutter speed (remember the 500 rule)
Step 6: Shoot and Review
Once I’m happy with my settings, I take multiple shots, reviewing each one carefully. Night photography often requires patience and persistence. Don’t get discouraged if your first attempts aren’t perfect.
Common Night Photography Subjects and Techniques
Night photography offers endless creative possibilities. Here are some of my favorite subjects and the techniques I use to capture them:
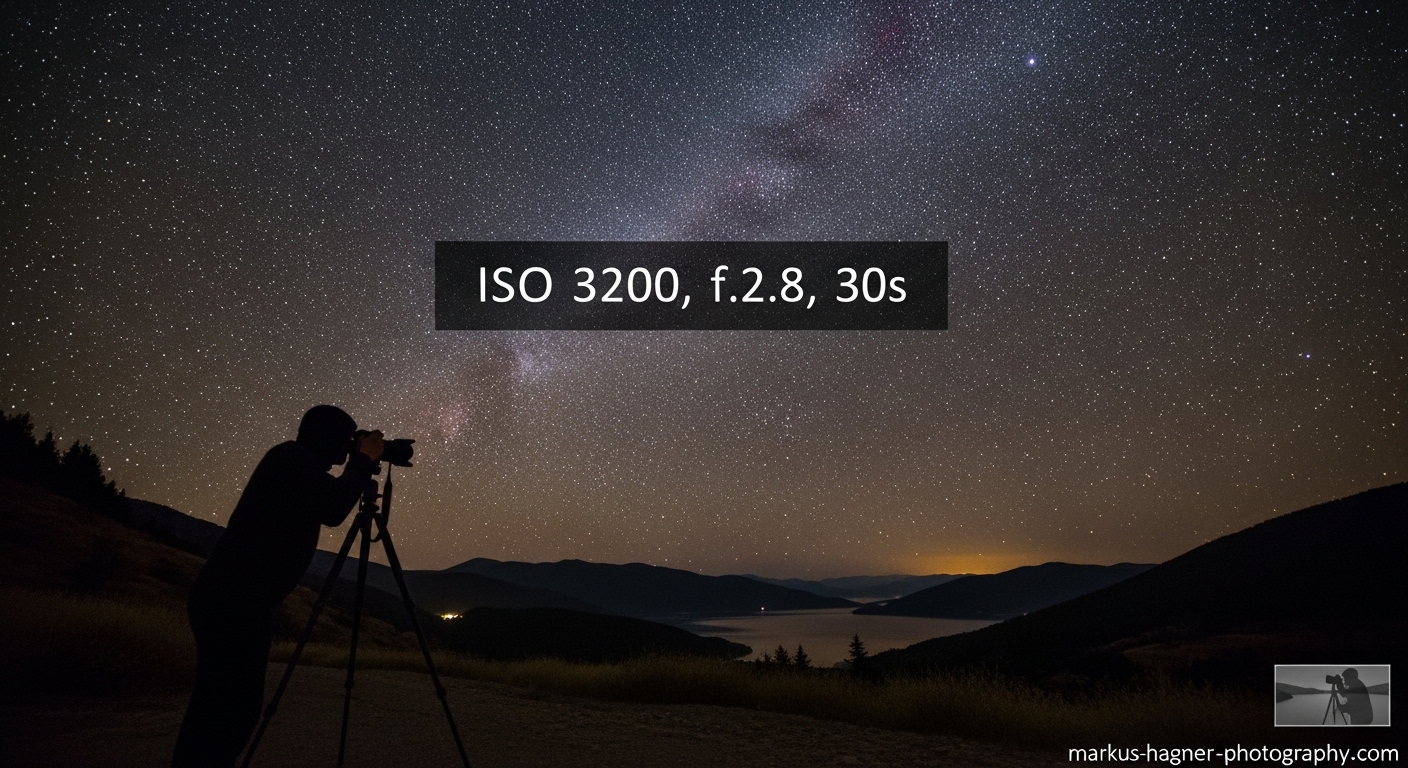
Astrophotography: Capturing the Milky Way
Photographing the Milky Way is one of the most rewarding types of night photography. Here’s how I do it:
Best conditions: Dark skies (no moon or minimal moon), clear weather, away from light pollution
Camera settings:
- Shutter speed: 15-30 seconds (use the 500 rule)
- Aperture: f/2.8 or wider
- ISO: 3200-6400
- Focus: Manual, set to infinity
Composition tips:
- Include an interesting foreground element
- Look for dark skies with minimal light pollution
- Use apps like PhotoPills to plan your shots
I discovered that the Milky Way is visible during different times of the year depending on your location. In the Northern Hemisphere, the best time is generally from March to October.
Star Trails: Painting with Stars
Star trails are created by taking very long exposures or multiple shorter exposures and stacking them. Here’s my approach:
Single exposure method:
- Shutter speed: 30 minutes to several hours
- Aperture: f/8-f/11
- ISO: 100-400
- Focus: Manual, set to infinity
Multiple exposure method:
- Take multiple 30-second exposures over 30-60 minutes
- Use an intervalometer to automate the process
- Stack the images in post-processing using software like StarStaX
I prefer the multiple exposure method because it produces less noise and gives me more flexibility in post-processing.
Also Read: 19 Best Sony E Mount Lenses
Cityscapes and Urban Night Photography
Cities come alive at night with lights, reflections, and energy. Here’s how I capture urban night scenes:
Camera settings:
- Shutter speed: 1-30 seconds (depending on the effect you want)
- Aperture: f/8-f/11 for sharpness throughout
- ISO: 100-800 (to keep noise low)
- Focus: Manual or autofocus (if there’s enough light)
Composition tips:
- Look for reflections in water or windows
- Include leading lines like roads or bridges
- Shoot during blue hour (just after sunset) for beautiful sky colors
I love shooting cityscapes during blue hour, when there’s still some color in the sky but city lights are starting to come on.
Light Painting: Creating with Light
Light painting is a creative technique where you use handheld light sources to “paint” light onto a scene during a long exposure. Here’s how I do it:
Camera settings:
- Shutter speed: Bulb mode (as long as needed)
- Aperture: f/8-f/11
- ISO: 100-400
- Focus: Manual, pre-focused on the scene
Light sources:
- Flashlights
- LED panels
- Glow sticks
- Sparklers
- Cell phone screens
Technique:
- Set up your camera on a tripod
- Open the shutter using a remote release
- “Paint” light onto your scene by moving your light source
- Close the shutter when you’re done
I’ve had a lot of fun with light painting, creating everything from illuminated landscapes to abstract light art.
Moon Photography: Capturing Earth’s Celestial Neighbor
The moon makes a beautiful subject for night photography. Here’s my approach:
Camera settings:
- Shutter speed: 1/125 to 1/500 second (depending on moon phase)
- Aperture: f/8-f/11
- ISO: 100-400
- Focus: Manual, set to infinity
Tips:
- Use a telephoto lens (200mm or longer) for detailed moon shots
- Shoot during partial moon phases for more surface detail
- Use the “loony 11 rule”: Set aperture to f/11 and shutter speed to 1/ISO
I discovered that moon photography is much like daytime photography because the moon is reflecting sunlight. You don’t need extremely high ISO or long exposures.
Post-Processing Night Photos
Post-processing is an essential part of night photography. RAW files give you the flexibility to bring out the best in your night images. Here’s my workflow:
Basic Adjustments
Exposure: Adjust exposure to bring out details without making the image look unnatural.
Contrast: Increase contrast slightly to make the image pop, but don’t overdo it.
White balance: Adjust to get natural-looking colors. Night scenes often have a color cast from artificial lights.
Noise reduction: Use noise reduction carefully. Too much can make details look soft.
Advanced Techniques
Star reduction: Some noise reduction tools can make stars look smaller. Use star reduction tools to bring them back.
Color grading: Adjust individual colors to enhance the mood of your image. I often boost blues and purples in night skies.
Local adjustments: Use brushes or gradients to adjust specific areas of the image. This is great for brightening foregrounds without overexposing the sky.
Sharpening: Apply sharpening carefully to bring out details without introducing noise.
Recommended Software
Adobe Lightroom: Great for basic adjustments and organizing your photos.
Adobe Photoshop: Essential for advanced techniques like stacking star trails.
Specialized software: Tools like StarStaX (for star trails), Sequator (for astrophotography), and Topaz DeNoise (for noise reduction).
I spend as much time post-processing as I do shooting, and it’s made a huge difference in the quality of my night photos.
Also Read: 8 Best Sony Camera For Wildlife Photography
Common Night Photography Mistakes and How to Avoid Them
I’ve made plenty of mistakes in my night photography journey. Here are the most common ones and how to avoid them:
1. Using Too High an ISO
Mistake: Cranking up the ISO to 6400 or higher for every shot, resulting in noisy images.
Solution: Start with a moderate ISO (1600-3200) and only increase if necessary. Use longer exposures and wider apertures to let in more light instead.
2. Forgetting to Turn Off Image Stabilization
Mistake: Leaving image stabilization on when using a tripod, causing blurry images.
Solution: Always turn off image stabilization when your camera is on a tripod. The stabilization system can actually introduce movement when it’s not needed.
3. Not Using a Tripod
Mistake: Trying to handhold night shots, resulting in blurry images.
Solution: Use a sturdy tripod for all night photography. If you don’t have one, brace your camera against a solid surface or use a beanbag.
4. Incorrect Focus
Mistake: Relying on autofocus in dark conditions, resulting in soft images.
Solution: Use manual focus with live view to ensure sharp focus. Take test shots and zoom in to check focus.
5. Shooting in JPEG Instead of RAW
Mistake: Shooting in JPEG format, limiting post-processing options.
Solution: Always shoot in RAW format. This gives you much more flexibility to adjust exposure, white balance, and reduce noise in post-processing.
6. Ignoring the Foreground
Mistake: Focusing only on the sky and neglecting the foreground, resulting in unbalanced compositions.
Solution: Include interesting foreground elements in your compositions. Use light painting or moonlight to illuminate foregrounds.
7. Not Checking the Histogram
Mistake: Relying on the camera’s LCD image to judge exposure, which is often inaccurate in dark conditions.
Solution: Use the histogram to judge exposure. A good night shot often has most of the data on the left side of the histogram, but shouldn’t be completely bunched up.
Advanced Night Photography Tips
Once you’ve mastered the basics, you can move on to more advanced techniques that will take your night photography to the next level.
Focus Stacking for Maximum Sharpness
Focus stacking involves taking multiple shots at different focus distances and combining them in post-processing. This is especially useful for night scenes with both close foregrounds and distant stars.
How to do it:
- Take one shot focused on the foreground
- Take another shot focused on the stars
- Combine the images in Photoshop using layers and masks
Exposure Blending for Dynamic Range
Night scenes often have a wide dynamic range, with bright lights and deep shadows. Exposure blending helps you capture detail in both areas.
Technique:
- Take multiple exposures at different brightness levels
- Blend them in post-processing using luminosity masks or HDR software
Time-Lapse Photography
Time-lapse photography involves taking a sequence of photos over time and combining them into a video. This is great for showing the movement of stars or changing light conditions.
Setup:
- Use an intervalometer to automate shooting
- Take a photo every 5-30 seconds, depending on the effect you want
- Combine the images in video editing software
Panoramic Night Photography
Stitching multiple images together allows you to create wide-angle views of the night sky that would be impossible with a single shot.
Technique:
- Shoot in portrait orientation for more vertical coverage
- Overlap each frame by about 30%
- Use a panoramic head for best results
- Stitch the images in software like Lightroom or PTGui
Essential Night Photography Apps and Tools
Modern technology has made night photography much easier and more accessible. Here are the apps and tools I use regularly:
Planning Apps
PhotoPills: This is my go-to app for planning night photography shoots. It helps me predict Milky Way positions, moon phases, and golden hour times.
Stellarium: A planetarium app that shows you exactly what stars and constellations will be visible from your location.
Dark Sky Finder: Helps you find dark sky locations away from light pollution.
Weather Underground: Provides detailed weather forecasts and cloud cover predictions.
In-Field Tools
Headlamp: Essential for seeing your gear in the dark. Look for one with a red light mode to preserve night vision.
Remote shutter release: Eliminates camera shake and allows for bulb exposures.
Intervalometer: Automates time-lapse and star trail photography.
Lens warmer: Prevents lens fogging in cold, humid conditions.
Post-Processing Tools
Adobe Lightroom: My primary tool for organizing and editing night photos.
Adobe Photoshop: Essential for advanced techniques like focus stacking and exposure blending.
StarStaX: Free software for creating star trails.
Sequator: Free software for stacking astrophotography images to reduce noise.
Topaz DeNoise: Powerful noise reduction specifically designed for high-ISO images.
Building Your Night Photography Skills
Night photography is a skill that develops with practice. Here’s how I recommend building your skills:
Start Simple
Don’t try to capture the Milky Way on your first night out. Start with simpler subjects like cityscapes or moonlit landscapes. As you get more comfortable, move on to more challenging subjects.
Practice Regularly
The more you shoot, the better you’ll get. Try to get out at least once a month, even if it’s just in your backyard. Regular practice helps you understand your gear and develop your eye for compositions.
Learn from Others
Study the work of accomplished night photographers. Join photography groups, attend workshops, and participate in online forums. I’ve learned so much from other photographers over the years.
Keep a Photography Journal
Document your shoots, including settings, conditions, and what worked (or didn’t work). This helps you learn from your experiences and track your progress over time.
Experiment and Have Fun
Night photography should be enjoyable. Don’t be afraid to experiment with different techniques and settings. Some of my best shots came from happy accidents and creative experiments.
FAQ: Night Photography for Beginners
What’s the best camera for night photography?
You don’t need an expensive camera for night photography. Any camera with manual controls will work. However, cameras with larger sensors (full-frame or APS-C) generally perform better in low light than cameras with smaller sensors.
Do I need an expensive lens for night photography?
While fast lenses (f/2.8 or wider) are ideal for astrophotography, you can get great results with kit lenses. I started with an 18-55mm kit lens and captured beautiful night photos. The most important thing is understanding how to use the lens you have.
How do I focus my camera at night?
Manual focus is essential for night photography. I use the live view method: zoom in on a bright star or distant light and focus manually. Some lenses also have an infinity mark that can serve as a starting point.
What’s the best time for night photography?
It depends on what you want to photograph. For Milky Way shots, you need dark skies with no moon. For cityscapes, blue hour (just after sunset) often produces beautiful results. Moonlit landscapes can be stunning during a full moon.
How do I reduce noise in my night photos?
Start with the lowest ISO possible for the conditions, use a tripod to avoid camera shake, and shoot in RAW format. In post-processing, use noise reduction tools carefully to avoid losing detail.
Can I do night photography without a tripod?
While a tripod is highly recommended, you can do some night photography without one. Try bracing your camera against a solid surface, using a beanbag, or increasing your ISO to allow for faster shutter speeds. However, for the best results, a tripod is essential.
How long does it take to get good at night photography?
Night photography has a steep learning curve, but most people start getting satisfying results after a few practice sessions. It took me about six months of regular practice to feel confident with night photography techniques.
What’s the biggest mistake beginners make in night photography?
The most common mistake is using too high an ISO, resulting in noisy images. Start with a moderate ISO and use longer exposures and wider apertures to let in more light instead.
Conclusion
Night photography opened up a whole new world of creative possibilities for me. There’s something magical about standing under a star-filled sky, capturing images that most people never get to see. It’s challenging, frustrating at times, but incredibly rewarding.
Remember, every expert was once a beginner. Don’t get discouraged if your first attempts aren’t perfect. Night photography takes practice, patience, and persistence. But with the tips and techniques I’ve shared in this guide, you’re well on your way to capturing stunning night images.
The most important thing is to get out there and start shooting. Experiment with different settings, try various subjects, and most importantly, have fun with it. Night photography is as much about the experience as it is about the final images.
I’d love to see your night photography results! Share your images and experiences in the comments below. And don’t forget to bookmark this page for reference as you continue your night photography journey. Clear skies and happy shooting!