iPhone Cinematic Mode promises that professional, shallow depth-of-field look without carrying a cinema camera. But if you have tried it, you probably noticed something: the results often look artificial. The background blur can appear fake, focus jumps unpredictably, and edges sometimes have strange halos around your subject.
You are not alone in this frustration. After testing Cinematic Mode extensively across multiple iPhone generations, I have discovered that the feature works brilliantly when you understand its limitations and use specific techniques. The difference between amateurish and professional-looking footage comes down to how you shoot, not just the settings you choose.
In this guide, I will show you exactly how to use iPhone Cinematic Mode properly and make it look natural. You will learn the optimal settings, shooting techniques, focus management strategies, and common mistakes to avoid. By the end, you will be capturing footage that genuinely looks like it came from a dedicated video camera.
What is iPhone Cinematic Mode and How Does It Work?
iPhone Cinematic Mode is a video recording feature introduced with the iPhone 13 series that creates a shallow depth-of-field effect. It keeps your subject in sharp focus while blurring the foreground and background, mimicking the look of professional cinema cameras with large sensors and wide apertures.
The technology behind this effect is impressive. Unlike traditional cameras that achieve shallow depth of field through optics (wide aperture lenses on large sensors), iPhone uses computational photography. The system captures depth information about your scene and applies artificial blur to areas outside the focus plane.
LiDAR and Depth Mapping Technology
Starting with iPhone 12 Pro models, Apple included a LiDAR (Light Detection and Ranging) scanner. This sensor measures distance by bouncing infrared light off objects in your scene. When you record in Cinematic Mode, the iPhone uses this LiDAR data combined with information from the main camera to create an accurate depth map.
This depth map is crucial for natural-looking results. Early versions of computational blur looked artificial because they could not accurately separate subjects from backgrounds. LiDAR dramatically improves edge detection, especially in challenging lighting conditions.
Multi-Plane Depth Detection
The system does not just detect foreground and background. It identifies multiple depth planes in your scene and applies blur progressively. Objects closer to your subject receive less blur than distant elements, creating a more realistic depth-of-field falloff that mimics optical lens behavior.
Focus Tracking and Transitions
Cinematic Mode does not just blur backgrounds. It actively tracks subjects and can smoothly transition focus between people or objects. When someone new enters your frame or looks at the camera, the iPhone can automatically shift focus to them. This creates those professional-looking rack focus effects that filmmakers use to direct viewer attention.
iPhone Model Compatibility
Cinematic Mode is available on iPhone 13 and newer models. However, the quality and capabilities vary significantly:
iPhone 13 and 13 mini: Basic Cinematic Mode at 1080p, 30fps. No LiDAR assistance.
iPhone 13 Pro and Pro Max: 4K Cinematic Mode options, LiDAR-assisted depth mapping for improved accuracy.
iPhone 14 series: Enhanced Cinematic Mode with improved low-light performance and 4K at 30fps standard.
iPhone 15 series: 4K at 60fps Cinematic Mode, significantly improved focus tracking and edge detection.
iPhone 16 and 17 series: Most advanced Cinematic Mode with spatial video recording capability and refined depth mapping algorithms.
How to Enable and Use iPhone Cinematic Mode Properly In 2026?
Accessing Cinematic Mode is straightforward, but knowing the correct workflow ensures you capture the best possible footage from the start.
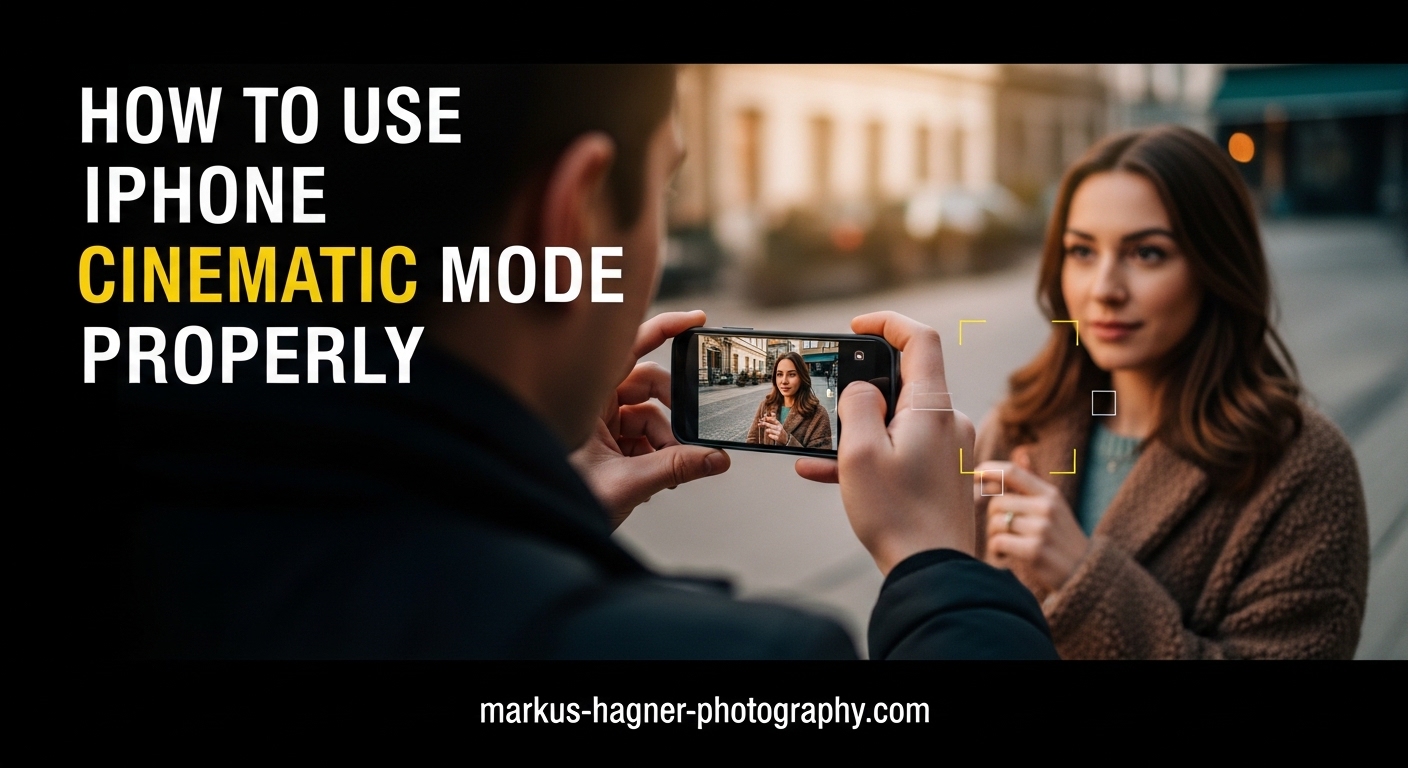
Step 1: Open the Camera app on your iPhone and swipe the mode selector until you see CINEMATIC. It sits between Video and Slo-mo modes.
Step 2: Before recording, tap the arrow at the top of the screen (or swipe up from the bottom on newer models) to reveal additional controls.
Step 3: Set your resolution. Tap the format button in the top right corner to toggle between HD (1080p) and 4K options. For most purposes, 4K at 24fps delivers the most cinematic look.
Step 4: Frame your subject. The yellow focus box will appear automatically on faces or subjects in the frame. You can tap anywhere on screen to manually set your focus point.
Step 5: Press the red record button to start capturing. The iPhone will track focus automatically, or you can tap different subjects during recording to create manual focus pulls.
Step 6: Press the record button again to stop. Your video saves to the Photos app with all depth information preserved for later editing.
Quick Settings Checklist
Before every Cinematic Mode shoot, verify these settings:
- Resolution: 4K for best quality, 1080p if storage is limited
- Frame rate: 24fps for film look, 30fps for standard video, 60fps for smoother motion
- HDR Video: Generally leave enabled, but disable for high-contrast scenes
- Stabilization: Enhanced works well for handheld shooting
- Lock Camera: Enable to prevent lens switching during recording
Essential Camera Settings for Natural Looking Cinematic Mode
The right settings make an enormous difference in how natural your Cinematic Mode footage appears. Here are the specific configurations I recommend after extensive testing.
Frame Rate: Why 24fps Matters
Shooting at 24 frames per second is the single most important setting for achieving a film-like aesthetic. This frame rate has been the cinema standard for decades. Our eyes associate 24fps motion with movies, while 30fps and 60fps look more like television or smartphone video.
When you shoot Cinematic Mode at 24fps, the shallow depth-of-field effect feels more natural because the overall motion characteristics match what we expect from cinema. At higher frame rates, the blur effect can appear more obviously computational because the smooth motion contrasts with the artificial depth.
Use 30fps when you need cleaner motion for fast-paced content like sports or action sequences. Reserve 60fps for situations where you plan to slow footage down in post, though Cinematic Mode is rarely the best choice for slow-motion capture.
Resolution: 4K vs 1080p
Always shoot in 4K if your iPhone supports it and you have adequate storage. The additional detail helps mask edge artifacts and makes the depth effect more convincing. At 1080p, you may notice more obvious edges around subjects where the blur meets the focused area.
The iPhone 13 and 14 Pro models support 4K Cinematic Mode. The standard iPhone 13 and 13 mini are limited to 1080p, which still produces good results but with less refinement around subject edges.
HDR Video Settings
HDR Video captures extended dynamic range, preserving more detail in shadows and highlights. For most Cinematic Mode shooting, keep HDR enabled. The improved tonal range helps the depth effect look more natural because the overall image quality is higher.
However, in high-contrast scenes with strong backlighting, HDR can sometimes create a flat look that makes the blur effect more noticeable. If you are shooting directly into bright light sources, try disabling HDR to see if the results look more natural.
Enhanced Stabilization and Lock Camera
Enhanced stabilization smooths handheld camera movement, which is helpful for most Cinematic Mode shooting. The smoother your footage, the less distracting camera motion will be, allowing viewers to focus on the depth effect and subject.
Lock Camera prevents the iPhone from switching between lenses during recording. This is essential for Cinematic Mode because lens changes can disrupt the depth mapping. Enable Lock Camera in your settings before shooting.
AE/AF Lock for Consistent Results
Tap and hold on your subject to lock both exposure and focus. This prevents the iPhone from changing exposure mid-shot, which can make the depth effect appear inconsistent. Locked exposure also helps maintain a natural look as subjects move through different lighting conditions.
Shooting Techniques for Natural Cinematic Mode Results
This section contains the most important information in this entire guide. The techniques below are what separate footage that looks professionally captured from footage that obviously came from a smartphone.
The Critical Distance Rule
Subject distance is the single biggest factor in achieving natural-looking Cinematic Mode footage. The iPhone needs adequate distance from your subject to accurately calculate depth and create convincing blur.
Optimal distance: 6 to 10 feet (2 to 3 meters) from your subject produces the most natural results. At this distance, the depth sensors can accurately map the scene, and the blur falloff looks gradual rather than abrupt.
Too close: When subjects are closer than 4 feet, edge detection becomes less accurate. You will see halos, fringing, and obvious artifacts where the subject meets the background.
Too far: Beyond 15 feet, the depth effect becomes minimal and may look unnatural because the blur is too subtle to be believable.
Background Separation Requirements
The space between your subject and background matters as much as the distance from camera to subject. For natural-looking blur, ensure at least 6 feet of separation between your subject and whatever is behind them.
When the background is too close, the iPhone cannot create a convincing blur gradient. The effect looks like a simple Gaussian blur filter applied in post rather than optical depth of field. More distance allows for smoother, more natural bokeh.
Lighting Conditions That Work Best
Cinematic Mode relies on the camera system capturing clear visual information to map depth. Good lighting is essential. The feature works best in these conditions:
Bright, even daylight: Outdoor shooting on overcast days or in open shade produces excellent results. The soft, diffused light helps the depth sensors work accurately.
Golden hour: The warm, directional light during early morning or late evening creates beautiful rim lighting that separates subjects from backgrounds naturally.
Well-lit interiors: Indoor spaces with large windows or good artificial lighting work well. Ensure your subject is facing the light source.
Subject Movement Guidelines
Cinematic Mode handles static or slowly moving subjects best. Rapid movement challenges the depth tracking system and can produce unnatural results.
Ask your subjects to move deliberately rather than quickly. Walking toward or away from the camera works better than fast lateral movement. When subjects move slowly, the iPhone can maintain accurate focus tracking and depth mapping.
Camera Movement and Stabilization
Smooth camera movement complements the Cinematic Mode effect. Jerky handheld footage draws attention to the artificial nature of the blur. Use these stabilization options:
Built-in Enhanced Stabilization: Good for most casual shooting situations.
Gimbal: A smartphone gimbal provides professional-level stabilization for tracking shots and complex camera movements.
Static shots: Placing your iPhone on a tripod or stable surface produces the most controlled results, letting the focus transitions be the only movement in the frame.
Focus Management: Manual Control and Smooth Transitions
The way you handle focus determines whether your footage looks like professional cinema or an obvious smartphone effect. Mastering focus control is essential for natural results.
Tap to Focus Basics
During recording, tap anywhere on screen to shift focus to that point. The iPhone creates a smooth transition rather than an abrupt switch. This is your primary tool for creating intentional focus pulls.
Practice tapping deliberately between subjects. Rushing your taps can create jerky transitions that look unnatural. Wait for each transition to complete before initiating another.
Manual Focus Pulls During Recording
For more controlled focus pulls, plan your shots in advance. If you know you want to shift focus from a foreground subject to a background subject, compose your frame to include both, then tap the background at the planned moment.
The best focus pulls serve a storytelling purpose. Shift focus to reveal information, emphasize a reaction, or guide viewer attention. Random focus changes distract rather than enhance.
Post-Capture Focus Editing
One of Cinematic Mode’s most powerful features is the ability to edit focus after recording. Open your video in the Photos app and tap Edit, then tap the Cinematic button at the top.
In this mode, you can:
- Tap anywhere in the frame to change the focus point at any moment in the timeline
- Adjust the depth (blur intensity) using the f-stop slider
- Remove automatic focus transitions entirely
- Create custom focus pulls by adding keyframes
This post-capture control means you do not need to nail every focus decision while shooting. Capture the footage with good depth information, then refine focus in post.
Avoiding Focus Hunting and Jumping
Focus hunting occurs when the iPhone cannot decide which subject to track, resulting in rapid focus switching that looks jarring. This happens most often in these situations:
- Multiple people at similar distances looking at the camera
- Subjects moving unpredictably
- Low-contrast scenes where the camera struggles to identify subjects
To prevent focus hunting, lock focus on your primary subject using AE/AF Lock before recording. Alternatively, edit the footage in post to remove unwanted focus changes.
Focus Transition Speed
The speed of focus transitions affects how natural they appear. Slower transitions look more deliberate and cinematic. The iPhone’s default transition speed works well, but in post-capture editing, you can trim clips to adjust the perceived transition timing.
Lighting Techniques That Make Cinematic Mode Shine
Lighting affects Cinematic Mode more than most users realize. Good lighting does not just improve image quality. It fundamentally changes how well the depth mapping works.
Why Good Lighting Is Essential
The depth detection system needs clear visual information to map your scene accurately. In poor lighting, the camera struggles to distinguish edges, leading to more artifacts and unnatural blur transitions.
Think of it this way: the iPhone is making millions of calculations about depth based on what it sees. When the image is dark or noisy, those calculations become less accurate.
Backlighting and Rim Light Techniques
Backlighting creates a natural separation between your subject and background that complements Cinematic Mode beautifully. When light comes from behind your subject, it creates a bright edge or rim that the depth sensors can easily detect.
Position your subject with their back to a window or light source. The iPhone will capture the bright edge around your subject while the background falls into soft blur. This technique produces some of the most natural-looking Cinematic Mode footage I have captured.
Golden Hour Advantages
Shooting during golden hour (the hour after sunrise or before sunset) provides ideal conditions for Cinematic Mode. The directional, warm light creates natural depth cues that complement the computational blur.
During golden hour, aim to position your subject with the sun behind or to the side. The warm tones and soft shadows create visual depth that makes the Cinematic Mode effect feel organic rather than artificial.
Avoiding Harsh Shadows
Direct overhead sunlight creates harsh shadows that can confuse depth detection. Shadows falling across faces or backgrounds create false edges that the iPhone may interpret incorrectly.
If you must shoot in bright midday sun, look for open shade under trees or building overhangs. The diffused light produces more even illumination and better depth mapping.
Indoor Lighting Tips
For indoor Cinematic Mode shooting, position your subject facing a window with as much distance from the wall behind them as possible. Natural window light produces excellent results.
If using artificial lights, avoid single overhead fixtures that create harsh shadows. Multiple light sources from different angles create more even illumination and better depth detection.
Low-Light Limitations and Workarounds
Cinematic Mode struggles in low light. The depth sensors need adequate illumination to function properly. When light levels drop, you will notice increased noise, edge artifacts, and inconsistent focus tracking.
If you must shoot in low light, try these workarounds:
- Use additional lighting (ring lights, LED panels, or even another phone’s flashlight)
- Get closer to your subject (within 5 feet) so the camera captures more light
- Keep subjects as still as possible to reduce focus tracking challenges
- Consider switching to regular video mode if Cinematic Mode results are poor
When NOT to Use iPhone Cinematic Mode?
Knowing when to skip Cinematic Mode is just as important as knowing how to use it properly. The feature is not suitable for every situation, and forcing it often produces worse results than standard video.
Low-Light Situations
As discussed above, Cinematic Mode performs poorly in dim conditions. If you are shooting indoors at night, at concerts, or in other low-light environments, switch to standard video mode. The footage will be cleaner and more natural-looking without the computational blur struggling to work with limited light.
Fast-Moving Subjects
Sports, pets running, children playing rapidly, and similar high-energy subjects challenge the depth tracking system. The iPhone cannot accurately map depth when subjects move quickly through the frame. You will see focus jumping, edge artifacts, and unnatural blur.
Complex Backgrounds with Fine Detail
Backgrounds with intricate patterns like foliage, chain-link fences, or detailed architecture can confuse depth detection. The system struggles to accurately blur these complex elements, producing strange artifacts and obvious computational errors.
Wide Group Shots
Cinematic Mode works best with a single clear subject. Group shots with multiple people at varying distances often result in unpredictable focus behavior. Some faces will be sharp while others blur, and the focus may jump between people unpredictably.
Scenic Landscapes
Cinematic Mode is designed for shallow depth of field, which is the opposite of what you want for landscapes. Landscapes benefit from deep focus where everything is sharp. Using Cinematic Mode for scenic shots blurs parts of the image that should be clear, creating an unnatural look.
When Regular Video Looks Better
Sometimes standard video mode simply produces better results. If you find yourself fighting with Cinematic Mode, getting poor results, and spending excessive time in post trying to fix issues, switch to regular video. The best footage is footage that works, regardless of which mode captured it.
Common Mistakes That Make Cinematic Mode Look Fake
This section addresses the core problem most users face: footage that looks obviously artificial. Understanding these mistakes and how to avoid them will dramatically improve your results.
Mistake 1: Subject Too Close to the Camera
When your subject is closer than 4 feet from the iPhone, the depth sensors cannot accurately map the scene. This results in obvious edge artifacts, halos around the subject, and blur that looks like a filter rather than optical depth of field.
Solution: Always maintain 6-10 feet between your camera and subject. If you need a tighter frame, crop in post rather than moving closer.
Mistake 2: Poor Background Separation
When your subject stands directly against a wall or background object, there is no space for natural blur to develop. The effect looks flat and obviously computational.
Solution: Ensure at least 6 feet between your subject and background. More distance equals more natural-looking blur.
Mistake 3: Shooting in Insufficient Light
Low light causes noise, focus issues, and inaccurate depth mapping. The blur effect becomes inconsistent and edge detection fails, producing unnatural results.
Solution: Shoot in well-lit conditions or add artificial lighting. If light is truly insufficient, use standard video mode instead.
Mistake 4: Too Much Subject Movement
Rapid movement confuses focus tracking. The iPhone cannot maintain accurate depth mapping when subjects dart around the frame, resulting in focus jumping and artifacts.
Solution: Direct your subjects to move slowly and deliberately. Save fast action for standard video mode.
Mistake 5: Ignoring Edge Artifacts
Halos and fringing around subjects are signs that depth detection failed. Many shooters ignore these artifacts during capture, assuming they can fix them in post.
Solution: Check your footage while shooting. If you see edge artifacts, adjust your distance, lighting, or background separation immediately.
Mistake 6: Jerky Focus Transitions
Tapping rapidly between subjects creates abrupt, mechanical-looking focus changes that break the cinematic illusion.
Solution: Plan your focus pulls in advance. Tap deliberately and allow each transition to complete before initiating another. Better yet, edit focus in post for maximum control.
Mistake 7: Overusing the Effect
Not every shot needs shallow depth of field. Using Cinematic Mode for every video regardless of content makes your footage feel gimmicky.
Solution: Use Cinematic Mode when it serves your content. Interviews, talking head videos, and isolated subjects benefit from the effect. Wide scenes, action, and landscapes often look better in standard mode.
Editing Cinematic Mode Footage for Professional Results
Post-processing can elevate good footage to great. Cinematic Mode offers unique editing capabilities that traditional video does not.
Focus Editing in the Photos App
Open any Cinematic Mode video in the Photos app and tap Edit. Then tap the Cinematic button at the top of the screen. You will see the timeline with focus points marked.
Scrub through your video and tap anywhere in the frame to change the focus point at that moment. You can also drag the depth slider to adjust blur intensity. Decreasing the f-stop (lower number) increases blur, while higher f-stops reduce the effect.
Removing Unwanted Focus Changes
Automatic focus transitions are not always desirable. In edit mode, you can tap on focus points in the timeline to delete them. This removes the automatic focus change, keeping focus locked on your chosen subject.
Color Grading Basics
Cinematic Mode footage benefits from color grading just like any video. Adjust exposure, contrast, and color temperature to enhance the film-like quality.
For a more cinematic look, try these adjustments:
- Slightly reduce saturation for a more muted, film-like palette
- Add a subtle S-curve to contrast for richer shadows and highlights
- Shift color temperature slightly warm for a more inviting look
- Lift shadows slightly to reduce harsh contrast
LUT Recommendations
Look-Up Tables (LUTs) can quickly apply cinematic color grades to your footage. Many free and paid LUT packs are available that work well with iPhone footage.
Look for LUTs labeled “film emulation” or “cinematic.” Apply them in video editing apps like LumaFusion, CapCut, or Adobe Premiere Rush. Start with subtle intensity (around 50-70%) and adjust to taste.
Export Settings for Quality
When exporting your final video, preserve as much quality as possible. Export at the same resolution you shot (4K if applicable) and use a high bitrate. For sharing on social platforms, most services will compress your video, so starting with maximum quality ensures the best final result.
Frequently Asked Questions
How do I properly use Cinematic Mode on my iPhone?
Open the Camera app and swipe to CINEMATIC mode. Set resolution to 4K at 24fps for the most film-like look. Position your subject 6-10 feet from the camera with at least 6 feet of background separation. Tap to set your focus point, then record. For best results, shoot in good lighting and keep subjects relatively still.
What are the best settings for iPhone Cinematic Mode?
Set resolution to 4K and frame rate to 24fps for a cinematic film look. Enable Enhanced Stabilization for handheld shooting and turn on Lock Camera to prevent lens switching. Use AE/AF Lock for consistent exposure. Leave HDR Video enabled unless shooting directly into bright light sources.
Why does my Cinematic Mode footage look fake?
Fake-looking footage usually results from shooting too close to your subject (under 4 feet), poor background separation, insufficient lighting, or fast subject movement. The depth sensors need adequate distance and light to map the scene accurately. Ensure 6-10 feet between camera and subject, good lighting, and minimal rapid movement.
Should I use Cinematic Mode for all my iPhone videos?
No. Cinematic Mode works best for interviews, talking head videos, and isolated subjects where shallow depth of field enhances the content. Avoid using it for landscapes, fast action, group shots, low-light situations, or scenes with complex backgrounds. Standard video mode often produces better results for these scenarios.
Does Cinematic Mode work in low light?
Cinematic Mode performs poorly in low light. The depth sensors need adequate illumination to function properly, and dim conditions result in noise, edge artifacts, and inconsistent focus tracking. Add artificial lighting or switch to standard video mode when shooting in dark environments.
Can I change the focus point after recording in Cinematic Mode?
Yes. Open your video in the Photos app, tap Edit, then tap the Cinematic button at the top. You can tap anywhere in the frame at any point in the timeline to change the focus, adjust blur intensity with the f-stop slider, or delete unwanted automatic focus transitions.
Which iPhone models support Cinematic Mode?
Cinematic Mode is available on iPhone 13 and all newer models. iPhone 13 and 13 mini support 1080p at 30fps. iPhone 13 Pro and newer support 4K recording. iPhone 15 Pro and later offer 4K at 60fps. Models with LiDAR (Pro series) have improved depth detection accuracy.
How do I fix focus jumping in Cinematic Mode?
Focus jumping occurs when the camera cannot decide which subject to track. Lock focus using AE/AF Lock before recording to prevent automatic changes. Alternatively, edit the footage in post by opening the video in Photos, tapping Edit and Cinematic, then removing unwanted focus points from the timeline.
What is the difference between Cinematic Mode and Portrait Mode video?
Cinematic Mode is designed specifically for video recording with dynamic focus transitions and subject tracking during capture. Portrait Mode for video (available on some models) applies a static depth effect without the sophisticated focus management and transition capabilities. Cinematic Mode offers more professional-looking results with post-capture editing flexibility.
How do I get smooth focus transitions in Cinematic Mode?
Plan your focus pulls in advance and tap deliberately between subjects rather than rapidly. Allow each transition to complete before initiating another. For maximum control, record with locked focus and edit transitions in post using the Photos app, where you can add precise keyframes for smooth, professional focus pulls.
Conclusion
iPhone Cinematic Mode can produce genuinely professional-looking footage when you understand how to work with its strengths and limitations. The difference between amateurish results and natural, cinematic video comes down to technique, not just settings.
Remember these core principles: maintain 6-10 feet between your camera and subject, ensure adequate background separation, shoot in good lighting, and keep movement controlled. These fundamentals matter more than any specific setting or feature.
The most common mistake I see is treating Cinematic Mode like a magic button that automatically creates professional video. It is a tool that requires understanding and practice. When you apply the techniques in this guide, you will capture footage that rivals what much more expensive cameras produce.
Start by practicing the distance and lighting guidelines. Once those become second nature, experiment with focus transitions and post-capture editing. The more you shoot with intention, the more natural your results will become.
Finally, know when to use Cinematic Mode and when to skip it. The feature excels for interviews, talking head content, and isolated subjects. It struggles with fast action, low light, and complex scenes. Using the right tool for each situation is what separates professional content from amateur attempts.
With practice and the techniques from this guide, your iPhone Cinematic Mode footage will look natural, professional, and genuinely cinematic. Now go shoot something great.