If you’ve ever spent 20 minutes looking for a specific photo from a shoot three years ago, or watched Lightroom crawl to a freeze while browsing through 50,000 images, you know the pain of a poorly organized catalog. I’ve been there – staring at the spinning beach ball while my clients waited for proofs. After managing libraries with over 150,000 images across a decade of photography work, I learned that the right Lightroom catalog structure isn’t just about staying organized. It’s about building a system that grows with you without becoming a bottleneck.
In this guide, I’ll show you how to set up a Lightroom catalog structure that scales from your first thousand images to well over 100,000 without performance degradation. We’ll cover the fundamental differences between folders and collections, when to use single versus multiple catalogs, and the exact workflow I use to keep catalogs fast and searchable year after year. Whether you’re starting fresh or drowning in a messy existing catalog, these strategies will transform how you work with Lightroom Classic.
Understanding Lightroom Catalogs: What They Are and Why Structure Matters
A Lightroom catalog is a database file that stores every piece of information about your photos – their location on your drive, every edit you’ve made, keywords, ratings, collections, and metadata. The catalog itself is a single file with the extension .lrcat, but it’s typically accompanied by a Previews.lrdata folder that contains preview renders of your images.
The most important thing to understand is that your catalog doesn’t contain your actual photos. It only contains references to where those photos live on your hard drive. This is why moving files outside of Lightroom causes the dreaded “missing file” warning – the database still points to the old location. Every edit you make in Lightroom’s Develop module is stored as a series of instructions in this database rather than changing the original file, which is what makes Lightroom’s editing non-destructive.
Why does structure matter for performance? Every time you browse the Library module, search for a photo, or switch between images, Lightroom queries this database. A well-structured catalog with efficient organization keeps these queries fast. As your library grows, poor structure compounds – fragmented folders, inconsistent naming, and bloated collections make each query more expensive. I’ve seen catalogs with 30,000 images perform better than ones with 10,000 simply because of better organization habits.
The Previews.lrdata folder deserves special attention. It can grow larger than your actual photo collection because Lightroom generates multiple preview sizes for each image. Standard previews are what you see in the Library module, while Smart Previews are smaller, portable versions that let you edit even when your original files aren’t connected. Understanding what these preview files do – and don’t do – is critical for managing catalog size and performance as you scale.
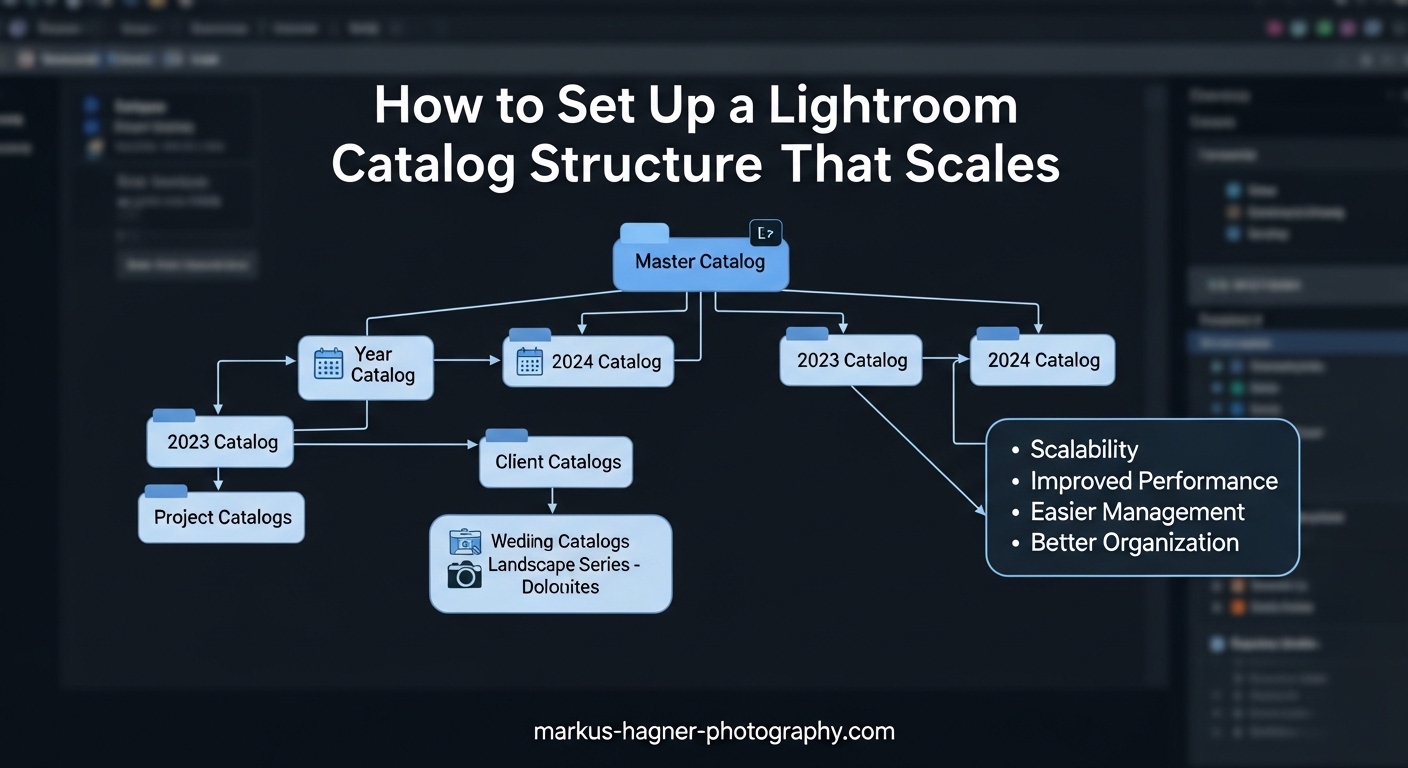
How to Set Up a Lightroom Catalog Structure That Scales
Step 1: Choose the Right Storage Location
Your catalog’s physical location on your drive matters more than most photographers realize. I recommend storing your catalog on your fastest drive – typically an internal SSD if you have one. External drives work, but you’ll notice slower performance, especially when generating previews or switching between images.
Should your catalog live on the same drive as your photos? It depends on your workflow. If you work primarily from one location, keeping catalog and photos on the same fast drive maximizes speed. But if you need portability or work across multiple computers, putting both catalog and photos on an external drive makes more sense. The key is consistency – don’t move your catalog around after creating it.
For external drives, I’ve had the best experience with SSDs rather than spinning hard drives. The performance difference is substantial when browsing large collections or generating previews. If budget is a concern and you must use a spinning drive, at least ensure your catalog itself lives on an internal SSD.
Step 2: Create Your Master Catalog
Open Lightroom Classic and go to File > New Catalog. Choose the location you decided on in Step 1. I recommend creating a dedicated “Lightroom” folder at the root of your drive, then creating your catalog inside that folder. This keeps things tidy if you ever need multiple catalogs later.
Name your catalog something clear and future-proof. “Master_Catalog_2026” works better than “My Photos” – you’ll know exactly what it is years from now. Lightroom will create both the .lrcat file and the Previews.lrdata folder in this location.
Immediately after creating your catalog, configure your backup settings. Go to Lightroom Classic > Catalog Settings (Mac) or Edit > Catalog Settings (Windows). Under the General tab, set your catalog to back up daily, weekly, or monthly depending on how frequently you work. I choose “Once a day, when Lightroom exits” – it’s saved me more than once.
Step 3: Design Your Folder Structure
Your folder structure should be simple, consistent, and mostly automated. The best structure I’ve found – and one used by most professional photographers – is a year-based hierarchy. Create a top-level “Photos” folder (or similar), then create folders for each year. Within each year, use a consistent date format like YYYY-MM-DD followed by a descriptive name.
Your structure might look like this:
/Photos/2026/2026-03-15-Smith-Wedding
/Photos/2026/2026-02-28-Johnson-Portraits
/Photos/2026/2026-01-10-Corporate-Event
Why the YYYY-MM-DD format? It keeps folders chronologically sorted regardless of what comes after the date. This matters as years accumulate – your 2024 folders will naturally group together.
The key rule is let Lightroom create these folders during import. Don’t manually create folders in Finder or Explorer – use Lightroom’s import dialog to set up the folder structure. This ensures Lightroom tracks the correct locations from the start.
Step 4: Configure Import Settings
The import preset is where most catalog problems begin or are prevented. Go to File > Import Photos and Video, then expand the “File Handling” section. Choose “Copy” (not “Move” or “Add”) – this copies files from your card to your drive while adding them to the catalog in one step.
Set your “Build Previews” to “Standard” for most work. “1:1 previews” sound appealing but take forever to build and create enormous preview files. You can always generate 1:1 previews later for specific images that need them.
Under “Apply During Import,” set up your file naming template. I use “Custom Name – Sequence” with a format like “SmithWedding_001.” Avoid generic names like “IMG_4523” – they’re meaningless six months later. Consistent, descriptive file names save you countless hours when searching through archives.
Create an import preset with these settings by clicking the bottom dropdown in the import window. This one step – having a consistent import preset – prevents the vast majority of catalog organization problems before they start.
Step 5: Set Up Initial Collection Structure
Collections are where Lightroom’s organization power really shines. Unlike folders, which mirror your drive structure, collections are virtual groupings that don’t care where files actually live. A photo can be in dozens of collections while existing in only one folder.
Create Collection Sets for major categories: “By Client,” “By Type,” “Favorites,” “Portfolio,” etc. Within these sets, create collections as needed. The key is building a hierarchy that matches how you actually think about and search for your work.
I recommend starting with these foundational collections:
– “To Edit” – Photos flagged for editing priority
– “Portfolio” – Your best work across all categories
– “Client Favorites” – High-rated images for client delivery
– “Technique Examples” – Images demonstrating specific techniques you reference
Don’t overbuild this initially – collections are easy to add as you discover needs. Start simple and let the structure evolve organically rather than trying to predict every possible future need.
Organization Systems: Folders vs Collections vs Smart Collections
Understanding the differences between these three organizational tools is essential for a scalable catalog. Folders are for storage – they represent where files physically live on your drive. They should follow a simple, predictable structure that doesn’t change often.
Collections are for organization – they’re virtual groupings that can include any photo regardless of its folder location. This is where you create groupings that matter to your workflow: “Best of 2026,” “Wedding Portfolio,” “Client Deliverables.” A single photo can appear in unlimited collections without duplication.
Smart Collections are where automation happens. These are collections that automatically populate based on rules you define. Instead of manually adding photos to a “Five-Star Portraits” collection, create a Smart Collection with the rule: “Rating is 5 stars” AND “Keyword contains portrait.” Any photo meeting these criteria automatically appears, no manual work required.
Here’s how to build a hybrid system that leverages all three effectively:
Use folders for chronological storage only – YYYY-MM-DD format with shoot names. Don’t try to make folders do heavy organizational lifting. They should be simple and consistent, requiring minimal thought.
Use collections for any grouping that matters to your workflow or business. Client deliverables, portfolio selections, technique examples, project-specific groups – these all belong in collections. The beauty is collections don’t care about folder location, so a photo from 2019 can live alongside a photo from 2026 in your “Portfolio” collection.
Use Smart Collections to automate repetitive organization needs. Some essential Smart Collections I use:
– “Recent Edits” – Edited in past 7 days
– “Needs Keywording” – No keywords, edited in past 30 days
– “Five Stars” – Rating equals 5 stars
– “Client Ready” – Flagged, rating 4+ stars, keyword “deliverable”
– “No GPS” – GPS coordinates empty (for travel photography)
These collections maintain themselves automatically. Every time you flag a photo or apply a keyword, Smart Collections update instantly. This automation scales infinitely – your 100,000th photo is as easy to categorize as your 1,000th because the rules do the work.
Single Catalog vs Multiple Catalogs: Making the Right Choice
The single versus multiple catalog debate has consumed photography forums for years, but the answer is simpler than most arguments suggest. For the vast majority of photographers, a single well-structured catalog performs better and is easier to manage than splitting work across multiple catalogs.
Modern Lightroom can easily handle catalogs with 100,000 to 200,000 images without performance issues. I’ve personally run catalogs with 175,000 images that remained responsive, provided they were well-organized and regularly optimized. The overhead of managing multiple catalogs – remembering which catalog contains which work, switching between them, searching across all of them – usually outweighs any theoretical performance benefit.
However, there are legitimate use cases for multiple catalogs:
– Professional studios separating distinct business lines (e.g., wedding photography vs. commercial work)
– Photographers who maintain separate personal and professional work
– Specialized workflows like tethered shooting for events that benefit from a clean slate
– Archives older than 3-5 years that you rarely access but want preserved
The key question is whether your work genuinely benefits from separation or if you’re just complicating your workflow. If you frequently need to search across all your work or find yourself unsure which catalog contains a particular image, multiple catalogs are working against you, not for you.
For most photographers, the sweet spot is a single master catalog for active work (the past 2-3 years) plus archived catalogs for older material you rarely access. This gives you the benefits of a single catalog for current work while keeping performance optimal. Annual archiving – moving older work to a separate catalog – keeps your active catalog lean while preserving full access to your archive when needed.
Scaling Strategies for Large Libraries (100K+ Images)
Even the best-organized catalog will eventually show signs of strain as image counts climb into six figures. The key is recognizing performance degradation early and taking proactive steps before it impacts your workflow.
Performance indicators that signal your catalog needs attention include:
– Library grid takes more than 2-3 seconds to populate
– Switching between Develop and Library modules has noticeable lag
– Filter or search operations take 10+ seconds to complete
– Importing new photos slows down significantly
– Spot healing or other local adjustments stutter when applied
If you’re experiencing these symptoms, your first step should be optimization, not splitting catalogs. Go to File > Optimize Catalog. This routine maintenance reorganizes the database file and can dramatically improve performance. I run this monthly on active catalogs and immediately notice the difference.
Year-end archival is the most effective scaling strategy I’ve found. Each January, I create a new catalog for the current year and export the previous year’s work as a separate catalog. This keeps my active catalog focused on current work while maintaining full access to previous years. Lightroom makes this painless – just select the folders or collections you want to export, then choose File > Export as Catalog.
When should you split your catalog? If you’ve optimized, archived old work, and still experience performance problems with under 50,000 active images, something else may be wrong. Common culprits include storing the catalog on a slow drive, an undersized preview cache, or hardware that needs upgrading. Only consider splitting by category or client type if your workflow genuinely requires that separation.
Maintenance and Optimization: Keeping Your Catalog Healthy
A healthy catalog requires regular maintenance, but the time investment is minimal compared to the cost of neglect. I’ve spent hours helping photographers recover from catalog corruption that could have been prevented with a simple backup routine.
Automated backup setup is non-negotiable. Go to Catalog Settings > General and configure Lightroom to back up your catalog every time you exit. The backup takes seconds and creates a safety net you’ll appreciate when – not if – something goes wrong. Test your backup by actually opening a backup catalog to verify it works. A backup you can’t restore isn’t a backup at all.
Monthly optimization should be part of your routine. Close Lightroom, then hold Command+Option (Mac) or Control+Alt (Windows) while relaunching. You’ll see an optimization dialog – let it complete. This reorganizes the database file and eliminates fragmentation that accumulates during normal use. I do this on the first of each month – it takes a few minutes and noticeably improves responsiveness.
Quarterly deep maintenance focuses on cleaning house. Delete collections you no longer use, remove rejected photos permanently (not just from the catalog – empty your trash folder too), and consolidate keywords that have become redundant. This is also a good time to update your Smart Collection rules to match evolving workflow needs.
Disaster recovery planning goes beyond simple backups. I maintain a backup catalog on a separate drive using Time Machine (Mac) or similar software. For critical client work, I also export specific collections as separate catalogs and store them with the client files. If my main catalog fails, I can reconstruct the essential parts of my library without starting from scratch.
Multi-Computer and External Drive Workflows
Many photographers work across multiple computers – a desktop for editing power and a laptop for portability. A well-designed catalog structure makes this workflow seamless rather than frustrating.
The external drive approach is simplest. Keep both your catalog and your photo library on a fast external SSD. When you move between computers, you just move the drive. Lightroom doesn’t care where the catalog lives – it just needs consistent access to the same location. This approach requires no special setup and works perfectly with the structure I’ve outlined.
Smart Previews enable a different workflow. When you generate Smart Previews during import, Lightroom creates compact, editable versions of your photos (about 2MB each for a full-resolution file). You can disconnect your main drive and edit using only these Smart Previews, then reconnect later to apply those edits to your original files. This is ideal for laptop editing when you don’t want to carry multiple drives.
The critical rule for multi-computer setups is never open your catalog on two computers simultaneously. This will create conflicting database states that can corrupt your catalog. Always quit Lightroom completely before moving your drive between computers, and verify the drive is properly mounted before relaunching.
For photographers who need true multi-computer access without moving drives, consider Lightroom’s cloud ecosystem. Lightroom CC stores your catalog in the cloud, enabling seamless syncing across devices. You sacrifice some of Classic’s advanced features but gain genuine cross-device access. Many professionals use a hybrid approach – Classic for primary catalog management with selective CC sync for mobile access to specific collections.
Frequently Asked Questions
How do I organize a Lightroom catalog?
Organize your Lightroom catalog using a simple year-based folder structure (YYYY-MM-DD format) for chronological storage, then use collections and Smart Collections for all your organizational needs. Folders should mirror where files physically live on your drive, while collections create virtual groupings that don’t require duplicating files. Let Lightroom create folders during import using a consistent import preset, and use Smart Collections to automate organization based on ratings, keywords, and flags.
What is the difference between a Lightroom library and catalog?
A Lightroom catalog (.lrcat) is a database file that stores information about your photos including edits, metadata, keywords, and organization. The term library typically refers to your entire collection of photos along with the catalog that manages them. Importantly, the catalog doesn’t contain your actual image files – it only contains references to where those files are stored on your drive. Your original photos remain separate and untouched, which is what makes Lightroom’s editing non-destructive.
How to optimize catalog in Lightroom?
Optimize your Lightroom catalog by closing Lightroom, then holding Command+Option (Mac) or Control+Alt (Windows) while relaunching the application. You’ll see an optimization dialog – let it complete fully. This routine maintenance reorganizes the database file and eliminates fragmentation. For best results, run this optimization monthly or whenever you notice performance slowdowns. Additionally, regularly delete rejected photos, remove unused collections, and keep your catalog size manageable through year-end archiving.
Should Lightroom Catalog be on the same drive as photos?
For maximum performance, keep your catalog on your fastest drive – typically an internal SSD. Your photos can be on a different drive without significant performance impact, as long as both drives have adequate speed. If you work primarily from one location, keeping catalog and photos on the same fast drive is ideal. For portability or multi-computer workflows, putting both catalog and photos on an external SSD provides the best combination of performance and flexibility. Avoid putting catalogs on slow spinning hard drives if possible.
How many photos can a Lightroom catalog handle?
Modern Lightroom Classic can easily handle 100,000 to 200,000 photos in a single catalog without significant performance issues, provided the catalog is well-organized and regularly optimized. Some photographers successfully manage catalogs with 300,000+ images. Performance depends more on your hardware, catalog structure, and maintenance habits than on an absolute image count. If you notice slowdowns, try optimization and archiving old work before splitting into multiple catalogs. Most photographers benefit more from a single well-maintained catalog than from managing multiple catalogs.
Conclusion: Building a Lightroom Catalog Structure That Grows With You
The best time to establish a proper Lightroom catalog structure is before you import your first photo. The second-best time is today. A well-designed catalog isn’t just about staying organized – it’s about building a workflow that scales from your hobbyist beginnings through professional growth without ever becoming a bottleneck.
Start with the fundamentals: a single master catalog, simple year-based folder structure, and collections that reflect how you actually work. Add Smart Collections to automate repetitive tasks, establish a regular maintenance routine, and implement year-end archiving to keep your active catalog lean. These habits compound over time – the photographer with 150,000 well-organized images can find a specific photo in seconds, while the one with 20,000 scattered images wastes hours searching.
Your Lightroom catalog structure should serve your creativity, not constrain it. Build it thoughtfully, maintain it consistently, and it will scale gracefully as your library and your photography grow together.