Some of the best photos I have ever taken were shot in the middle of a downpour. Rain turns ordinary scenes into something extraordinary: streets mirror city lights, forests breathe in the mist, and dramatic skies roll over the landscape like something out of a painting. The catch is that water and electronics are a genuinely terrible combination, and a moment of carelessness can turn a rewarding shoot into an expensive repair bill.
I have made a few costly mistakes over the years, and I have learned from watching others make them too. This guide covers everything I have figured out about shooting in wet and stormy weather safely in 2026, from the protection methods that actually work to the camera settings that give you sharp, moody results even in low rain-light.
Whether you are heading out with a professional mirrorless setup or an older DSLR, the principles here apply. You do not need to spend hundreds on specialized gear to protect your camera in the rain. What you do need is the right knowledge before you step outside.
How to Photograph Rain and Stormy Weather Without Ruining Your Camera?
To photograph rain and stormy weather without ruining your camera, you need to protect your gear from moisture using a combination of weather-sealed equipment, physical barriers like rain covers or umbrellas, and smart shooting habits. Use a lens hood at all times, keep a microfiber cloth accessible, minimize lens changes outdoors, and know your camera’s actual weather resistance limits before you rely on it in a serious storm.
The sections below break each of these steps down in detail so you can go out prepared and come back with great images and dry gear.
Know Your Camera’s Weather Resistance Before You Go Out
Weather sealing is not a guarantee of waterproofing. This is the single most important thing to understand before you take any camera out in rain. Most professional and mid-range bodies have some level of sealing around buttons, dials, and ports, but the specifications are almost never tested against continuous heavy rain or submersion.
Camera manufacturers are deliberately vague about weather sealing ratings. Unlike smartphones, which carry IP ratings that define exactly what kind of water exposure they can handle, most cameras are labeled “weather resistant” or “weather sealed” with no specific standard. A Canon R5 or Nikon Z8 has meaningful sealing that can handle moderate rain. A Sony a6000-series body has much lighter protection. An entry-level DSLR like a Canon Rebel series has almost none.
Before a shoot, look up your specific camera body and lens combination online. The lens matters as much as the body. A weather-sealed body paired with a non-sealed lens is still vulnerable at the lens-mount junction. If your lens has no weather sealing, moisture can wick into the camera body even through a sealed mount.
The practical rule is this: weather sealing buys you margin for error, it does not remove the risk entirely. Even a sealed camera deserves protection in a serious storm.
Essential Gear to Protect Your Camera in the Rain
You have several options for physically protecting your camera, and the best approach usually combines two or three of them. Here is what works, and what the trade-offs are.
A Large Golf Umbrella
A full-size golf umbrella (60 inches or larger) is one of the most useful items you can carry for rain photography. It keeps your head and camera dry while leaving both hands free to operate the camera. The key is size: a compact travel umbrella is not large enough. You need the kind that covers your shoulders and gives you room to raise the camera to your eye.
The limitation is wind. In a serious storm with gusts, an umbrella becomes a sail and a liability. On a tripod, the umbrella will cause vibrations unless you brace it carefully. Many photographers clip the umbrella to their tripod’s hot shoe or strap it to a belt, but these solutions still struggle in high wind.
Dedicated Rain Covers and Rain Sleeves
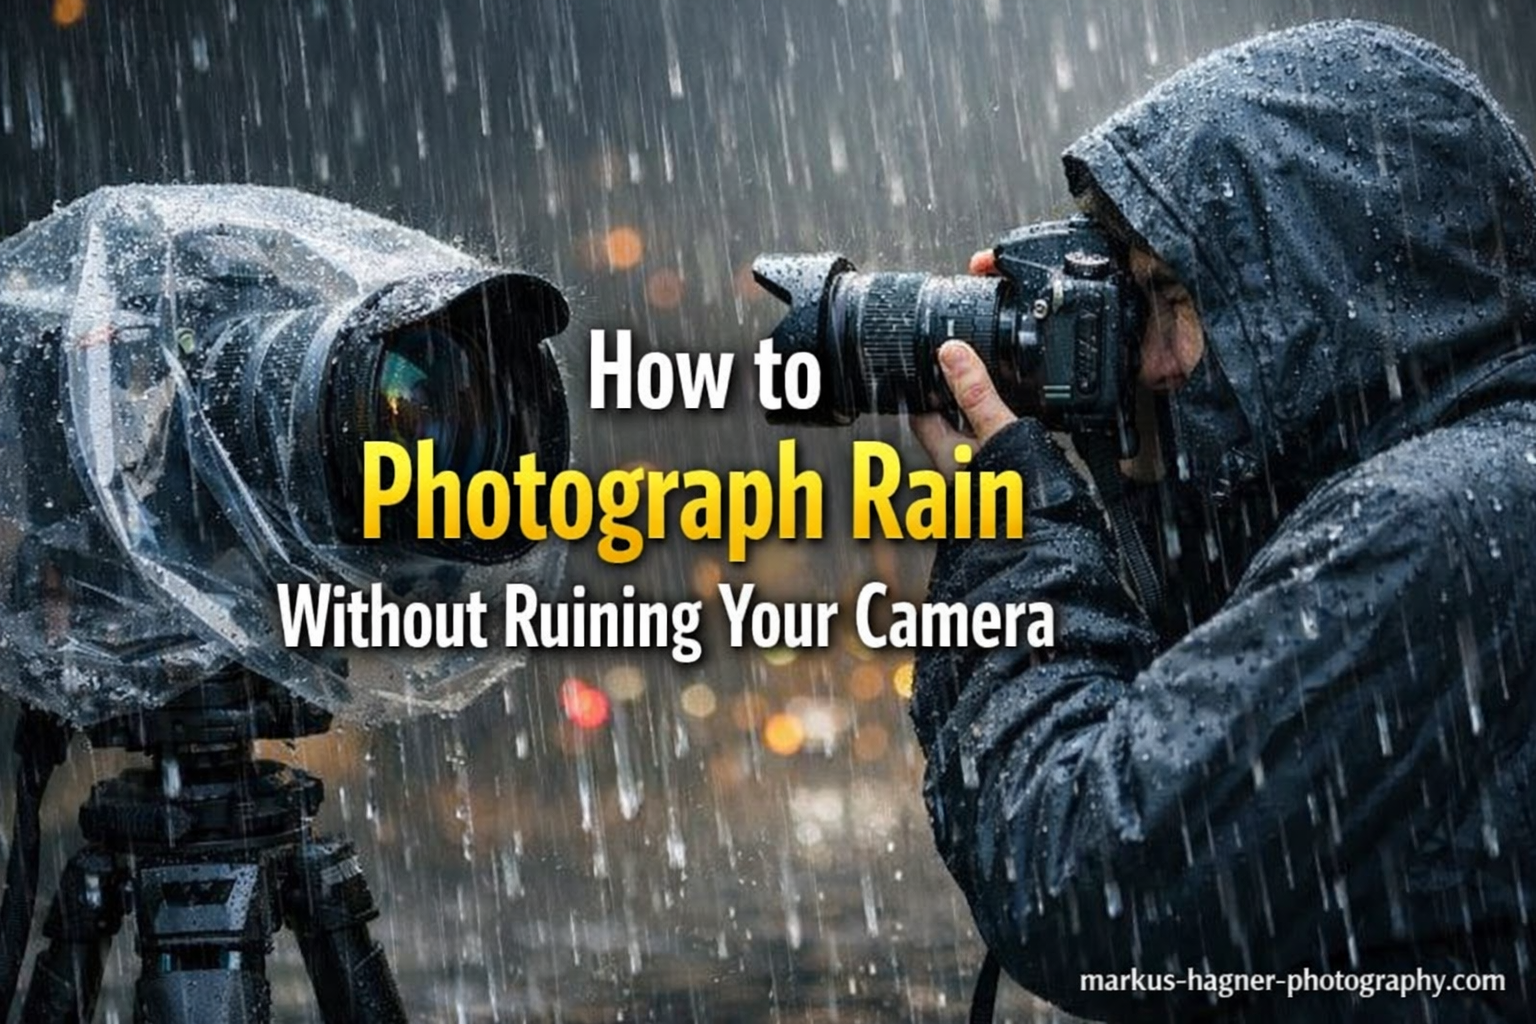
Purpose-built camera rain covers are fitted neoprene or nylon sleeves that wrap the entire camera and lens, with a hand port at the back and a clear optical element at the front for the lens. They work extremely well in sustained rain and free both hands. The downside is they make operating controls harder — accessing dials and menus through thick neoprene requires practice.
Rain sleeves are a thinner, cheaper variant. They are essentially flexible plastic bags designed for cameras, often transparent enough to see controls. They offer less protection in driving rain but are far easier to work with. Many photographers find these to be the sweet spot for general wet-weather shooting.
The Plastic Bag Method
This is the solution most real photographers use when caught unprepared. A sturdy zip-lock freezer bag or a standard grocery bag can be wrapped around the camera body with a rubber band, leaving the lens free. Cut a small hole for the lens if you want to cover the body but not the glass. It looks ridiculous and it genuinely works.
From the Reddit r/photography community, the consistent advice is to use a bag with a hole cut out for the lens, secured with a rubber band around the lens barrel. The bag protects the body, the lens hood protects the front element, and you can still reach the shutter and most controls. This is particularly good for non-sealed bodies where even light rain is a concern.
Lens Hood
Always use your lens hood in rain. It keeps rain from hitting the front element directly and buys you more time between cleanings. A deep petal or circular hood makes a significant difference. This is not optional gear in wet weather: put the hood on before you leave the car.
Microfiber Cloths
Carry at least two microfiber cloths. Keep one in a sealed bag so it stays dry as a backup. Wipe the front lens element between shots whenever you see droplets forming. Small water drops on the front element create ugly halos and blur in your images. A quick wipe every few minutes keeps the glass clean and does not harm modern coatings.
Hot Shoe Cover
If you are not using a flash, put a hot shoe cover on. The hot shoe port is a direct opening in the top of the camera and rain can run straight in. These small rubber covers cost almost nothing and seal one of the most vulnerable points on a camera.
Step-by-Step: How to Set Up and Shoot in the Rain In 2026?
Having the right gear is only half of it. How you actually set up and work in rain matters just as much. Here is the process I follow.
Step 1: Prepare your kit before you leave shelter. Put on the rain cover or plastic bag, attach the lens hood, cover the hot shoe, and have one microfiber cloth in your jacket pocket. Do not wait until you are standing in the rain to do this.
Step 2: Choose the right lens and commit to it. Decide on your focal length before going out and do not change lenses in the rain unless absolutely necessary. Each lens change is an opportunity for moisture to enter the camera body. If you are shooting landscapes, go out with a wide or mid-range zoom. If you are doing street work, take a single 35mm or 50mm prime and work with it all session.
Step 3: Use a camera strap and keep the camera close to your body. Your body generates heat and creates a partial shelter. Keeping the camera under your jacket between shots slows moisture accumulation. Use a peak system or strap that lets you raise the camera quickly to your eye without fumbling.
Step 4: Shield the camera while you are not actively shooting. If you are waiting for a shot, do not let the camera hang in open rain. Tuck it under your arm or keep it covered. Exposure time adds up.
Step 5: Wipe the lens before each important shot. Get in the habit of a quick lens check and wipe before pressing the shutter on any shot you genuinely care about. Rain builds up faster than you think.
Step 6: Store wet gear properly after the shoot. See the section on what to do if your camera gets wet before you pack up and go home.
Best Camera Settings for Rain and Stormy Weather
Rain and storms often mean low light, movement, and fast-changing conditions. Your settings need to account for all of this.
ISO: Push It Higher Than You Think You Need
Overcast and rainy skies kill ambient light significantly more than most people expect. Start at ISO 400 and be ready to climb to ISO 800-1600 without hesitation. Modern sensors handle high ISO noise well, and grainy rain photos have a character that suits the mood. Do not sacrifice shutter speed by keeping ISO artificially low.
Shutter Speed: Fast Enough to Freeze Raindrops
To render individual raindrops as sharp streaks or frozen drops, you need a minimum of 1/500s. For truly frozen drops in a heavy downpour, aim for 1/1000s or faster. If you want long blurred streaks of rain that convey motion, drop to 1/30s-1/60s. Both approaches work artistically and both are valid.
The practical minimum for hand-holding in rain with any camera movement is 1/125s at the wider end of a lens. With image stabilization active, you can push this down further, but rain adds unpredictable micro-movements that stabilization cannot always correct.
Aperture: Balance Depth of Field With Light
In rainy conditions, f/5.6 to f/8 is a good starting range for landscape and street work. This gives you enough depth of field for most scenes while letting in adequate light. If you need more exposure, open up rather than lowering shutter speed, unless you specifically want motion blur in the rain.
Turn Image Stabilization On
Whether your stabilization is in the lens or the sensor (IBIS), keep it active. Wet, cold hands are less steady, wind adds subtle camera shake, and you may be shooting one-handed while managing an umbrella. Every bit of stabilization helps.
Shoot in RAW
Rain scenes often have compressed dynamic range and flat colour. RAW files give you the recovery latitude to pull back highlights in bright rain-lit skies and push shadows in dark foregrounds. JPEG will give you a processed image that is harder to rescue if the exposure was not perfect. In unpredictable weather, exposure is rarely perfect, so shoot RAW.
Manual or Aperture Priority Mode
Camera metering systems often struggle with very bright rain-lit skies combined with dark wet surfaces. Aperture priority with exposure compensation (-0.3 to -0.7 EV) keeps you in control without requiring full manual exposure every frame. If you are comfortable in manual, use it. In fast-moving storm conditions, aperture priority gives you more flexibility to react quickly.
Autofocus Considerations
Heavy rain creates contrast noise in the AF system — the camera can lock onto falling rain rather than your subject. Use single-point or small-zone autofocus rather than wide-area or subject-tracking modes. If shooting through rain on glass (car windows, for example), switch to manual focus.
Photographing Special Storm Conditions (2026)
Beyond general rain photography, storms create specific conditions that reward photographers who are prepared for them.
Rainbows
Rainbows appear when sun breaks through rain at the right angle. They are most common in the late afternoon with the sun low behind you. If a storm is clearing and patches of sunlight appear, move fast: rainbows are brief. A polarizing filter can increase their saturation in post, but pulling the effect out in Lightroom from a RAW file works just as well. Shoot wide to capture a full arc if conditions allow.
Lightning
Lightning photography is genuinely dangerous and requires specific safety practices. Do not photograph lightning from an open field or elevated position. Shoot from inside a building, from a covered carpark, or from your vehicle with the windows cracked. Use a tripod, set your camera to a long exposure (4-30 seconds) at a low ISO (100-200) and aperture of f/8-f/11. Leave the shutter open during electrical activity and multiple strikes may appear in one frame.
Never shelter under a tree, on a hillside, or in an open structure during lightning. Your safety comes before any photograph.
Waterfalls and Rain-Fed Rivers
Rain swells rivers and waterfalls quickly. The milky long-exposure look of moving water is most dramatic when water volume is high, and that happens right after heavy rain. Use a neutral density filter to extend your exposure to 0.5-4 seconds in daylight conditions. Be aware that river banks become slippery and unstable after rain. Always check your footing before committing to a position near moving water.
Shooting From Your Vehicle
Your car is one of the best rain photography tools you have. It protects camera and photographer completely, and shooting from a car window gives a low, intimate perspective. Use a beanbag or window mount to steady the camera rather than hand-holding. Keep the engine off to remove vibration. Shoot through the window rather than lowering it to keep rain out, but clean the window glass first with a microfiber cloth to remove smears and grime that degrade the image.
Fog and Mist
Fog is rain’s quieter cousin and often follows heavy rain as temperatures shift. Misty conditions simplify scenes beautifully, separating foreground subjects from backgrounds through atmospheric depth. Shoot early morning after overnight rain for the best fog conditions. Exposure: add +0.5 to +1 EV because foggy scenes fool meters into underexposure.
Cold Weather Considerations: Condensation and Fogging
This is the section most guides skip, and it is one of the most common causes of camera damage that photographers attribute incorrectly to direct rain exposure.
When you bring a cold camera from outside into a warm indoor space, condensation forms on and inside the camera, just like it does on a cold glass of water in a warm room. This internal fogging can cause electrical shorts, fog the rear element of a lens, and in severe cases, leave permanent moisture marks on the sensor.
The solution is to give the camera time to acclimatize gradually rather than going from 2°C to 22°C in one step. Before going inside, put the camera into a sealed zip-lock bag while it is still cold. The condensation will form on the outside of the bag rather than on the camera. Leave the bagged camera near the door or in a cool hallway for 20-30 minutes before bringing it into a warm room. Only open the bag once the camera has reached close to room temperature.
The same logic applies in reverse when going from a heated car into cold rain. The camera needs a moment to adjust. Giving it a minute outside in its bag before shooting helps prevent interior fogging on your viewfinder and rear LCD, which is distracting in the field even if not damaging.
After any wet shoot, remove the battery and memory card and leave the camera in a dry, ventilated space. Do not put it straight into a camera bag, which traps moisture. A dry room with the body cap off allows airflow that helps dry any moisture that made it past your protection.
What to Do If Your Camera Gets Wet?
Despite all precautions, cameras sometimes take on more water than planned. Here is what to do in that situation, in order.
First: Remove the battery immediately. Water plus live electricity is what causes actual damage. If the camera is still on, turn it off, then remove the battery before doing anything else. Remove the memory card at the same time.
Second: Do not press any buttons or try to operate the camera. Button presses can push water deeper into the electronics.
Third: Pat the exterior dry with a clean, absorbent cloth. Do not blow air into ports, which forces moisture further in.
Fourth: Leave the camera in a dry environment with the battery door open for 24-48 hours. Some photographers use silica gel packets in a sealed bag to draw out moisture. Do not use a hair dryer: heat can damage seals and internal elements.
Fifth: After 48 hours in a dry environment, reinsert a fully charged battery and test. If the camera shows any unusual behavior, erratic menus, stuck pixels, or clicking noises, take it to a camera repair shop before using it further.
I have seen cameras survive serious soakings when handled this way. The drying period is the critical step that most people skip because they are impatient.
Post-Processing Rain and Stormy Weather Photos
Rainy and overcast light tends toward flat, low-contrast images. This is not a problem — it is an opportunity that post-processing handles well.
Increase Contrast and Clarity
The single biggest improvement for most rain photos is adding contrast and clarity. In Lightroom or Capture One, push the contrast slider to +15 to +30 and add clarity of +10 to +20. This separates the tones that flat rain light compresses together and makes the scene feel more three-dimensional. Do not overdo clarity on images with human subjects, as it emphasizes skin texture harshly.
Work With Vibrance and Saturation
Wet surfaces become intensely saturated. Wet pavement, wet leaves, and wet wood all show deeper colours than they do when dry. Use vibrance (gentler on skin tones than raw saturation) to bring this out. A vibrance boost of +15 to +25 typically works well. Pull back any colours that are too dominant using targeted HSL adjustments.
Consider Black and White
Storm and rain images often work beautifully in black and white. The drama of a dark sky, the reflections on wet surfaces, and the textural quality of rain all translate extremely well without colour. In Lightroom’s black and white panel, push the blue channel darker (creating dramatic storm skies) and pull the orange/red channel lighter if there are human subjects in the image to maintain skin tones.
Recover Highlights in Stormy Skies
Bright breaks in storm clouds and rain-lit skies often blow out slightly in-camera. RAW files typically hold 1.5-2 stops of recoverable highlight detail. Pull the highlights slider down (-40 to -80) and bring the whites back (-20 to -30) to restore cloud texture without making the image feel underexposed overall.
Remove Water Drop Artefacts
Occasionally a water drop on the lens makes it through your wipe routine. Small drops create soft circular halos in images. In Lightroom, the healing/cloning brush handles these well if they fall against a reasonably uniform background. For drops that fall on complex areas (like a person’s face), you may need to use Photoshop’s content-aware fill or simply crop them out if possible.
Use Dehaze for Fog and Mist
Lightroom’s dehaze tool is useful for foggy conditions, but apply it with restraint. A little dehaze (+10 to +20) removes unwanted muddy haze without stripping out the atmospheric quality that makes the image interesting. Too much dehaze creates artificial-looking results and heavy noise in shadows.
Frequently Asked Questions
How do photographers take photos in the rain?
Photographers protect their camera with a rain cover, plastic bag sleeve, or golf umbrella and shoot in the rain using higher ISO settings, faster shutter speeds, and image stabilization. They minimize lens changes outdoors, use a lens hood to keep droplets off the front element, and keep a microfiber cloth accessible for wiping the glass between shots.
What are the best settings for rain photography?
Start with ISO 400-800 and adjust up as needed, use a shutter speed of at least 1/500s to freeze individual raindrops (or 1/30s-1/60s for motion blur streaks), and set aperture to f/5.6-f/8 for most situations. Turn image stabilization on, shoot in RAW format for maximum editing latitude, and use single-point autofocus to prevent the camera from locking onto falling rain.
How do you film or photograph in the rain without damaging the camera?
Use a dedicated rain cover or rain sleeve designed for your camera, or improvise with a clear plastic zip-lock bag over the body with a hole for the lens. Keep the lens hood attached, cover the hot shoe port, and keep the camera tucked against your body or under an umbrella when not actively shooting. After the shoot, remove the battery and memory card and let the camera dry in a ventilated space before storing it.
Can I use a non-weather-sealed camera in the rain?
Yes, with extra precautions. A plastic bag sleeve over the body with the lens hood protecting the front element provides meaningful protection for light to moderate rain. Avoid heavy downpours, minimize the time the camera is exposed, and cover it between shots. Ensure you never change lenses outdoors with an unsealed body. After any wet shoot, remove the battery and dry the camera thoroughly.
Go Shoot in the Rain
Photographing rain and stormy weather without ruining your camera comes down to preparation and habit. Know your gear’s actual limits, not the marketing version. Use physical protection before you need it, not after you are already standing in a downpour. Set your camera for the conditions rather than hoping for the best. And after the shoot, give your equipment the time and space to dry properly.
The photographers who consistently capture dramatic storm images are not the ones with the most expensive weather-sealed gear. They are the ones who show up prepared when everyone else stays inside. In 2026, some of the most compelling photography is being made in exactly the conditions that most people avoid. The rain is out there — go get it.