I remember the first time I truly understood the power of filling the frame. I was shooting a portrait of my grandmother, and my initial shots showed her small in the frame with lots of distracting background elements. Then I decided to move closer—really close—and capture just her face, filled with wrinkles, character, and those incredible eyes that had seen so much. That image became one of my most beloved photographs, not just for me but for our entire family. It taught me a lesson I’ve carried throughout my photography career: sometimes, getting closer is all you need to transform an ordinary photo into something extraordinary.
Fill the frame composition is one of those photography techniques that sounds simple but can completely revolutionize your work. It’s about making your subject dominate the image, eliminating distractions, and creating immediate impact with your viewers. Over the years, I’ve discovered that this technique is versatile, powerful, and applicable to virtually every genre of photography. Whether you’re shooting portraits, wildlife, street scenes, or macro photography, learning to fill the frame effectively will take your images to the next level.
In this comprehensive guide, I’ll share everything I’ve learned about fill the frame composition—from the fundamental concepts to advanced techniques that professionals use. We’ll explore when to use this technique, when to avoid it, and how to master it across different photography genres. By the end of this article, you’ll have the knowledge and confidence to use fill the frame composition to create stunning, impactful images that grab attention and hold it.
Understanding Fill the Frame Composition
Fill the frame composition is exactly what it sounds like—making your subject take up most or all of the image area. It’s about eliminating unnecessary space and distractions, focusing attention squarely on what matters most in your photograph. When you fill the frame, you’re essentially telling your viewers, “This is important. Pay attention to this.”
I’ve found that many beginners struggle with this concept because they naturally want to include everything in their shots. They step back to “get it all in,” resulting in images where the main subject gets lost in a sea of irrelevant details. I know I made this mistake countless times when I was starting out. My early portfolio is filled with photos where you can barely tell what the subject is supposed to be because there’s so much else competing for attention.
Fill the frame composition is the opposite approach. It’s about being selective and intentional about what you include in your frame. Instead of asking, “What can I fit in this shot?” you ask, “What can I remove to make this stronger?” This shift in thinking is transformative and will change how you approach every photography session.
The beauty of this technique lies in its simplicity. You don’t need expensive equipment or advanced technical knowledge to start filling the frame effectively. All you need is a willingness to get closer to your subjects—either physically or optically—and a new way of seeing the world through your camera.
Why Fill the Frame Matters
Understanding why fill the frame composition is so powerful will help you use it more intentionally in your work. Through years of shooting and teaching photography, I’ve identified several key benefits that make this technique indispensable.
Creates Immediate Impact
When your subject fills the frame, it creates instant visual impact. There’s no confusion about what the viewer should focus on because the subject dominates the image. I’ve discovered that frame-filling shots tend to stop viewers in their tracks, demanding attention in a way that more loosely composed images often don’t.
Think about it this way: when you’re walking through a gallery or scrolling through social media, which images make you pause? Usually, it’s the ones where the subject is bold and prominent, filling the frame with confidence. These images have a presence that’s hard to ignore.
Reveals Hidden Details
One of my favorite aspects of fill the frame photography is how it reveals details that would otherwise go unnoticed. When you get close to your subject, whether physically or with a telephoto lens, you start seeing textures, patterns, and nuances that are invisible from a distance.
I once shot a series of flower images where I started with wide shots showing the entire garden. They were nice, but nothing special. Then I decided to fill the frame with just one flower, getting so close that you could see individual pollen grains on the petals. Those close-up shots became the most popular images from that session, with viewers marveling at details they’d never noticed in real life.
Eliminates Distractions
We’ve all had the experience of taking what we thought was a great shot, only to realize later that there’s something distracting in the background—a trash can, an ugly sign, or just clutter that pulls attention away from our subject. Filling the frame is one of the most effective ways to eliminate these distractions.
I learned this lesson the hard way while shooting portraits in a busy park. My initial shots had people walking in the background, cars passing by, and all sorts of visual noise. Then I moved closer and filled the frame with just my subject’s face. The difference was night and day—suddenly, it was all about the person, not the chaotic environment.
Creates Emotional Connection
There’s something intimate and powerful about frame-filling images, especially in portrait photography. When you fill the frame with someone’s face, you create a stronger emotional connection between the subject and the viewer. The eyes become more intense, expressions more readable, and personality more apparent.
I’ve found that my most successful portrait sessions are often the ones where I’m not afraid to get close and fill the frame. Clients might feel a bit uncomfortable at first, but when they see the results—images that capture their essence so powerfully—they understand why this technique works so well.
Simplifies Your Composition
In a world where we’re constantly bombarded with visual information, simplicity stands out. Fill the frame composition is inherently simple—you’re focusing on one thing and making it prominent. This simplicity can be incredibly refreshing and effective.
I’ve noticed that when I’m feeling overwhelmed or uninspired, returning to fill the frame composition helps me reset. By focusing on the basics and making my subject dominate the frame, I often create my strongest work during these periods.
Essential Equipment for Fill the Frame Photography
While you can practice fill the frame composition with any camera, having the right equipment can make the process easier and expand your creative possibilities. Over the years, I’ve built a kit that’s specifically tailored for frame-filling work, and I’ll share what’s actually worth investing in.
Camera Bodies
Almost any modern camera can handle fill the frame composition, but some features make the process more enjoyable and effective:
DSLRs offer excellent optical viewfinders that show you exactly what you’re getting, which I find helpful for precise framing. I used a Canon 5D Mark IV for years and loved how it handled frame-filling portraits and wildlife shots.
Mirrorless cameras have become my go-to for fill the frame work because their electronic viewfinders show you the exposure in real-time. This is incredibly helpful when you’re working with high-contrast situations where you want to ensure your subject is properly exposed while the background falls away.
High-resolution cameras (24MP and above) give you more flexibility if you need to crop in post-processing. While I always try to get the composition right in-camera, having those extra pixels can be a lifesaver when you need to fine-tune your framing.
Lenses That Excel at Filling the Frame
Your choice of lens dramatically affects how easily you can fill the frame with your subject. Different lenses offer different advantages for this technique:
Telephoto lenses (70mm and longer) are perhaps the most versatile tools for fill the frame photography. They allow you to fill the frame with distant subjects without physically moving closer. I use a 70-200mm f/2.8 for most of my portrait work and a 100-400mm for wildlife. These lenses compress the background, making your subject stand out even more dramatically.
Prime lenses force you to move your feet to get the framing you want, which can actually be beneficial for learning fill the frame composition. A 50mm f/1.8 or 85mm f/1.8 is perfect for portraits, while a 100mm macro lens excels at close-up work.
Macro lenses are essential if you want to fill the frame with small subjects like flowers, insects, or product details. A true macro lens (1:1 magnification) allows you to capture life-size images of tiny subjects, filling the frame with incredible detail.
Wide-angle lenses can also be used for fill the frame composition, but they require you to get extremely close to your subject. I love using a 24mm or 35mm lens for environmental portraits where I want to fill the frame with my subject while still including some context.
Supporting Equipment
While not strictly necessary, these accessories can make your fill the frame photography more successful:
Tripods are essential when you’re using long telephoto lenses or shooting in low light. They help you maintain sharpness while you fine-tune your composition. I use a carbon fiber tripod that’s sturdy yet lightweight enough to carry on location.
Remote shutter releases help eliminate camera shake, especially when you’re working with slower shutter speeds or doing macro work. They allow you to trigger the camera without touching it, ensuring maximum sharpness.
Reflectors can be invaluable when you’re filling the frame with portraits, as they help you control the light on your subject’s face. A 5-in-1 reflector gives you multiple options for filling in shadows and creating flattering light.
Camera Settings for Perfect Fill the Frame Shots
Getting your camera settings right is crucial for successful fill the frame composition. Over the years, I’ve developed a systematic approach to settings that helps me achieve consistent results across different shooting scenarios.
Aperture Selection
Your aperture choice dramatically affects how your frame-filling images look, particularly in terms of background separation:
Wide apertures (f/1.4 to f/2.8) are my go-to for portrait work when I want to fill the frame and create beautiful background blur. The shallow depth of field ensures that your subject is sharp while the background melts away into soft, pleasing bokeh. I’ve found that f/1.8 to f/2.2 is often the sweet spot for most portrait situations.
Medium apertures (f/4 to f/8) work well when you need a bit more depth of field but still want some background separation. This is ideal for situations where your subject has some depth, like a person’s face from nose to ears, or when you’re shooting small groups.
Smaller apertures (f/11 to f/16) are useful when you’re filling the frame with landscapes or architectural details and want everything sharp from front to back. I rarely use these for portrait work, but they’re essential for certain types of frame-filling shots.
Shutter Speed Considerations
Your shutter speed needs to be fast enough to freeze motion and eliminate camera shake, especially when you’re working with longer lenses:
For handheld shooting, I follow the reciprocal rule: my shutter speed should be at least 1/focal length. So if I’m shooting with a 200mm lens, I’ll use a shutter speed of at least 1/200s. For critical work, I’ll go even faster—1/500s or more.
For moving subjects, you need even faster shutter speeds. When I’m filling the frame with wildlife or sports action, I’ll use shutter speeds of 1/1000s or faster to freeze the motion and ensure sharpness.
For static subjects, you can use slower shutter speeds, but I’d still recommend using a tripod to ensure maximum sharpness, especially if you’re working with macro lenses where even slight movement can ruin the shot.
ISO Management
ISO is your tool for balancing exposure in different lighting conditions, but it comes with trade-offs:
Low ISO (100-400) gives you the cleanest images with the most detail and dynamic range. This is ideal for bright conditions or when you’re using a tripod.
Medium ISO (400-1600) is necessary in moderate lighting or when you need faster shutter speeds. Modern cameras handle these ISO values remarkably well, with minimal noise.
High ISO (1600+) should be reserved for low-light situations when you have no other choice. While modern cameras are much better at handling high ISO, you’ll still see some noise that can reduce the impact of your frame-filling images.
Focus Mode Selection
Getting sharp focus is critical when you’re filling the frame, as any focus errors will be immediately obvious:
Single-point autofocus is my preferred mode for most fill the frame work. It allows me to precisely control where the camera focuses, which is essential when you’re working with shallow depth of field.
Back-button focus has revolutionized my photography. By separating the focus function from the shutter button, I can focus once and then shoot multiple frames without the camera trying to refocus. This is especially useful for frame-filling portraits.
Manual focus is sometimes necessary, particularly in macro photography where autofocus can struggle. I use focus peaking on my mirrorless camera to ensure precise focus when working manually.
Core Techniques to Fill the Frame
Now let’s dive into the practical techniques you can use to fill the frame with your subjects. These are the methods I use every day in my photography work, and they’ve proven effective across countless shooting scenarios.
1. Move Closer Physically
The simplest and most direct way to fill the frame is to physically move closer to your subject. This technique costs nothing and can be done with any camera and lens combination.
When I’m shooting portraits, I’ll often start with a wider shot to establish the scene, then gradually move closer until the subject’s face fills the frame. I’ve discovered that many subjects feel uncomfortable at first when I get this close, but I explain that this is how we’ll create the most powerful images, and they usually relax into it.
For street photography, moving closer requires a bit more stealth and confidence. I’ve learned to be quick and decisive, getting the shot I need before my subject even realizes what’s happening. The key is to be respectful and aware of your surroundings—some people don’t appreciate having a camera thrust in their face!
In nature photography, moving closer often requires patience and an understanding of animal behavior. I’ve spent hours slowly creeping closer to birds and small animals, moving only when they’re comfortable with my presence. The reward is frame-filling images that show incredible detail and personality.
2. Use Telephoto Lenses
Telephoto lenses are perhaps the most versatile tools for fill the frame composition. They allow you to make distant subjects appear larger in the frame without physically moving closer.
I use my 70-200mm lens for about 80% of my portrait work. At 200mm, I can fill the frame with a person’s face from a comfortable distance, which helps my subjects relax. The compression effect of telephoto lenses also makes backgrounds appear closer and larger, creating beautiful, soft bokeh that enhances the frame-filling effect.
For wildlife photography, longer telephotos are essential. My 100-400mm lens allows me to fill the frame with birds and animals from a safe distance, both for my safety and to avoid disturbing the wildlife. I’ve captured incredible frame-filling shots of eagles, deer, and even small songbirds that would have been impossible with shorter lenses.
One tip I’ve learned: when using telephoto lenses for fill the frame work, pay attention to your background. The compression effect can make distant background elements appear larger and potentially distracting. I always scan the background through my viewfinder before taking the shot to ensure it complements rather than competes with my subject.
3. Employ Macro Photography Techniques
Macro photography takes fill the frame composition to the extreme, allowing you to capture life-size or larger images of small subjects. This is where you can truly explore the intricate details that are invisible to the naked eye.
I use a dedicated 100mm macro lens for most of my close-up work. It allows me to fill the frame with flowers, insects, and other small subjects while maintaining a comfortable working distance. The level of detail you can capture is astonishing—I’ve spent entire afternoons exploring a single flower, discovering new patterns and textures with each frame.
For beginners who aren’t ready to invest in a macro lens, close-up filters or extension tubes are affordable alternatives. They won’t give you the same quality as a true macro lens, but they’re great for learning and experimenting with frame-filling close-up photography.
One challenge with macro photography is the extremely shallow depth of field. When you’re working at 1:1 magnification, even at f/11, you might only have a few millimeters of sharp focus. I’ve learned to focus stack—taking multiple shots at different focus points and combining them in post-processing—to create frame-filling macro images that are sharp throughout.
4. Wait for the Subject to Come to You
Sometimes, the best way to fill the frame is to let the subject come to you. This technique requires patience and an understanding of your subject’s behavior, but it can yield incredible results.
In wildlife photography, I’ll often set up in a location where I know animals will appear and wait for them to come within range. I’ve spent hours in blinds or camouflaged positions, waiting for birds to land on a nearby perch or deer to walk down a familiar trail. When they finally come close enough to fill the frame, the wait is always worth it.
For street photography, I’ll find an interesting background or lighting situation and wait for the right person to walk into my frame. This approach allows me to create frame-filling candid shots that look spontaneous but are actually carefully planned. I’ve captured some of my best street images this way, with subjects completely filling the frame in interesting environments.
The key to this technique is anticipation. You need to understand your subject’s behavior patterns and be ready when the moment arrives. I always have my camera settings dialed in and my finger on the shutter button, ready to capture the frame-filling shot when it happens.
5. Strategic Cropping in Post-Processing
While I always try to get my composition right in-camera, cropping in post-processing is a valuable tool for fine-tuning fill the frame compositions. Sometimes you don’t realize the perfect framing until you’re reviewing your images on a larger screen.
When I crop for fill the frame effect, I’m careful not to go too far and lose image quality. A good rule of thumb is to never crop more than about 25-30% of your original image, unless you’re shooting with a very high-resolution camera. Heavy cropping can result in soft images and visible noise, especially in low-light situations.
I use the crop tool in Lightroom or Photoshop to experiment with different framings. I’ll try several different crops to see which one creates the strongest impact. Sometimes a slight crop can transform an ordinary image into something extraordinary by making the subject more prominent.
One technique I’ve developed is to crop with the final use in mind. If I know an image will be viewed on social media, I might crop more aggressively since the smaller display size will hide any quality loss. For large prints, I’m much more conservative with cropping to ensure maximum quality.
Advanced Fill the Frame Strategies
Once you’ve mastered the basic techniques, you can explore more advanced strategies that will take your fill the frame composition to the next level. These are the methods that separate good photographers from great ones.
Selective Focus for Emphasis
Selective focus is a powerful technique where you intentionally make only a small part of your frame-filling image sharp, allowing the rest to fall into soft blur. This creates a dreamy, artistic effect that draws the viewer’s eye exactly where you want it.
I love using this technique for portrait work, especially with eyes. By focusing precisely on the eyes and using a wide aperture like f/1.4 or f/1.8, I can create frame-filling portraits where the eyes are razor sharp while the rest of the face softens into beautiful blur. This creates an incredibly intimate and engaging effect.
For macro photography, selective focus can create almost abstract images. I’ll focus on just one part of a flower or insect, letting the rest of the frame dissolve into soft colors and shapes. The result is often more artistic and impressionistic than a straightforward documentary shot.
The key to successful selective focus is precise focusing. I use single-point autofocus and often focus manually to ensure I’m nailing the exact point I want sharp. Focus peaking on mirrorless cameras is incredibly helpful for this, showing you exactly what’s in focus before you take the shot.
Multiple Exposures for Creative Fill the Frame
Multiple exposure photography allows you to combine two or more images into a single frame, creating unique and artistic compositions. This advanced technique can produce stunning fill the frame images that are impossible to capture in a single exposure.
I’ve experimented with combining multiple frame-filling portraits of the same person in different positions, creating a single image that shows movement and personality. The results are often surreal and dreamlike, perfect for artistic or conceptual work.
For nature photography, I’ll sometimes combine a frame-filling macro shot with a wider environmental shot, creating an image that shows both the intricate details and the broader context. This technique requires careful planning and precise alignment, but the results can be breathtaking.
Many modern cameras have built-in multiple exposure modes that make this technique easier than ever. I’ve found that shooting in RAW gives me the most flexibility when combining images in post-processing, allowing me to fine-tune the blend until it looks just right.
Extreme Angles for Dynamic Compositions
Changing your shooting angle can dramatically affect how your subject fills the frame. Most photographers shoot from eye level, but exploring extreme angles can create much more dynamic and interesting compositions.
Shooting from below your subject can make them appear larger than life, filling the frame with a sense of power and dominance. I’ve used this technique for portrait work, especially with athletes or performers, to create images that emphasize their strength and presence.
Shooting from above can create an intimate, vulnerable feeling. I’ll often stand on a ladder or shoot from a balcony when doing portrait sessions, looking down on my subject to fill the frame with their face and upper body. This angle can be incredibly flattering and creates a unique perspective that viewers find engaging.
For macro work, I’ll experiment with shooting straight down on my subject, creating frame-filling images that look almost like scientific illustrations. This top-down perspective can reveal patterns and symmetries that aren’t visible from other angles.
Using Frames Within Frames
Frames within frames is a composition technique where you use elements within your scene to create a natural frame around your subject. When combined with fill the frame composition, this can create incredibly layered and complex images.
I love using architectural elements like doorways, windows, or arches to frame my subjects. By positioning my subject within these natural frames and then filling the camera frame with the entire composition, I create images that have both depth and immediate impact.
In nature photography, I’ll use overhanging branches, rock formations, or even the frame created by other plants to surround my subject. This technique works especially well with wildlife, creating a sense that you’re peeking at the subject through a natural window.
The key to successful frames within frames is to ensure that the framing element doesn’t compete with your main subject. I look for framing elements that are darker or softer than my subject, creating a clear visual hierarchy that guides the viewer’s eye to what matters most.
Fill the Frame Across Different Photography Genres
Fill the frame composition is versatile and can be applied to virtually every genre of photography. Let’s explore how to adapt this technique for different types of photography, with specific tips and examples from my own experience.
Portrait Photography
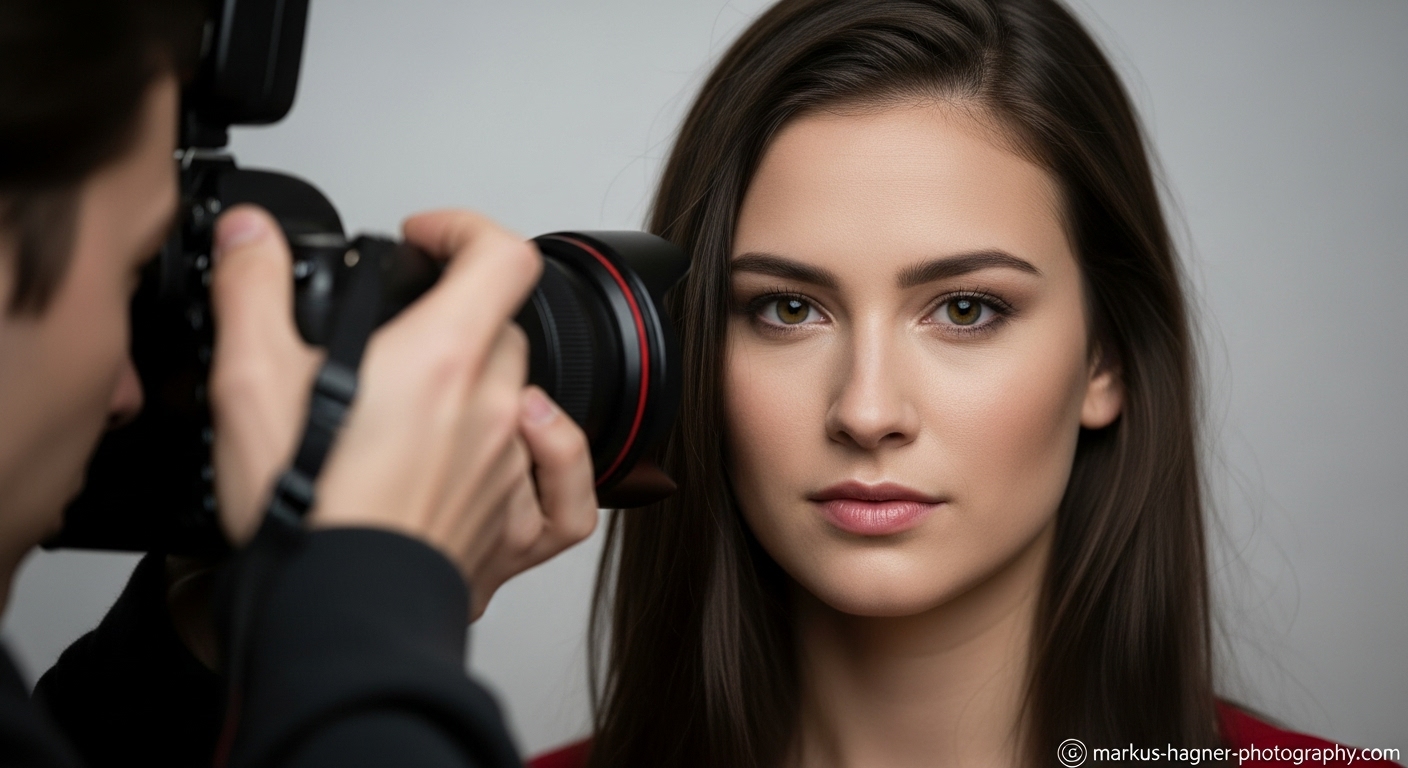
Portraits are perhaps the most natural application of fill the frame composition. Getting close to your subject creates intimacy and reveals personality in ways that wider shots simply can’t match.
For headshots, I’ll fill the frame with just the person’s face, often cropping just above the eyebrows and just below the chin. This extreme close-up creates powerful images that focus entirely on facial features and expression. I’ve found that this works especially well for actors, models, and business professionals who need images that make a strong first impression.
For environmental portraits, I’ll still fill the frame but include more of the subject’s body and some context about their life or work. The key is to move close enough that the subject still dominates the frame, with the environment serving as supporting information rather than competing for attention.
One technique I’ve developed for portrait sessions is to start with wider shots to help my subject relax, then gradually move closer as they become more comfortable. By the end of the session, I’m often filling the frame with extreme close-ups, and my subjects are so comfortable with the process that they forget the camera is there.
Wildlife Photography
Wildlife photography presents unique challenges for fill the frame composition, since you often can’t physically get close to your subjects. This is where telephoto lenses become essential.
For birds, I’ll use my longest lens (400mm or longer) and try to fill the frame with the bird’s head and shoulders. This creates intimate portraits that reveal incredible detail in the feathers and eyes. I’ve spent countless hours in blinds, waiting for birds to come within range of my lens, and the results are always worth the patience.
For larger animals like deer or bears, I’ll still try to fill the frame as much as possible while maintaining a safe distance. This often means using telephoto lenses from 200mm to 600mm, depending on the size of the animal and how close I can safely get.
One challenge in wildlife photography is that animals rarely cooperate by staying still. I’ve learned to use fast shutter speeds and continuous autofocus to ensure I get sharp frame-filling shots even when my subjects are moving. Pre-focusing on a spot where I expect the animal to be can also increase my chances of success.
Street Photography
Street photography is all about capturing authentic moments, and fill the frame composition can make these moments even more powerful. The challenge is getting close enough to fill the frame without being intrusive or disrupting the natural scene.
For candid street portraits, I’ll use a wide-angle prime lens like a 35mm and get physically close to my subjects. This creates frame-filling images that feel intimate and immediate, as if the viewer is right there in the scene. I’ve found that if I’m confident and move quickly, most people don’t even notice I’ve taken their picture.
For environmental street shots, I’ll look for situations where people naturally fill interesting parts of the frame—doorways, windows, or other architectural elements. This creates a layered composition where the person fills part of the frame while the environment provides context.
One technique I’ve developed is to set my camera settings in advance and then shoot from the hip when I’m in crowded situations. This allows me to get frame-filling shots without drawing attention to myself. It takes practice to get the framing right, but the candid results are often incredible.
Macro Photography
Macro photography is essentially fill the frame composition taken to the extreme. When you’re shooting at 1:1 magnification or higher, your subject completely fills the frame, revealing details that are invisible to the naked eye.
For flower photography, I’ll fill the frame with just the center of a flower, revealing intricate patterns in the petals and stamens. I’ve discovered that the most interesting macro shots often come from getting closer than most people would think possible, showing parts of flowers that we rarely see up close.
For insect photography, the challenge is getting close enough to fill the frame without scaring the subject away. I’ll use a longer macro lens (150mm or 200mm) to give myself more working distance, and I’ll move very slowly and deliberately to avoid disturbing my tiny subjects.
One tip I’ve learned for macro work is to focus manually rather than relying on autofocus. The shallow depth of field in macro photography makes autofocus unreliable, and manual focus gives you precise control over exactly what part of your frame-filling image is sharp.
Landscape Photography
While landscape photography often calls for wide shots that include sweeping vistas, fill the frame composition can still be incredibly effective when applied to smaller details within the landscape.
I’ll look for interesting patterns, textures, or small features within a larger landscape and fill the frame with just those elements. This might be the intricate patterns in sand dunes, the texture of tree bark, or the way light falls on a particular rock formation. These frame-filling landscape details often create more unique and personal images than the grand scenic shots everyone else is taking.
For intimate landscapes, I’ll use a medium telephoto lens (70-200mm) to isolate interesting sections of a larger scene. This allows me to fill the frame with just the elements that interest me, creating compositions that are more about mood and feeling than about documenting a specific location.
One technique I’ve developed is to scout locations with both wide and telephoto lenses in mind. I’ll capture the grand scenic shots first, then switch to my telephoto and look for frame-filling details that tell a more intimate story about the place.
When to Use (and When to Avoid) Fill the Frame
While fill the frame composition is a powerful technique, it’s not appropriate for every situation. Learning when to use it—and when to step back and include more context—is crucial for developing your photographic judgment.
Situations Where Fill the Frame Excels
Fill the frame composition is most effective when you want to create impact, reveal detail, or eliminate distractions. Here are the scenarios where I consistently reach for this technique:
Portraits where personality and expression are paramount are perfect for fill the frame composition. When I want to capture the essence of a person—their eyes, their smile, their character—I’ll move in close and fill the frame with their face. The resulting images have an intimacy and power that wider shots simply can’t match.
Wildlife and nature subjects where detail matters benefit tremendously from fill the frame composition. Whether it’s the intricate patterns on a butterfly’s wings or the texture of a flower’s petals, getting close enough to fill the frame reveals a world of detail that creates fascination and wonder.
Product photography almost always calls for fill the frame composition. When I’m shooting products for clients, I want to eliminate all distractions and focus attention squarely on the product itself. Filling the frame ensures that viewers see exactly what I want them to see, with nothing competing for their attention.
Abstract and artistic photography is another area where fill the frame composition shines. By filling the frame with interesting patterns, textures, or colors, I can create images that are more about feeling and visual interest than about representing specific subjects.
When to Step Back and Include More Context
There are definitely situations where fill the frame composition isn’t the best choice. Learning to recognize these scenarios is just as important as knowing when to fill the frame:
Environmental portraits often benefit from showing more of the subject’s surroundings. When I’m photographing an artist in their studio or a chef in their kitchen, including some of the environment helps tell their story more completely than a tight headshot would.
Architecture photography usually requires showing more of the building to convey its design and scale. While I might fill the frame with interesting architectural details, the overall shots need to include enough context to show how the building relates to its surroundings.
Street photography scenes often work better when they include the interaction between subjects and their environment. A frame-filling shot of a person’s face might be interesting, but showing how they relate to the urban environment around them often tells a more complete story.
Landscape photography typically needs to include more of the scene to convey the sense of place and scale. While I might fill the frame with interesting details, the classic landscape shots need breathing room to show the grandeur of the location.
Finding the Right Balance
The most skilled photographers know how to find the perfect balance between filling the frame and including context. This isn’t about rigid rules—it’s about making intentional choices based on what you want to communicate with your images.
I’ve learned to ask myself a series of questions before deciding how much of the frame to fill with my subject:
- What’s the most important element in this scene?
- Do I need to include context to tell the story effectively?
- Will including more environment enhance or distract from my main subject?
- What feeling do I want to evoke in the viewer?
These questions help me make deliberate choices rather than defaulting to always filling the frame or always shooting wide. The goal is to serve the image and its message, not to stick to a rigid compositional formula.
One technique I’ve developed is to shoot the same subject multiple ways—filling the frame, medium shots, and wide shots. This gives me options when I’m editing and helps me learn which approach works best for different types of scenes and subjects.
Post-Processing Tips for Fill the Frame Images
Post-processing is where good fill the frame images become great. The right editing techniques can enhance the impact of your frame-filling compositions and ensure they look their best. Here are the post-processing strategies I’ve developed specifically for fill the frame photography.
Cropping for Maximum Impact
While I always try to get my composition right in-camera, cropping in post-processing is an essential tool for refining fill the frame compositions. Sometimes you don’t realize the perfect framing until you’re reviewing your images on a larger screen.
When I crop for fill the frame effect, I start by considering the aspect ratio. The standard 3:2 ratio might not be the most effective for a particular image. I’ll experiment with square (1:1), 4:5, or even panoramic crops to see which one creates the strongest composition.
I pay special attention to the edges of the frame when cropping. A slight adjustment can make the difference between an image that feels cramped and one that feels perfectly balanced. I’ll often try several different crops, comparing them side by side to see which one has the most impact.
One technique I’ve found helpful is to use the crop overlay tools in Lightroom or Photoshop. These overlays show compositional guidelines like the rule of thirds, golden ratio, or diagonal lines, helping me refine my crop for maximum visual impact.
Enhancing Sharpness and Detail
Since fill the frame images often reveal incredible detail, enhancing that detail in post-processing is crucial. However, it’s important to find the right balance—too much sharpening can look unnatural and harsh.
I start with basic sharpening in Lightroom, using the Detail panel to adjust the Amount, Radius, Detail, and Masking sliders. For frame-filling portraits, I’ll use a lower Amount (around 40-50) and higher Masking (around 70-80) to sharpen only the edges and avoid emphasizing skin texture.
For more precise control, I’ll use Photoshop’s sharpening tools. The High Pass filter technique is one of my favorites—I create a duplicate layer, apply the High Pass filter with a radius of 1-3 pixels, then change the blend mode to Overlay or Soft Light. This gives me incredible control over exactly which parts of the image are sharpened.
For macro photography, where detail is paramount, I might use focus stacking techniques. This involves taking multiple shots at different focus points and combining them in post-processing to create an image that’s sharp throughout. Photoshop has excellent focus stacking capabilities that make this process relatively straightforward.
Adjusting Exposure and Contrast
Fill the frame images often benefit from careful exposure and contrast adjustments to make the subject pop even more. The goal is to guide the viewer’s eye to the most important parts of the image.
I’ll start with basic exposure adjustments in Lightroom, making sure my subject is properly exposed. If the background is distracting, I might darken it slightly using the graduated filter or adjustment brush tools. This helps the subject stand out even more dramatically.
Contrast adjustments can enhance the three-dimensional quality of frame-filling images. I’ll use the Tone Curve panel in Lightroom to create a gentle S-curve, which adds punch to the image without looking unnatural. For more dramatic effects, I might increase the contrast slider, but I’m careful not to go too far and lose detail in the highlights or shadows.
Selective contrast adjustments using adjustment brushes or radial filters can be incredibly effective. I’ll often add a bit of contrast to my subject’s eyes in portraits or to the most important details in macro shots, making them the clear focal point of the image.
Color Grading for Mood
Color plays a crucial role in how viewers perceive and respond to your images. Thoughtful color grading can enhance the mood and impact of your fill the frame compositions.
I start with basic white balance adjustments to ensure accurate colors. Then I’ll use the HSL/Color panel in Lightroom to fine-tune individual colors. For portraits, I might enhance the blues in the eyes or warm up the skin tones slightly. For nature shots, I’ll make the greens more vibrant or the flower colors more saturated.
Split toning is another powerful tool for fill the frame images. By adding different colors to the highlights and shadows, I can create a specific mood or feeling. For portraits, I might add warm tones to the highlights and cool tones to the shadows for a cinematic look. For nature shots, I might enhance the natural colors of the scene.
For more advanced color grading, I’ll use Photoshop’s Color Lookup Tables (LUTs) or create my own color grading using adjustment layers. This gives me precise control over the color palette of my images, allowing me to create a consistent look across a series of frame-filling photographs.
Common Mistakes and How to Fix Them
Even experienced photographers can fall into common traps when working with fill the frame composition. I’ve made all of these mistakes myself at some point, and learning to recognize and fix them has dramatically improved my photography.
Mistake 1: Cutting Off Limbs Awkwardly
When you’re filling the frame with portraits, it’s easy to cut off limbs in awkward places that look unnatural and uncomfortable. I’ve countless images where I’ve cut off hands, feet, or joints in ways that make the subject look amputated rather than intentionally framed.
How to fix it: Be mindful of where you’re cropping limbs. Avoid cutting at joints—instead, crop mid-thigh, mid-bicep, or mid-forearm. If you’re going to include hands, make sure they’re completely in the frame or crop them out entirely. The same goes for feet—either show them completely or crop well above the ankles.
Prevention tip: Before pressing the shutter, do a quick scan of the edges of your frame. Make sure any limbs that are cut off are cropped in natural places. This simple habit has saved me from countless awkward crops.
Mistake 2: Losing Critical Details
When you’re focused on filling the frame, it’s easy to get so close that you lose important details that give context or meaning to the image. I’ve shot frame-filling portraits where I was so close that I missed important elements like jewelry, clothing details, or environmental context that would have enhanced the story.
How to fix it: Take a step back and consider what details are important to the story you’re trying to tell. Sometimes including a bit more context can actually strengthen your image rather than weaken it. Don’t be so focused on filling the frame that you lose elements that make the image more interesting or meaningful.
Prevention tip: Before you get too close, take a wider reference shot. This gives you a record of the full scene and helps you remember what elements might be important to include or reference in your frame-filling composition.
Also Read: Sony 70-200 Vs 70-300
Mistake 3: Ignoring the Background
Just because you’re filling the frame with your subject doesn’t mean you can completely ignore the background. I’ve taken many frame-filling shots where the background, while small, was still distracting enough to pull attention away from my subject.
How to fix it: Pay attention to what’s showing in the background, even when your subject dominates the frame. Look for bright spots, distracting colors, or recognizable shapes that might compete with your subject. Use a wide aperture to blur the background, or reposition yourself to eliminate distracting elements.
Prevention tip: Before you take the shot, scan the entire frame—including the background areas—for potential distractions. This habit will help you catch problems before they become permanent in your images.
Mistake 4: Forgetting About Focus
When you’re filling the frame, especially with wide apertures, your depth of field becomes extremely shallow. I’ve ruined countless frame-filling shots by having the wrong point in focus—sharp ears when the eyes should be sharp, or sharp petals when the center of the flower should be the focal point.
How to fix it: Be deliberate about where you place your focus point. For portraits, focus on the eyes—specifically the eye closest to the camera. For other subjects, identify the most important point and make sure that’s where your focus is set. Use single-point autofocus for precise control.
Prevention tip: Use your camera’s focus magnification feature to check critical focus before taking the shot. This is especially important for macro photography where depth of field is razor-thin.
Mistake 5: Overlooking Composition Basics
It’s easy to get so excited about filling the frame that you forget other basic compositional principles. I’ve taken frame-filling shots where the subject was centered awkwardly, or where leading lines actually led away from my subject rather than toward it.
How to fix it: Remember that fill the frame composition is just one tool in your compositional toolkit. It still needs to work with other principles like the rule of thirds, leading lines, and balance. Even when you’re filling the frame, think about how the elements within that frame relate to each other.
Prevention tip: Before you take the shot, ask yourself if the composition feels balanced and intentional. If something feels off, adjust your position or framing until it looks right.
Creative Variations of Fill the Frame
Once you’ve mastered the basics of fill the frame composition, you can explore creative variations that will make your images stand out from the crowd. These advanced techniques push the boundaries of traditional fill the frame approaches.
Partial Fill the Frame
Partial fill the frame is a technique where you fill most but not all of the frame with your subject, leaving a small amount of breathing room. This creates a different effect than completely filling the frame—it’s less intense but still focuses attention on your subject.
I often use this technique for portraits where I want to show some context but still keep the focus on the person. I’ll fill about 80% of the frame with my subject, leaving just a sliver of environment that gives a hint of location or mood without being distracting.
For nature photography, partial fill the frame can create a sense of scale. I might fill most of the frame with a flower or rock formation but leave a small amount of space that shows something else in the scene for reference. This helps viewers understand the size and context of my main subject.
The key to successful partial fill the frame is to be intentional about what you include in the small areas that aren’t filled by your main subject. Every element should serve a purpose, whether it’s providing context, creating balance, or adding visual interest.
Multiple Subjects Filling the Frame
Instead of filling the frame with a single subject, try filling it with multiple related subjects. This creates complex, layered compositions that can tell more sophisticated stories.
I’ve used this technique for portrait sessions with families or couples, filling the frame with multiple people who are interacting with each other. The result is a dynamic composition where the relationships between the subjects become as important as the individuals themselves.
For nature photography, I’ll fill the frame with multiple flowers or leaves, creating patterns and rhythms that are more interesting than a single subject might be. This approach works especially well when there’s repetition with variation—similar elements that aren’t exactly the same.
The challenge with multiple subjects is to avoid visual chaos. I look for ways to organize the elements—through color, size, position, or focus—to create a clear visual hierarchy that guides the viewer’s eye through the image.
Abstract Fill the Frame
Abstract fill the frame focuses on patterns, textures, and colors rather than recognizable subjects. This approach can create incredibly artistic and visually striking images that are more about feeling and visual interest than about representing specific objects.
I love using this technique for urban photography, filling the frame with architectural details, reflections, or shadows that create abstract compositions. The result is often more about graphic design and visual rhythm than about documenting a specific place.
For nature photography, I’ll fill the frame with patterns in sand, water, or foliage, creating images that are almost unrecognizable as nature photographs but are visually compelling in their own right.
The key to successful abstract fill the frame is to look beyond the literal subject and focus on the visual elements—line, shape, color, texture. Ask yourself what makes this interesting visually, rather than what this is a picture of.
Also Read: Nikon Vs Sony Mirrorless
Fill the Frame with Negative Space
This might seem counterintuitive, but you can actually use fill the frame composition with negative space—those areas of your image that are empty or understated. The technique involves filling the frame with your subject while also being intentional about the negative space around it.
I use this approach for minimalist compositions where I want to create a sense of isolation or emphasis. By filling most of the frame with my subject but leaving a significant area of negative space, I create images that feel both intimate and expansive.
For portrait work, this might mean filling most of the frame with a person’s face but leaving a area of empty space that creates a sense of direction or mood. The negative space becomes as important as the subject in creating the overall feeling of the image.
The key to this technique is balance. Too much negative space and your subject gets lost; too little and you lose the effect. I experiment with different ratios to find the perfect balance for each specific image.
Frequently Asked Questions
What exactly does “fill the frame” mean in photography?
Fill the frame means composing your image so that your main subject takes up most or all of the picture area. It’s about eliminating unnecessary space and distractions, making your subject the clear focus of attention. When you fill the frame, you’re essentially telling viewers, “This is what matters in this image.”
How close is too close when filling the frame?
There’s no absolute rule—it depends on your subject and what you’re trying to communicate. For portraits, I’ll sometimes get so close that I’m cropping off parts of the face, which can create dramatic, intimate images. For product photography, I might fill the frame so completely that you can’t even tell what the product is, focusing instead on interesting textures or details. The key is to be intentional about your composition and make sure it serves your creative vision.
Do I need expensive equipment to fill the frame effectively?
Not at all! While telephoto and macro lenses can make it easier to fill the frame with distant or small subjects, you can achieve great results with any camera by simply moving closer to your subject. Some of my favorite frame-filling images were taken with basic kit lenses just by getting physically closer to my subjects.
When should I avoid filling the frame?
Fill the frame isn’t appropriate for every situation. You should avoid it when you need to show context or environment, when you’re shooting architecture that needs to show scale, or when the relationship between multiple subjects is important. Environmental portraits, street photography scenes, and classic landscape photography often benefit from showing more of the scene rather than filling the frame.
How do I fill the frame without making my subject look cramped?
The key is to be intentional about where you crop. Avoid cutting off limbs at joints, which looks unnatural. Instead, crop mid-thigh, mid-bicep, or mid-forearm. Also, pay attention to the overall balance of the composition—sometimes leaving a small amount of breathing room around your subject can prevent the image from feeling cramped while still maintaining the frame-filling effect.
Can I fill the frame in post-processing by cropping?
Yes, cropping in post-processing is a valid way to achieve fill the frame composition, but it should be used thoughtfully. Heavy cropping can reduce image quality, especially if you’re planning to print your images large. I always try to get as close to my final composition as possible when shooting, using cropping only as a fine-tuning tool in post-processing.
What aperture should I use for fill the frame photography?
Your aperture choice depends on your creative goals. For portraits, I often use wide apertures (f/1.4 to f/2.8) to create beautiful background blur that makes my subject stand out even more dramatically. For macro work, I might use smaller apertures (f/8 to f/16) to get more depth of field and keep more of my small subject in focus. For landscapes or architectural details, I might use medium apertures (f/5.6 to f/11) to balance sharpness throughout the frame.
How do I fill the frame with moving subjects like wildlife or sports?
For moving subjects, telephoto lenses are essential. I use long lenses (300mm or longer) to fill the frame with distant subjects. Fast shutter speeds (1/1000s or faster) help freeze motion and ensure sharp images. Continuous autofocus modes that track moving subjects are also crucial. Patience is key—wait for the subject to come to you rather than chasing after it.
Can fill the frame composition work for landscape photography?
While traditional landscape photography often uses wide compositions, fill the frame techniques can be very effective for intimate landscapes. I’ll use telephoto lenses to isolate interesting details within a larger landscape—patterns in sand dunes, interesting rock formations, or sections of forests. These frame-filling landscape details often create more unique and personal images than the grand scenic shots everyone else is taking.
How do I know when I’ve successfully filled the frame?
A successful fill the frame composition immediately draws the viewer’s eye to your subject without confusion or distraction. When you look at the image, there should be no question about what the main subject is. The composition should feel intentional and balanced, with every element serving a purpose. If viewers have to search for the subject or if there are distracting elements pulling attention away, you probably haven’t filled the frame effectively.
Ready to Master Fill the Frame Composition?
Fill the frame composition has transformed my photography, and I’m confident it will transform yours too. It’s one of those fundamental techniques that seems simple on the surface but has incredible depth and versatility once you start exploring it seriously.
Remember, the key to mastering fill the frame composition is practice and experimentation. Try it with different subjects, in different lighting conditions, and with different equipment. Pay attention to how it changes the mood and impact of your images. Most importantly, develop your own style and approach—there’s no single “right” way to fill the frame, only what works for your creative vision.
Save this guide for your next photography session! Bookmark this page so you can reference these tips and techniques when you’re out shooting. And don’t forget to share your frame-filling creations with me—I’d love to see how you’re using these techniques to develop your unique photographic voice!
Looking for more photography inspiration? Check out my guides on Rule of Thirds Mastery, Portrait Photography Secrets, and Creative Composition Techniques to continue expanding your photographic skills.
Happy shooting, and may your frames always be filled with intention and impact!