Getting professional-looking YouTube videos from your mirrorless camera isn’t about having the most expensive gear. It’s about understanding the right camera settings for shooting YouTube videos with a mirrorless camera and how each one affects your final output. After testing countless configurations across Sony, Canon, Nikon, and Fujifilm bodies, I’ve found that a handful of key settings make the difference between amateur footage and content that keeps viewers watching.
In this guide, I’ll walk you through every setting you need to know, from frame rates to white balance. You’ll also get a quick-start cheat sheet so you can start filming immediately, then dive deeper into why each setting matters. Whether you’re shooting talking head tutorials, cinematic vlogs, or product reviews, these mirrorless camera video settings will elevate your YouTube content in 2026.
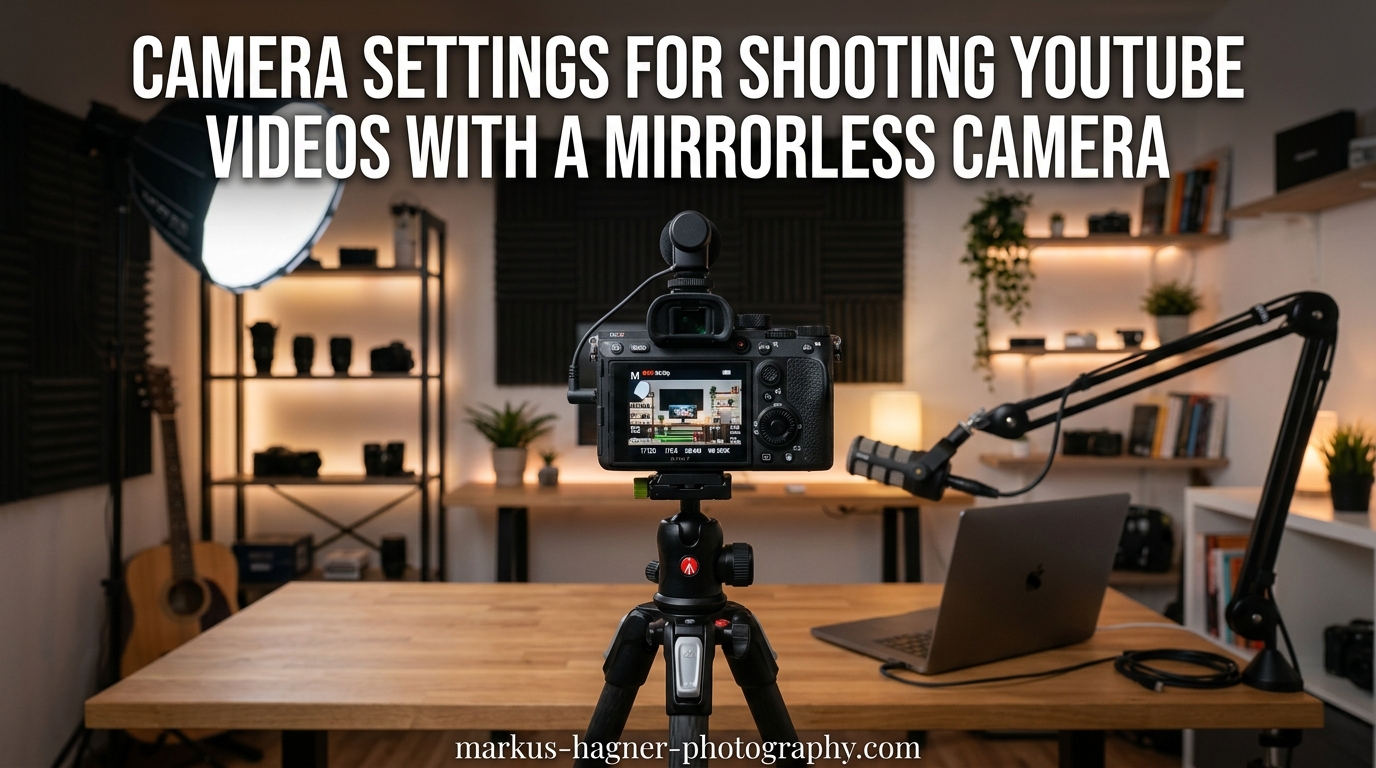
Quick-Start Settings Cheat Sheet
If you just want to start filming right now, here are the settings I recommend for most YouTube creators. These work as a baseline you can fine-tune based on your specific shooting conditions.
Talking Head / Tutorial Videos: 30fps, 1/60 shutter speed, f/4-f/5.6 aperture, ISO 100-800, 4K or 1080p, manual white balance set to your room’s Kelvin value.
Vlogs / Run-and-Gun: 30fps (or 60fps for smoother motion), 1/60 or 1/125 shutter, f/2.8-f/4 aperture, auto ISO with a cap at 3200, 4K preferred, auto white balance with occasional manual checks.
Cinematic / B-Roll: 24fps, 1/50 shutter speed, f/1.8-f/2.8 for shallow depth of field, ISO as low as possible, 4K, manual white balance, LOG picture profile if available.
I’ll explain why each of these settings works throughout this guide. For now, copy these into your camera and start shooting. You can always adjust as you learn what each control does.
Camera Settings for Shooting YouTube Videos with a Mirrorless Camera: Frame Rate Guide
The frame rate you choose affects how motion appears in your video and determines your editing flexibility later. Frame rate, measured in frames per second (fps), is one of the first settings you should lock in before adjusting anything else because it directly impacts your shutter speed choice.
24fps for Cinematic Look
24fps creates that film-like quality most people associate with movies and high-end productions. The slightly slower frame rate produces natural motion blur that feels smooth and intentional. I use 24fps for cinematic b-roll, travel content, and any video where I want a more artistic, polished feel.
The downside of 24fps is that it doesn’t handle fast motion well. If you’re filming sports, action sequences, or quick camera movements, 24fps can look choppy. Stick to 30fps or higher for those situations.
30fps for Standard YouTube Content
30fps is the sweet spot for most YouTube videos. It delivers smooth motion without the soap-opera effect that higher frame rates can create. Talking head videos, tutorials, product reviews, and standard vlogs all look great at 30fps. This is my default recommendation for creators just starting out.
YouTube’s platform handles 30fps natively, so you won’t run into any encoding issues. It also gives you some flexibility in post-production without requiring massive file sizes.
60fps for Smooth Motion and Slow Motion
60fps excels when you need extra smooth motion or want the option to slow footage down in editing. Action sports, gaming content, and fast-paced tutorials benefit from 60fps. The real power comes when you slow 60fps footage to 30fps or 24fps in your timeline, creating buttery smooth slow motion.
Here’s a common mistake I see in forums: creators shoot everything at 60fps because higher numbers seem better. But 60fps uses more storage, can look hyper-real (which works against cinematic goals), and requires faster shutter speeds that need more light. Only use 60fps when you specifically need its benefits.
Frame Rate Quick Reference:
– 24fps: Cinematic feel, film-like quality, best for b-roll and artistic content
– 30fps: Standard YouTube, most versatile, good for talking heads and tutorials
– 60fps: Smooth motion, slow motion potential, action and fast-paced content
Shutter Speed and the 180-Degree Rule
The 180-degree shutter rule is the single most important concept for natural-looking video motion. This rule states that your shutter speed should be approximately double your frame rate. So if you’re shooting at 24fps, use 1/50 shutter speed. At 30fps, use 1/60. At 60fps, use 1/125.
Why does this matter? The 180-degree rule creates the right amount of motion blur that our eyes expect to see. Too fast a shutter speed and your video looks staccato and jittery, like a Saving Private Ryan battle scene. Too slow and motion becomes smeared and dreamy. The 180-degree rule hits the sweet spot.
How to Calculate Shutter Speed
Here’s the math: take your frame rate and double it, then set your shutter speed to the closest available setting. For 24fps, that’s 48, so use 1/50. For 30fps, that’s 60, so use 1/60. For 60fps, that’s 120, so use 1/125 (or 1/120 if your camera offers it).
This formula works because it mimics how film cameras expose each frame for half the duration between frames. That half-exposure creates natural blur that smooths motion between frames.
When to Break the 180-Degree Rule
Sometimes you need to deviate from the rule. In bright sunlight, you might not be able to achieve 1/50 shutter speed without stopping down your aperture or using ND filters. In very low light, you might need to slow your shutter to 1/30 or slower to get enough exposure.
Creative choices also apply. Fast shutter speeds can create tension and urgency in action sequences. Slow shutter speeds add dreaminess to romantic or ethereal scenes. Just understand the effect you’re creating before you break the rule.
Shutter Speed Reference by Frame Rate:
– 24fps → 1/50 second
– 30fps → 1/60 second
– 60fps → 1/125 second
– 120fps → 1/250 second
Aperture and Depth of Field for Video
Aperture controls two things: how much light enters your lens and how much of your scene appears in focus. For YouTube videos, aperture is your primary tool for achieving that professional blurred-background look while maintaining proper exposure.
How Aperture Affects Your Video
Lower f-numbers (like f/1.8 or f/2.8) create a shallow depth of field where your subject is sharp but the background blurs into creamy bokeh. Higher f-numbers (like f/8 or f/11) keep more of the scene in focus from foreground to background.
For talking head videos, I typically shoot between f/2.8 and f/5.6. This keeps my face sharp while softening the background enough to remove distractions. Going too wide (f/1.4) can make it hard to stay in focus if you move even slightly.
Depth of Field Explained
Depth of field is the zone of acceptable sharpness in your image. Three factors affect it: aperture, focal length, and distance to subject. Wider apertures, longer focal lengths, and closer distances all reduce depth of field.
For YouTube, think about what you want viewers to focus on. If your background adds context to your content (like a workshop for DIY videos), use a smaller aperture to keep it recognizable. If the background is just visual noise, open up your aperture to blur it away.
The ND Filter Problem
Here’s a common frustration: you’re shooting outdoors at 24fps with 1/50 shutter speed, but even at your lens’s smallest aperture, you’re still overexposed. This is where neutral density (ND) filters become essential. Think of them as sunglasses for your lens, letting you maintain proper shutter speed and aperture in bright conditions.
I always recommend carrying at least a variable ND filter if you shoot outdoor YouTube content. It gives you full control over exposure without sacrificing the settings that make your video look professional.
ISO Settings and Noise Management
ISO determines how sensitive your camera’s sensor is to light. Higher ISO values brighten your image but introduce digital noise, those grainy speckles that make footage look amateur. The key is finding your camera’s optimal ISO range and staying within it whenever possible.
What ISO Does in Video
Unlike photography where you might push ISO high for a single image, video requires consistency. If your ISO jumps around during a clip, noise levels will visibly fluctuate, which is distracting to viewers. Set your ISO before recording and try to keep it constant throughout each take.
Most mirrorless cameras have a “native” or “base” ISO where they produce the cleanest image. For many cameras, this falls between ISO 100 and ISO 800. Below native ISO, you might not see much improvement. Above it, noise increases progressively.
Native ISO and Optimal Ranges
Different cameras have different native ISOs, and some have dual native ISO systems that switch to a secondary, cleaner high-ISO mode. Sony A7 series cameras typically perform best at ISO 100 and ISO 640 (their second native ISO). Canon cameras often have native ISOs around 100-160 and 800. Check your specific camera’s recommendations.
For YouTube content, I try to stay under ISO 1600 whenever possible. At ISO 3200 and above, noise becomes noticeable even to casual viewers. If you need more light, invest in lighting equipment before cranking up your ISO.
Handling Low Light Situations
When faced with low light, adjust settings in this order: open your aperture wider, slow your shutter speed (within reason), then finally increase ISO. Adding light is always better than increasing ISO, so consider affordable LED panels or ring lights before pushing your sensor to its limits.
Some cameras handle high ISO better than others. Full-frame sensors typically outperform crop sensors in low light. If you regularly shoot in dim conditions, this might influence your equipment choices.
White Balance and Kelvin for Video
White balance tells your camera what “white” looks like under your current lighting so it can reproduce all colors accurately. Get this wrong and your footage will look orange (too warm) or blue (too cool), a common complaint I see in videography forums.
Why Auto White Balance Fails
Auto white balance seems convenient, but it’s unreliable for video. As light changes during your shot, AWB adjusts continuously, causing color shifts that are jarring and difficult to correct in editing. A person walking past a window can trigger a white balance change that ruins an otherwise perfect take.
For YouTube videos where consistency matters, always use manual white balance. Your viewers might not consciously notice perfect color, but they’ll absolutely notice when skin tones shift between shots.
Kelvin Scale Explained
The Kelvin scale measures color temperature in degrees. Lower numbers (2700K-3200K) represent warm, orange-tinted light like tungsten bulbs or candlelight. Higher numbers (5000K-6500K) represent cool, blue-tinted light like daylight or overcast skies. Mid-range values (4000K-4500K) approximate neutral white.
Setting white balance by Kelvin gives you precise, repeatable control. Once you know your shooting environment’s Kelvin value, you can lock it in and get consistent colors across every take.
Common Kelvin Values for Different Lighting
Kelvin Reference Guide:
– Candlelight: 1850K-1900K
– Tungsten/Incandescent bulbs: 2700K-3200K
– Warm LED panels: 3000K-3500K
– Neutral fluorescent: 4000K-4500K
– Daylight (noon): 5500K-5600K
– Overcast/shade: 6500K-7500K
When shooting YouTube videos indoors with mixed lighting, set your Kelvin to match your primary light source. If you’re lit by window light at 5600K but have warm lamps in the background, exposing for 5600K keeps you looking natural while the background takes on a warm glow, which can actually look quite pleasant.
Video Resolution: 4K vs 1080p for YouTube
Resolution determines how many pixels make up your image. 4K (3840 x 2160) offers four times the detail of 1080p (1920 x 1080). But higher resolution isn’t always better for YouTube creators. The right choice depends on your content, computer, and storage situation.
When to Use 4K
4K makes sense when you want maximum quality, need cropping flexibility in editing, or want to future-proof your content. If your camera and computer can handle it, 4K gives you the ability to punch in on footage without losing quality, reframe shots, and deliver sharper final videos.
For cinematic content, product showcases, and any video where detail matters, 4K is worth the extra storage and processing requirements. Many viewers now expect 4K from creators they consider professional.
When 1080p Is Better
Don’t dismiss 1080p. It requires a quarter of the storage space, edits smoothly on modest computers, and still looks excellent on YouTube. If you’re just starting out, have an older editing rig, or primarily create content viewed on mobile devices, 1080p might be the smarter choice.
I often recommend beginners master their settings at 1080p before jumping to 4K. The fundamentals of exposure, composition, and camera movement matter far more than resolution. A well-lit, properly exposed 1080p video beats a poorly executed 4K production every time.
Storage and Editing Considerations
4K footage eats storage. A single minute of 4K video can consume 400MB to 2GB depending on your codec and bitrate. Factor in multiple takes, B-roll, and archived projects, and you’ll need substantial hard drive space. 1080p gives you roughly four times the recording time on the same card.
Editing 4K also demands processing power. If your computer struggles to play back 4K smoothly, you’ll waste time dealing with lag and proxy files. Be honest about your hardware limitations and choose the resolution that lets you focus on creating rather than troubleshooting.
YouTube-Specific Optimization Tips
Beyond basic camera settings, several YouTube-specific considerations can improve how your content looks on the platform. These tips come from testing what actually performs well on YouTube, not just what looks good on your editing monitor.
Picture Profiles and LOG Explained
Picture profiles are color settings baked into your video file. Standard profiles look good out of camera but offer limited editing flexibility. LOG profiles capture a flat, low-contrast image that preserves more dynamic range, giving you more control in post-production.
For YouTube, LOG isn’t always necessary. If you’re shooting controlled content with consistent lighting and don’t want to color grade, standard profiles work fine. But if you want maximum quality and don’t mind spending time in editing, LOG profiles from Sony (S-Log), Canon (C-Log), and others can elevate your footage.
Just remember: LOG requires color grading. Don’t shoot LOG if you plan to upload straight from camera. Flat footage looks wrong to viewers and won’t perform well.
Bitrate Considerations
Bitrate measures how much data your camera records per second of video. Higher bitrates preserve more detail but create larger files. For YouTube, you want the highest bitrate your camera offers within your chosen resolution and frame rate.
YouTube re-encodes everything you upload, so starting with higher quality gives the encoder more to work with. If your camera offers 100Mbps or higher for 4K, use it. For 1080p, 50Mbps is a good minimum target.
Brand-Specific Quick Tips
Sony: Find video settings in the Camera Settings 2 menu. Enable “Movie” mode in the mode dial for full manual video control. Sony’s autofocus is excellent for video, but learn to switch AF modes for different situations. S-Log3 gives the most dynamic range but requires exposure +1 to +2 stops.
Canon: Canon’s menus are more intuitive for video. Look for “Movie Rec. Size” to change resolution and frame rate. Canon’s Dual Pixel AF tracks faces beautifully for YouTube. C-Log3 is easier to grade than Sony’s LOG but offers slightly less dynamic range.
Nikon: Nikon Z cameras hide video settings in the Movie Shooting Menu. Enable “N-Log” for flat footage. Nikon’s IBIS is excellent for handheld YouTube work. Focus peaking can be enabled to help with manual focus.
Fujifilm: Film Simulation modes work for video too. “Eterna” is designed for video with soft highlights and shadows. Fujifilm’s film-like colors look great without grading, making it perfect for creators who want to minimize post-production.
Common Beginner Mistakes to Avoid
After spending time in videography forums and reviewing countless YouTube channels, I’ve identified the most common mistakes that make videos look amateur. Avoiding these will immediately improve your content quality.
Mistake 1: Shooting Everything at 60fps
Higher isn’t always better. 60fps is for action and slow motion, not talking head videos. Stick to 24fps or 30fps for standard content unless you have a specific reason for 60fps.
Mistake 2: Relying on Auto Settings
Auto exposure and auto white balance create inconsistency. Your viewers will notice when brightness and color shift between shots. Commit to manual settings for professional results.
Mistake 3: Ignoring Audio
Viewers tolerate mediocre video quality but will click away from bad audio instantly. Invest in an external microphone before upgrading your camera. A $100 lavaliere mic improves perceived quality more than a $1000 camera upgrade.
Mistake 4: Overlooking Lighting
Great lighting makes average cameras look good. Poor lighting makes expensive cameras look bad. Before buying new gear, learn to position lights for flattering results.
Mistake 5: Shooting Without a Plan
Know your settings before you press record. Fumbling through menus while the camera rolls wastes time and looks unprofessional. Set up your shot, lock in your settings, then record.
Frequently Asked Questions
What is the best camera setting for YouTube videos?
The best camera settings for YouTube videos are 30fps frame rate, 1/60 shutter speed, f/4 aperture for talking heads, ISO 100-800, and manual white balance set to your room’s Kelvin value. Shoot in 4K if your computer can handle it, or 1080p if you need to conserve storage and processing power.
What is the 180-degree shutter rule?
The 180-degree shutter rule states that your shutter speed should be approximately double your frame rate. For 24fps, use 1/50 shutter speed. For 30fps, use 1/60. For 60fps, use 1/125. This creates natural motion blur that looks smooth and professional rather than jittery or smeared.
Should I shoot 24fps or 30fps for YouTube?
Shoot 30fps for most YouTube content including talking heads, tutorials, and vlogs. Use 24fps for cinematic content where you want a film-like quality. The difference is subtle: 24fps feels more artistic and cinematic, while 30fps feels more immediate and natural for standard video content.
Should I do 4K or 1080p for YouTube?
Choose 4K for maximum quality, cropping flexibility, and future-proofing your content. Choose 1080p if you have limited storage, an older editing computer, or want to focus on mastering fundamentals first. Well-executed 1080p content outperforms poorly executed 4K every time.
Is a mirrorless camera better for videography?
Yes, mirrorless cameras offer several advantages for videography including real-time exposure preview through the electronic viewfinder, excellent autofocus tracking, typically lighter weight than DSLRs, and often superior video features like LOG profiles and higher bitrates. Most modern mirrorless cameras are designed with video as a primary use case.
Conclusion
Mastering camera settings for shooting YouTube videos with a mirrorless camera comes down to understanding a handful of core concepts. Use 24fps or 30fps for most content, follow the 180-degree shutter rule, control your depth of field with aperture, keep ISO low, and set manual white balance by Kelvin. These fundamentals apply whether you’re shooting on a Sony, Canon, Nikon, or Fujifilm body.
The best way to learn is to practice. Set up your camera using the quick-start cheat sheet, shoot some test footage, then adjust one setting at a time to see how it affects your image. Before long, these settings will become second nature, and you can focus entirely on creating engaging content for your YouTube audience in 2026.