After shooting over 200 interviews as a solo videographer, I can tell you that you do not need a truck full of equipment to create professional-looking content. The truth is, most of my best interview work happens with just one camera and a solid understanding of the fundamentals. When I first started, I thought throwing more cameras at a shoot would automatically make it look better. I was wrong. What actually creates that polished, cinematic interview look comes down to lighting, composition, audio, and knowing how to work efficiently with limited gear.
In this guide, I will walk you through exactly how to shoot a cinematic interview with one camera. We will cover camera settings, lens selection, lighting setups, audio recording, and the workflow tips that make solo shooting manageable. Whether you are a documentary filmmaker, corporate videographer, or content creator working alone, these techniques will help you produce interview footage that looks like it came from a multi-camera crew.
What Makes an Interview Look Cinematic
A cinematic interview has a distinct visual quality that separates professional video from amateur footage. The defining characteristics include shallow depth of field that blurs the background while keeping the subject sharp, controlled lighting that adds dimension and mood, careful framing that follows composition rules, and clean audio that matches the visual quality. When these elements work together, your interview subject appears isolated from distractions, lit with intention, and framed in a way that draws viewer attention exactly where it belongs.
The shallow depth of field effect comes from using a wider aperture on a telephoto lens. This creates background separation, often called bokeh, which instantly signals professional production value. Three-point lighting adds shape and dimension to faces rather than flat, even illumination. Proper framing follows the rule of thirds and gives subjects appropriate headroom and look room. These techniques combine to create that cinematic interview look that viewers recognize as high-quality content.
Camera Selection and Setup for Interviews
Almost any modern camera can produce excellent interview footage, but certain features make the job easier. I recommend shooting in 4K whenever possible because it gives you flexibility in post-production. The extra resolution lets you punch in for close-ups during editing, effectively simulating a second camera angle from a single wide shot. This technique alone has saved countless solo shoots where I needed cut points but only had one camera running.
Log recording is another feature worth having. Shooting in log profiles like S-Log, C-Log, or V-Log captures more dynamic range and gives you greater flexibility during color grading. The flat footage might look washed out initially, but it holds onto highlight and shadow detail that standard profiles clip away. If your camera offers 10-bit recording, use it. The extra color information makes skin tone adjustments smoother and gradients less banded.
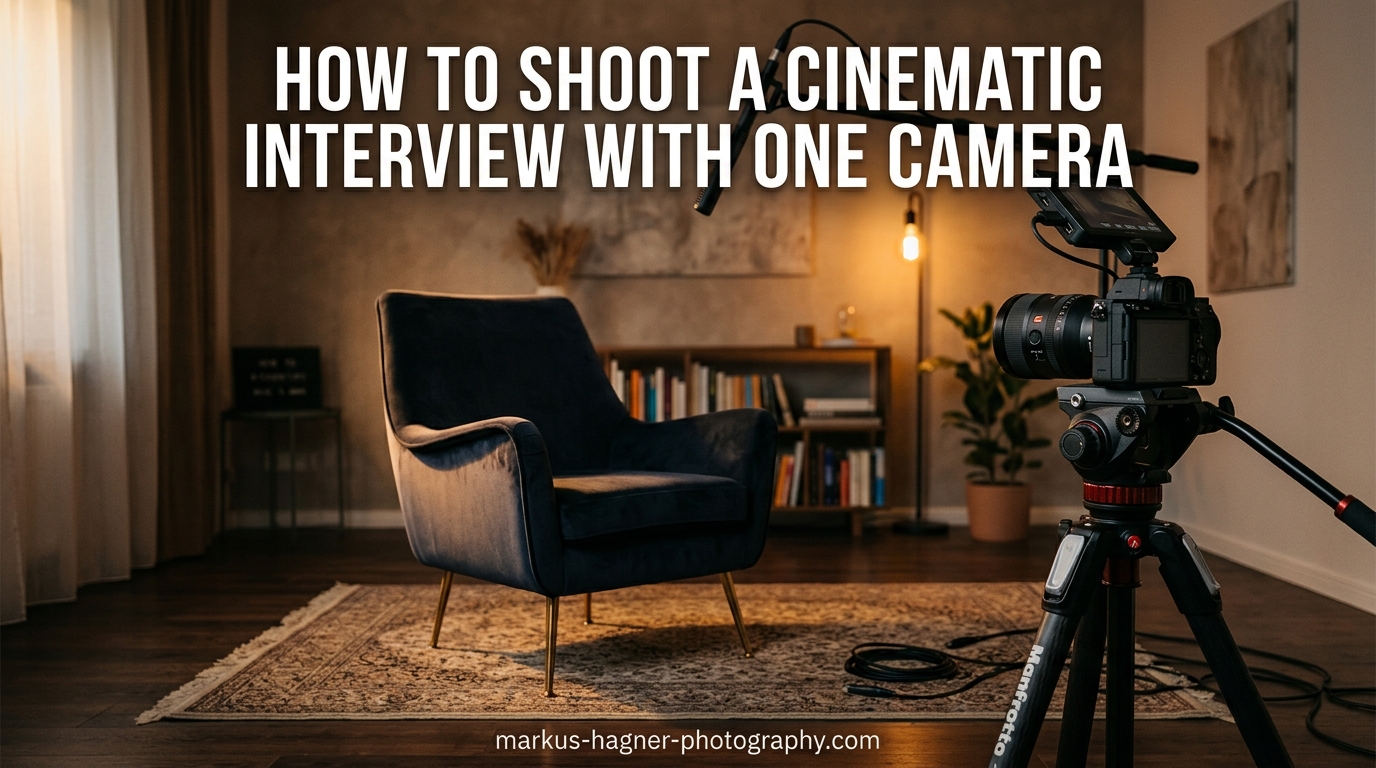
A sturdy tripod is non-negotiable for interview work. Handheld shooting has its place, but interviews typically benefit from locked-off stability. I use a fluid head tripod that allows smooth pan and tilt adjustments for reframing between takes. Make sure your tripod can handle your camera’s weight with all accessories attached, including microphones and monitors.
Essential Camera Settings for Cinematic Interviews
Getting your camera settings right forms the foundation of cinematic interview footage. I start every interview setup with the same baseline settings and adjust from there based on the specific environment.
Aperture Settings
Shoot with your aperture wide open or slightly stopped down to achieve shallow depth of field. On most lenses, f/2.8 provides excellent background separation while maintaining enough depth to keep the subject’s entire face in focus. Going wider to f/1.8 or f/1.4 creates even more blur, but focus becomes critical and any subject movement can throw parts of their face soft. For interviews, I typically stay between f/2.0 and f/4.0 depending on the lens and working distance.
Shutter Speed
Follow the 180-degree shutter rule for natural motion blur. At 24 frames per second, use 1/50 second shutter speed. At 30fps, use 1/60 second. This creates the motion characteristics our eyes expect from cinematic content. Faster shutter speeds produce staccato movement that looks like video rather than film. Slower speeds create excessive blur during any movement.
ISO Management
Keep your ISO as low as possible while maintaining proper exposure. Most cameras have a native ISO where image quality is optimal, typically ISO 800 or ISO 1600 on many mirrorless cameras. Going above native ISO introduces noise, which becomes especially visible in shadow areas and on skin tones. If you need more light, add it with fixtures rather than cranking up ISO. Your footage will thank you in post-production.
Frame Rate
For interviews, 24fps delivers the most cinematic feel. This frame rate has been associated with film production for over a century, and audiences subconsciously recognize it as premium content. 30fps works fine for web content but has a slightly more video-like quality. Avoid 60fps for interviews unless you specifically want that hyper-real broadcast look.
White Balance
Set white balance manually rather than relying on auto mode. Auto white balance can shift during recording as the subject moves or lighting changes slightly, creating inconsistent color across your footage. I typically dial in 5600K for daylight-balanced lighting or 3200K for tungsten sources. Take a custom reading using a white card for the most accurate results in mixed lighting situations.
Best Lens for Interview Video
Lens choice dramatically affects the cinematic quality of your interviews. The focal length you select determines working distance, background compression, and how flattering the shot looks to your subject.
For most interviews, I recommend focal lengths between 70mm and 100mm on a full-frame camera. This telephoto range provides flattering facial compression while allowing enough working distance to position lights and audio equipment between camera and subject. Wider lenses like 35mm or 50mm require getting closer to fill the frame, which distorts facial features and shows more of the background than desired.
A 85mm prime lens is my go-to choice for interview work. The focal length is flattering, the maximum aperture typically falls between f/1.4 and f/1.8 for excellent background separation, and prime lenses generally offer superior sharpness compared to zooms. That said, a 24-70mm f/2.8 zoom gives you framing flexibility without changing lenses, which matters when working solo.
If you shoot on a crop sensor camera, adjust your focal length accordingly. A 50mm lens on an APS-C sensor behaves like a 75mm on full-frame, making it an excellent interview choice. Micro Four Thirds cameras need even shorter focal lengths to achieve the same look, with 40-50mm working well for interview framing.
Interview Framing and Composition Techniques
How you frame your subject communicates professionalism and directs viewer attention. Good framing follows established conventions while adapting to your specific subject and environment.
Rule of Thirds
Position your subject off-center using the rule of thirds. Place their eye line along the upper horizontal third line and give them look room in the direction they are facing. If your subject looks camera-left, position them on the right third of frame. This creates balanced composition with negative space that feels natural and professional.
Camera Height
Set your camera at the subject’s eye level or slightly below. Shooting from above makes subjects appear smaller and less authoritative. Shooting from below can make them look powerful but also unflattering if the angle is too extreme. Eye-level placement creates an equal, conversational relationship between subject and viewer.
Headroom and Look Room
Leave appropriate space above the subject’s head and in the direction they are looking. Too much headroom wastes frame space and makes the composition feel awkward. Too little crowds the subject and creates tension. Aim for a small gap between the top of their head and the frame edge, and ensure the look room in front of their face exceeds the space behind their head.
Shot Sizes
For interviews, medium shots and medium close-ups work best. A medium shot frames the subject from the waist up, showing some environment while keeping focus on them. A medium close-up captures from mid-chest to the top of the head, creating intimacy without feeling invasive. Save extreme close-ups for emotional moments in documentary work, and use wider shots for context when the environment matters to the story.
Three-Point Lighting Setup Explained
Three-point lighting is the foundation of professional interview illumination. This technique uses a key light, fill light, and backlight to create dimensional, flattering light on your subject while separating them from the background.
Key Light
The key light is your primary illumination source and should be the brightest light on your subject. Position it at a 45-degree angle from the camera-subject axis, slightly above eye level. This creates modeling on the face, with a highlight side and a shadow side that gives the image depth. The size of your key light source affects the quality of shadows it produces. Larger sources like softboxes create soft, gradual shadow transitions. Smaller sources produce harder, more defined shadows.
I typically use a large softbox or diffusion panel for interview key lights. The soft quality flatters skin and creates gentle shadow transitions that look natural on camera. Position the key light close enough to your subject for soft quality but far enough that falloff does not leave the bottom of the frame significantly darker than the top.
Fill Light
The fill light reduces shadow density created by the key light without eliminating shadows entirely. Position it on the opposite side of the camera from the key light, typically at a lower intensity. The ratio between key and fill determines the contrast level of your lighting. A 2:1 ratio produces subtle shadows with minimal contrast. A 4:1 ratio creates dramatic, moody lighting with deep shadows.
For interviews, I usually aim for a 2:1 or 3:1 ratio that provides dimension without making the subject look harsh. You can achieve fill with a second light fixture or by using a reflector to bounce key light back into shadow areas. Reflectors work well for fill because they cannot overpower the key light, making it easy to maintain proper ratios.
Backlight and Rim Light
The backlight, also called rim light or hair light, positions behind the subject to create a highlight along their edge. This separation prevents your subject from blending into the background and adds another layer of depth to the image. Position the backlight above and behind the subject, angled down toward their head and shoulders.
The intensity of your backlight should create visible separation without looking unnatural. You want a subtle glow along the edge of the subject, not a bright halo that draws attention to itself. Backlights often need flags or barn doors to control spill and keep light off the background or lens.
Background Light
Adding a fourth light to illuminate the background gives you additional control over the final image. You can light the background evenly for a clean corporate look, create a gradient for more visual interest, or add patterns using gobos. Background lighting is optional but helps create separation and visual polish in studio interview setups.
Working with Natural Light for Interviews
Not every interview happens in a controlled studio environment. Sometimes you work with available light, and understanding how to shape natural light opens up location possibilities.
Window light makes an excellent key light for interviews. Position your subject at a 45-degree angle to a large window, using the window as your soft key source. The size of the window determines the softness of the light. Large windows create beautiful, soft illumination perfect for interview work. Use a reflector on the shadow side to provide fill and control the contrast ratio.
Time of day affects window light quality significantly. Midday sun creates harsh, contrasty light through windows. Morning and late afternoon provide softer, more directional light that is easier to work with. Overcast days turn the entire sky into a giant softbox, producing some of the most flattering natural light for interviews.
When working with natural light, I always bring reflectors and diffusion panels. A large diffusion panel can soften direct sunlight coming through a window. Reflectors fill shadows and help balance the lighting ratio. These tools give you control over natural light without requiring power or extensive setup time.
Subject Positioning and Eye-Line Direction
Where you position your subject and where they look fundamentally shapes how viewers perceive the interview. These decisions affect the emotional tone and professional quality of your final footage.
Off-Camera Interviewer Positioning
For most interviews, the subject should look at an off-camera interviewer rather than directly into the lens. Position yourself or your interviewer just to the side of the camera, close enough that the subject’s eye-line stays near the lens axis. This creates an intimate conversation feel while maintaining the convention of the subject not breaking the fourth wall.
The direction your subject faces affects composition. I prefer having subjects look toward the side where I have positioned them in frame. If the subject sits on the left third of frame, they should look camera-left. This creates logical look room and balanced composition.
Eye-Line Consistency
Maintain consistent eye-line throughout the interview. If your subject starts looking at a spot camera-left, they should continue looking there for the entire conversation. Wandering eye-lines look unprofessional and make editing difficult. Mark the interviewer’s position with tape if needed so the subject has a consistent reference point.
Subject Comfort
The technical aspects of interview production matter less if your subject appears uncomfortable on camera. Take time before recording to chat casually and help them relax. Explain the process so they know what to expect. Keep the conversation flowing during the interview rather than treating it like an interrogation. Comfortable subjects give better performances, and their ease translates to more engaging footage.
Audio Setup for Single Camera Interviews
Audio quality often determines whether an interview feels professional or amateur. Viewers tolerate imperfect video more readily than bad sound, making audio setup critically important.
Shotgun Microphone
A shotgun microphone mounted on a boom pole provides excellent audio pickup for interviews. Position the boom just above the frame line, angled down toward the subject’s mouth. This placement captures clear dialogue while rejecting off-axis sounds from the sides and rear. Shotgun microphones work well for controlled environments but may pick up room reflections in echoey spaces.
Lavalier Microphone
Lavalier microphones clip directly to the subject’s clothing near their chest. This placement provides consistent audio pickup regardless of head movement and works well in challenging acoustic environments. Hide the lav under clothing or a collar for a cleaner on-camera appearance. Use medical tape or moleskin to secure the microphone and reduce clothing rustle.
Dual System Recording
For the best results, I record audio to a separate recorder rather than relying solely on camera audio inputs. External recorders typically offer better preamps and lower noise than cameras. Sync audio in post-production using a slate clap or by matching waveforms. This approach also provides a backup if one recording fails.
Backup Strategies
Audio failures happen, and they are devastating when they occur. I always run at least two audio sources for interviews. Typically this means a lavalier on the subject plus a shotgun on a boom. If one microphone has issues, the other saves the shoot. This redundancy has rescued more of my projects than I care to admit.
How to Simulate Multi-Camera Look with One Camera
One of the biggest challenges of single-camera interviews is creating enough visual variety for dynamic editing. Without cutaway angles, interviews can feel static. Fortunately, several techniques help simulate multi-camera coverage.
4K Punch-In Technique
Shooting in 4K gives you flexibility to crop in during editing without losing quality for HD delivery. Record your interview in a medium shot, then create close-up versions by scaling the footage in post-production. This technique effectively gives you two or three angles from a single camera take. Plan your framing with this in mind, leaving enough headroom that you can punch in without cutting off the subject’s head.
Framing Changes Between Takes
If you have time during your shoot, record portions of the interview with different framing. Start with a medium shot for the main content, then move the camera closer for key emotional moments. Have the subject repeat important answers if necessary. This approach requires more editing but provides genuine angle variation rather than digital zooms.
B-Roll Coverage
B-roll footage covers cuts and adds visual interest to interview content. Shoot relevant cutaways before or after the interview that relate to what your subject discusses. Hands gesturing, environment details, related objects, or activity footage all work as cutaway material. Edit these shots over audio from the interview to hide cuts and maintain visual engagement.
Solo Shooter Workflow and Tips
Working alone presents unique challenges that multi-person crews do not face. Developing an efficient workflow makes solo interview production manageable and professional.
Pre-Interview Preparation
Preparation becomes even more critical when you are the only person handling everything. Scout your location beforehand if possible. Know where you will position the subject, where lights will go, and what audio challenges you might face. Prepare your questions in advance and share them with your subject so they can prepare thoughtful responses.
Create a checklist of equipment and settings to verify before rolling. When you are alone, it is easy to forget something important in the chaos of setup. A written checklist ensures you capture everything correctly.
Equipment Checklist
Before every solo interview, I verify this equipment list: camera with charged batteries and formatted cards, tripod, lenses, microphones with fresh batteries, audio recorder with headphones, lights with stands, extension cords, gaffer tape, and reflectors. Having backup batteries, cards, and cables prevents equipment failures from ending a shoot.
Time Management
Solo shoots take longer than crew shoots because one person handles everything. Build extra time into your schedule for setup, troubleshooting, and breaks. Rushing leads to mistakes that require reshooting, which takes even more time. I typically budget twice as much time as I think I need for solo interview work.
Subject Direction
When you are operating alone, you must also direct the interview. Establish rapport before the camera rolls. Give clear instructions about where to look and how to deliver answers. Remind subjects that they can pause, restart, or rephrase answers. Your direction during the interview keeps energy and focus high, resulting in better content.
Common Mistakes to Avoid
After years of interview production, certain mistakes appear repeatedly. Knowing these pitfalls helps you avoid them.
Poor Audio Quality
The most common interview mistake is prioritizing video over audio. Bad sound ruins otherwise excellent footage. Always monitor audio with headphones during recording. Watch your levels to avoid clipping. Test microphones before the interview begins. Room noise, air conditioning hum, and clothing rustle all degrade audio quality and are difficult to remove in post-production.
Bad Eye-Line
Subjects who look at the wrong place, or whose eye-line wanders during the interview, appear unprofessional. Establish clear eye-line direction before recording. Mark the interviewer’s position visibly. Correct wandering eye-line immediately rather than hoping it will improve.
Lighting Errors
Common lighting mistakes include flat illumination without dimension, harsh shadows from small sources, inadequate separation from background, and mixed color temperatures that create odd skin tones. Review your lighting on a monitor before recording. Look specifically at shadow density, highlight control, and color consistency.
Background Distractions
Cluttered backgrounds compete with your subject for viewer attention. Check the frame for distracting elements like exit signs, plants growing from heads, or bright objects that pull the eye away from the subject. Simplify backgrounds or use shallow depth of field to blur distractions.
Post-Production Tips for Single Camera Interviews
How you handle footage in post-production affects the final cinematic quality of your interview.
Color Grading
Color grading unifies your footage and establishes mood. If you shot in log, apply a LUT as a starting point, then refine the grade manually. Focus on skin tone accuracy first, then adjust overall contrast and saturation. Subtle grading typically serves interviews better than stylized looks that call attention to themselves.
B-Roll Integration
Use b-roll strategically to cover cuts and add visual interest. Cut away from the interview subject during transitions, important points, or when you need to hide a jump cut. Time b-roll to match what the subject discusses rather than cutting randomly.
Finding Cut Points
Even single-camera interviews need cuts to remove mistakes, tighten timing, or reorganize content. Look for natural pause points where the subject takes a breath or finishes a thought. Punch-in shots and b-roll cover these cuts smoothly. J-cuts and L-cuts, where audio leads or lags video, help cuts feel less abrupt.
Frequently Asked Questions
How do you make an interview look cinematic?
To make an interview look cinematic, use a telephoto lens between 70-100mm for shallow depth of field, implement three-point lighting with a soft key light, follow the rule of thirds for framing, shoot at 24fps with 1/50 shutter speed, and record high-quality audio with a lavalier or shotgun microphone.
What lens is best for interviews?
An 85mm prime lens on a full-frame camera is ideal for interviews. This focal length provides flattering facial compression and allows enough working distance for lighting and audio equipment. A 70-200mm zoom or 24-70mm f/2.8 also works well for flexibility.
How do you light a cinematic interview?
Use three-point lighting: position a soft key light at 45 degrees from the camera-subject axis, add a fill light or reflector on the opposite side to control shadow density, and place a backlight behind the subject for edge separation. Aim for a 2:1 to 3:1 lighting ratio.
What camera settings should I use for interviews?
Set your aperture to f/2.8 for shallow depth of field, shutter speed to 1/50 for 24fps recording, ISO at your camera’s native level (typically 800-1600), frame rate at 24fps for cinematic motion, and white balance manually to 5600K for daylight or 3200K for tungsten.
Should the interview subject look at the camera?
For most interviews, subjects should look at an off-camera interviewer positioned just beside the lens, not directly into the camera. This creates a conversational feel. Direct address to camera works for specific styles like testimonials or presenter-led content.
How do you shoot an interview with one camera?
Shoot in 4K to enable punch-in close-ups during editing, use a telephoto lens for flattering compression, set up three-point lighting, record dual audio sources for backup, capture b-roll for cutaway coverage, and plan framing changes between takes for variety.
How high should the camera be for an interview?
Position the camera at the subject’s eye level or slightly below. This creates an equal, conversational relationship between subject and viewer. Shooting from above makes subjects appear smaller, while shooting from far below creates unflattering angles.
What is the best background for an interview?
The best interview background is clean and uncluttered, with colors that complement skin tones without competing for attention. Use shallow depth of field to blur distracting elements. Darker backgrounds often work well for cinematic interviews because they help subjects stand out.
Conclusion
Shooting a cinematic interview with one camera requires understanding fundamentals that apply regardless of budget or crew size. The combination of shallow depth of field from a telephoto lens, three-point lighting that creates dimension, careful framing following composition rules, and clean audio from quality microphones produces professional results every time.
Remember that preparation matters as much as technique. Scout your location, prepare your questions, check your equipment, and build in time for the unexpected. When you work solo, organization prevents chaos and ensures you capture everything you need.
The techniques covered in this guide come from real experience shooting interviews as a one-person crew. Start with the basics: set your camera to 24fps at 1/50 shutter speed, open your aperture to around f/2.8, position your subject off-center using the rule of thirds, light them with a key light at 45 degrees and a reflector for fill, and capture audio with a lavalier or shotgun microphone. Master these fundamentals before worrying about advanced techniques.
Practice makes the difference between knowing these concepts and executing them confidently on real shoots. Each interview you film teaches you something new about lighting, audio, subject direction, and workflow efficiency. The more you shoot, the more natural this process becomes.
Single-camera interview production opens creative possibilities for documentary filmmakers, corporate videographers, and content creators working with limited resources. You do not need a massive crew or budget to produce cinematic interviews. You need solid technique, careful preparation, and the willingness to learn from each shoot.