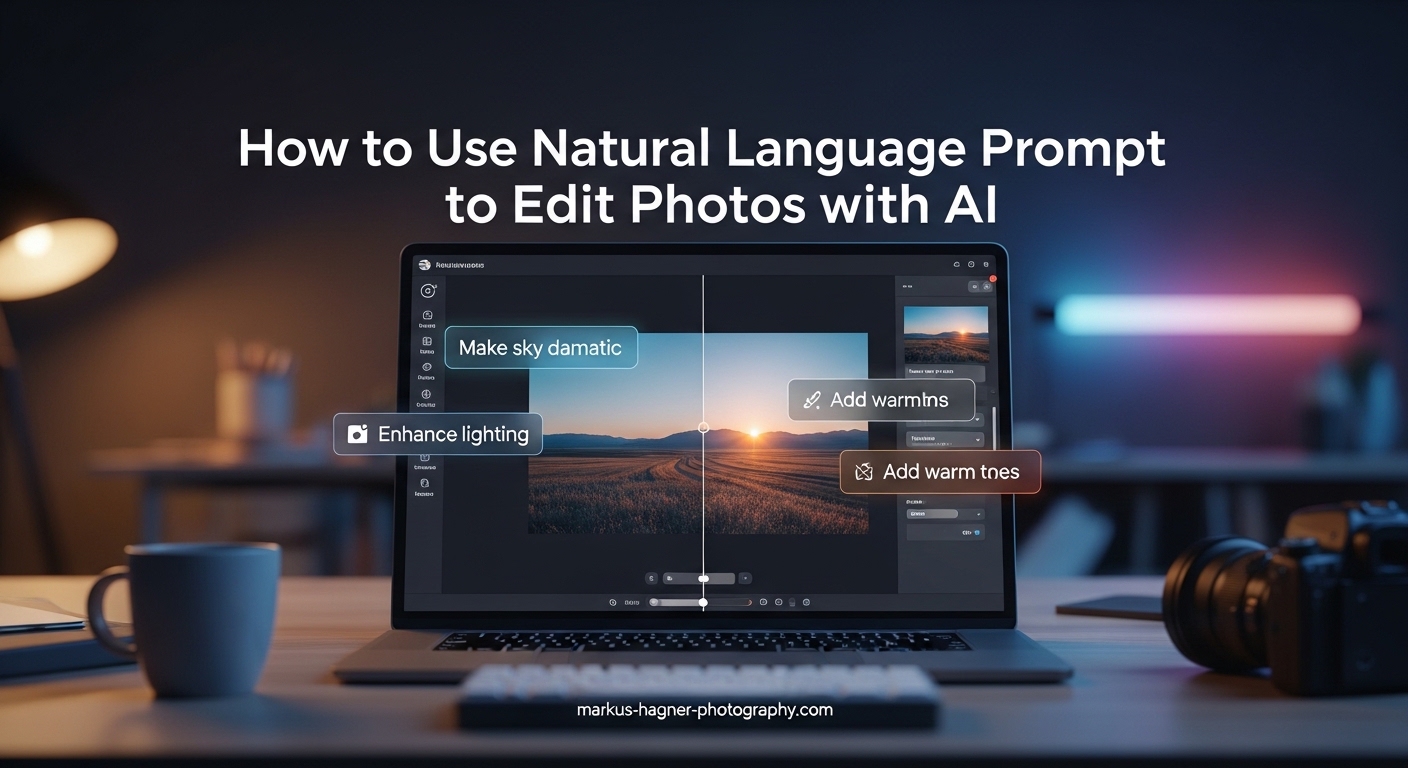
Imagine describing exactly how you want your photo to look, and watching an AI make those changes in seconds. That is the promise of natural language photo editing. Instead of spending hours learning complex software menus, you simply tell the AI what you want. This guide shows you exactly how to use natural language prompts to edit photos with AI, from basic adjustments to advanced creative transformations.
I have spent months testing different AI photo editors and prompt strategies. What I discovered surprised me: the right words can unlock professional-quality edits that used to require years of training. Whether you are a professional photographer looking to speed up your workflow or a hobbyist wanting better results, this guide will help you master prompt-based photo editing.
In this comprehensive guide, you will learn which AI tools understand natural language best, how to structure your prompts for maximum impact, and see real examples you can copy and use immediately. I will also share the common mistakes that waste time and how to avoid them.
What Is Natural Language Photo Editing with AI?
Natural language photo editing with AI means describing changes you want to make to an image using everyday language, then letting artificial intelligence handle the technical work. Instead of selecting tools, adjusting sliders, and masking areas manually, you type instructions like “make the background blurry” or “warm up the skin tones.”
The AI behind these tools uses machine learning models trained on millions of images. These models have learned to recognize visual elements like skies, faces, objects, and lighting conditions. When you provide a text description, the AI identifies the relevant parts of your photo and applies intelligent transformations based on your request.
This technology differs significantly from traditional photo editing. In programs like Photoshop, you need to know which tool accomplishes each task, understand layer masking, and master blending modes. With natural language AI editing, the interface becomes conversational. You describe the result you want, and the software figures out how to achieve it.
For photographers, this represents a fundamental shift in how we approach post-processing. Tasks that once took minutes of careful selection and adjustment can now happen in seconds. More importantly, it opens creative possibilities that might never have occurred to you. You can experiment with dramatic changes without committing hours to each version.
AI Photo Editing Tools That Support Natural Language Prompts
Several AI photo editors now support natural language input, but they vary significantly in capability and approach. Here is what you need to know about the major players.
ChatGPT Image Editing
ChatGPT’s image editing capabilities let you upload photos and describe changes in plain language. The interface allows you to select specific areas for editing or apply changes to the entire image. Users have reported success with everything from changing hair color to age progression effects.
The strength of ChatGPT lies in its conversational approach. You can refine edits through back-and-forth dialogue, asking for adjustments until you achieve the desired result. However, it works best for experimental edits rather than precision professional work.
Adobe Firefly and Photoshop Generative Fill
Adobe’s Firefly powers the Generative Fill feature in Photoshop, which many professionals consider the most reliable AI editing tool currently available. You can select areas of an image and describe what you want to add, remove, or change.
What sets Adobe apart is integration with professional workflows. Generative Fill works alongside traditional tools, letting you combine AI speed with manual precision. The results tend to maintain higher quality and resolution than many competitors.
Canva AI Photo Editing
Canva has integrated AI editing features that understand natural language requests. Their Magic Edit tool lets you brush over areas and describe changes. The platform excels at quick, social-media-ready edits rather than high-resolution professional work.
For content creators and marketers, Canva offers an accessible entry point into AI photo editing. The learning curve is minimal, and results come quickly. Just be aware of resolution limitations for print or large-format work.
Other Notable AI Photo Editors
Midjourney earns praise from many users as the best overall AI image tool, though it requires a subscription and focuses more on generation than editing existing photos. Leonardo AI offers detailed control with strong photography terminology support. Luminar Neo provides AI editing specifically designed for photographers, with features like sky replacement and portrait enhancement. Pixlr offers free AI editing options with natural language support, making it accessible for casual users.
Forum discussions reveal a common frustration: many users end up using four or more different apps to achieve one desired edit. Choosing a primary tool that handles most of your needs will save significant time and maintain consistency in your work.
Understanding Prompt Structure for Photo Editing
Effective prompts share a common structure that helps AI understand exactly what you want. Learning this structure will dramatically improve your results across all AI photo editing platforms.
The Four Core Components
Every strong photo editing prompt contains four elements: subject, action, style, and details. The subject tells the AI what to focus on. The action describes what change to make. The style defines the overall look or mood. Details provide specific parameters that refine the result.
Consider this example: “Brighten the model’s face using soft, diffused lighting with warm undertones.” The subject is “model’s face.” The action is “brighten.” The style is “soft, diffused lighting.” The details are “warm undertones.”
Photography Terminology That Works
AI photo editors understand many photography terms, and using them produces more precise results. Terms like “bokeh,” “golden hour,” “high key,” “low key,” “chiaroscuro,” and “Rembrandt lighting” help the AI understand exactly the look you want.
Camera-related terms also work well. Specifying “shallow depth of field,” “long exposure,” or “macro photography style” gives the AI important context. These terms trigger specific visual understandings that generic language cannot match.
The Basic Prompt Formula
For most editing tasks, follow this formula: [Action] + [Subject] + [Style/Mood] + [Specific Details]. This structure works because it mirrors how AI models process visual information. They first identify what to change, then determine the target area, then apply stylistic interpretation, and finally refine with specifics.
Here is a weak prompt: “Make it look better.” This lacks all four components. The AI has no clear subject, no specific action, no style direction, and no details. Results will be unpredictable.
Here is a strong prompt: “Enhance the sunset colors in the sky with warm orange and pink gradients, making the clouds appear more dramatic and vibrant.” This includes action (enhance), subject (sunset colors in the sky), style (warm, dramatic), and details (orange, pink, gradients, clouds, vibrant).
Natural Language Prompts to Edit Photos with AI: Practical Examples by Category
The best way to learn prompt-based editing is through examples. Here are copy-paste ready prompts organized by common editing tasks. Each one follows the structure principles covered above.
Background Editing Prompts
Background changes rank among the most popular AI editing requests. These prompts handle various background scenarios.
1. “Replace the background with a soft-focus forest scene with dappled sunlight filtering through trees.”
2. “Remove the current background entirely and make it pure white with subtle shadows preserved.”
3. “Change the background to a blurred city street at night with bokeh lights in the distance.”
4. “Blur the existing background to create shallow depth of field while keeping the subject sharp.”
5. “Extend the current background on the left side to create more negative space.”
Lighting Adjustment Prompts
Lighting edits can transform the mood of any photo. These prompts address common lighting challenges.
6. “Add warm golden hour lighting to the entire scene with soft shadows on the right side.”
7. “Fix the harsh shadows on the face by adding soft fill light from the front.”
8. “Create dramatic Rembrandt lighting with a triangular highlight on the shadow side of the face.”
9. “Brighten the underexposed foreground while keeping the sky from becoming washed out.”
10. “Add a subtle rim light around the subject’s edges to separate them from the background.”
Object Addition, Removal, and Replacement
These prompts handle elements within your frame that need modification.
11. “Remove the power lines from the sky and seamlessly fill in the blue background.”
12. “Add a steaming coffee cup on the table in front of the subject.”
13. “Replace the plain white wall behind the subject with exposed brick texture.”
14. “Remove all people from the background while preserving the architectural elements.”
15. “Add falling autumn leaves throughout the image with natural motion blur.”
Portrait Retouching Prompts
Portrait work requires sensitivity and precision. These prompts maintain natural appearance while improving results.
16. “Smooth skin texture while preserving natural pores and avoiding a plastic look.”
17. “Brighten the eyes and add catchlights to make them more engaging.”
18. “Subtly whiten teeth while maintaining natural tooth texture and avoiding over-processing.”
19. “Reduce under-eye shadows without eliminating them completely for natural appearance.”
20. “Enhance natural makeup look with subtle contour and highlight on cheekbones.”
Color Grading and Mood
Color transforms emotional impact. These prompts achieve specific moods through color manipulation.
21. “Apply a cinematic teal and orange color grade with slightly crushed blacks.”
22. “Create a vintage film look with muted colors, slight fade, and warm undertones.”
23. “Cool down the overall color temperature while keeping skin tones natural and warm.”
24. “Add a subtle purple color cast in the shadows and golden highlights for a dreamy effect.”
25. “Convert to black and white with high contrast and rich midtones, emphasizing texture.”
Sky Replacement Prompts
Sky changes dramatically alter landscape and outdoor portrait images.
26. “Replace the overcast sky with dramatic storm clouds and golden light breaking through.”
27. “Change the daytime sky to a vibrant sunset with pink, orange, and purple gradients.”
28. “Add a clear blue sky with wispy cirrus clouds for a bright, optimistic mood.”
29. “Replace the sky with a starry night scene while maintaining the foreground lighting.”
Image Enhancement and Sharpening
These prompts improve overall image quality and detail.
30. “Sharpen details throughout the image while avoiding halos around high-contrast edges.”
31. “Reduce noise in the shadow areas while preserving detail in the midtones.”
32. “Increase overall clarity and local contrast for a more punchy, detailed look.”
33. “Upscale the image resolution while maintaining sharpness and avoiding artifacts.”
Advanced Prompting Techniques for Better Results
Once you master basic prompts, these advanced techniques give you more precise control over your edits.
Iterative Refinement Strategy
Complex edits rarely succeed on the first attempt. Instead of trying to accomplish everything in one prompt, break your vision into sequential steps. Start with broad changes, then refine with increasingly specific prompts.
For example, rather than asking for a complete portrait transformation, begin with “even out the skin tone.” Then follow up with “add subtle contouring to the cheekbones.” Then “brighten the eyes slightly.” Each step builds on the previous result, giving you more control.
Negative Prompts Explained
Negative prompts tell the AI what to avoid. This technique prevents unwanted elements from appearing in your edits. Most platforms support this feature, though the syntax varies.
Common negative prompts include “no artifacts,” “no distortion,” “no oversaturation,” and “no plastic skin texture.” Using negative prompts alongside positive instructions narrows the AI’s interpretation toward your intended result.
Combining Multiple Edits
While iterative refinement offers control, some edits work better combined. Related changes in a single prompt can create more cohesive results. For instance, “warm up the skin tones and soften the shadows on the face” produces natural-looking warmth that affects both elements consistently.
The key is grouping related changes. Combining unrelated edits often produces unpredictable results. Keep your combined prompts focused on elements that naturally relate to each other.
Maintaining Consistency Across Edits
When editing multiple images from the same shoot, consistency matters. Save your successful prompts and reuse them. Document which prompts produced which results. Some platforms allow you to save preset prompts for repeated use.
For batch editing, test your prompt on one image first. Refine until it produces the desired result, then apply the same prompt across all similar images. This approach maintains visual consistency while saving significant time.
Quality Preservation Tips
Forum discussions reveal quality loss as a major user concern. To maintain image quality, always work with the highest resolution source available. Avoid multiple generations of AI editing on the same image. Export at maximum quality settings. When possible, use AI for specific adjustments rather than wholesale transformations.
Some tools handle resolution better than others. Adobe Firefly and Photoshop tend to preserve more detail than free alternatives. If quality matters for your final use, test different tools with the same prompt and compare results.
Common Mistakes When Using Natural Language Prompts for Photo Editing
Understanding what goes wrong helps you avoid wasted time and frustrating results. These mistakes appear repeatedly in user forums and my own testing.
Vague or Ambiguous Prompts
“Make it look professional” means nothing to an AI. Professional could mean crisp and commercial, or it could mean artistic and moody. Always specify exactly what you want. Compare “bright and clean with even lighting” to “dramatic with strong contrast and shadows.” Both are professional, but completely different.
Overloading Prompts with Instructions
Packing too many requests into one prompt overwhelms the AI. Each additional instruction dilutes focus on the others. Instead of writing paragraphs, identify your top priority. Address that first, then add secondary changes through follow-up prompts.
Ignoring Platform-Specific Syntax
Different tools interpret prompts differently. ChatGPT works best with conversational language. Midjourney responds better to comma-separated keyword lists. Adobe Firefly prefers descriptive sentences. Learn the conventions of your primary tool and adapt your prompts accordingly.
Not Preserving Important Details
AI edits can accidentally remove elements you wanted to keep. When editing specific areas, explicitly mention what should remain unchanged. For example, “brighten the face while preserving the natural skin texture and facial features.”
Expecting Perfection on First Attempt
Even experienced prompt engineers rarely achieve perfect results immediately. The first output is usually a starting point. Plan to refine through two or three iterations. This expectation shift alone will reduce frustration significantly.
Integrating AI Photo Editing into Your Photography Workflow
AI works best as part of a broader editing strategy, not as a complete replacement for traditional tools. Here is how professional photographers are incorporating these capabilities.
When to Choose AI vs Traditional Tools
Use AI for tasks that are time-consuming but straightforward. Background removal, sky replacement, and basic color grading suit AI perfectly. Reserve traditional tools for precise work where exact control matters. Fine art retouching, detailed compositing, and color-critical commercial work still benefit from manual approaches.
Combining AI with Manual Adjustments
The best results often come from hybrid workflows. Start with AI to handle the heavy lifting. Use AI to remove a background or adjust lighting broadly. Then switch to traditional tools for refinement. This approach captures AI speed while maintaining professional precision.
Professional Workflow Recommendations
For portrait work, try this sequence: AI handles skin smoothing and basic color correction. Manual tools address specific retouching needs like blemish removal and dodging. AI returns for final color grading. For landscapes, start with AI sky replacement if needed, use manual adjustments for local exposure, then AI for final color grading consistency across a series.
Frequently Asked Questions About AI Photo Editing with Prompts
How can I use AI prompts for image editing?
To use AI prompts for image editing, upload your photo to an AI editor like ChatGPT, Adobe Firefly, or Canva, then type a description of the changes you want. For example, type ‘brighten the shadows’ or ‘replace the sky with sunset colors.’ The AI interprets your text and applies the requested edits automatically. Start with simple, specific prompts and refine through follow-up instructions.
How to tell ChatGPT to edit a photo?
In ChatGPT, upload your image using the attachment feature, then describe your desired changes in the chat. You can select specific areas to edit or apply changes to the entire image. Use clear, descriptive language like ‘remove the person in the background’ or ‘add warm lighting to the scene.’ ChatGPT allows conversational refinement, so you can request adjustments until satisfied.
What AI can edit a photo from a written prompt?
Several AI tools edit photos from written prompts: ChatGPT for conversational editing, Adobe Firefly and Photoshop Generative Fill for professional work, Canva AI for quick social media edits, Midjourney for high-quality creative edits, Leonardo AI for detailed control, Luminar Neo for photography-specific features, and Pixlr for free basic editing. Each offers different strengths in quality, ease of use, and pricing.
How to write better AI prompts for images?
Write better AI prompts by following this structure: action plus subject plus style plus details. Be specific about what you want changed, where, and how. Use photography terminology like ‘golden hour,’ ‘bokeh,’ or ‘Rembrandt lighting’ for precise results. Avoid vague requests like ‘make it better.’ Instead, say ‘brighten the shadows while keeping highlights natural.’ Refine through multiple iterations rather than expecting perfection immediately.
Getting Started with Natural Language Photo Editing
Natural language prompts to edit photos with AI have transformed what is possible for photographers at every skill level. The ability to describe changes in plain language and see results in seconds democratizes capabilities that once required extensive training. From simple background adjustments to complex portrait retouching, the prompts in this guide give you a practical starting point.
The key to success lies in specificity and iteration. Start with clear, structured prompts that include action, subject, style, and details. Expect to refine through multiple attempts rather than achieving perfection immediately. As you become comfortable with the basics, experiment with advanced techniques like negative prompts and iterative refinement.
Choose one tool and spend time learning its particular strengths. Whether you select ChatGPT for conversational editing, Adobe Firefly for professional work, or Canva for quick results, consistent practice with one platform will build intuition faster than switching between tools. Begin with the prompt examples in this guide, then adapt them to your specific needs as you develop confidence.