Creating a photography pricing guide for your website transforms how potential clients perceive your business. When I first started showing my prices online, my inquiry quality improved dramatically. Serious clients knew exactly what to expect before they ever reached out.
In this guide, you will learn exactly how to create a photography pricing guide that builds trust, qualifies leads, and converts browsers into paying clients. We will cover everything from essential elements to technical implementation across popular website platforms.
A well-designed pricing page does more than list numbers. It tells your story, showcases your value, and guides visitors toward booking. Let me walk you through building one that works for your photography business.
Why Your Photography Pricing Guide Matters
Your pricing guide acts as a 24/7 sales tool working even when you are editing photos or shooting sessions. Photographers who display their pricing see higher-quality inquiries because potential clients self-qualify before contacting you.
I spent years hiding my prices behind contact forms. The result? Endless emails from people who could not afford my services or wanted extensive negotiation. Once I added transparent pricing to my website, those wasted conversations dropped significantly.
Transparency builds trust. When visitors see your prices clearly displayed, they perceive you as professional and confident in your value. Hidden pricing often signals uncertainty or the assumption that your rates will scare people away.
The right pricing guide also sets clear expectations. Clients understand what they get for their investment before the first conversation. This reduces misunderstandings about deliverables, timelines, and additional costs that might arise later.
10 Essential Elements of an Effective Photography Pricing Guide
After analyzing dozens of successful photography websites and testing my own pricing pages, I identified ten components that consistently convert visitors into clients. Each element serves a specific purpose in building trust and encouraging inquiries.
1. Welcome and Brand Introduction
Your pricing guide should open with a warm welcome that reinforces your brand identity. This brief introduction sets the tone for the entire pricing experience. Think of it as greeting someone who just walked into your studio.
I include two to three sentences about what makes my photography approach unique. This reminds visitors why they were interested in my work before they see any numbers. The goal is maintaining that emotional connection while transitioning into business details.
2. Your Photography Style and Philosophy
Before discussing packages, explain your artistic approach. This section helps clients understand the value behind your pricing. I describe my editing style, shooting philosophy, and what clients can expect from working with me.
Keep this section concise but meaningful. Three to four sentences work well. Focus on what differentiates your work from other photographers in your market. This context helps clients appreciate why your pricing reflects the quality you deliver.
3. About the Photographer Section
Include a brief bio with your photo. Clients want to know the person behind the camera. I share my photography journey, relevant experience, and a personal detail that makes me relatable. This humanizes the transaction.
Professional photography is deeply personal. Clients trust you to capture important moments in their lives. Seeing your face and learning about your background builds that trust before they ever meet you in person.
4. The Process Explanation
Walk clients through what happens from inquiry to final delivery. I break this into four to six steps with brief descriptions. This shows the full value of your service beyond just the photo session itself.
My process section covers the initial consultation, session planning, the shoot itself, editing timeline, and delivery method. Clients see that their investment covers much more than a few hours of photography time.
5. Portfolio Showcase
Include your best work directly within or alongside your pricing guide. I select images that represent the style and quality clients can expect. These photos reinforce your pricing by demonstrating the finished product.
Choose portfolio images that match your target client demographic. If you specialize in luxury weddings, show your most elegant wedding work. For family portraits, display genuine moments that resonate with parents.
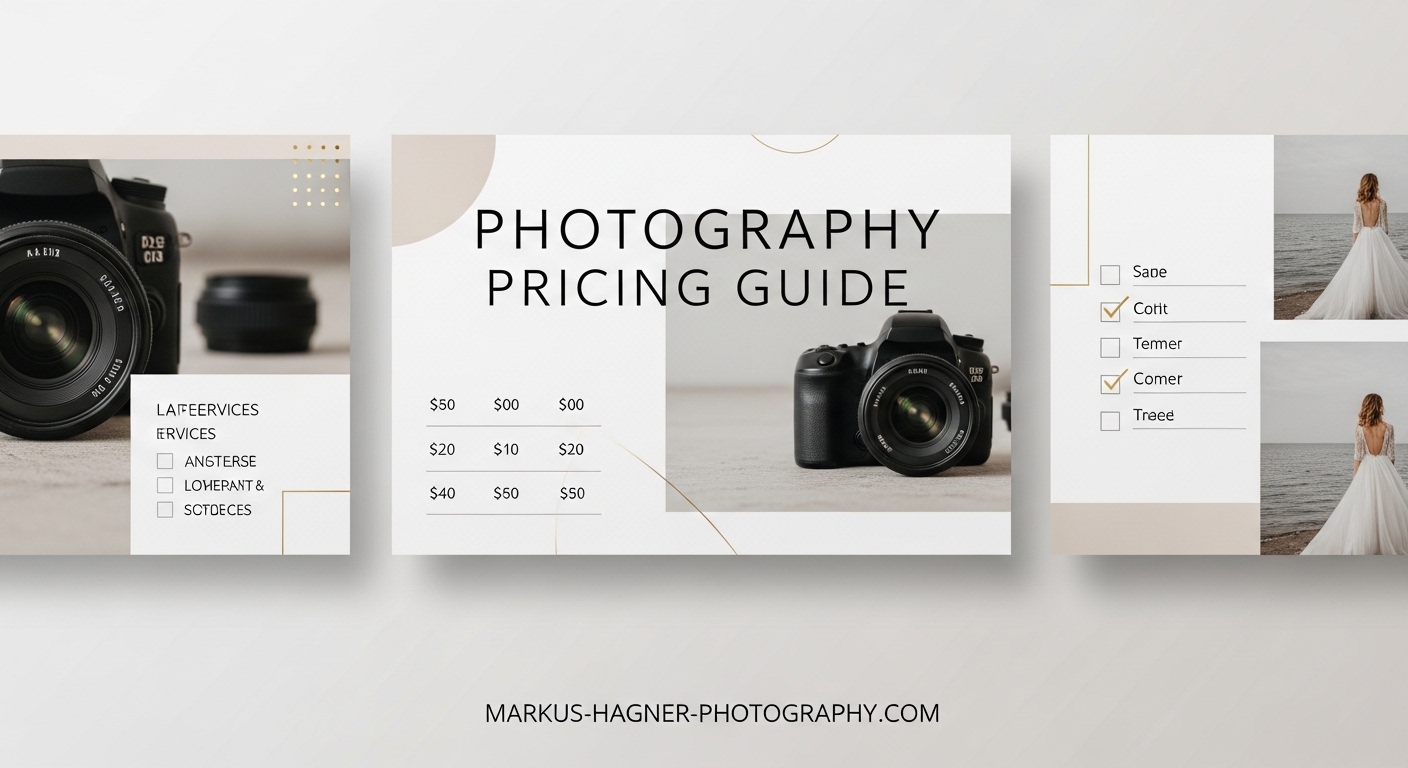
6. Packages and A La Carte Options
This is the core of your pricing guide. Present your packages clearly with what each includes. I recommend three package tiers: a basic option, a mid-range package, and a premium offering. This gives clients choices without overwhelming them.
List specific deliverables for each package. Include session duration, number of edited images, print products, and any additional services. Clarity here prevents confusion and establishes clear expectations from the start.
Offering a la carte options allows clients to customize their experience. I list add-ons like extra editing time, additional locations, or rush delivery. This captures revenue from clients who want more than your standard packages.
7. Testimonials and Social Proof
Place client reviews strategically near your pricing. I include three to five testimonials with client names and session types. These reviews provide third-party validation of your value and service quality.
Video testimonials work exceptionally well if you can get them. A short clip of a happy client describing their experience adds authenticity that written reviews sometimes lack.
8. Frequently Asked Questions
Answer common questions directly in your pricing guide. I include questions about payment schedules, travel fees, rescheduling policies, and image usage rights. This reduces repetitive emails and shows you have thought through the client experience.
Review your past inquiry emails to identify frequently asked questions. What do clients ask repeatedly? Those questions belong in this section.
9. Studio or Equipment Showcase
If you have a studio space or professional equipment, show it. This section demonstrates your investment in your craft and the professional experience clients can expect. I include photos of my studio setup and key gear.
This element is optional for location-based photographers. If you primarily shoot on location, skip this or replace it with location examples instead.
10. Clear Call-to-Action
Every pricing guide needs a strong call-to-action. I place CTAs at multiple points: after each package description, at the bottom of the guide, and in the navigation. Make it easy for interested clients to take the next step.
My preferred CTA text is simple and direct: “Ready to Book? Contact Me Today” or “Check My Availability.” Link directly to your contact form or booking calendar.
Visual Design and Layout Best Practices
The visual presentation of your pricing guide affects how clients perceive your professionalism. A polished, well-designed guide suggests attention to detail and quality. A cluttered or poorly formatted page raises doubts about your overall service.
Mobile Optimization Essentials
Over 60% of my website traffic comes from mobile devices. Your pricing guide must display perfectly on phones and tablets. Test every element on multiple screen sizes before publishing.
Mobile optimization means more than responsive design. Consider how scrolling works on touchscreens. Make buttons large enough for fingers. Ensure text remains readable without zooming. Break up long sections with visual breaks.
Check that your pricing tables scroll horizontally rather than squeezing content. Package comparison becomes impossible when three columns compress onto a phone screen.
Typography and Readability
Choose fonts that reflect your brand while remaining highly readable. I use sans-serif fonts for body text at a minimum of 16 pixels. Headings can be larger decorative fonts that match your visual identity.
Line spacing affects readability more than most photographers realize. I set line height at 1.5 to 1.6 times the font size. This prevents text from feeling cramped and makes longer sections easier to scan.
Contrast between text and background matters enormously. Dark text on light backgrounds works best for pricing information. Avoid light gray text on white backgrounds, even if it looks elegant.
White Space and Visual Hierarchy
White space is not wasted space. It gives visual breathing room and guides the eye through your content. I leave generous margins around pricing sections and between package descriptions.
Visual hierarchy tells readers what matters most. Use size, color, and positioning to emphasize key information. Package names and prices should stand out immediately. Details come secondary.
Group related elements together. Keep package details visually contained so readers know which features belong to which tier. Borders or background colors help separate packages visually.
Brand Consistency Across Your Pricing Guide
Your pricing guide should feel like a natural extension of your website. I use the same color palette, fonts, and design elements throughout. Inconsistent branding creates a disjointed experience that undermines professionalism.
If your website uses a particular color for buttons, use that same color for CTAs in your pricing guide. If your portfolio pages have a specific layout style, echo that structure in your pricing presentation.
Photography clients often research multiple photographers before deciding. Consistent branding helps you remain memorable and recognizable throughout their decision process.
Accessibility Considerations
Web accessibility ensures everyone can access your pricing information, including clients with visual impairments. Following WCAG guidelines also improves overall usability for all visitors.
Add descriptive alt text to all images in your pricing guide. Screen readers use this text to describe visual content. Write alt text that conveys the purpose and content of each image.
Ensure sufficient color contrast between text and backgrounds. Tools like WebAIM’s contrast checker help verify your choices meet accessibility standards. Avoid conveying information through color alone.
Make your pricing guide keyboard navigable. Some users cannot use a mouse and rely on tab navigation to browse websites. Test your page by navigating with only your keyboard.
Pricing Display Strategies: Packages vs Hourly vs Hybrid
How you present your pricing significantly impacts client perception and conversion rates. Three main approaches exist, each with distinct advantages depending on your photography style and target market.
Package-Based Pricing
Package pricing bundles services at set rates. I prefer this approach because clients know exactly what they get and what they pay. Packages reduce decision fatigue and simplify the booking process.
Structure packages to serve different client needs and budgets. Your base package covers essential services. Mid-tier adds popular extras. Premium includes everything plus special touches that justify higher pricing.
Name packages creatively rather than using generic labels. “Essential,” “Signature,” and “Luxury” works better than “Bronze,” “Silver,” and “Gold.” Names that reflect your brand voice create stronger connections.
Hourly Rate Pricing
Hourly pricing charges clients based on time spent. This approach works well for event photography where session length varies significantly. Clients understand the direct relationship between time and cost.
However, hourly pricing can discourage longer sessions. Clients might cut shoots short to save money, resulting in fewer great images. I only recommend hourly rates for corporate events or commercial work.
If you choose hourly pricing, clearly state minimum booking times and what each hour includes. Specify whether editing time is additional or included in the hourly rate.
Hybrid Approaches
Hybrid pricing combines elements of packages and hourly rates. I use this for wedding photography: a base package with set deliverables plus hourly rates for extended coverage. This offers flexibility while maintaining predictable base pricing.
Another hybrid option is package pricing with add-ons. Clients choose a base package and add extra services at set prices. This captures revenue from clients who want more without creating countless package variations.
Hybrid approaches require clear communication. Ensure clients understand what the base includes and what costs extra. Confusion about pricing creates friction in the booking process.
Starting Prices vs Full Transparency
The debate between showing starting prices versus complete pricing divides many photographers. I tested both approaches and found full transparency works better for my business.
Starting prices attract more inquiries but many are unqualified. Full pricing reduces inquiry volume but increases quality. Those who contact you already accept your rates.
Consider your market positioning. High-end photographers often benefit from full transparency because it reinforces premium positioning. Budget-conscious markets might respond better to starting prices that encourage contact.
Choosing Your Pricing Display Method
Your choice depends on your photography niche and target client. Wedding and portrait photographers typically benefit from package-based pricing. Commercial and event photographers often prefer hourly or hybrid models.
Test different approaches and track results. Monitor inquiry quality, conversion rates, and average booking values. The right method maximizes both inquiry volume and quality.
Technical Implementation for Your Photography Website
Creating your pricing guide content is only half the work. Technical implementation determines how effectively that content reaches your audience. Different website platforms require different approaches.
WordPress Implementation
WordPress offers maximum flexibility for pricing pages. I use page builders like Elementor or Divi to create custom layouts without coding. These tools include pricing table modules designed for service businesses.
Install a dedicated pricing table plugin if you prefer simpler solutions. Many free and premium options exist with responsive designs and customization options. Test how tables display on mobile before publishing.
Create a dedicated page for your pricing rather than embedding it in existing pages. This allows direct linking in marketing materials and clear navigation structure.
Squarespace Setup
Squarespace includes built-in pricing page templates designed for creative businesses. Select a template that matches your brand and customize the layout. The platform handles responsive design automatically.
Use Squarespace blocks to structure your pricing guide. Text blocks for descriptions, image blocks for portfolio samples, and button blocks for CTAs. The block system makes layout changes simple.
Squarespace’s integrated analytics help track pricing page performance. Monitor visitor time on page and click-through rates to your contact form. These metrics reveal optimization opportunities.
Showit Configuration
Showit provides drag-and-drop design freedom ideal for photographers who want complete visual control. Design your pricing page as a canvas with unlimited layout possibilities.
Showit integrates with WordPress for blogging while handling page design separately. This means your pricing page can have completely different styling from your blog if desired.
Mobile view editing in Showit is separate from desktop. Design both views intentionally rather than relying on automatic responsive adjustments. This control ensures perfect mobile presentation.
PDF vs Webpage Pricing Guide
Some photographers prefer PDF pricing guides emailed to inquiries rather than website-based pricing. PDFs allow more detailed presentation and trackable downloads. However, they add friction to the inquiry process.
Webpage pricing provides instant access to information. Clients browse your rates without waiting for email responses. This immediacy captures interest while it is fresh.
I recommend website pricing for most photographers with PDF guides available for detailed follow-up. This hybrid approach captures both casual browsers and serious inquirers.
Update PDF guides regularly to match website pricing. Outdated PDFs create confusion and erode trust when they do not match current rates.
Integration with Booking Systems
Connect your pricing guide to your booking system for seamless client conversion. I link CTAs directly to my booking calendar where clients can select dates and pay deposits.
Popular booking platforms like HoneyBook, Dubsado, and 17hats integrate with most website builders. These systems handle contracts, invoices, and scheduling automatically after clients decide to book.
Ensure pricing in your booking system matches your pricing guide exactly. Discrepancies between displayed prices and booking system prices create trust issues and lost sales.
Common Mistakes to Avoid
Even well-intentioned pricing guides fail when they make these common errors. Learn from mistakes I made early in my photography business.
Hiding prices completely frustrates serious clients. Many will not bother contacting you without at least some pricing indication. Those who do contact you may be shocked by your rates and feel their time was wasted.
Overwhelming visitors with information causes analysis paralysis. Too many packages, too many details, too many options lead to decision fatigue. Keep your guide focused and scannable.
Ignoring mobile users alienates the majority of web traffic. If your pricing tables do not work on phones, you lose potential clients who browse on mobile devices during commutes or lunch breaks.
Missing call-to-action buttons leaves interested clients without a clear next step. Every pricing page needs visible, clickable paths to booking or contact.
Outdated pricing information creates awkward conversations. Update your pricing guide immediately when rates change. Nothing undermines credibility like pricing that no longer matches what you actually charge.
Frequently Asked Questions
How do I create a photography pricing guide?
To create a photography pricing guide, start by listing your services and calculating your costs. Create three to four package tiers with clear deliverables. Design a page or document that includes your brand introduction, packages, portfolio samples, testimonials, and call-to-action. Ensure the design matches your website branding and displays well on mobile devices.
Should photographers display prices on their website?
Yes, displaying prices on your website qualifies leads and saves time. Clients who contact you already know your rates and have accepted them. This reduces conversations with unqualified prospects and increases booking conversion rates. Transparency also builds trust and demonstrates confidence in your value.
What should be included in a photography pricing guide?
A photography pricing guide should include your brand introduction, photography style overview, about section, process explanation, portfolio samples, packages with clear deliverables, testimonials, frequently asked questions, and strong call-to-action buttons. Optional elements include studio showcase and a la carte pricing options.
How do I set pricing for photography?
Calculate your cost of doing business including equipment, insurance, software, and time. Research competitor pricing in your market. Determine your desired profit margin and annual income goal. Price packages to cover costs plus profit while remaining competitive. Adjust based on demand and experience level.
Is it better to use a PDF or webpage for photography pricing?
Webpage pricing provides instant access and better SEO benefits. Clients can view rates without waiting for email responses. PDF guides allow more detailed presentation and work well as follow-up materials. Many successful photographers use both: website pricing for accessibility and PDFs for detailed inquiries.
Conclusion
Creating a photography pricing guide for your website transforms how clients discover and evaluate your services. By following the ten essential elements outlined in this guide, you build a pricing page that converts visitors into qualified inquiries.
Remember that your pricing guide reflects your brand. Invest time in design, keep information current, and optimize for mobile users. The effort you put into presentation directly impacts how clients perceive your professionalism and value.
Start with the structure that works for your photography niche. Wedding photographers might emphasize packages and albums. Portrait photographers might highlight session experiences. Commercial photographers might focus on usage rights and licensing.
Test your pricing guide with real visitors. Track which sections get attention and where people drop off. Continuous improvement based on data creates better conversion rates over time.
Your photography pricing guide is never truly finished. As your skills improve, costs change, and market conditions shift, update your pricing and presentation accordingly. What works today may need adjustment next year.
Take action today. Even a basic pricing page outperforms no pricing information. You can always refine and improve as you learn what resonates with your ideal clients. The photographers who see results are those who publish and iterate rather than waiting for perfection.