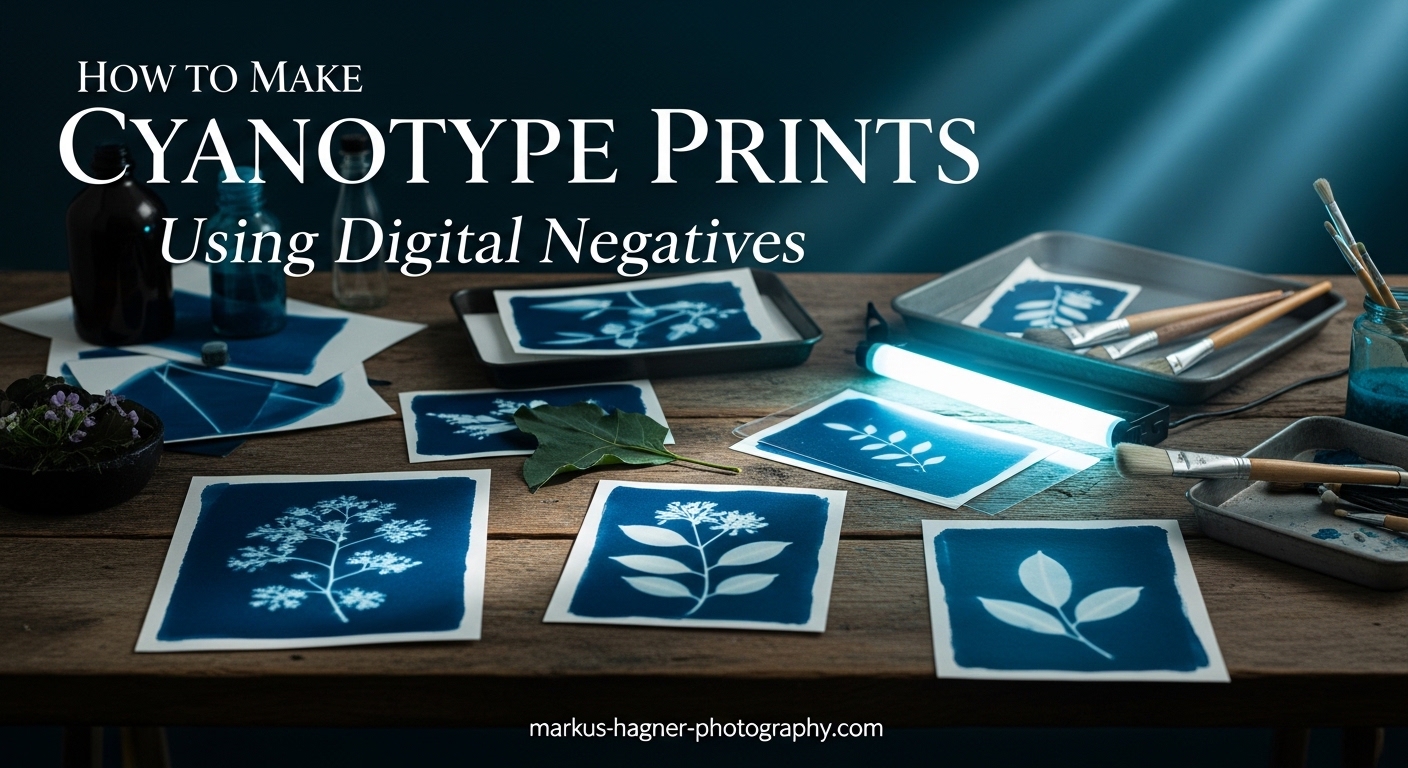
Cyanotype printing is one of the most accessible alternative photographic processes, and learning how to make cyanotype prints using digital negatives opens up creative possibilities that were once limited to those with darkroom access. I have spent years experimenting with this technique, and what started as a curiosity has become one of my favorite ways to create distinctive blue-toned prints from digital photographs.
A digital negative for cyanotype is essentially an inverted image printed on transparent film that blocks ultraviolet light in specific areas. When you place this negative on chemically coated paper and expose it to sunlight or a UV lamp, the protected areas stay white while exposed areas develop that iconic Prussian blue color. The beauty of this process lies in combining the precision of digital editing with the organic, hands-on nature of historic photographic techniques.
This guide walks you through everything you need to know about creating digital negatives for cyanotype printing, from selecting materials to troubleshooting common problems. Whether you are a photographer looking to expand your creative toolkit or a complete beginner curious about alternative processes, you will find practical, tested advice here.
What Is a Digital Negative for Cyanotype?
A digital negative is a transparent film printed with your image in reversed tones. The dark areas of the negative block UV light during exposure, keeping those parts of your cyanotype paper white in the final print. The clear or light areas allow UV light to pass through, turning those regions blue after development.
This might sound counterintuitive at first. Why would dark areas on the negative create light areas on the print? The answer lies in how cyanotype chemistry works. The sensitizer solution (a mixture of ferric ammonium citrate and potassium ferricyanide) reacts to UV light by forming the insoluble Prussian blue pigment. Where UV light hits the coated paper, blue forms. Where the negative blocks the light, the chemicals wash away during development, leaving white paper.
Contact printing is the method used to transfer your image from the digital negative to the coated paper. You place the negative directly against the sensitized surface and expose the sandwich to UV light. This is different from enlarging, which uses lenses to project an image. Contact printing means your final print will be the same size as your negative.
Why Digital Negatives Matter for Modern Photographers
Before digital negatives, photographers needed traditional film negatives to make cyanotype prints. This limited the process to those shooting film or willing to make enlarged internegatives in a darkroom. Digital negatives changed everything by allowing photographers to work from any digital source file.
The advantages go beyond convenience. Digital negatives give you precise control over contrast, density, and tonal range before you ever coat a piece of paper. You can test and refine your negative on screen, saving time and expensive materials. You can also combine images, add text, or make adjustments that would be difficult or impossible with traditional negatives.
Materials and Equipment Needed for Cyanotype Digital Negatives
Creating quality digital negatives requires specific materials, but you do not need to spend a fortune to get started. I will cover both professional-grade options and budget-friendly alternatives that work well for beginners.
Transparency Film Options
Transparency film is the foundation of your digital negative. Not all clear films work equally well for this purpose.
Pictorico Premium OHP Transparency Film is considered the gold standard by many alternative photographers. It offers excellent ink adhesion, minimal curling, and consistent results. The trade-off is cost: it runs significantly more per sheet than budget options.
Arista II Ortho Litho Film provides a good balance of quality and affordability. Many photographers in online communities report excellent results with this film for both cyanotype and other alternative processes.
Budget alternatives include standard overhead projector (OHP) transparency films. The 3M Transparency Film found at office supply stores can work, though results may be less consistent. Some photographers report success with vellum paper or even oiled regular paper for testing purposes.
Printer Requirements
Your printer choice significantly impacts your results. Understanding the difference between inkjet and laser printers is crucial.
Inkjet printers are the standard choice for digital negatives. They deposit liquid ink that absorbs into the transparency coating, creating the density needed to block UV light. Epson printers are particularly popular among alternative photographers, though many Canon and HP models work well too.
Laser printers generally do not work for cyanotype digital negatives. The toner they use does not block UV light effectively, and the heat involved in the printing process can warp transparency film. If laser printing is your only option, you would need to print multiple layers or find specialized materials, which adds complexity.
For beginners, almost any inkjet printer will produce workable negatives. As you advance, you may want a printer with more ink colors for better UV blocking in specific tones.
Software for Negative Preparation
You need image editing software to prepare your digital negatives. The specific steps involve inverting your image, adjusting curves, and preparing it for printing.
Adobe Photoshop offers the most comprehensive tools for digital negative preparation, including advanced curve adjustments and color management. It remains the professional standard.
Free alternatives like GIMP can handle basic negative preparation, though the interface for curve adjustments differs from Photoshop. For photographers on a budget, GIMP combined with patience and experimentation can produce excellent results.
Cyanotype Chemistry and Paper
The classic cyanotype formula uses two chemicals mixed together: ferric ammonium citrate (green variety) and potassium ferricyanide. You can purchase pre-mixed kits or buy the chemicals separately and mix your own sensitizer solution.
For paper, watercolor paper works beautifully. Look for papers sized internally (meaning they have been treated to resist excessive absorption). Hot-press papers have a smooth surface that holds fine detail well. Cold-press papers have more texture, which some photographers prefer for the artistic character it adds.
UV Light Sources
Sunlight remains the most accessible UV source for cyanotype printing. It is free and provides the broad UV spectrum the process requires. The downside is variability: cloud cover, time of day, and season all affect exposure times.
UV LED panels offer consistent, controlled exposure regardless of weather. These have become affordable in recent years and are worth considering if you plan to print regularly.
How to Create Cyanotype Digital Negatives: Step-by-Step Process
The following workflow takes you from a digital image file to a printed transparency ready for cyanotype printing. I recommend working through each step methodically at first. Once you understand the process, you can develop shortcuts that work for your specific setup.
Step 1: Select and Prepare Your Image
Start with a high-quality digital image. The resolution should be sufficient for your intended print size. A good rule of thumb is 300 pixels per inch at the final print dimensions.
Open your image in your editing software. Make any basic adjustments needed: exposure correction, contrast tweaks, cropping. Get the image looking the way you want your final cyanotype to appear, keeping in mind that cyanotypes naturally have lower contrast than full-color images.
Images with strong tonal separation tend to work better than subtle, low-contrast scenes. Landscapes with defined shadows and highlights, architectural subjects, and graphic designs often translate beautifully to cyanotype.
Step 2: Convert to Grayscale
Convert your color image to grayscale. In Photoshop, use Image > Mode > Grayscale. This simplifies the image and helps you focus on tonal values rather than color relationships.
After conversion, assess the tonal range. Your image should have a full range from near-black to near-white, with good distribution through the midtones. Use the Levels or Curves adjustment to spread the tones across the full range if necessary.
Pay particular attention to the midtones. This is where many cyanotype prints struggle, losing detail between the highlights and shadows. If your midtones look compressed or muddy on screen, address this now before proceeding.
Step 3: Invert and Flip the Image
This step is where many beginners make mistakes. You need to do two things: invert the tonal values and flip the image horizontally.
Invert means reversing the lights and darks. White becomes black, black becomes white. In Photoshop, use Image > Adjustments > Invert (or Ctrl/Cmd + I). This creates the negative that will block UV light appropriately.
Flip horizontally means mirroring the image left to right. In Photoshop, use Image > Image Rotation > Flip Canvas Horizontal. This is necessary because contact printing reverses the image orientation. If you skip this step, your final cyanotype will be a mirror image of your original photograph.
Work in 16-bit mode if possible. This gives you more tonal information to work with during curve adjustments and produces smoother gradients in your final negative.
Step 4: Choose the Right Ink Color
The color of ink you print with affects how well your negative blocks UV light. This might seem strange: surely black ink blocks light best? Actually, different ink colors have different UV blocking properties.
Through testing, photographers have discovered that yellow, green, and orange inks often block UV more effectively than pure black for cyanotype purposes. The reason involves the specific wavelengths of UV light that affect cyanotype chemistry and how different pigments absorb those wavelengths.
For your first attempts, try printing with a simple orange or green color fill. In Photoshop, you can use Edit > Fill and select Color, then choose a bright orange or yellow-green. Apply this with the Screen blending mode to fill the light areas of your negative with UV-blocking color.
As you advance, you may want to test different ink combinations to find what works best with your specific printer and paper combination.
Step 5: Apply Color Correction Curves
This step separates basic negatives from negatives that produce truly excellent cyanotype prints. Color correction curves adjust the tonal relationships in your negative to compensate for how cyanotype chemistry responds to UV exposure.
Why curves matter: Cyanotype chemistry does not respond linearly to UV exposure. The shadows (which become highlights in your negative) may develop differently than the midtones or highlights. Without correction, your prints may have blocked-up shadows or lost midtone detail.
Simple approach for beginners: Start with a gentle S-curve adjustment. In the Curves dialog, click to add a point in the shadows and pull it down slightly. Add a point in the highlights and pull it up slightly. This increases contrast in your negative, which often improves cyanotype results.
Advanced approach using ChartThrob: For photographers who want precise control, the ChartThrob script (developed by Kevin Bjorke and refined by Michael Koch-Schulte) provides a systematic way to create custom correction curves. The process involves printing a step wedge (a gradient from white to black), making a cyanotype from it, and using the script to analyze the results and generate a correction curve.
The ChartThrob method takes more time upfront but produces curves tailored to your specific materials and equipment. Once you have a working curve, you can apply it to any image and get consistent results.
If you want to skip the advanced curve creation, many photographers share their curves online. Search for curves designed for cyanotype with your printer model and transparency film combination.
Step 6: Set Printer Settings
Printer settings significantly affect your negative quality. Take time to configure these correctly.
Media type: Select the setting for transparency film or photo paper glossy. This tells the printer to lay down more ink than it would for plain paper.
Print quality: Choose the highest quality setting available. This typically means slower printing but better ink coverage and density.
Color management: Turn off printer color management if you have carefully prepared your image. Let the printer output your file as-is without additional adjustments.
DPI: Set resolution to at least 300 DPI. Higher settings like 720 DPI can improve detail but may require longer drying times.
Step 7: Print Your Digital Negative
Before printing your final negative, do a test print on plain paper to verify orientation and sizing. It is frustrating to waste expensive transparency film on a simple mistake.
Load your transparency film correctly. Most films have a printable side and a non-printable side. Printing on the wrong side results in ink that smears or beads up. If you are unsure which side to use, breathe gently on the film: the printable side will not fog up like the non-printable side.
After printing, let the negative dry completely before handling. Fresh ink can smudge easily. I recommend waiting at least 30 minutes, though overnight drying produces the most durable negatives.
Step 8: Test with Step Wedges
A step wedge is a gradient strip from pure white to pure black, divided into distinct steps. Printing a step wedge as a digital negative and making a cyanotype from it reveals how your process translates tones.
Examine your step wedge print under good light. You should see distinct steps from the darkest blue to the lightest white. If steps merge together in the shadows or highlights, your negative may be too dense or too thin. If the middle steps are compressed or lost, your curve needs adjustment.
Keep notes on your results. Write down your printer settings, the film you used, your exposure time, and any curve adjustments. This documentation helps you refine your process over time and reproduce successful results.
Troubleshooting Common Cyanotype Digital Negative Problems
Even experienced photographers encounter problems with digital negatives. The following issues appear frequently in online forums and photography communities, along with tested solutions.
Midtones Disappearing
This is perhaps the most common complaint. The shadows and highlights look fine, but the middle tones vanish into undifferentiated gray or blue.
The cause is usually an incorrect curve. Cyanotype chemistry tends to compress midtones, so your negative needs to compensate by expanding them. Try adjusting your curve to boost contrast specifically in the midtone region.
Another cause can be overexposure. If your exposure time is too long, the midtones may develop fully while you wait for the highlights to appear, losing the subtle gradations. Reduce your exposure time and see if midtone detail improves.
Prints Coming Out Too Dark
If your entire print looks dark blue with little tonal variation, your negative may not be dense enough. The ink is not blocking sufficient UV light in the shadow areas.
Try increasing the ink density in your negative. You can do this by adjusting the curve to make the dark areas darker, or by printing with a more UV-blocking ink color.
Also check your exposure time. Overexposure causes even protected areas to develop some blue tone, darkening the overall print.
Prints Coming Out Too Light
Pale prints with weak blue tones usually indicate underexposure or a negative that is too dense.
First, verify your UV source is adequate. Sunlight on a cloudy day provides much less UV than direct summer sun. If using artificial UV, check that your bulbs are functioning properly.
If exposure seems correct, your negative may be blocking too much UV. Try reducing the density of your negative by adjusting the curve or using a different ink color.
Muddy Results and Lack of Contrast
Muddy prints often result from incomplete washing after exposure. The unexposed chemicals must rinse completely from the paper, or they will continue to react slowly, creating an overall blue cast that reduces contrast.
Wash your prints longer. The water should run completely clear before you finish. Some photographers add a brief vinegar bath to help clear residual chemicals.
Contrast issues can also stem from your negative. If your original image lacked contrast, or if your curve compressed the tonal range, the cyanotype will reflect that. Go back to your digital file and increase contrast before printing another negative.
Which Side of the Transparency to Print On
This confusion trips up many beginners. Most transparency films have one side coated to receive ink and one side that is simply plastic.
The quick test: breathe on the film. The side that does not fog up is the coated (printable) side. The uncoated side will show condensation from your breath.
If you print on the wrong side, the ink will not adhere properly. It may bead up, smear immediately, or never fully dry. If this happens, clean the film and try again on the correct side.
Printer Nozzle Issues Affecting Negative Quality
Clogged printer nozzles create streaks or bands in your negative. These translate to visible flaws in your cyanotype print.
Run your printer’s nozzle check and cleaning cycle before printing important negatives. This is especially important if you have not used the printer recently or if you previously printed with different ink colors.
Some photographers dedicate a specific printer to digital negative work, using the same ink colors consistently to minimize clogging from color changes.
Safety and Environmental Considerations
No article on cyanotype digital negatives would be complete without addressing safety. While cyanotype is considered one of the safer alternative photographic processes, the chemicals still require respect and proper handling.
Chemical Handling Safety
The two chemicals used in cyanotype, ferric ammonium citrate and potassium ferricyanide, are relatively low in toxicity compared to many photographic chemicals. However, this does not mean they are harmless.
Always wear gloves when mixing and coating cyanotype solution. The chemicals can cause skin irritation and may be absorbed through the skin over time. Safety glasses protect your eyes from splashes during mixing.
Work in a well-ventilated area. While the chemicals do not produce strong fumes, good ventilation is always wise when handling any chemical substances.
Keep chemicals away from children and pets. Store them in clearly labeled containers in a cool, dry place.
Protecting Your Digital Negatives
One of the ferric ammonium compounds used in cyanotype is a silver solvent. This means it can damage traditional photographic negatives if they come into contact with the sensitizer.
Digital negatives printed on transparency film are somewhat protected by the plastic barrier, but the coating on the film can still be affected by wet chemicals. Always ensure your coated paper is completely dry before placing a negative on it for contact printing.
If chemicals do contact your negative, rinse it gently with water immediately. Some negatives survive this treatment; others are permanently damaged. Having a digital backup of your negative file allows you to reprint if necessary.
Environmental Disposal
Do not pour cyanotype chemicals down the drain. While they are less toxic than many photographic chemicals, they can still affect water quality and aquatic life.
Contact your local waste management authority for guidance on disposing of photographic chemicals in your area. Many communities have household hazardous waste collection programs that accept these materials.
The wash water from developing cyanotype prints contains very dilute chemicals. Most photographers consider this acceptable for drain disposal, but check local regulations if you are concerned.
Expert Tips for Better Cyanotype Prints
Beyond the basic process, these tips from experienced practitioners can help you achieve better results and recover from setbacks.
Budget-Friendly Alternatives That Work
You do not need expensive materials to start making cyanotype prints. Coffee filters work surprisingly well as inexpensive test papers. They are absorbent, relatively flat, and cost a fraction of watercolor paper.
Vellum paper can substitute for transparency film in some cases. It is not as clear, so exposure times increase, but it holds ink and blocks UV adequately for testing.
For transparency film, Fixon brand from eBay offers an economical alternative to Pictorico. Many photographers in online communities report success with this budget option.
How to Salvage Failed Negatives
If your negative is too thin (not blocking enough UV), try printing a second copy and layering them together. Double-layer negatives can increase density enough to produce workable prints.
You can also hand-adjust negatives with acrylic paint or marking pens. Adding density to specific areas can rescue a negative that is almost right but needs local adjustment.
Community Resources
The r/cyanotypes community on Reddit offers a supportive space for beginners and experienced printers alike. Members share test results, troubleshooting advice, and encouragement.
AlternativePhotography.com hosts articles, tutorials, and forums covering cyanotype and many other alternative processes. The collective knowledge there represents decades of practitioner experience.
Start simple and embrace experimentation. Make many small tests rather than committing to large prints immediately. Each test teaches you something about how your specific materials work together.
Frequently Asked Questions
Can you cyanotype film negatives?
Yes, you can make cyanotype prints from traditional film negatives. The process is the same: place the negative on coated paper and expose to UV light. However, traditional film negatives are often smaller than the desired print size, and they may not have the density range optimized for cyanotype chemistry. Many photographers prefer digital negatives because they can size images appropriately and adjust curves specifically for the cyanotype process.
Does cyanotype ruin negatives?
Cyanotype chemicals can damage traditional film negatives because one component (ferric ammonium citrate) is a silver solvent. If wet chemicals contact a film negative, the silver in the emulsion may be affected. Digital negatives on transparency film are more resistant, but the coating can still be damaged by prolonged contact with wet sensitizer. Always ensure your coated paper is completely dry before contact printing, and rinse your negatives promptly if any chemical contact occurs.
How toxic is cyanotype?
Cyanotype chemistry is relatively low in toxicity compared to many photographic processes. The two chemicals, ferric ammonium citrate and potassium ferricyanide, can cause skin and eye irritation but are not highly dangerous with proper handling. Wear gloves and eye protection when mixing and coating. Work in a ventilated area. Keep chemicals away from children and pets. The distinctive blue color of cyanotype prints comes from Prussian blue, which is stable and non-toxic in the finished print.
What happens if you don’t rinse cyanotype?
If you do not rinse your cyanotype print adequately, unexposed chemicals remain in the paper. These will continue to react slowly over time, causing the print to develop an overall blue cast and lose contrast. The yellowish chemicals may also become visible, discoloring areas that should be white. Always wash prints until the water runs completely clear. A brief bath in diluted white vinegar can help clear residual chemicals and is a common practice among experienced cyanotype printers.
Can you use a laser printer for cyanotype negatives?
Laser printers generally do not work well for cyanotype digital negatives. The toner they use does not effectively block UV light, which is essential for the cyanotype process. Additionally, the heat involved in laser printing can warp transparency film. If you only have access to a laser printer, you would need to print multiple overlays to achieve sufficient density, which adds complexity and alignment challenges. An inkjet printer is strongly recommended for creating digital negatives for cyanotype printing.
Conclusion
Learning how to make cyanotype prints using digital negatives combines the best of historic photographic processes with modern digital tools. The technique opens creative possibilities for photographers who want the distinctive look of cyanotype without requiring traditional darkroom access or film negatives.
The process involves several steps: preparing your digital image, inverting and flipping it correctly, choosing appropriate ink colors, applying correction curves for optimal tonal reproduction, and printing on quality transparency film. Each step builds on the previous one, and small refinements compound into significant improvements in your final prints.
Do not be discouraged if your first attempts fall short of your expectations. Cyanotype digital negatives require experimentation to match your specific materials and equipment. Keep detailed notes, make small tests, and learn from each print. The community of alternative photographers is generous with knowledge, and resources like r/cyanotypes and AlternativePhotography.com offer ongoing support.
Start with the basics, embrace the learning process, and enjoy creating beautiful blue prints from your digital photographs. The combination of digital precision and handcrafted printing produces results that are uniquely yours.