There’s something magical about creating images with your hands, coating glass or metal with light-sensitive chemistry, and watching a photograph emerge in a tray of developer. Wet plate collodion photography, invented in 1851, offers exactly this experience. I’ve spent the last few years exploring this historical process, and I want to share what I’ve learned about getting started with wet plate collodion photography at home.
This guide will walk you through everything you need to know: the equipment, the chemicals, the step-by-step process, and the safety considerations you must understand. Whether you’re drawn to the unique aesthetic of tintypes and ambrotypes, or you’re simply fascinated by photographic history, wet plate collodion photography offers a rewarding hands-on experience that connects you with photography’s roots.
What Is Wet Plate Collodion Photography?
Wet plate collodion photography is a 19th-century photographic process that dominated photography from the 1850s to the 1880s. The process involves coating a glass or metal plate with collodion (a sticky solution containing gun cotton), sensitizing it in silver nitrate, exposing it in a camera while still wet, and then developing, fixing, and varnishing the image. The entire process must be completed within 10-20 minutes while the plate remains wet, hence the name.
There are two main types of wet plate images: ambrotypes and tintypes (also called ferrotypes). Ambrotypes are created on glass plates and appear as positive images when viewed against a dark background. Tintypes are made on metal plates (traditionally japanned iron, though modern practitioners often use black aluminum) and are direct positives. Both share the same process but offer different aesthetic qualities and handling characteristics.
What makes wet plate collodion photography special today is its hand-crafted nature. Each plate is unique, bearing the marks of its creation. The images have a distinctive look with rich tones, a limited tonal range that creates dramatic contrast, and physical imperfections that become part of the artwork’s character. For many photographers, the slow, deliberate process is a welcome contrast to digital photography’s instant gratification.
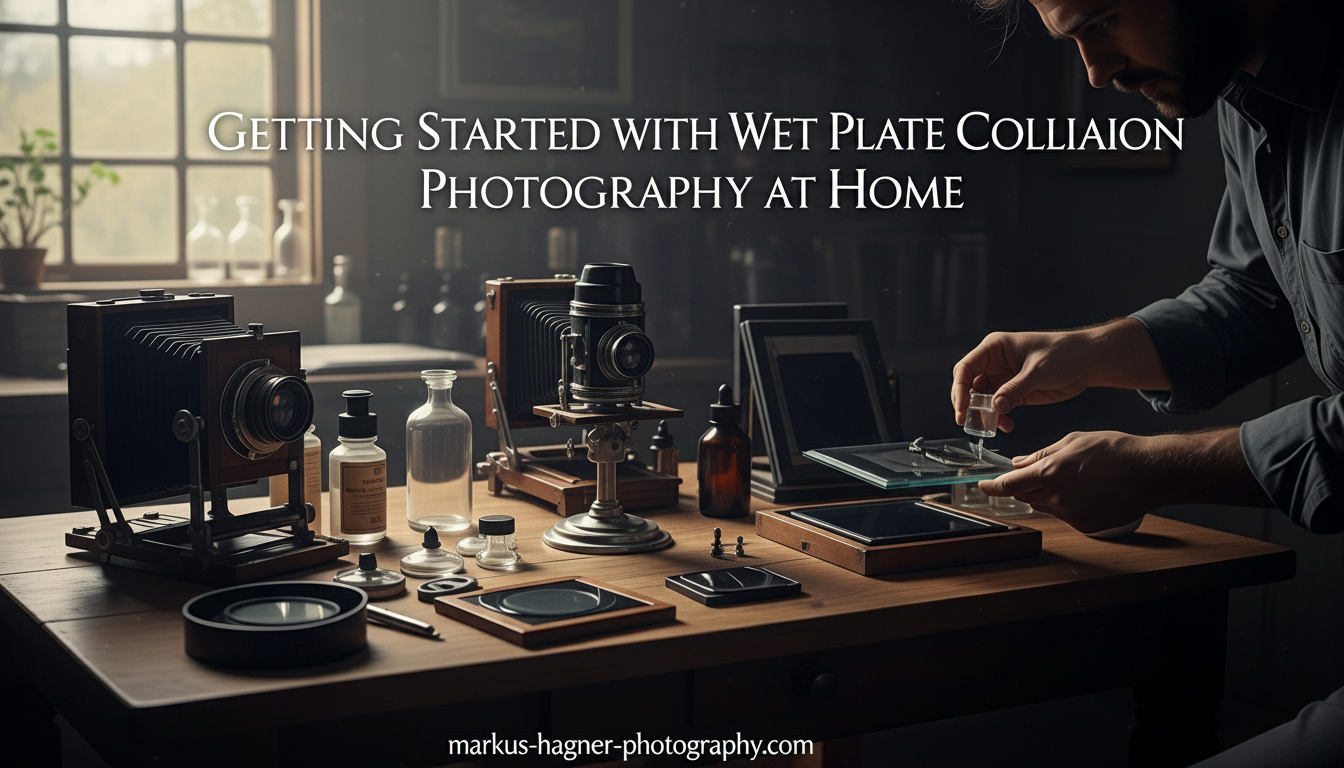
Essential Equipment and Supplies for Wet Plate Photography
Getting started with wet plate collodion photography requires specific equipment and supplies. Some items are essential, while others can be improvised or acquired gradually. I’ve learned that starting with a beginner kit can be more economical than sourcing individual components, especially when you’re uncertain about your long-term commitment to the process.
Here’s what you’ll need:
Camera Equipment
Large Format Camera: Ideally, you need a 4×5 or larger view camera. These cameras have ground glass focusing, lens movements, and accept standard film holders that can be modified for wet plate work. Brands like Graflex Crown Graphic, Calumet, or any field camera will work well. If you’re on a budget, keep an eye on auction sites or used camera dealers.
Lens: You need a lens with sufficient coverage for your plate size and a shutter or some way to control exposure duration. Process lenses (often used for enlarging) are excellent and affordable options. Many wet plate photographers use barrel lenses (lenses without shutters) and control exposure with a lens cap or simple shutter mechanisms.
Plate Holders: Standard film holders can be modified to hold wet plates, or you can buy dedicated wet plate holders. Modification involves sealing the light traps and adding septums to hold plates securely. Some photographers use modified Holga cameras as an entry point, which can work for smaller plates.
Chemicals and Solutions
Collodion: This is your light-sensitive binder. It comes as “salted” collodion (with potassium iodide already added) or plain collodion that you salt yourself. Store-bought collodion is consistent and reliable, though many photographers eventually mix their own recipes.
Silver Nitrate: The sensitizer that makes your plate light-sensitive. You’ll need a silver nitrate bath (typically 7-9% solution) and a tank to hold it. Silver nitrate stains everything it touches permanently, so handle with extreme care. This is one of your most expensive ongoing consumables.
Developer: Typically a ferrous sulfate-based solution. It develops the latent image on your exposed plate. Developer can be mixed from raw chemicals or purchased as a prepared solution.
Fixer: Traditionally potassium cyanide was used, but due to its extreme toxicity, most modern practitioners use sodium thiosulfate (hypo) or commercial fixers designed for wet plate work. Fixer removes unexposed silver halides and stabilizes the image.
Varnish: Wet plates must be varnished for protection. Traditional sandarac varnish requires heating and is applied with a flow technique. Many photographers now use modern substitute varnishes that can be applied at room temperature.
Darkroom Supplies
Silver Nitrate Tank: A light-tight container for your sensitizing bath. Purpose-built tanks are ideal, but many photographers build their own from acrylic or other materials. The tank must hold enough solution to completely submerge your plates.
Developing Trays: Plastic trays work well for developing, fixing, and washing. Tupperware containers can serve as budget alternatives. You need separate trays for each chemical step.
Safelights: Traditional darkroom safelights work, but many wet plate photographers use red LED bike lights as affordable alternatives. The key is red light that won’t fog your sensitized plates.
Measuring and Mixing Equipment: Graduated cylinders, funnels, and storage bottles for your chemicals. Glass amber bottles are ideal for storing light-sensitive solutions.
Plates
Glass: For ambrotypes, use clear glass cut to your desired size. Thicker glass (at least 1/8 inch) is less fragile and easier to handle. Clean thoroughly and store in a dust-free environment.
Metal: For tintypes, traditional japanned iron plates are available from specialty suppliers. Many modern photographers prefer black aluminum sheets, which can be cut to size and don’t require japanning (black enameling).
Safety Equipment
Personal Protection: Nitrile gloves, safety goggles, and a respirator mask are non-negotiable. Collodion contains ether, which is volatile and can cause dizziness and nausea. Silver nitrate burns skin and stains permanently. Work in a well-ventilated area or outdoors when mixing chemicals.
Ventilation: Essential for safe chemical handling. Either work in a space with good airflow or use a fume hood when mixing and pouring collodion.
Chemical Safety and Handling
I cannot emphasize this enough: wet plate collodion photography involves hazardous chemicals that demand respect and proper handling. The collodion process traditionally uses ethyl ether, which is highly flammable and can cause serious health effects with prolonged exposure. Many modern collodion substitutes replace ether with less hazardous solvents, but all variants require care.
Silver nitrate is perhaps the most notorious chemical in the wet plate arsenal. It causes severe eye damage and skin irritation, and it stains everything it touches permanently—your skin, your clothes, your darkroom counters, your tools. Always wear gloves when handling silver nitrate, and consider wearing an apron or old clothes dedicated to darkroom work. If you get silver nitrate on your skin, it will turn brown or black and may take weeks to fade.
Traditional wet plate fixer contained potassium cyanide, one of the most deadly poisons known. While most modern practitioners use safer alternatives like sodium thiosulfate, some still prefer cyanide for its archival qualities. If you choose to use cyanide, you must educate yourself thoroughly on its dangers, have specific antidotes on hand, and never work alone. For most beginners, sodium thiosulfate fixer is perfectly adequate and much safer.
Proper ventilation is critical, especially when pouring collodion. The fumes can accumulate quickly in enclosed spaces. If you feel dizzy, lightheaded, or develop a headache, step into fresh air immediately. Many experienced photographers do their collodion pouring outdoors or in a garage with the door open.
Store all chemicals in clearly labeled containers out of reach of children and pets. Keep silver nitrate in amber glass bottles away from light. Never mix different chemical solutions unless you know exactly what you’re doing. Dispose of waste chemicals according to local regulations—silver-containing waste is particularly regulated in many areas.
Setting Up Your Home Darkroom for Wet Plate Work
You don’t need a dedicated darkroom building to practice wet plate photography, but you do need a space you can make completely dark. A bathroom, laundry room, closet, or even a section of a garage can work. The key requirements are: light-tightness, ventilation, and enough workspace for your chemical trays and silver tank.
Light-proofing your space is the first priority. Use blackout curtains, weatherstripping around doors, or even blankets taped over windows. Test your darkroom by sitting in it for 10 minutes with the lights off—if you can see any light leaks, seal them. A small amount of light can fog your plates and ruin hours of work.
Ventilation is equally important, especially when working with ether-based collodion. If possible, set up near a window that can be opened, or install a small exhaust fan. At minimum, ensure there’s some airflow, and take frequent breaks for fresh air if you’re working in an enclosed space.
Your work area needs to accommodate several trays (for developer, fixer, and wash), your silver tank, and space to handle plates. Many photographers use a folding table covered with a waterproof tablecloth or plastic sheeting. Arrange your workflow logically: you’ll move from silver tank to camera to developer to fixer to wash to drying rack.
For safelights, as mentioned earlier, red LED bike lights work wonderfully and cost a fraction of traditional safelights. Position them where they won’t cast shadows on your work area. Test by placing a sensitized test plate in various locations under your safelight—if it shows any fogging after several minutes, your light is too bright or the wrong color.
If you’re working in a temporary space like a bathroom, consider building a portable darkroom setup. This might involve a cart that holds all your chemicals and equipment, which can be rolled into your darkroom when you need it and stored elsewhere when you don’t. Some photographers even use camping tents modified for darkroom work—anything that can be made light-tight.
Temperature and humidity affect your results. Wet plate chemistry works best around 70°F (21°C). Very cold temperatures slow the process; very warm temperatures accelerate it and can cause collodion to run. High humidity can affect how collodion pours and dries. Many photographers notice seasonal differences in their results and adjust their timing accordingly.
Getting Started with Wet Plate Collodion Photography at Home: The Complete Process
Now let’s walk through the complete wet plate process step by step. Remember that timing matters—your plate must stay wet throughout. The entire process from sensitizing to varnishing typically takes 20-30 minutes for your first plate, though you’ll get faster with practice.
Step 1: Prepare Your Plate
Clean your glass or metal plate thoroughly. Any dust, oil, or residue will show in your final image. Use glass cleaner for glass plates; for metal, clean with alcohol and let dry completely. Handle plates only by the edges to avoid fingerprints.
Some photographers pre-coat their plates with a subbing layer (like albumen) to help the collodion adhere better, especially on glass. This isn’t strictly necessary but can improve consistency, particularly for ambrotypes.
Step 2: Pour the Collodion
Working in your darkroom under safelight, hold the plate at a slight angle and pour the collodion near one edge. Let it flow across the surface, tilting the plate to distribute the collodion evenly. The goal is a smooth, even coating without bubbles or bare spots. Hold the plate over your collodion bottle to catch drips.
The collodion needs to set to a specific consistency—tacky but not wet. This usually takes 30-60 seconds depending on temperature and humidity. If it’s too wet when you sensitize, you’ll get milky plates. If it’s too dry, it won’t sensitize properly. This is one of those skills that develops with experience.
Step 3: Sensitize in Silver Nitrate
Place your plate in the silver nitrate bath, emulsion side up. Ensure it’s fully submerged. Sensitizing takes approximately 3 minutes in fresh silver nitrate, though older baths may take longer. During this time, the silver ions combine with the iodide in the collodion to form light-sensitive silver iodide.
While your plate sensitizes, prepare your camera and set up your shot. Wet plate collodion has an ISO equivalent of roughly 0.5 to 5, depending on your formula and conditions. This means exposures typically range from several seconds to minutes, even in bright sunlight. A tripod is absolutely essential.
Step 4: Load and Expose
After 3 minutes in the silver bath, remove your plate (drain briefly back into the tank) and immediately load it into your plate holder. Keep the holder light-tight. Move quickly to your camera—the sensitized plate will begin to lose sensitivity immediately once removed from the silver bath.
Insert the plate holder into your camera, remove the dark slide, and make your exposure. Exposures vary widely based on lighting conditions, your collodion formula, and your development method. In bright sun with fast collodion, you might expose for 2-5 seconds. In shade or with slow collodion, exposures can stretch to 30 seconds or more. Bracket your exposures until you know your materials.
After exposure, replace the dark slide and return to your darkroom. You have a limited window before the plate dries—typically 10-15 minutes, though humidity extends this time.
Step 5: Develop the Plate
In your darkroom under safelight, pour developer evenly across the plate surface while holding it at an angle over your developer tray. Watch for the image to appear. Development usually takes 10-30 seconds. The image will appear as a negative (dark values light, light values dark) at this stage.
Stop development by rinsing the plate briefly in water. Don’t overdevelop—wet plate images develop quickly and can become dense and contrasty if developed too long. This is another aspect that improves with practice.
Step 6: Fix the Image
Place the plate in your fixer solution. Fixing removes the unexposed silver halides, making the image permanent. This takes 3-5 minutes. Watch as the image transforms—ambrotypes will shift from negative to positive, while tintypes will deepen and clarify.
Agitate the fixer tray occasionally to ensure fresh solution contacts all parts of the plate. If using sodium thiosulfate, this step is relatively safe (though always wash hands afterward). If using cyanide fixer, use extreme caution and proper ventilation.
Step 7: Wash and Dry
After fixing, wash your plate thoroughly in running water for 10-15 minutes to remove all residual chemicals. Inadequate washing leads to staining and image deterioration over time. For tintypes, you can be less rigorous about washing since the metal substrate doesn’t absorb chemicals like glass does.
Let the plate dry completely. Glass plates can be placed on a drying rack or stood on edge. Metal plates dry more quickly. Some photographers use alcohol to speed drying, especially in humid conditions. Never varnish a damp plate.
Step 8: Varnish for Protection
Once completely dry, your plate must be varnished for protection against abrasion, moisture, and oxidation. Traditional sandarac varnish is heated until fluid and poured across the plate surface, then excess is drained off. Modern substitute varnishes can be applied at room temperature with a brush or by pouring.
Varnishing is a skill in itself and takes practice to master. Aim for an even coat without bubbles or streaks. Let the varnish cure fully before handling your finished plate.
Camera Options and Modifications
Choosing the right camera for wet plate work depends on your budget, space constraints, and photographic goals. While large format cameras are ideal, they’re not your only option. I’ve seen successful wet plates made with everything from Graflex cameras to modified plastic toy cameras.
Large Format Cameras: These are the gold standard for wet plate work. Cameras like the Graflex Crown Graphic, Calumet monorails, or any 4×5 field camera offer precise control, ground glass focusing, and ready availability of accessories. They accept standard film holders that can be modified for wet plate use. If budget allows, this is your best path forward.
Modified Holga: For a budget-friendly entry point, many photographers modify Holga 120 cameras for wet plate work. This involves removing the camera back, creating a light-tight mounting system for plate holders, and often replacing the lens with something sharper. While limited to smaller plates and less precise focusing, Holgas make wet plate accessible on a tight budget.
DIY Cameras: If you’re handy, building your own camera is rewarding and economical. Photographers have built wet plate cameras from matt board, tape, and found lenses. A process lens from an industrial enlarger can be mounted in a simple box with bellows made from dark cloth. While crude, these cameras can produce stunning results and teach you a lot about the photographic process.
Lens Considerations: Any lens with sufficient coverage for your plate size will work. Process lenses are excellent—designed for flat-field reproduction, they’re sharp and often affordable. Barrel lenses (lenses without shutters) require you to control exposure manually, but this is easily done with a lens cap or simple shutter mechanisms.
Plate Holder Modification: Standard film holders can be adapted for wet plate use. The key modifications include: sealing the light traps (collodion can dissolve traditional light trap materials), adding septums to hold plates securely, and sometimes removing the dark slides to create open holders. Some photographers prefer dedicated wet plate holders, but modified film holders work well for most purposes.
Light-Tightness: Whatever camera you use, it must be completely light-tight. Even small light leaks will fog your plates. Check your camera carefully, seal any gaps with black gaffer tape, and test with an unexposed but sensitized plate if you suspect leaks. Electrical tape over camera windows and seams is a common practice among wet plate photographers.
Troubleshooting Common Wet Plate Problems
Every wet plate photographer encounters problems. The process has many variables, and small mistakes can ruin hours of work. Based on my experience and forum discussions, here are the most common issues and their solutions:
Milky or Foggy Plates: This is the most common beginner problem and usually results from putting the plate in the silver bath too soon, before the collodion has set properly. The collodion should be tacky, not wet, when sensitized. Another cause is exhausted silver nitrate—your bath needs regular rejuvenation or replacement. Also check for light leaks in your camera or darkroom.
Hot Spots and Streaks: Uneven coating during pouring creates areas of different sensitivity. This can result from pouring too slowly, tilting the plate unevenly, or working in temperatures that cause the collodion to set too quickly. Practice your pouring technique, work in consistent temperatures, and ensure smooth, even coverage of the entire plate surface.
Fingerprints: Touching the emulsion surface leaves oily fingerprints that show clearly in the final image. Always handle plates by the edges only. Use tongs or gloves when loading plates into holders. This becomes second nature with practice.
Plates Drying Too Quickly: If your plates dry before you can complete the process, you’re working too slowly or in conditions that are too hot or dry. The wet plate window is typically 10-20 minutes from sensitizing. Work more efficiently, use a humidifier in dry climates, or consider using a collodion formula with slower evaporation.
Weak or Faint Images: Underexposure is common with wet plate due to its very low ISO. If your images are consistently weak, increase exposure time. Also check your silver nitrate strength—old or exhausted silver produces less sensitive plates. Fresh silver is critical for consistent results.
High Contrast or Blocked Highlights: Overdevelopment creates dense highlights and harsh contrast. Watch your development carefully and stop as soon as the image appears fully formed. Also ensure your developer is fresh and at proper strength.
Chemical Stains on Plates: Inadequate washing leaves chemical residues that stain over time. Wash fixed plates thoroughly in running water. For persistent stains, you can use a clearing bath (sodium sulfite solution) before the final wash.
Environmental Factors: Humidity and temperature significantly affect your results. High humidity can cause collodion to flow poorly and never set properly. Low humidity accelerates drying. Temperature affects collodion viscosity and chemical activity. Most photographers find their results vary seasonally until they learn to compensate.
Remember that failed plates are part of learning. Every wet plate photographer has a collection of mistakes. The good news is that glass and metal plates can be cleaned and reused—strip the old collodion with alcohol, clean thoroughly, and start fresh. Each failed plate teaches you something about the process.
Budget Considerations and Getting Started
One of the most common questions in forums is about the cost of getting started with wet plate photography. The honest answer is that it’s not cheap, but there are ways to manage the expense. Let me break down the realistic costs:
Beginner Kit Approach: Purchasing a complete starter kit from suppliers like Bostick & Sullivan typically costs $400-600. This includes all essential chemicals, basic equipment, and sometimes a modified camera setup. While not inexpensive, it’s often cheaper than sourcing everything individually and ensures you have compatible materials.
Building Gradually: If you’re on a tight budget, you can acquire equipment piecemeal. Start with the camera and basic darkroom setup, then add chemicals as you can afford them. Many photographers already own some darkroom equipment, which reduces startup costs. However, don’t skimp on safety gear—gloves, goggles, and ventilation are essential.
Camera Investment: This is your biggest variable expense. A used large format camera might cost $200-500. A DIY or Holga modification can be done for under $100. Borrowing or renting equipment initially can help you decide if wet plate is right for you before investing heavily.
Ongoing Costs: Silver nitrate is your major recurring expense, typically $50-100 per bottle depending on concentration and quantity. Collodion, developer, and fixer are less expensive but still represent ongoing costs. Plates themselves are relatively cheap, especially if you cut your own metal or buy glass in bulk.
Where to Buy: Specialty suppliers like Bostick & Sullivan, Main Trophy Supply, and Camera Chemicals cater specifically to wet plate photographers. They offer reliable products and can provide guidance. Some general photography suppliers also carry basic materials. Join wet plate photography forums and Facebook groups—community members often share supplier recommendations and sometimes pool orders for bulk discounts.
Budget-Friendly Alternatives: Consider using plastic food containers as trays, red LED bike lights for safelights, and homemade silver tanks. Many successful wet plate photographers started with improvised equipment and upgraded gradually. Focus on getting the chemistry right initially—fancy equipment can come later.
Frequently Asked Questions
What is wet plate collodion photography?
Wet plate collodion photography is a 19th-century photographic process where a glass or metal plate is coated with light-sensitive collodion, sensitized in silver nitrate, exposed in camera, and developed immediately while still wet, typically within 10-20 minutes.
Is wet plate photography dangerous?
Wet plate photography involves hazardous chemicals including silver nitrate (causes burns and staining) and ether (flammable, can cause health effects). Proper safety equipment including gloves, goggles, ventilation, and a respirator mask is essential. Traditional fixer contained potassium cyanide, though many modern photographers use safer alternatives like sodium thiosulfate.
How long does the wet plate process take?
The entire wet plate process from pouring collodion to varnishing takes approximately 20-30 minutes for an experienced photographer. The critical wet window after sensitizing is 10-20 minutes—the plate must be exposed, developed, and fixed before it dries. Beginners should expect 30-45 minutes for their first plates.
Can you do wet plate photography at home?
Yes, wet plate photography can be done at home with proper setup. You need a light-tight space that can be darkened (bathroom, closet, or section of a garage), adequate ventilation for chemical fumes, and workspace for chemical trays. Many photographers practice wet plate successfully in temporary home darkrooms.
What camera do I need for wet plate photography?
Ideally, a large format camera (4×5 or larger) with ground glass focusing and lens movements. These accept modified film holders for wet plates. Budget options include modified Holga cameras or DIY-built cameras. Any camera must be light-tight and capable of holding plate holders. Process lenses with adequate coverage are recommended.
Is wet plate photography expensive?
Wet plate photography requires significant initial investment. A beginner kit costs approximately $400-600 for all essential chemicals and basic equipment. A suitable camera adds $200-500. Ongoing costs include silver nitrate ($50-100 per bottle) and other chemicals. However, equipment can be acquired gradually, and budget alternatives exist for many items.
Conclusion
Getting started with wet plate collodion photography at home is a journey that rewards patience and persistence. The process has a steep learning curve, but each successful plate brings immense satisfaction. There’s something profound about creating images with methods used over 150 years ago, connecting with photographers who labored over similar chemistry and equipment.
Start with the essentials: a beginner kit, a suitable camera, and a safe darkroom space. Don’t worry about achieving perfect results immediately—every wet plate photographer has made milky plates, light leaks, and development mistakes. Learn from each plate, keep notes on your process, and gradually refine your technique.
The community of wet plate photographers is welcoming and generous with knowledge. Join forums like the Large Format Photography Forum, Facebook groups dedicated to wet plate work, or seek out workshops if possible. Seeing others work and getting hands-on instruction can accelerate your learning dramatically.
Wet plate collodion photography isn’t for everyone. It’s slow, messy, sometimes frustrating, and requires significant investment in time and money. But for those who embrace it, it offers a unique artistic voice and a deeper understanding of photography’s foundations. Each hand-crafted plate carries the marks of its creation—a tangible record of your time, your effort, and your vision.