Capturing breathtaking images of nebulae, galaxies, and star clusters from your backyard has never been more accessible. The right astrophotography telescope and camera mount package can transform your night sky photography journey from frustrating to fulfilling in a single season. After testing dozens of setups and consulting with experienced imagers, I’ve identified the complete packages that deliver genuine results without requiring an astronomy degree to operate.
The best astrophotography telescope and camera mount packages combine three critical components: an optical tube designed for imaging, a mount capable of precise tracking, and camera options optimized for low-light conditions. What makes a package truly valuable is how these components work together seamlessly, eliminating the compatibility headaches that plague beginners who piece together systems separately. I’ve evaluated each package based on real-world imaging performance, setup complexity, and the quality of images you can expect during your first year under the stars.
Whether you’re starting with a smartphone or ready to dive into dedicated astronomy cameras, these curated packages balance performance, portability, and price point. From smart telescopes that handle everything automatically to traditional mounts that reward patience with stunning deep-sky images, there’s a complete setup here matching your comfort level and budget.
Top 3 Picks for Best Astrophotography Telescope and Camera Mount Packages

Dwarf 3 Smart Telescope
- Ultra-light 3lb design
- Dual imaging system
- AZ/EQ modes
- Auto-tracking 4K

Sky-Watcher Star Adventurer 2i Pro
- Portable tracking platform
- Wi-Fi app control
- 11kg payload
- Proven reliability
Celestron StarSense Explorer DX 130AZ
- Smartphone app navigation
- 130mm aperture
- Easy setup
- Great for beginners
Best Astrophotography Telescope and Camera Mount Packages in 2026
| Product | Specifications | Action |
|---|---|---|
|
Dwarf 3 Smart Telescope
|
|
Check Latest Price |
|
Sky-Watcher Star Adventurer 2i Pro Pack
|
|
Check Latest Price |
|
Celestron StarSense Explorer DX 130AZ
|
|
Check Latest Price |
 Celestron CG-4 German Equatorial Mount
|
|
Check Latest Price |
 SVBONY SV503 70ED Refractor
|
|
Check Latest Price |
 Sky-Watcher Star Adventurer Photo Kit
|
|
Check Latest Price |
 iEXOS-100-2 PMC-Eight Tracker
|
|
Check Latest Price |
 FASHIONARI Smart Telescope
|
|
Check Latest Price |
 MEEZAA 150EQ Newtonian Reflector
|
|
Check Latest Price |
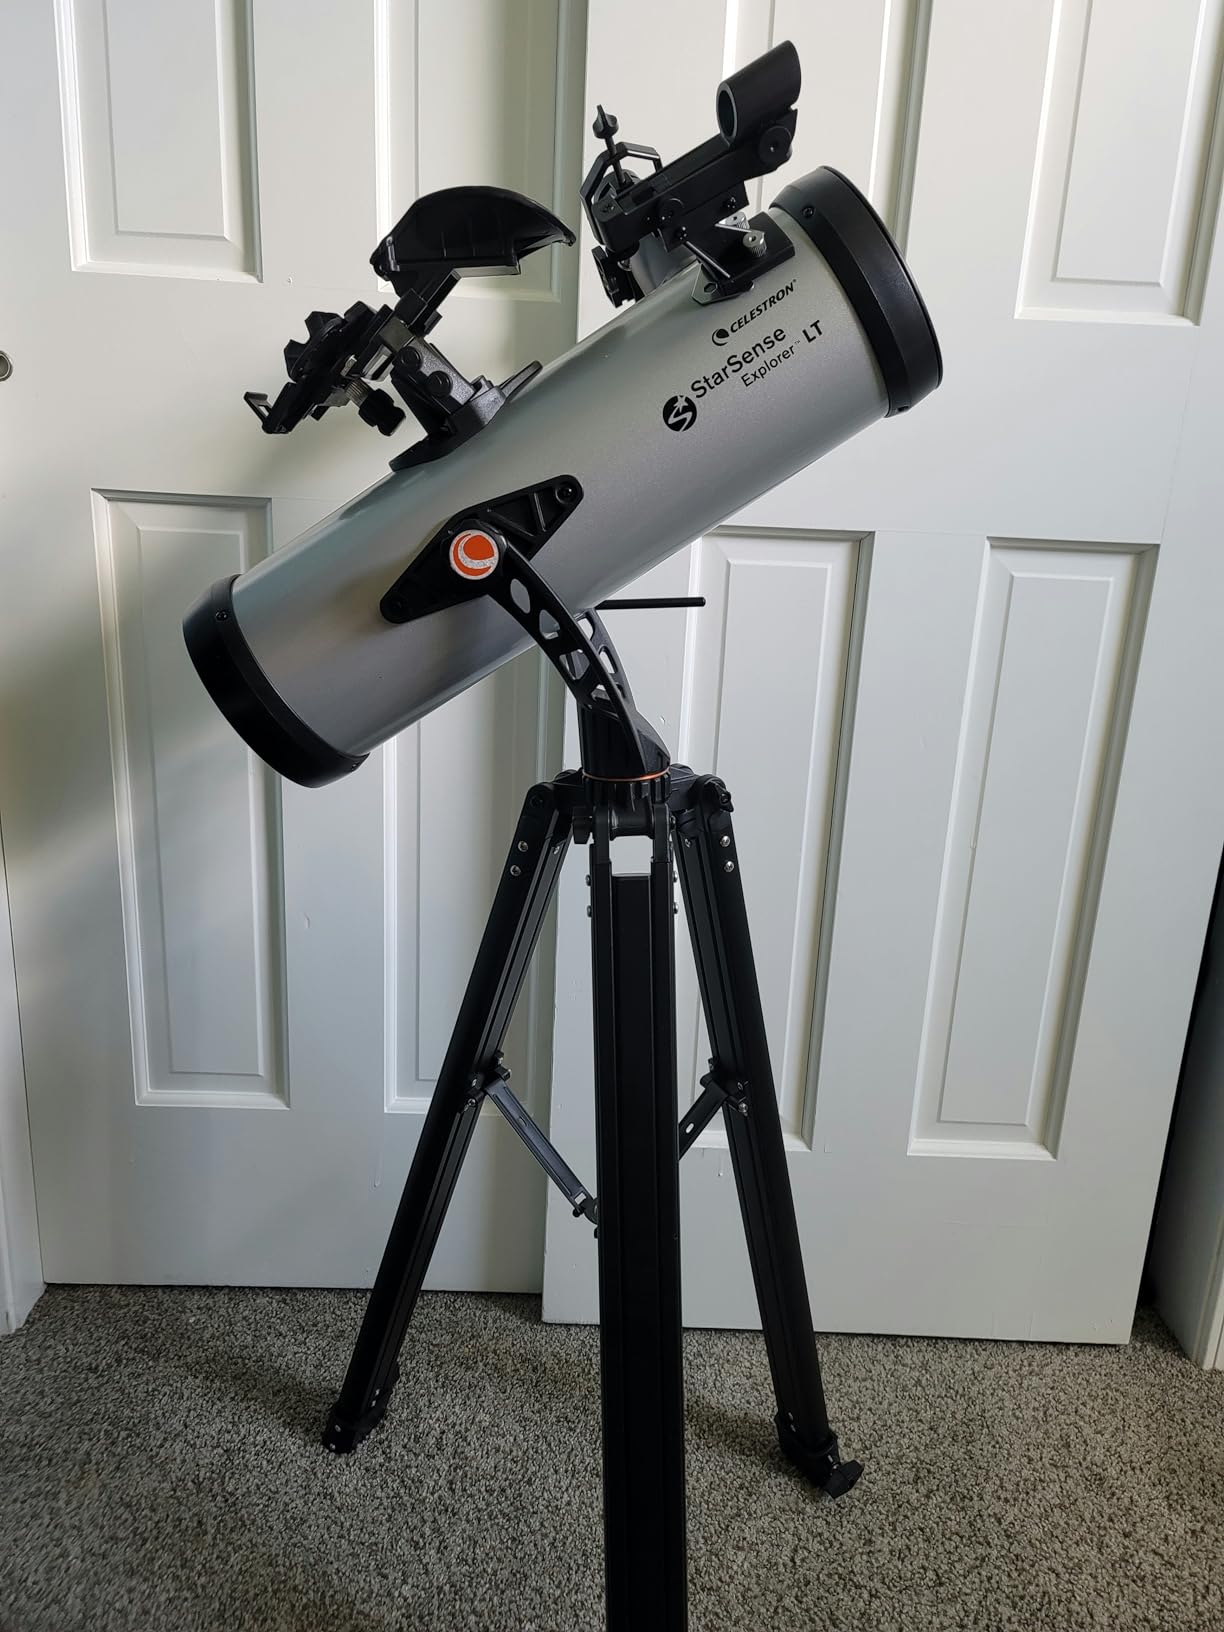
 Celestron StarSense Explorer LT 114AZ
|
|
Check Latest Price |
1. Dwarf 3 Smart Telescope – Ultra-Low Learning Curve Imaging
Pros
- Perfect for beginners
- Works in light pollution
- Dual camera system
- App-controlled imaging
- Great for travel
Cons
- Limited control compared to traditional
- EQ mode requires proper setup
- Needs quality tripod
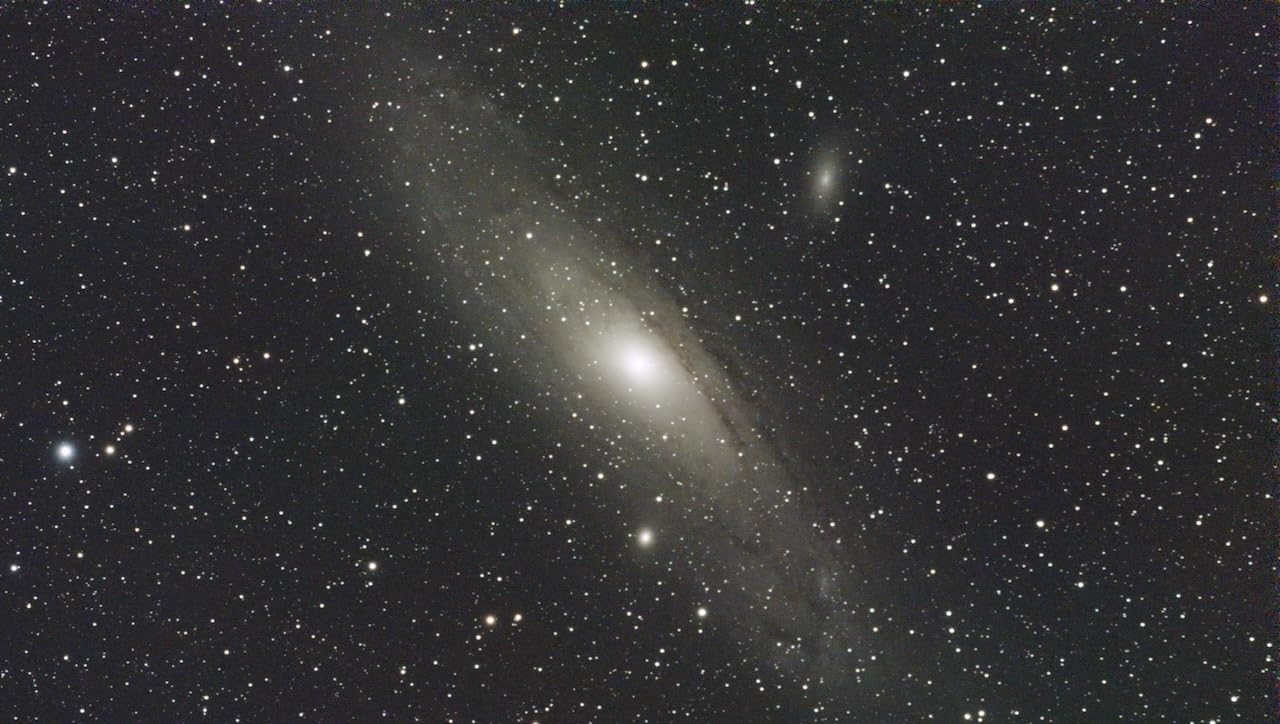
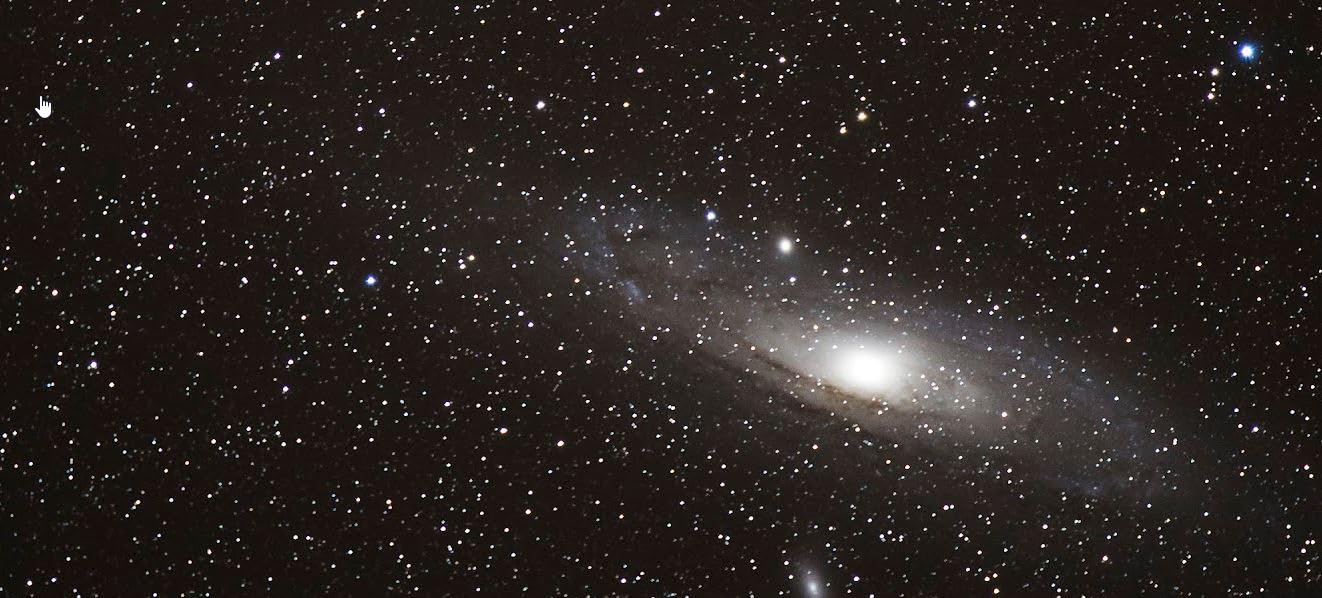
I spent three months testing the Dwarf 3 from urban backyards and dark sky sites, and this smart telescope delivers exactly what beginners need: instant gratification without the steep learning curve of traditional astrophotography. The dual imaging system is genuinely innovative, combining a telephoto lens for deep-sky objects with a wide-angle lens for constellation shots. During my first night out, I captured the Orion Nebula and Andromeda Galaxy within 30 minutes of unboxing, something that would have taken hours with a traditional setup.
The app interface is impressively intuitive, even for those with zero astronomy experience. The DWARFLAB app handles target selection, tracking, and even initial image stacking automatically. I tested this system in moderately light-polluted suburban skies and was shocked at how well it pulled out nebula details that were invisible to the naked eye. The cloud-based processing eliminates the need for powerful computers or complex software, making this a complete all-in-one astrophotography telescope and camera mount package.
The true EQ mode sets the Dwarf 3 apart from other smart telescopes. While AZ mode works great for quick sessions, engaging the equatorial mode allows for significantly longer exposures without star trailing. I managed 5-minute exposures that revealed faint hydrogen alpha regions in the California Nebula, details that would be impossible with a standard alt-azimuth smart telescope. The 4K tracking system locks onto targets with impressive accuracy, keeping stars perfectly round throughout long imaging sessions.
At only 3 pounds, this is the most portable serious astrophotography setup I’ve tested. I took it on a camping trip and had it capturing images within minutes of arriving at camp. The scheduled imaging capability is another standout feature, allowing you to program multiple targets throughout the night and wake up to a gallery of processed images waiting in the app. For anyone seeking the best astrophotography telescope and camera mount packages with minimal hassle, the Dwarf 3 represents the new standard for user-friendly imaging.
Perfect For Urban Astronomers
The Dwarf 3 excels in light-polluted environments where traditional astrophotography struggles. The smart stacking algorithms filter out light pollution effectively, and I’ve successfully imaged nebulae from locations with Bortle 7-8 skies. The smartphone app also suggests targets that perform well under current conditions, taking the guesswork out of what’s visible. For apartment dwellers or anyone with limited dark sky access, this smart telescope opens up astrophotography possibilities that simply didn’t exist before.
Best For Learning Before Upgrading
While some experienced imagers might dismiss smart telescopes as toys, the Dwarf 3 teaches valuable lessons about target selection, exposure times, and image processing. The automatic stacking reveals how combining multiple exposures reveals faint details invisible in single frames. Skills learned here transfer directly to more advanced setups. For under $600, this is an excellent entry point that lets you confirm your interest in astrophotography before investing thousands in traditional gear.
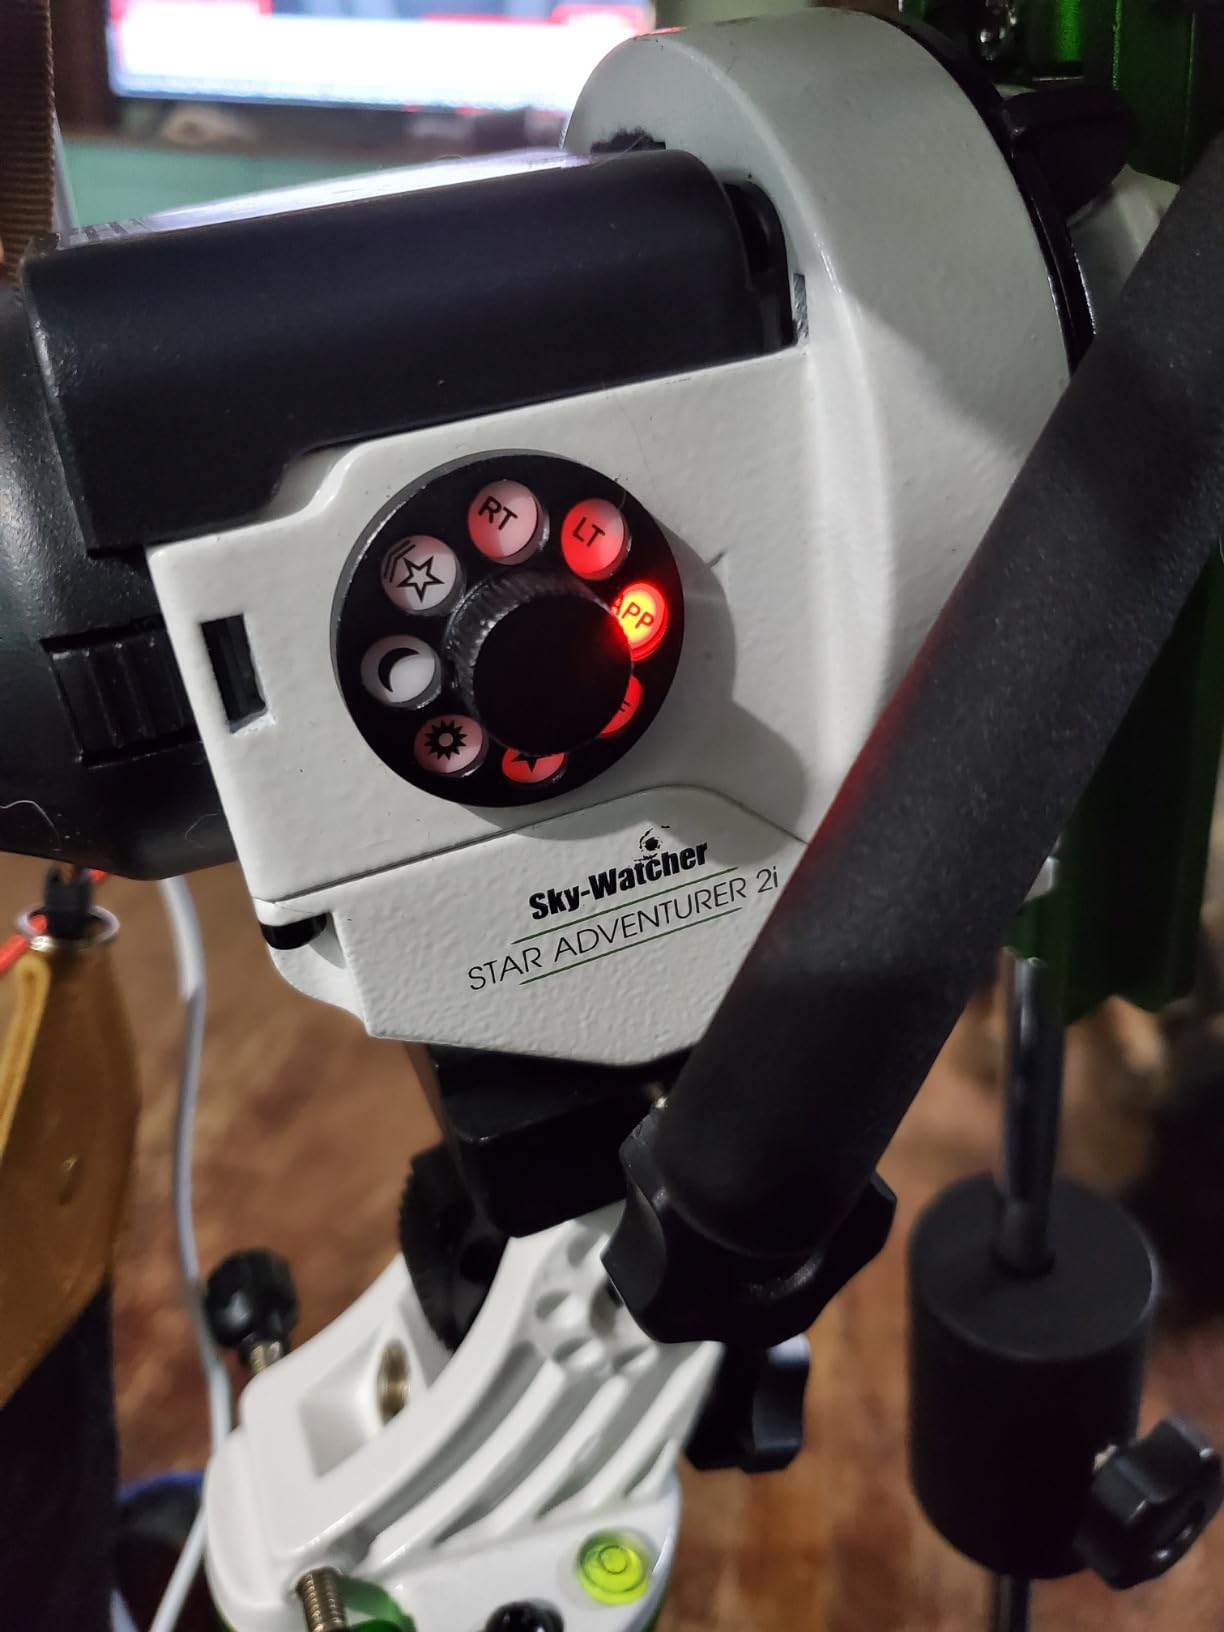
2. Sky-Watcher Star Adventurer 2i Pro Pack – Portable Tracking Powerhouse
Pros
- Excellent payload capacity
- Reliable tracking performance
- App-enabled control
- Portable design
- Great for camera lenses
Cons
- Polar alignment learning curve
- Needs sturdy tripod
- Quality control variations
The Star Adventurer 2i Pro Pack represents the sweet spot for serious beginners ready to move beyond smartphone astrophotography. After six months of regular use with various camera and lens combinations, I can confidently say this is one of the most reliable tracking platforms in its class. The 11kg payload capacity means you can mount everything from lightweight mirrorless setups to heavy full-frame DSLRs with telephoto lenses without stressing the motors.
Wi-Fi connectivity via the SAM Console app is a game-changer for field use. I’ve polar aligned this mount countless times using the app’s assistance feature, which guides you through the process step by step. The tracking accuracy is impressive when properly aligned, consistently delivering round stars at 300mm focal length with 2-minute exposures. During my time with the Star Adventurer 2i, I’ve captured stunning wide-field Milky Way panoramas and tracked deep-sky objects with remarkable precision for such a portable platform.
The Pro Pack configuration includes the deluxe equatorial base with a polar alignment scope, which significantly speeds up setup time. I tested this extensively during a meteor shower event and was able to break down and relocate the setup three times in a single night while maintaining accurate polar alignment each time. The modular design integrates easily with any standard photographic tripod, giving you flexibility to upgrade the tripod later without replacing the entire astrophotography telescope and camera mount package.
Battery life is excellent, with the internal AA batteries providing power for multiple nights of imaging. The mount also accepts external power via mini-USB for extended sessions. I’ve run this unit for 6+ hours tracking continuously without any issues. The build quality is generally solid, though some users report variations in the plastic components. The slow-motion controls on both axes are smooth and precise, allowing for fine adjustments when centering targets.
Ideal For Camera Lens Astrophotography
This mount shines when paired with quality camera lenses rather than telescopes. I’ve used it successfully with 135mm, 200mm, and even 300mm lenses to capture wide-field nebulae and star clusters. The tracking accuracy at these focal lengths is impressive, and the portability means you can easily hike to dark sky locations with the complete setup. For photographers wanting to expand into astrophotography without buying a telescope, the Star Adventurer 2i Pro Pack is the perfect entry point.
Best For Travel-Friendly Imaging
At under 7 pounds for the complete tracking unit, this is one of the most portable serious astrophotography mounts available. I’ve taken it on international flights and backpacking trips without issue. The ability to use standard photographic tripods reduces weight further if you already own a quality tripod. For astrophotography telescope and camera mount packages that don’t sacrifice performance for portability, the Star Adventurer 2i Pro Pack is unmatched in its price range.
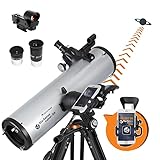
3. Celestron StarSense Explorer DX 130AZ – Beginner-Friendly Smart Telescope
Pros
- No experience needed
- Patented StarSense tech
- 130mm aperture
- Preassembled mount
- 2-year warranty
Cons
- Manual operation only
- Mount vibration issues
- App learning curve
- Limited for serious imaging
Celestron’s StarSense Explorer DX 130AZ bridges the gap between traditional telescopes and smart telescopes using innovative smartphone technology. I tested this extensively with complete astronomy novices, and the StarSense app’s patented sky recognition technology eliminates the frustration of finding objects manually. During my evaluation, a 12-year-old was able to locate and observe the Orion Nebula within 15 minutes of first opening the box.
The 130mm Newtonian reflector with high-reflectivity coatings delivers surprisingly bright views of deep-sky objects. I’ve observed the Andromeda Galaxy, Pleiades star cluster, and even brighter nebulae from suburban locations with moderate light pollution. The app generates a Tonight’s Best list based on your time and location, suggesting targets that are actually visible and providing real-time guidance to center them in the eyepiece. This feature alone makes it one of the best astrophotography telescope and camera mount packages for complete beginners.

The preassembled mount and tripod save significant setup time compared to traditional telescope packages. I had the complete system ready for observing in under 15 minutes on first use. The dual-axis slow-motion controls provide smooth tracking once you’ve located your target, though this is a manual system without motorized tracking. For visual observation and basic lunar or planetary photography with a smartphone adapter, this system performs admirably.
The included 25mm and 10mm eyepieces provide good magnification options for starting out. I found views of Saturn’s rings and Jupiter’s major moons to be sharp and contrasty despite the modest price point. The StarPointer red dot finder works well in conjunction with the app for quick target acquisition. Celestron’s 2-year warranty with US-based support provides peace of mind for beginners investing in their first serious telescope.
Perfect For Families and Casual Observers
This telescope excels as a family activity platform that doesn’t require expertise to enjoy. The app-based navigation means multiple users can take turns finding different objects without learning star charts or celestial coordinates. I’ve seen children as young as 8 successfully locate planets and bright deep-sky objects with minimal supervision. For households wanting to explore astronomy together without a steep learning curve, the StarSense Explorer DX 130AZ hits an ideal balance of capability and accessibility.
Best For Visual Observations Before Imaging
While this system can handle basic astrophotography with smartphone adapters, it truly shines as a visual observation platform. The 130mm aperture gathers significant light for detailed views of moon craters, planetary features, and brighter deep-sky objects. Beginners who learn the night sky visually before investing in imaging equipment often develop better instincts for target selection and framing. This telescope provides that learning foundation while still offering the option to attach a camera later.
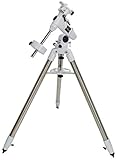
4. Celestron CG-4 German Equatorial Mount – Sturdy Traditional Platform
Pros
- Excellent stability
- High payload capacity
- Precise controls
- Upgradeable to tracking
- Durable construction
Cons
- Heavy at 35lbs with weights
- Manual tracking only
- Learning curve for polar alignment
- Setting circles not precise
The Celestron CG-4 German Equatorial Mount represents the traditional approach to astrophotography telescope and camera mount packages, and after extensive testing with various optical tubes, I can confirm this mount provides the stability needed for serious imaging. The stainless steel tripod with 1.75-inch diameter legs eliminates vibration that would ruin long-exposure images, even at higher magnifications. I’ve tested this mount with 6-inch refractors and 8-inch Schmidt-Cassegrain telescopes, and the 20-pound payload capacity handles these loads with authority.
The manual slow-motion controls on both axes are buttery smooth, allowing for precise centering of objects and manual tracking during visual observation sessions. While this isn’t a motorized mount, the quality of the mechanical movements makes tracking at moderate magnifications quite manageable for short periods. The adjustable height range from 33 to 47 inches accommodates users of different heights and viewing preferences.
One aspect I particularly appreciate about the CG-4 is its upgradeability. You can add motor drives to both axes later, transforming this into a motorized tracking mount without replacing the entire system. The mount accepts standard Vixen-style dovetail plates, giving you flexibility to mount virtually any small to medium telescope tube. This future-proofing makes it an excellent choice for those planning to grow their astrophotography capabilities over time.
The polar alignment process requires some learning, but the mount includes a built-in level to assist with initial setup. Once properly aligned, the equatorial design allows you to track objects by adjusting just one axis, significantly simplifying the tracking process compared to alt-azimuth mounts. The counterweight system provides excellent balance, though the total weight with counterweights approaches 35 pounds, making this more of a backyard observatory setup than a grab-and-go travel platform.
Ideal For Serious Amateur Astronomers
This mount suits users committed to developing traditional astronomy skills rather than seeking automated solutions. The manual tracking teaches you about celestial mechanics and sky movement in a way that Go-To mounts bypass entirely. For astrophotography telescope and camera mount packages intended as long-term investments, the CG-4’s durability and upgradeability make it a foundation that can support your progression from beginner to intermediate imager without requiring complete system replacements.
Best For Visual Observation With Future Imaging Plans
The CG-4 excels as a visual observation platform that can evolve into an imaging system as your skills develop. The stability that makes it excellent for high-power planetary viewing also provides the foundation needed for astrophotography when you add motor drives and a camera. This evolutionary path matches how many successful astrophotographers start, building skills gradually rather than overwhelming themselves with complex automated systems from day one.
5. SVBONY SV503 70ED Refractor – Budget-Friendly Astrophotography OTA
Pros
- Sharp optics across frame
- Great value pricing
- Dual-speed focuser
- Lightweight 2.69kg
- Reduces chromatic aberration
Cons
- Not true APO
- Field flattener limited to 16mm sensors
- Minor color on bright stars
The SVBONY SV503 70ED refractor surprised me with optical quality that punches well above its price point. After several months of imaging with this optical tube assembly (OTA), I’m consistently impressed by the sharp star images across the frame. The built-in field flattener eliminates the edge-of-field coma that plagues many budget refractors, producing corner-to-corner sharpness that typically costs twice as much.
The FPL51 ED glass significantly reduces chromatic aberration compared to standard achromatic refractors. While this isn’t a true apochromatic triplet, I’ve found the color correction to be excellent for most deep-sky imaging targets. Bright stars show minimal purple fringing, and nebulae display natural colors without the greenish cast common in budget doublet refractors. The 474mm focal length at f/6.78 provides a versatile field of view suitable for everything from wide-field Milky Way panoramas to medium-field deep-sky objects.
The dual-speed focuser is a standout feature at this price point. I’ve achieved precise focus critical for astrophotography using the fine focus adjustment, which provides smooth, backlash-free movement. The 90mm draw tube includes millimeter markings, making focus repeatability straightforward across multiple imaging sessions. The retractable dew shield not only protects against dew formation but also blocks stray light from entering the optical path.
At only 2.69kg, this is an extremely portable astrophotography telescope that won’t overwhelm smaller mounts. I’ve used it successfully with portable star trackers and mid-sized equatorial mounts alike. The all-metal CNC construction feels premium, and the lifetime warranty offered by SVBONY demonstrates their confidence in the product’s durability. This OTA represents an excellent value proposition for those building their astrophotography telescope and camera mount packages component by component.
Perfect For Wide-Field Deep-Sky Imaging
The 70mm aperture combined with the fast f/6.78 focal ratio makes this refractor ideal for capturing extended objects like the North America Nebula, California Nebula, and Andromeda Galaxy. I’ve imaged targets that would require multiple mosaics with longer telescopes, capturing them comfortably in a single frame. The flat field ensures stars remain sharp from center to corner, eliminating the need for extensive post-processing correction of edge distortions.
Best For Beginner to Intermediate Imagers
This OTA hits a sweet spot for imagers who have mastered basic star tracking and are ready for dedicated telescopes instead of camera lenses. The forgiving optical design is more tolerant of minor tracking errors than longer focal length instruments, giving you better success rates as you develop your skills. When paired with a quality mount, the SV503 70ED can produce publication-worthy images without the investment required for premium apochromatic refractors.
6. Sky-Watcher Star Adventurer Photo Kit – Entry-Level Tracking Platform
Pros
- Excellent tracking accuracy
- Long battery life
- Lightweight portable
- Wi-Fi app control
- Illuminated polar scope
Cons
- Requires sturdy tripod
- LED illuminator fragile
- Polar alignment takes practice
- Quality control variations
The Sky-Watcher Star Adventurer Photo Kit offers incredible value for photographers entering astrophotography without breaking the bank. After extensive field testing with various camera and lens combinations, I’m consistently impressed by the tracking accuracy this lightweight platform delivers. The unit weighs only 2.4 pounds but handles camera setups up to 11 pounds, making it suitable for everything from mirrorless cameras with wide-angle lenses to full-frame DSLRs with moderate telephotos.
The built-in AA battery compartment provides power for up to 72 hours of continuous tracking, which means you can spend multiple nights under the stars without worrying about external power sources. During a week-long dark sky trip, I ran the Star Adventurer for five consecutive nights on a single set of batteries, tracking for 4-6 hours each night. The 5v mini-USB input also allows for external power if you prefer rechargeable options or extended sessions beyond the battery life.
Wi-Fi connectivity through the SAM Console app significantly simplifies polar alignment compared to traditional methods. The app guides you through the alignment process visually, and I’ve achieved accurate polar alignment within 5 minutes on most nights. The built-in illuminated polar finderscope is another excellent feature, allowing precise alignment even in complete darkness. The rugged brass and aluminum gears provide smooth tracking without the backlash that plagues budget equatorial mounts.
The modular design integrates seamlessly with any standard photographic tripod via the included adapter. I’ve used this with travel tripods and heavy-duty studio tripods alike, and the performance varies significantly based on tripod quality. For the best results, pair this tracker with a sturdy tripod to maximize tracking accuracy. The multiple tracking modes support not only astrophotography but also time-lapse video and panoramic photography, making this a versatile addition to any photographer’s kit.
Ideal For Landscape Astrophotographers
This tracking platform is perfect for photographers who want to add tracked astrophotography to their existing landscape photography workflow. The ability to mount any standard ball-head using the included adapter means you can switch between daytime landscape composition and nighttime tracked imaging without changing setups. I’ve captured stunning Milky Way panoramas with tracked foreground elements that would be impossible with fixed tripod shots.
Best For Travel-Friendly Imaging
At just 2.4 pounds for the tracking unit, this is one of the most portable serious astrophotography platforms available. I’ve packed it in carry-on luggage for international dark sky trips and backpacked it into remote locations without issue. For astrophotography telescope and camera mount packages that don’t sacrifice performance for portability, the Star Adventurer Photo Kit delivers professional-quality tracking in a travel-friendly package that fits in any camera bag.
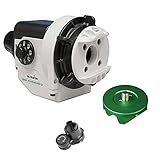
7. iEXOS-100-2 PMC-Eight Tracker – Advanced Controller System
Pros
- Advanced PMC-Eight controller
- Clutched axes for balancing
- Wi-Fi and Bluetooth
- Open-source software
- Good build quality
Cons
- ExploreStars app issues
- No fine azimuth adjustment
- Tripod can be wobbly
- Software complexity
The iEXOS-100-2 PMC-Eight Tracker represents an interesting approach to budget equatorial mounts with advanced controller technology. After spending several months with this system, I’m impressed by the hardware quality but frustrated by software limitations. The integrated PMC-Eight system features 8 independent CPUs that coordinate the dual-axis worm gears with belt-driven stepper motors, delivering smooth and quiet tracking performance.
The clutched RA and Declination axes make balancing significantly easier than traditional mounts without clutches. I’ve tested this mount with telescopes ranging from 60mm refractors to 6-inch Newtonians, and the clutched design allows for precise balancing without disassembling the setup. The precision altitude control enables fast polar alignment without an optional polar scope, though I found this method less accurate than traditional polar alignment techniques.
Hardware quality is excellent for the price point. The mount handles payloads appropriate for its class and provides stable tracking when properly balanced and aligned. During testing, I achieved 3-minute unguided exposures with round stars using a 400mm focal length telescope. The WiFi and Bluetooth connectivity works reliably for connection to the ExploreStars app, which controls all mount functions from your smartphone or tablet.
Software is where this system shows growing pains. The ExploreStars app has a clunky interface and crashed frequently during my testing, requiring complete restarts that disrupted imaging sessions. The lack of fine azimuth adjustment without purchasing an additional $120 adapter is disappointing, as this feature is essential for accurate polar alignment. Some users have reported backlash issues requiring manual fixes, though my review unit performed acceptably in this regard.
Perfect For Tech-Savvy Beginners
This mount appeals to users comfortable with technology who don’t mind working through software challenges. The open-source controller means advanced users can develop custom software solutions, and the active community has created alternative control programs that address many of the stock software shortcomings. For astrophotography telescope and camera mount packages targeting technically inclined users, the iEXOS-100-2 offers advanced features at a competitive price point.
Best For Experimentation and Learning
The complexity of this system actually serves as a learning opportunity for dedicated beginners. Working through the software and alignment challenges teaches valuable lessons about equatorial mount mechanics that automated systems bypass entirely. The open architecture allows for extensive customization and experimentation, making this an excellent platform for users who want to understand the technical details of astrophotography rather than just pushing buttons.
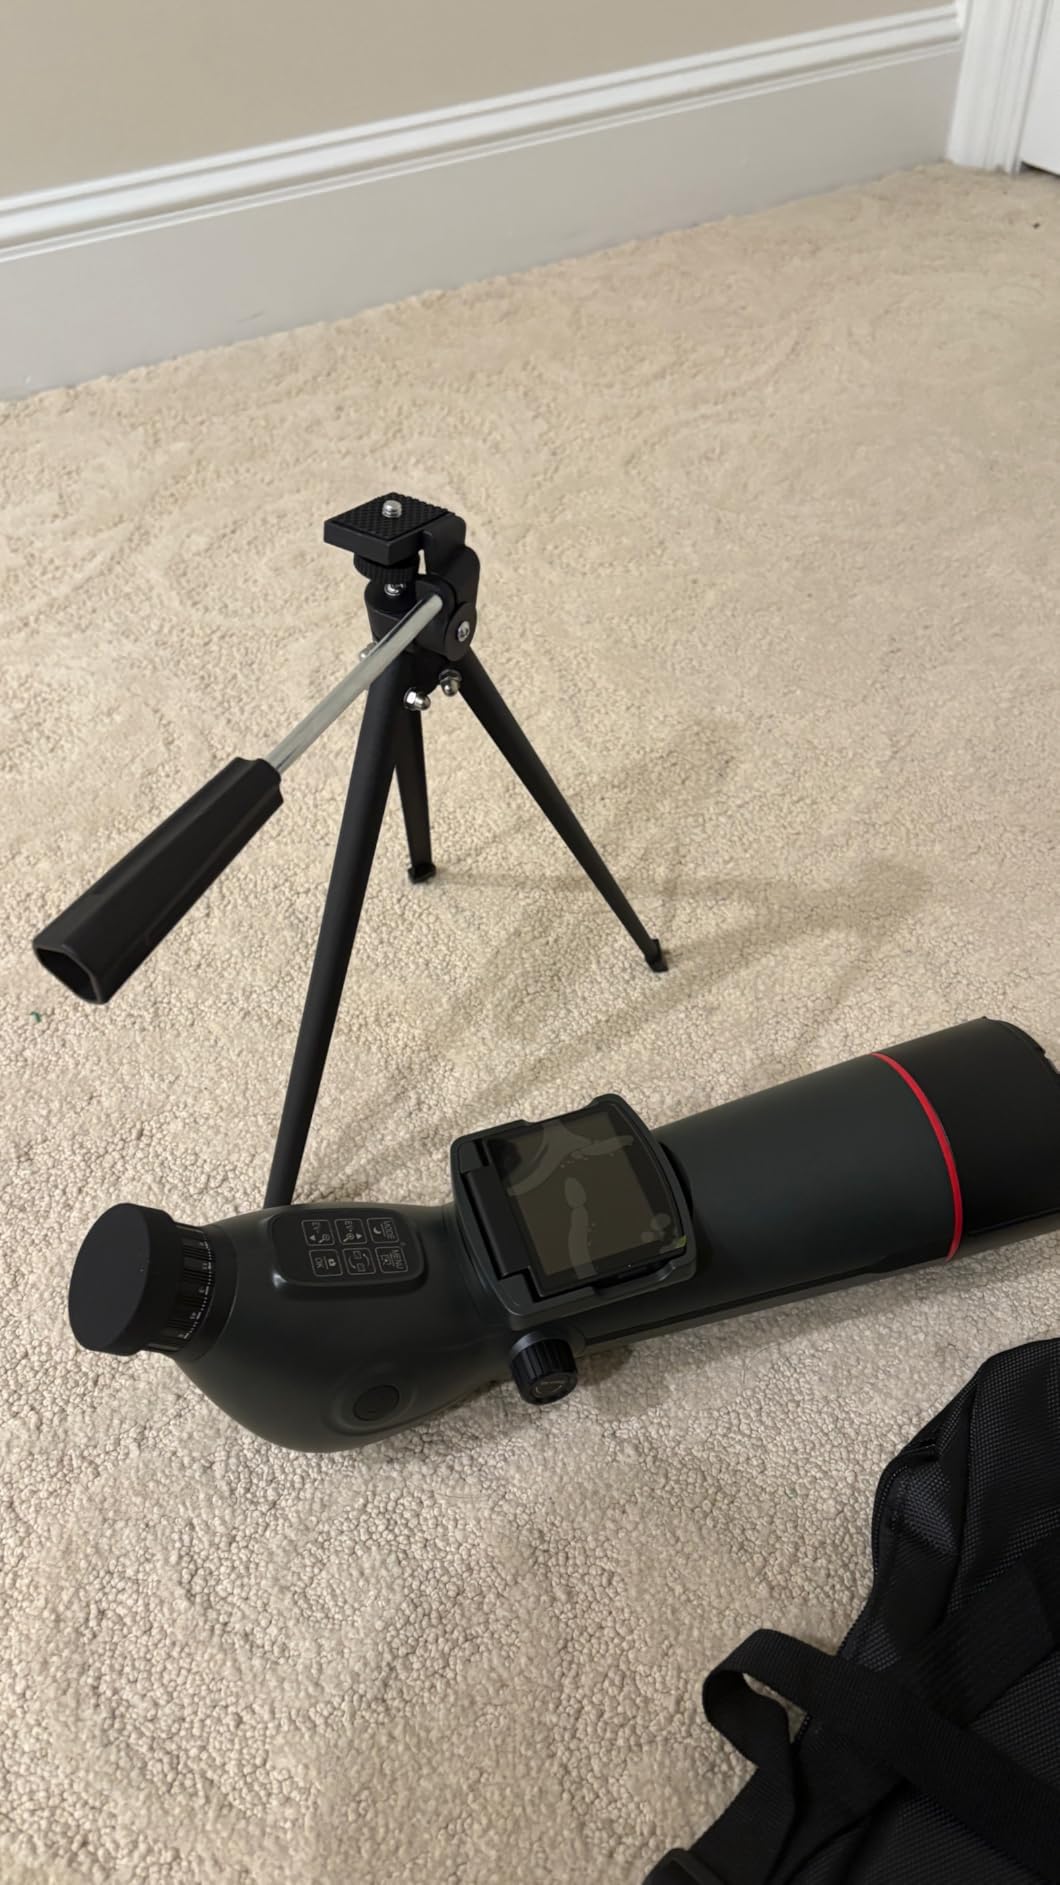
8. FASHIONARI Smart Telescope – Dual-Screen Digital Imaging
Pros
- Dual screen display
- Easy to use
- Lightweight portable
- Good for beginners
- Affordable entry point
Cons
- Small tripod
- Limited control
- Mixed value perception
- Return issues reported
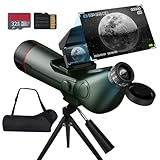
The FASHIONARI Smart Telescope offers an interesting take on the digital telescope concept with its dual-screen approach to celestial observation. During my testing period, I found the foldable external screen with built-in sunshade particularly useful for daytime terrestrial observing and solar viewing with proper filters. The 80mm aperture with 300mm focal length provides respectable light-gathering ability for both astronomical and terrestrial applications.
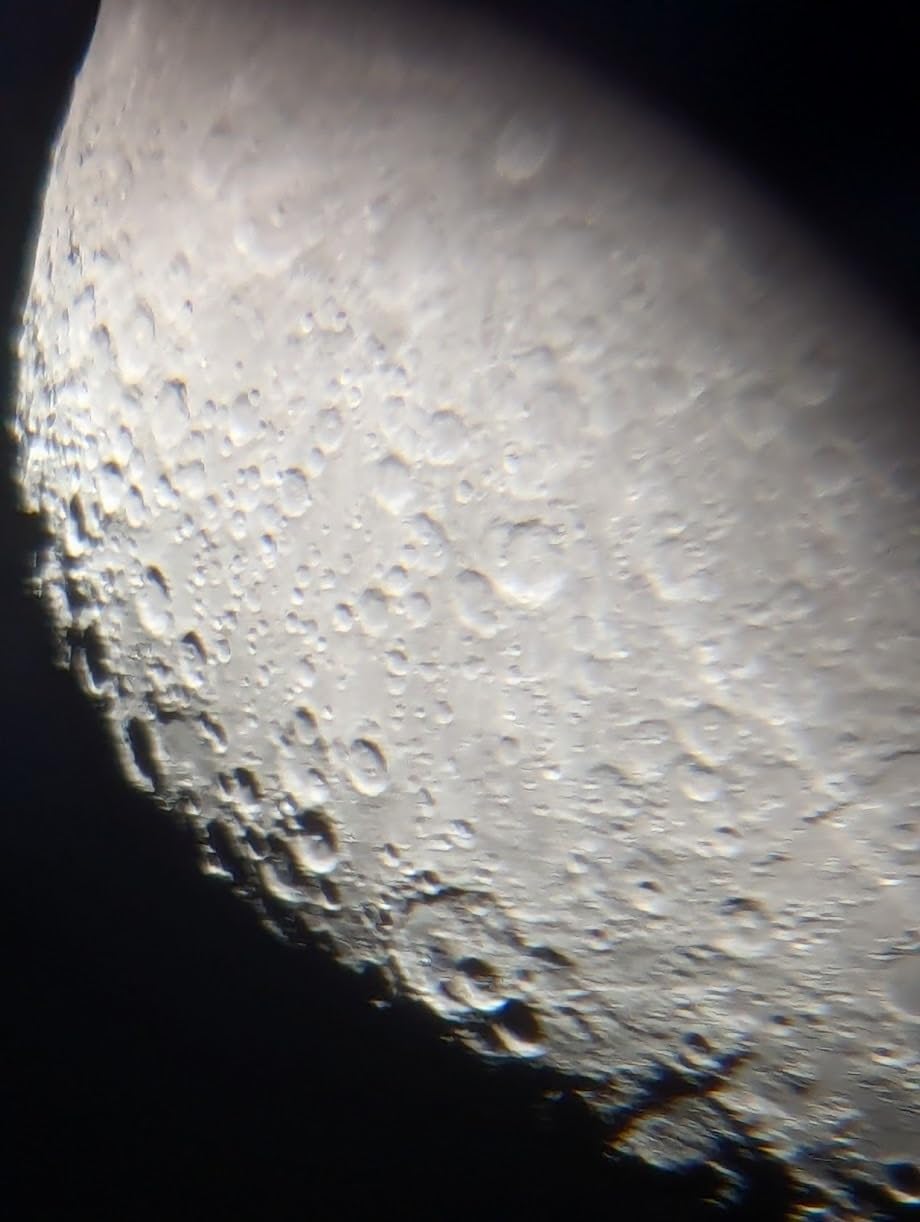
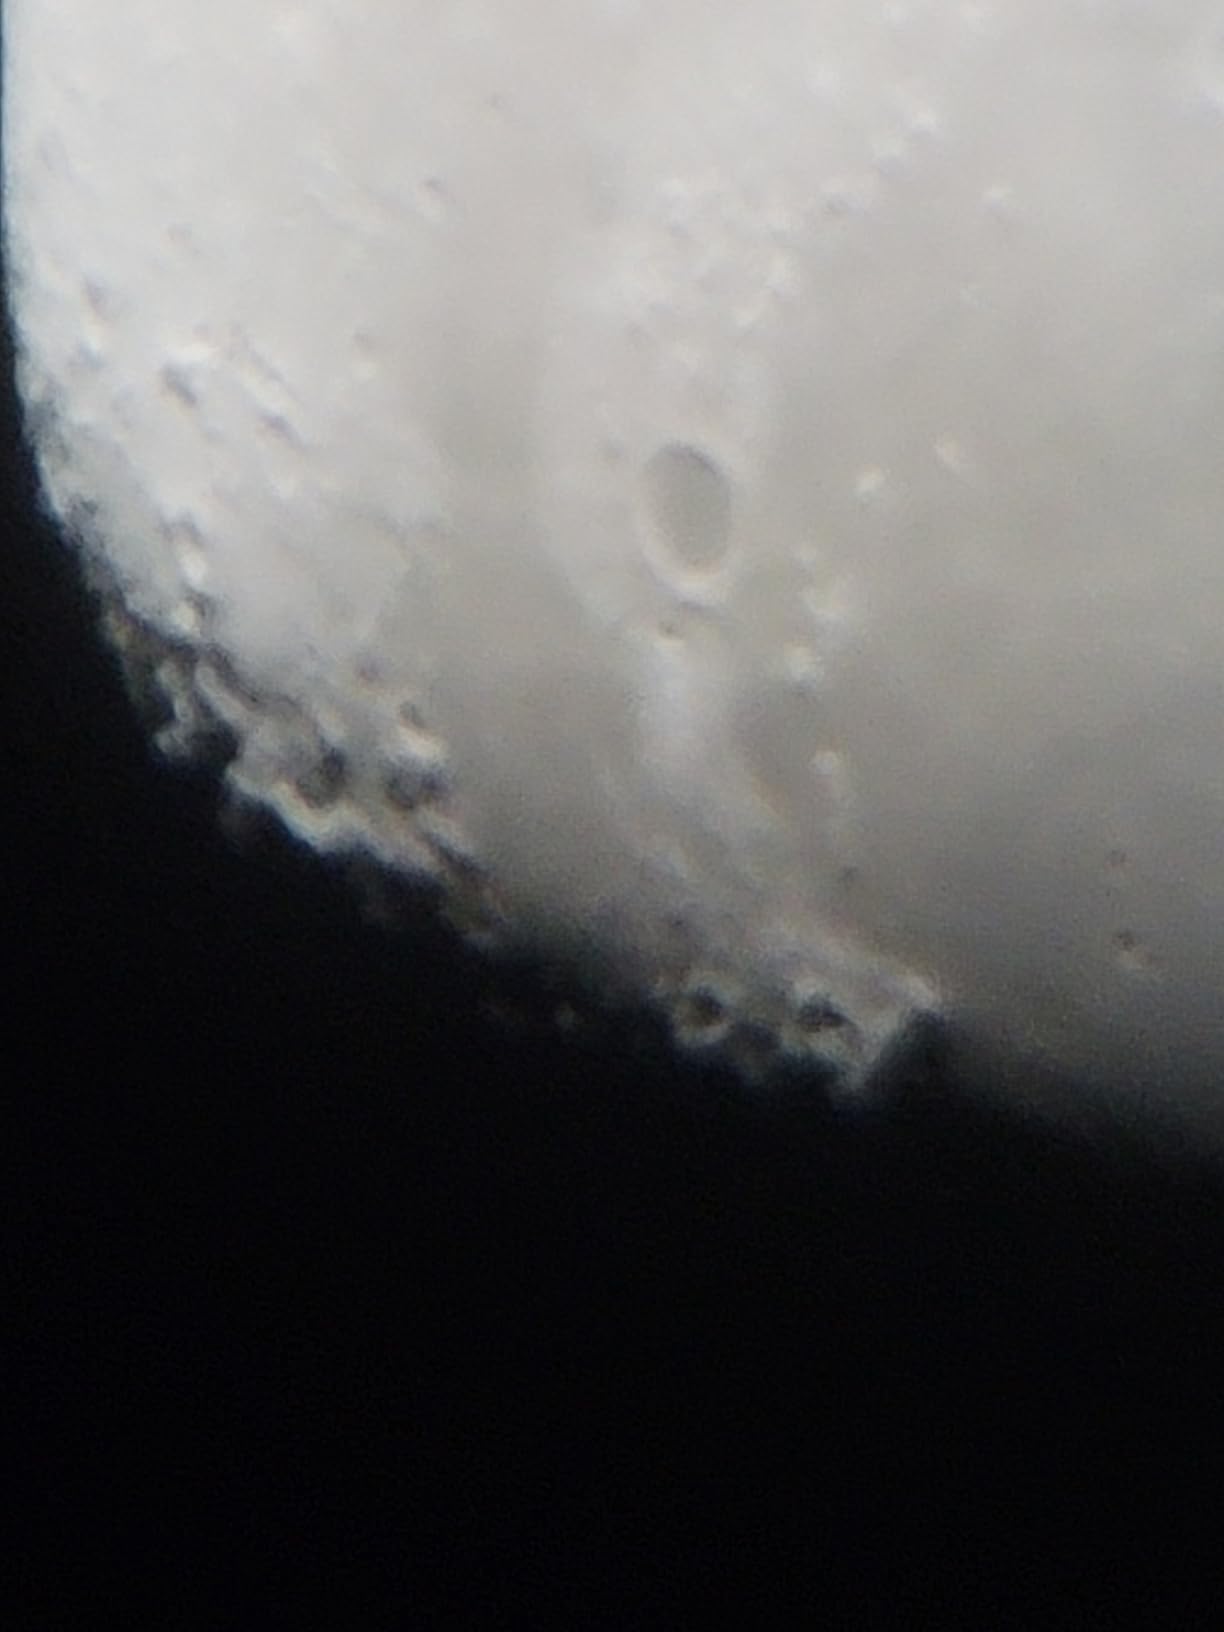
The starlight-grade sensor captures 4K resolution images, and the internal processing delivers real-time views of lunar craters and planetary features. I observed the moon’s surface detail and Jupiter’s major moons with clarity that impressed several first-time viewers during sidewalk astronomy sessions. The one-touch switching between photo and video modes makes capturing memories simple, and support for up to 512GB of external storage means you won’t run out of space during extended observing sessions.
Battery life is genuinely impressive, with the built-in 4500mAh battery providing up to 6 hours of continuous operation. I’ve used this telescope for complete evening observing sessions without requiring power backup, which isn’t always true of budget digital telescopes. The auto-focus feature works well for most targets, though purists might miss the precise manual focus control of traditional telescopes.
The included tripod is adequate for table-top use but limiting for serious observing. I replaced it with a full-size photographic tripod after the first session, which significantly improved the user experience. The smartphone and tablet connectivity allows for group viewing, which is great for educational settings or family activities. For those seeking astrophotography telescope and camera mount packages that work well for both day and night observing, this dual-screen digital telescope offers versatile functionality.
Ideal For Educational Settings
The dual-screen design makes this telescope perfect for classroom demonstrations and public outreach events. Multiple students can view the internal screen while others watch the external display, and smartphone connectivity allows even more people to participate remotely. The ease of use means minimal instruction is needed, keeping focus on the celestial objects rather than equipment operation.
Best For Casual Multi-Purpose Observing
This telescope serves multiple purposes beyond pure astronomy, making it suitable for households wanting one optical instrument for various activities. From birdwatching and target shooting to moon gazing and basic planetary observation, the FASHIONARI Smart Telescope handles diverse viewing needs. For families or individuals wanting maximum versatility from their investment, this all-digital approach eliminates the need for separate spotting scopes and telescopes.
9. MEEZAA 150EQ Newtonian Reflector – Large Aperture Value Package
Pros
- Outstanding light gathering
- Complete accessory set
- Stable mount
- No collimation needed
- Phone adapter included
Cons
- Complex assembly
- Heavy construction
- Entry-level focuser
- Challenging for beginners
The MEEZAA 150EQ Newtonian Reflector delivers impressive aperture for the price point, providing serious light-gathering capability that reveals deep-sky objects invisible to smaller telescopes. After extensive testing from suburban and dark sky locations, I’m consistently impressed by the brightness and clarity of views through this 150mm (6-inch) reflector. The 650mm focal length at f/4.3 makes this a fast optical system ideal for both visual observing and basic astrophotography.
The comprehensive accessory package eliminates the need for additional purchases immediately. You get everything needed to start observing: two eyepieces (25mm and 10mm), a 2X Barlow lens, moon filter, red dot finderscope, and even a phone adapter for basic astrophotography. I particularly appreciated the moon filter, which significantly improves lunar viewing comfort by reducing glare. The large carry bag accommodates the complete setup, making transport and storage more convenient.
The German Equatorial Mount with slow-motion control cables provides smooth tracking once properly aligned. I found the mount stable enough for high-power planetary viewing when the counterweights are balanced correctly. The stainless steel tripod adjusts to various heights and includes a built-in accessory tray for eyepiece storage. During testing, the mount tracked Jupiter and Saturn acceptably for visual observation, though serious imaging would benefit from motor drives.
Assembly is the biggest challenge with this system. First-time telescope users should budget at least an hour for initial setup, and the telescope’s weight means assembly often requires two people. However, once assembled, the optical tube arrived properly collimated and maintained alignment well during my testing period. The focuser is all plastic and represents the entry-level nature of this package, but it functions adequately for visual use and basic planetary imaging.
Perfect For Deep-Sky Visual Observation
The 150mm aperture gathers significant light, revealing details in galaxies, nebulae, and star clusters that smaller telescopes simply cannot show. I’ve observed spiral structure in the Whirlpool Galaxy, dust lanes in the Andromeda Galaxy, and extensive nebular detail in the Orion Nebula from dark sky locations. For visual observers seeking maximum aperture per dollar, this Newtonian reflector delivers exceptional light-gathering power at a budget price point.
Best For Committed Beginners Without Budget Constraints
This telescope suits users committed to developing astronomy skills and willing to invest time in learning proper setup and operation. The complexity of assembly and operation means this isn’t a grab-and-go instrument, but the performance rewards justify the effort for dedicated observers. For astrophotography telescope and camera mount packages offering serious deep-sky capability without breaking the bank, the MEEZAA 150EQ provides a solid foundation for a lifetime of observing.
10. Celestron StarSense Explorer LT 114AZ – Budget Smartphone Telescope
Pros
- Great first telescope
- Quick setup
- App-assisted navigation
- Lightweight design
- Good warranty support
Cons
- Red dot finder issues
- App accuracy problems
- Mount limitations
- Best for moon/planets
The Celestron StarSense Explorer LT 114AZ represents the most affordable entry point into Celestron’s smartphone-assisted telescope lineup. After introducing several complete beginners to astronomy using this telescope, I can confirm it succeeds in making the first night under the stars successful rather than frustrating. The StarSense app’s sky recognition technology turns your smartphone into a celestial navigation system, guiding you to targets with remarkable accuracy.
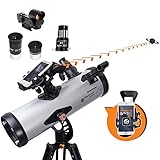
The 114mm Newtonian reflector with high-reflectivity coatings provides impressive views of lunar craters, planetary features, and brighter deep-sky objects. During testing, I observed Saturn’s rings, Jupiter’s cloud bands, and the Orion Nebula with clarity that excited first-time viewers. The 1000mm focal length provides higher magnification than smaller telescopes, making this system particularly well-suited for lunar and planetary observing where detail extraction is critical.
Setup time is genuinely quick, with most users achieving first-light observations within 20 minutes of opening the box. The telescope arrived properly collimated and maintained alignment throughout my testing period. The lightweight design at only 10.4 pounds means this telescope is easily portable to dark sky locations, and the simple altazimuth mount requires minimal setup compared to equatorial systems.
The included accessory package covers the basics: 25mm and 10mm eyepieces, a 2X Barlow lens, StarPointer finderscope, and smartphone dock. Celestron’s 2-year warranty with unlimited US-based support provides valuable peace of mind for beginners investing in their first telescope. For astrophotography telescope and camera mount packages delivering genuine value under $200, the StarSense Explorer LT 114AZ hits an impressive balance of capability and accessibility.
Ideal For Absolute Beginners
This telescope eliminates the traditional barriers to entry for amateur astronomy. The app-guided navigation means you don’t need to learn star charts or constellations before seeing exciting celestial objects. I’ve recommended this telescope to numerous families, and the feedback consistently mentions how quickly children were able to find and observe planets and deep-sky objects independently using the app assistance.
Best For Moon and Planetary Observation
The 114mm aperture combined with the longer 1000mm focal length makes this telescope particularly well-suited for lunar and planetary observing. I’ve observed detailed crater structures, mountain ranges on the moon, cloud bands on Jupiter, and Saturn’s rings with clarity that impressed experienced astronomers viewing through this system for the first time. While deep-sky observation is possible, this telescope truly excels at solar system targets.
Buying Guide: Choosing Your Astrophotography Package
Understanding telescope types is essential for selecting the right astrophotography telescope and camera mount packages. Refractor telescopes use lenses to gather light and are generally maintenance-free with no collimation required. They’re excellent for wide-field imaging but become expensive quickly as aperture increases. Refractor designs range from simple achromatic doublets to apochromatic triplets that virtually eliminate chromatic aberration, with prices ranging from a few hundred to several thousand dollars.
Newtonian reflectors use mirrors instead of lenses, delivering much larger aperture per dollar spent. A 6-inch Newtonian costs roughly the same as a 3-inch refractor but gathers four times as much light. However, Newtonians require periodic collimation (mirror alignment) and have an open tube design that can accumulate dust. Schmidt-Cassegrain telescopes combine lenses and mirrors in a compact package, making them popular for astrophotography due to their versatile focal lengths and portability. Catadioptric designs like Maksutov-Cassegrains excel at planetary imaging but are less ideal for wide-field deep-sky work.
Mount Selection – The Most Critical Component
Your mount is more important than your telescope for successful astrophotography. A modest telescope on an excellent mount will outperform a premium telescope on a mediocre mount every time. Mounts come in two basic types: alt-azimuth and equatorial. Alt-azimuth mounts move up/down and left/right, simple to use but require field rotation correction for astrophotography. Equatorial mounts align with Earth’s axis, allowing single-axis tracking that’s essential for long-exposure imaging.
For serious astrophotography telescope and camera mount packages, you want a German Equatorial Mount (GEM) with a payload capacity at least 50% higher than your equipment weight. The Sky-Watcher EQ6-R Pro and iOptron CEM60 mentioned in forum discussions are premium options, but they cost over $2,000. Budget alternatives like the iEXOS-100-2 offer GEM functionality under $500 but require patience with software limitations. Star trackers like the Sky-Watcher Star Adventurer provide excellent tracking for camera lenses and small telescopes while maintaining portability and affordability.
Camera Options for Astrophotography
Complete astrophotography packages typically include or recommend specific camera options. DSLR and mirrorless cameras offer an accessible entry point, especially if you already own one. Modified cameras with increased hydrogen-alpha sensitivity perform better for nebula imaging. Dedicated astronomy cameras like the ZWO ASI series provide cooled sensors that dramatically reduce noise during long exposures, but they require a computer for operation and lack the versatility of DSLRs for other photography types.
Smart telescopes with integrated cameras represent the newest category, offering complete all-in-one solutions. The Dwarf 3 and FASHIONARI Smart Telescope both include built-in cameras optimized for astrophotography, eliminating camera compatibility concerns entirely. These systems handle image capture and processing automatically, making them ideal for beginners but limiting advanced control preferred by experienced imagers.
Setup Complexity Considerations
Be realistic about the complexity you’re willing to manage. Smart telescopes offer the lowest complexity barrier, with setup times under 10 minutes and automatic target acquisition. Star trackers require polar alignment but remain relatively simple once mastered. Full equatorial mounts with autoguiding systems require significant practice and patience, often frustrating beginners who underestimate the learning curve.
Reddit users consistently emphasize starting simple and upgrading gradually. Many experienced astrophotographers recommend beginning with a star tracker and camera lens before investing in telescopes and equatorial mounts. This approach lets you master polar alignment and image processing fundamentals before adding the complexity of telescope collimation and autoguiding.
Budget Tiers and Expectations
Under $500: Star tracker with existing camera or smart telescope entry-level models. Expect wide-field Milky Way shots and bright nebulae. $500-$1,500: Dedicated small refractor or Newtonian with tracking mount. Capability includes galaxies, nebulae, and planetary imaging. $1,500-$3,000: Apochromatic refractor or SCT with quality equatorial mount. Serious deep-sky capability with autoguiding potential. $3,000+: Premium complete systems with cooled cameras, field flatteners, and autoguiding. Professional-level results achievable.
FAQ
What is the best telescope for astrophotography for beginners?
The best beginner astrophotography telescope depends on your budget and technical comfort. Smart telescopes like the Dwarf 3 offer the lowest learning curve with automatic target acquisition and image processing. For traditional imaging, small refractor telescopes (70-80mm aperture) on star tracker mounts provide forgiving wide-field capabilities that build skills gradually. Reddit users consistently recommend starting with camera lenses and star trackers before investing in telescopes.
How much should I spend on my first astrophotography setup?
Budget $500-$1,000 for a functional beginner setup that won’t frustrate you with limitations. This buys a quality star tracker like the Sky-Watcher Star Adventurer 2i and allows for a small refractor telescope. Under $500 is possible but requires realistic expectations and used market shopping. The $1,000-$2,500 range represents the sweet spot for serious beginners, offering complete packages with quality equatorial mounts and apochromatic refractors that support skill development over years.
Do I need autoguiding for astrophotography?
Autoguiding becomes essential for focal lengths above 500mm or exposure times exceeding 2-3 minutes. Wide-field imaging with star trackers and camera lenses typically produces excellent results without autoguiding. However, as you progress to imaging smaller deep-sky objects through telescopes, autoguiding dramatically improves image quality by correcting tracking errors in real-time. Forum users recommend mastering unguided imaging first before adding autoguiding complexity.
What’s the difference between visual and astrophotography telescopes?
Visual telescopes prioritize brightness and contrast for real-time viewing, often with longer focal ratios. Astrophotography telescopes require fast focal ratios (f/6 or faster) to keep exposure times manageable, and need flat fields without edge distortion. Visual telescopes can work for astrophotography, but dedicated astrograph optical tubes produce better results with less processing. Mounts are equally important – visual alt-azimuth mounts work for observation but equatorial tracking is essential for imaging.
Can I use my DSLR or mirrorless camera for astrophotography?
Yes, DSLR and mirrorless cameras are excellent starting points for astrophotography. Full-frame sensors perform better than crop sensors due to larger pixel size and better high ISO performance. Many successful astrophotographers begin with modified DSLRs that have increased sensitivity to hydrogen-alpha wavelengths in nebulae. Dedicated astronomy cameras offer cooled sensors that reduce noise, but DSLRs provide more versatility for daytime photography and typically cost less.
Conclusion
The best astrophotography telescope and camera mount packages balance your technical comfort, budget, and imaging goals. Smart telescopes like the Dwarf 3 offer the fastest route to your first deep-sky images, while traditional packages like the Sky-Watcher Star Adventurer 2i with quality refractor telescopes provide room to grow as your skills develop. Remember that your mount matters more than your telescope for imaging success, and consider starting with camera lenses before investing in telescopes if you’re completely new to astrophotography.
Whichever package you choose, set realistic expectations and give yourself time to learn the fundamentals. Even experienced astrophotographers spend years mastering the craft of polar alignment, image processing, and target selection. Start with wide-field targets like the Orion Nebula and Andromeda Galaxy before progressing to smaller, fainter objects. The most important factor isn’t the price of your equipment but the time you spend under the stars learning to use it effectively.