I remember the first time I discovered photomontage. I was flipping through an art book and stumbled upon Hannah Höch’s “Cut with the Kitchen Knife through the Last Weimar Beer-Belly Cultural Epoch in Germany.” My jaw dropped. Here was this incredible artwork made entirely from cut-up photographs, creating something entirely new and powerful. That moment changed how I thought about photography forever.
Photomontage isn’t just about sticking photos together – it’s about creating visual stories, making political statements, exploring dreams, and pushing the boundaries of what photography can be. Whether you’re looking to create surreal dreamscapes, powerful political art, or simply want to combine multiple images into something extraordinary, photomontage offers endless creative possibilities.
In this comprehensive guide, I’ll walk you through everything you need to know about photomontage – from its fascinating history to modern digital techniques. I’ve spent years experimenting with different styles and methods, and I’m excited to share everything I’ve learned with you.
What Exactly is Photomontage?
At its core, photomontage is the art of combining multiple photographs to create a new, unified image. But that simple definition doesn’t capture the incredible diversity and power of this medium. Let me break it down for you.
The Technical Definition
Photomontage is the process and result of making a composite photograph by cutting, gluing, rearranging, and overlapping two or more photographs into a new image. Sometimes the resulting composite image is photographed so that the final image appears as a seamless physical print. In the digital age, we call this “compositing,” though most people just say “photoshopping.”
What Photomontage is NOT
I want to clear up some common misconceptions right away. Photomontage isn’t:
- Simply breaking up a single photo to make it look like multiple images
- Arranging unrelated photos in a grid or collage without artistic intent
- Digital filters that make photos look “artsy”
True photomontage involves combining distinct photographic elements to create something new and meaningful. It’s about transformation, not just decoration.
The Different Types of Photomontage
Through my experimentation, I’ve discovered several distinct styles of photomontage:
1. Composite Photomontage: This is what most people think of when they hear “photomontage.” You combine different photos to create a new scene that never existed in reality. Think of those surreal images where someone might be standing on the moon while holding a giant flower.
2. Photo Joiners (Cubist Style): This approach, popularized by David Hockney, involves taking multiple photos of the same subject from different angles and perspectives, then combining them to show multiple viewpoints simultaneously. It’s like cubism in photography.
3. Political and Social Commentary Photomontage: Used extensively by Dada artists and protesters, this style combines images to make powerful statements about society, politics, and current events.
4. Surreal Dream Photomontage: This style focuses on creating dreamlike, impossible scenes that explore the subconscious mind, similar to what Salvador Dalí did with painting.
5. Digital Compositing: The modern evolution of photomontage, using software like Photoshop to seamlessly combine images with incredible precision.
The Fascinating History of Photomontage
Understanding the history of photomontage has completely transformed how I approach my own work. The techniques we use today have deep roots in artistic and social movements that changed the world.
Victorian Beginnings: Combination Printing
Believe it or not, photomontage dates back to the 1850s! The first famous example was Oscar Rejlander’s “The Two Ways of Life” (1857), which combined 32 different negatives to create a single moralistic tableau. Rejlander spent six weeks creating this image, and it caused quite a scandal when it was first exhibited.
I tried recreating a Victorian-style combination print once, and let me tell you – it’s incredibly difficult without modern tools! These early photographers were true pioneers, working with wet plate collodion processes and spending hours in the darkroom to achieve what we can do in minutes today.
The Dada Revolution: Photomontage as Protest
Everything changed during World War I. In 1916, artists John Heartfield and George Grosz literally invented modern photomontage in their Berlin studio. They were part of the Dada movement, which rejected traditional art forms and used absurdity to protest the horrors of war.
Heartfield became particularly famous for his anti-Nazi photomontages. His work was so powerful that he earned the number five spot on the Gestapo’s Most Wanted List! I find it incredible that cut-and-paste artwork could be considered so dangerous by a totalitarian regime.
Surrealism and the Unconscious Mind
The Surrealists, led by artists like Man Ray, took photomontage in a different direction. They used the technique to explore dreams and the unconscious mind, creating bizarre, dreamlike images that challenged reality itself.
When I first started experimenting with surreal photomontage, I discovered something amazing: the more I let go of logic and reason, the more powerful my images became. There’s something liberating about creating impossible scenes that feel emotionally true.
Russian Constructivism: Art as Propaganda
Meanwhile, in Russia, artists like Alexander Rodchenko and Gustav Klutsis were using photomontage for revolutionary purposes. They created bold, dynamic compositions for Soviet propaganda, combining typography with photographic elements to create striking visual messages.
What I love about Constructivist photomontage is how it uses geometric shapes and strong diagonals to create energy and movement. I often incorporate these principles into my own work, even when I’m not making political statements.
The Digital Revolution
The advent of digital photography and software like Photoshop has revolutionized photomontage once again. What once took hours of painstaking cutting and pasting can now be done with a few clicks. But here’s the thing I’ve discovered: the tools may have changed, but the creative principles remain the same.
I remember when I first switched from traditional to digital photomontage. I was worried that it would feel “cheating” or less authentic. But I quickly realized that the computer is just another tool – the artistry still comes from your vision and creativity.
Essential Tools for Photomontage
Whether you’re working traditionally or digitally, having the right tools makes all the difference. Let me share what I’ve found most useful in my photomontage journey.
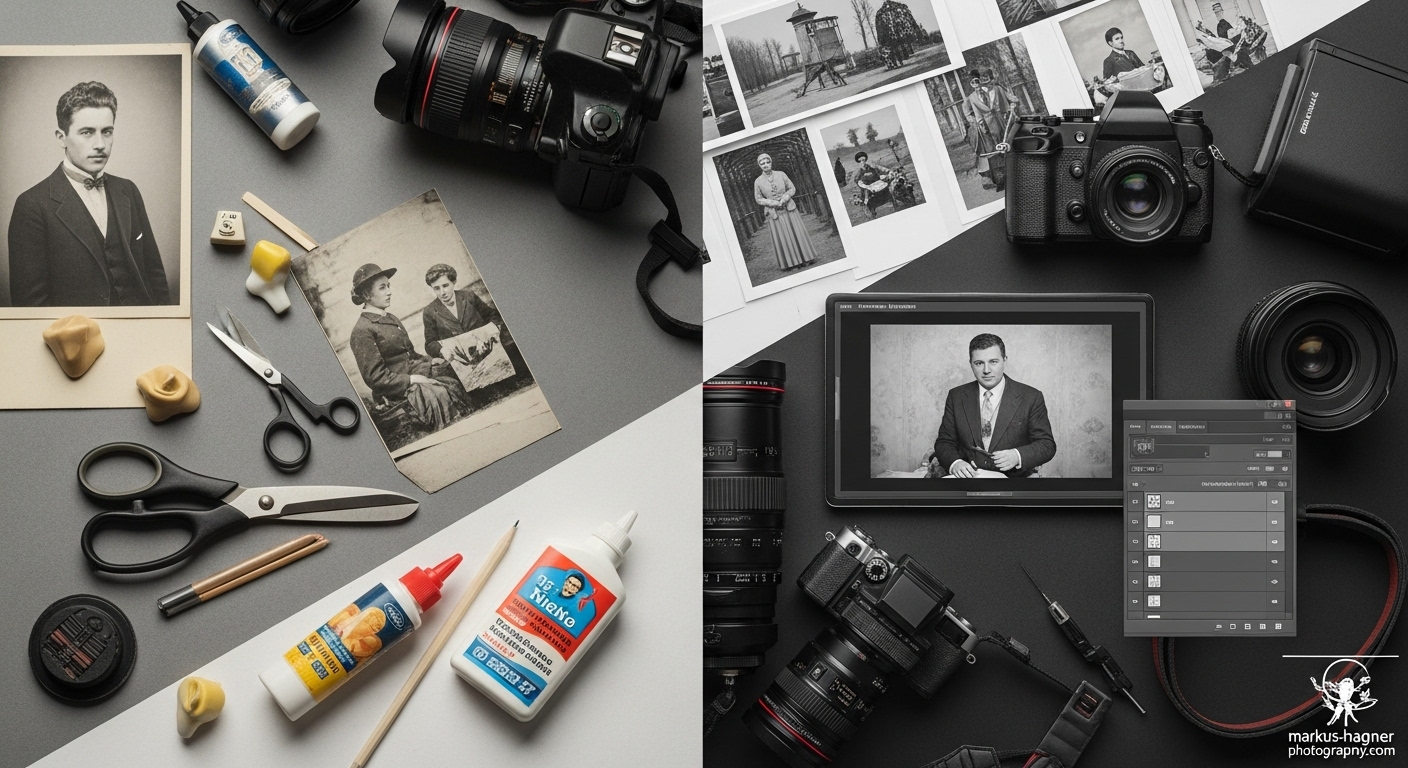
Traditional Photomontage Tools
If you want to try traditional cut-and-paste photomontage (and I highly recommend it, even just once), you’ll need:
1. Quality Scissors and Craft Knives: Invest in good, sharp scissors and an X-Acto knife with plenty of replacement blades. Dull tools will tear your photos and give you ragged edges.
2. Cutting Mat: A self-healing cutting mat protects your work surface and gives you a clean, safe cutting area.
3. Adhesives: I’ve tried everything from rubber cement to double-sided tape. For traditional photomontage, I recommend:
- Rubber cement for repositionable bonds
- Acid-free glue sticks for permanent mounting
- Double-sided tape for clean, precise application
4. Source Materials: Collect magazines, newspapers, old photos, and any other printed materials. I keep a “morgue file” of interesting images organized by theme.
5. Tweezers: Precision tweezers are invaluable for placing small pieces exactly where you want them.
Digital Photomontage Tools
For digital photomontage, your toolkit will be different:
1. Software Options:
- Adobe Photoshop: The industry standard for a reason. I use it for 90% of my digital work.
- GIMP: A free, open-source alternative that’s surprisingly powerful
- Affinity Photo: A more affordable alternative to Photoshop with excellent layer capabilities
- Photopea: A free web-based Photoshop alternative that’s great for beginners
2. Hardware Considerations:
- A computer with sufficient RAM (8GB minimum, 16GB+ preferred)
- A graphics tablet (Wacom or Huion) for precise control
- A good monitor with accurate color representation
3. Additional Digital Tools:
- Stock photo resources (Adobe Stock, Unsplash, Pexels)
- Texture overlays for adding depth and atmosphere
- Brush sets for creating custom effects
My Must-Have Tools
After years of experimentation, here are the tools I can’t live without:
- Wacom Intuos Tablet: This has transformed my digital photomontage work. The precision and pressure sensitivity make a huge difference.
- Adobe Creative Cloud: While expensive, the integration between Photoshop, Lightroom, and other Adobe apps is unbeatable.
- Extensive Photo Library: I’ve built up a massive personal photo library over the years, and I’m always adding to it.
- Inspiration Folder: I keep a folder of inspiring photomontage work by other artists. When I’m feeling stuck, browsing through it always gets my creative juices flowing.
Also Read: Fujifilm X100V vs Sony RX100 VII
Step-by-Step Guide: Creating Your First Photomontage
Ready to dive in? I’ll walk you through creating your first photomontage, whether you’re working traditionally or digitally. I’ll cover both methods because I believe understanding the traditional approach will make you a better digital artist.
Traditional Photomontage Method
Let’s start with the classic cut-and-paste method. There’s something incredibly satisfying about working with physical materials.
Step 1: Concept Development
Before you start cutting, you need a concept. Ask yourself:
- What story do I want to tell?
- What emotion do I want to evoke?
- What’s the central idea or message?
I like to sketch my ideas first. Nothing fancy – just rough thumbnails to get the composition worked out. For your first photomontage, keep it simple. Maybe combine a landscape with an unexpected element, or create a simple surreal scene.
Step 2: Gather Your Materials
Collect source images that fit your concept. Look for:
- High-contrast images (they’re easier to cut cleanly)
- Images with interesting textures
- Photos that share similar lighting conditions
I recommend making photocopies of your source images rather than cutting up originals. That way, you can experiment without fear of ruining precious photos.
Step 3: Cutting and Preparing
This is where the magic begins. Here’s my technique:
- Cut out your main elements first: Start with the most important parts of your composition.
- Leave a small border: When cutting, leave a tiny white border around your elements. You can trim it later, but this gives you room for error.
- Organize your pieces: As you cut, lay out your pieces on your work surface. I like to group related elements together.
Step 4: Composition and Layout
Now for the fun part – arranging your pieces:
- Start with your background: Choose or create a background that will unify your composition.
- Place your focal point: Position your main element first, using the rule of thirds for a dynamic composition.
- Build around it: Add supporting elements, creating visual flow and balance.
- Step back frequently: Look at your composition from a distance to see how it reads as a whole.
Step 5: Adhesion and Finishing
Once you’re happy with your layout:
- Work from background to foreground: Glue down elements starting with the background layer.
- Use the right adhesive: Rubber cement is great for repositioning, while glue sticks work well for permanent bonds.
- Apply adhesive carefully: Less is more. Too much glue will cause wrinkling.
- Burnish as you go: Use a bone folder or the back of a spoon to smooth out air bubbles.
Step 6: Documentation
Photograph your finished piece! Good documentation is essential, especially if you plan to share your work online or enter exhibitions.
Digital Photomontage Method
Now let’s tackle digital photomontage. While the principles are similar, the techniques are quite different.
Step 1: Concept and Planning
Just like with traditional photomontage, start with a strong concept. I find it helpful to:
- Create a mood board with reference images
- Sketch out my composition
- Gather all my source images before opening Photoshop
Step 2: Setting Up Your Canvas
- Create a new document: Go to File > New in Photoshop.
- Set your dimensions: I recommend starting with 3000×2000 pixels at 300 DPI for good print quality.
- Choose your color mode: RGB for digital display, CMYK if you plan to print.
Step 3: Importing and Organizing
- Open your source images: Drag them into your Photoshop document.
- Organize your layers: Name each layer descriptively and group related elements.
- Use layer masks: Instead of deleting parts of images, use layer masks. This non-destructive editing gives you more flexibility.
Step 4: Selection and Extraction
This is where precision matters. Here are my go-to techniques:
For simple shapes:
- Use the Quick Selection Tool for basic selections
- Refine with Select and Mask
- Apply a layer mask
For complex edges:
- Use the Pen Tool for precise control
- Create paths and convert them to selections
- Feather the edge slightly (0.5-1 pixel) for natural blending
For hair and fine details:
- Use the Select and Mask workspace
- Experiment with the Edge Detection feature
- Paint with the Refine Edge Brush for tricky areas
Step 5: Blending and Compositing
This is where the magic happens in digital photomontage:
- Match lighting and color: Use adjustment layers (Curves, Color Balance, Hue/Saturation) to make different elements look like they belong together.
- Add shadows: Create realistic shadows on separate layers beneath your elements.
- Use blend modes: Experiment with different blend modes (Multiply, Overlay, Soft Light) to integrate elements.
- Add atmospheric effects: Use gradients and texture overlays to unify the composition.
Step 6: Final Touches
- Sharpen selectively: Use the Unsharp Mask filter on focal points.
- Add overall color grading: Apply a final adjustment layer to tie everything together.
- Save your work: Save both a layered PSD file and a flattened JPEG or PNG.
Advanced Photomontage Techniques
Once you’ve mastered the basics, you’ll want to explore more advanced techniques. These are the methods that separate good photomontage from great photomontage.
Creating Realistic Composites
The holy grail of digital photomontage is creating images that look so real, people have to look twice to realize they’re composites. Here’s how I achieve this:
Lighting Consistency
Lighting is the single most important factor in creating realistic composites. I always:
- Analyze the light source: Where is the light coming from in each image?
- Match light direction: Ensure all elements are lit from the same direction.
- Match light quality: Hard light vs. soft light should be consistent.
- Adjust color temperature: Use Color Balance adjustment layers to match the warmth or coolness of light.
Perspective Matching
Nothing ruins a composite faster than mismatched perspective. To get it right:
- Use the Vanishing Point filter: This helps you match perspective between images.
- Pay attention to camera height: Elements should appear to be photographed from the same height.
- Consider lens distortion: Wide-angle and telephoto lenses create different distortions.
Depth and Atmosphere
Creating a sense of depth is crucial:
- Atmospheric perspective: Distant elements should be less sharp and slightly bluer.
- Depth of field: Use Gaussian Blur to simulate shallow depth of field.
- Add environmental effects: Dust, haze, and light rays can unify a scene.
Surreal Photomontage Techniques
For dreamlike, impossible scenes, I use different techniques:
Scale Manipulation
Playing with scale is one of the most powerful tools in surreal photomontage:
- Extreme size differences: Combine miniature elements with giant ones.
- Impossible physics: Create scenes that defy gravity and logic.
- Selective focus: Use focus to guide the viewer through impossible scenes.
Texture Integration
Texture can make or break a surreal composite:
- Overlay textures: Use grunge, paper, or film textures to add atmosphere.
- Texture mapping: Apply textures to specific elements using layer masks.
- Displacement maps: Use these to warp textures to match contours.
Photo Joiners (Cubist Style)
This technique, pioneered by David Hockney, creates fascinating results:
Shooting Technique
- Choose your subject: Start with something static for your first attempt.
- Shoot systematically: Move your camera position slightly between each shot.
- Overlap generously: Aim for 30-50% overlap between images.
- Vary perspectives: Shoot from different angles and distances.
Assembly Method
- Create a large canvas: Give yourself plenty of room to work.
- Arrange photos manually: Don’t use automated stitching tools.
- Embrace imperfections: The gaps and misalignments are part of the charm.
- Consider printing: Photo joiners often work best as large physical prints.
Also Read: Sigma 24-70 2.8 Vs Sony 24-105 F4
Common Mistakes and How to Avoid Them
I’ve made plenty of mistakes in my photomontage journey. Let me share some common pitfalls and how to avoid them.
Technical Mistakes
1. Poor Selections
The Problem: Jagged edges, halos, or incomplete selections ruin the realism of a composite.
The Solution:
- Take your time with selections
- Use the right tool for the job (Pen Tool for precision, Quick Selection for speed)
- Always refine your edges with Select and Mask
- Zoom in to 100% to check your work
2. Mismatched Lighting
The Problem: Elements look like they’re from different photos because the lighting doesn’t match.
The Solution:
- Analyze the light direction and quality in each source image
- Use adjustment layers to match exposure and color temperature
- Add or enhance shadows to create consistency
- Consider the time of day in each image
3. Ignoring Perspective
The Problem: Elements look “pasted on” because they don’t follow the same perspective rules.
The Solution:
- Use the Vanishing Point filter to match perspective
- Pay attention to camera height and lens choice
- Transform elements to match the perspective plane
- Look for converging lines in your scene
Creative Mistakes
1. Overcomplicating Things
The Problem: Trying to include too many elements, resulting in a chaotic composition.
The Solution:
- Start with a clear concept
- Focus on one main idea or story
- Use the “less is more” principle
- Remove elements that don’t serve the composition
2. Lack of Focal Point
The Problem: The viewer doesn’t know where to look because everything competes for attention.
The Solution:
- Establish a clear focal point using contrast, size, or position
- Use the rule of thirds for dynamic placement
- Create visual hierarchy through size and contrast
- Guide the eye with leading lines
3. Inconsistent Style
The Problem: The final image looks like a collection of unrelated photos rather than a unified artwork.
The Solution:
- Apply consistent color grading across all elements
- Use similar texture treatments throughout
- Maintain a consistent lighting atmosphere
- Consider the overall mood and tone
Pro Tips from My Experience
After years of creating photomontages, I’ve picked up some tricks that really make a difference. Here are my top professional tips:
Workflow Tips
1. Work Non-Destructively
Always use adjustment layers and layer masks instead of making permanent changes. I learned this the hard way after ruining hours of work by making direct edits. Non-destructive workflow gives you the flexibility to experiment without fear.
2. Save Iteratively
Save multiple versions of your work as you progress. I use a naming system like “ProjectName_v01,” “ProjectName_v02,” etc. This has saved me countless times when I’ve wanted to go back to an earlier version.
3. Use Smart Objects
Convert layers to Smart Objects whenever possible. This allows you to scale, transform, and apply filters non-destructively. It’s a game-changer for complex composites.
Creative Tips
1. Collect Reference Images
I maintain an extensive library of reference images organized by category (lighting, perspective, texture, etc.). When I’m stuck, browsing through these always gives me new ideas.
2. Study the Masters
Spend time analyzing photomontage by artists like John Heartfield, Hannah Höch, and modern digital artists. I try to deconstruct their techniques and understand why their compositions work.
3. Experiment with Constraints
Sometimes, limiting your options can boost creativity. Try creating a photomontage using only images from a single magazine, or limit yourself to three source images. These constraints often lead to more innovative solutions.
Technical Tips
1. Master Layer Masks
Layer masks are the most powerful tool in digital photomontage. Learn to use them with brushes, gradients, and selections. The time invested in mastering layer masks will pay off exponentially.
2. Understand Blend Modes
Don’t just stick to Normal blend mode. Experiment with Multiply, Overlay, Soft Light, and others. Each blend mode interacts differently with underlying layers, creating unique effects.
3. Use Actions for Repetitive Tasks
If you find yourself doing the same thing repeatedly (like applying a specific curve adjustment), create an Action. This automates the process and ensures consistency across your work.
Photomontage for Different Purposes
Photomontage isn’t just one thing – it’s a versatile medium that can serve many different purposes. Let me share how I approach different types of photomontage projects.
Fine Art Photomontage
When creating photomontage as fine art, I focus on:
Concept Development
- Start with a strong artistic vision
- Consider the emotional impact you want to create
- Think about how the work fits into art historical contexts
- Develop a unique visual language
Technical Execution
- Use high-resolution source images
- Pay attention to print quality and presentation
- Consider the physical properties of the final piece
- Experiment with different printing methods and papers
Exhibition Considerations
- Think about scale and how the work will be viewed
- Consider lighting conditions in exhibition spaces
- Create artist statements that explain your process and intent
- Document your work professionally
Commercial Photomontage
Commercial work has different requirements:
Client Communication
- Understand the client’s needs and brand identity
- Create clear mockups and concepts for approval
- Be prepared to make revisions based on feedback
- Deliver files in the required formats and specifications
Technical Standards
- Work at higher resolutions for print applications
- Use color profiles appropriate for the final output
- Keep organized layer structures for client revisions
- Provide multiple file formats (PSD, TIFF, JPEG)
Legal Considerations
- Ensure you have rights to all source images
- Understand usage rights and licensing
- Keep clear records of image sources and permissions
- Consider model releases if applicable
Personal Projects
Personal photomontage projects are where I really push my creativity:
Creative Freedom
- Experiment with new techniques without pressure
- Develop personal themes and series
- Create work that’s meaningful to you
- Take risks and try unconventional approaches
Skill Development
- Use personal projects to learn new skills
- Challenge yourself with difficult concepts
- Document your process and progress
- Share your work and get feedback from peers
Building a Portfolio
- Create a cohesive body of work
- Show range while maintaining a consistent style
- Include both process shots and final pieces
- Update your portfolio regularly
Getting Your Work Out There
Creating great photomontage is only half the battle. Getting your work seen and appreciated is equally important. Here’s what I’ve learned about sharing photomontage with the world.
Building an Online Presence
Social Media Strategy
- Instagram: Perfect for visual work. Use relevant hashtags like #photomontage, #surrealart, #digitalart
- Pinterest: Great for inspiration and driving traffic to your website
- Behance: Excellent for professional portfolios and connecting with other artists
- Flickr: Still relevant for photography communities
Website Essentials
- Create a clean, professional portfolio website
- Include artist statements and process information
- Make it easy for people to contact you
- Optimize for mobile viewing
Entering Exhibitions and Competitions
Finding Opportunities
- Research galleries that show photomontage and digital art
- Look for calls for entries in art magazines and websites
- Consider both online and physical exhibitions
- Start with local opportunities before aiming for international shows
Submission Tips
- Follow submission guidelines exactly
- Prepare professional artist statements
- Document your work well
- Don’t get discouraged by rejections
Selling Your Work
Print Sales
- Offer limited edition prints for exclusivity
- Use high-quality printing services
- Consider different paper types and sizes
- Price your work appropriately
Digital Products
- Create tutorials and process videos
- Sell digital assets like textures and brushes
- Offer online workshops or classes
- Consider stock photography for your composite elements
FAQ: Your Photomontage Questions Answered
What’s the difference between photomontage and collage?
While often used interchangeably, there’s a subtle difference. Collage typically involves combining various materials (paper, fabric, photos), while photomontage specifically uses photographic images as the primary medium. In practice, though, the terms often overlap.
Do I need expensive software to create photomontage?
Not at all! While Photoshop is the industry standard, there are excellent free alternatives like GIMP and Photopea. I’ve seen stunning photomontages created with basic software. The tool matters less than your creativity and vision.
How do I avoid copyright issues when using source images?
This is crucial. Always use images you have the rights to:
- Take your own photos
- Use royalty-free stock photos
- Use public domain images
- Create composite elements from scratch
When in doubt, assume you need permission. I keep detailed records of all my image sources.
What’s the best way to learn photomontage?
Start with the basics and practice consistently. I recommend:
- Follow online tutorials
- Analyze work by artists you admire
- Join online communities
- Take workshops or classes
- Most importantly: experiment and have fun!
How long does it take to create a good photomontage?
It varies wildly. A simple composite might take a few hours, while a complex piece could take days or even weeks. My most detailed photomontage took over 40 hours of work. Don’t rush – quality takes time.
Can I make a living from photomontage?
Yes, but it’s challenging. Many photomontage artists supplement their income with:
- Commercial work
- Teaching and workshops
- Print sales
- Stock photography
- Freelance design work
Build your skills and reputation gradually, and diversify your income streams.
Conclusion: Your Photomontage Journey Begins
Photomontage has been an incredible journey for me. From that first moment of discovering Hannah Höch’s work to creating my own digital masterpieces, it’s a medium that continues to inspire and challenge me. The beauty of photomontage lies in its endless possibilities – you’re limited only by your imagination.
Remember, every great photomontage artist started exactly where you are now. The techniques I’ve shared in this guide will give you a solid foundation, but the real magic happens when you develop your own unique voice and vision. Don’t be afraid to experiment, make mistakes, and push boundaries.
I encourage you to start small, practice consistently, and most importantly, have fun with it. Photomontage is supposed to be joyful, creative, and liberating. Let your imagination run wild, and don’t worry about creating “perfect” art – the most interesting work often comes from happy accidents and unexpected discoveries.
Ready to start your photomontage journey? Grab your camera (or your mouse), gather some images, and begin creating. I’d love to see what you come up with! Feel free to share your work and questions in the comments below.
Bookmark this guide for reference as you explore the fascinating world of photomontage. I’ll be updating it regularly with new techniques, tips, and inspiration to help you on your creative journey.