Choosing between sRGB and Adobe RGB can make or break your print results. I have spent years testing both color spaces across different printers, labs, and paper types. The difference is not always dramatic, but it matters when quality counts.
This sRGB vs Adobe RGB for print-ready photography comparison will help you understand which color space fits your workflow. Adobe RGB captures more colors, especially in greens and cyans. sRGB works everywhere without compatibility headaches.
Most photographers should stick with sRGB for simplicity. But if you print professionally or work with high-end labs, Adobe RGB gives you an edge. Let me explain exactly when each option makes sense.
What Is a Color Space?
A color space defines the range of colors a digital file can represent. Think of it as a container that holds your color data. Some containers are bigger than others, holding more distinct colors and shades.
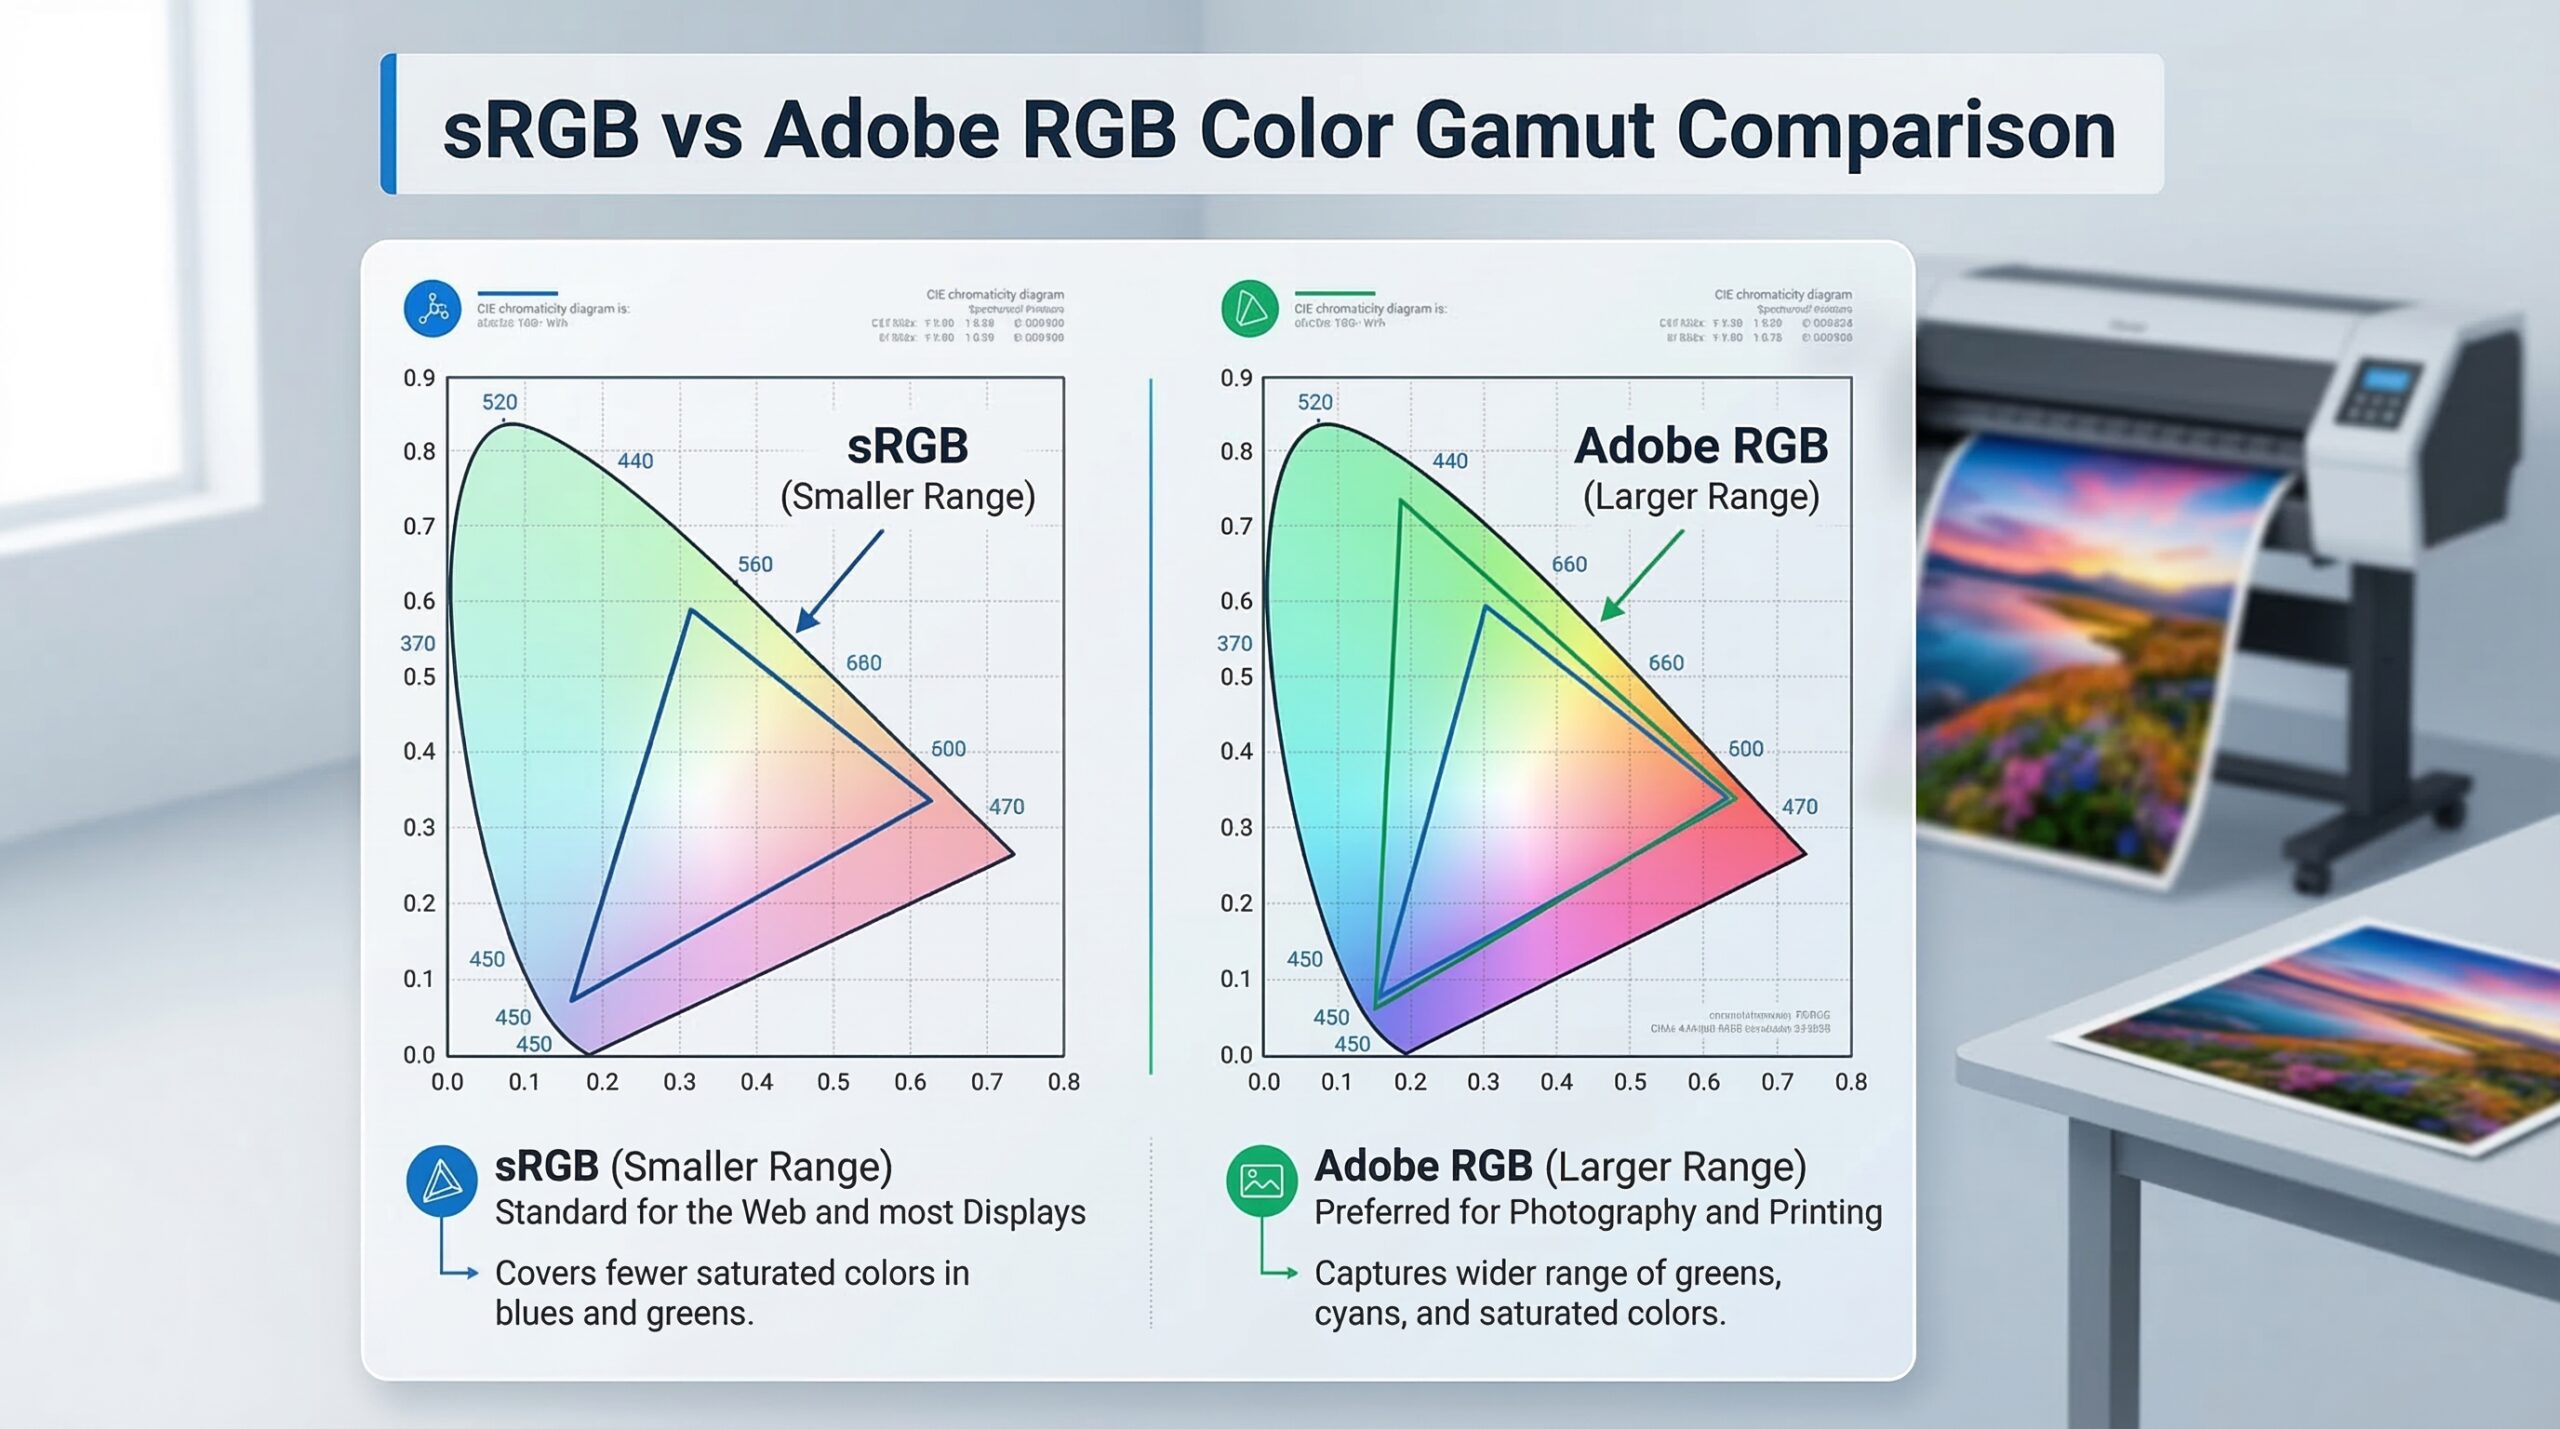
The technical term for this range is “color gamut.” A wider gamut means the color space can capture more saturated colors, particularly in specific color ranges like greens, cyans, and deep blues. Narrower gamuts are more limited but work more consistently across devices.
Color spaces matter because every device in your workflow interprets colors differently. Your camera captures colors one way, your monitor displays them another, and your printer reproduces them differently again. The color space you choose acts as the common language between these devices.
For print photography, this matters enormously. A print can only show colors within its printer and paper combination’s gamut. If your file contains colors outside that range, something gets lost in translation. Understanding color spaces helps you control what gets lost and what stays.
Understanding sRGB: The Universal Standard
sRGB (standard Red Green Blue) was created in 1996 by HP and Microsoft as a color space for monitors, printers, and the internet. It became the default standard because it matches the capabilities of most consumer displays and printers.
The sRGB color gamut covers approximately 35% of the colors visible to the human eye. While that sounds limited, it captures most colors we encounter in typical photography. Skin tones, landscapes, and everyday scenes reproduce well within sRGB’s range.
The biggest advantage of sRGB is universal compatibility. Every web browser, social media platform, consumer printer, and phone screen expects sRGB. When you save an image in sRGB, you know it will look consistent almost everywhere.
For most photographers, sRGB is the safe choice. I recommend it for anyone sharing images online, delivering files to clients, or printing at consumer labs. You avoid color shifts, washed-out previews, and confused clients who see different colors than you intended.
The limitation appears when you want to push beyond what consumer devices can show. Certain saturated greens, vibrant cyans, and deep blues fall outside sRGB’s range. If you photograph tropical waters, dense forests, or vivid fabrics, sRGB clips some of that intensity.
Understanding Adobe RGB (1998): The Professional Choice
Adobe RGB (1998) was developed by Adobe Systems specifically for print production workflows. It offers a color gamut roughly 35% larger than sRGB, with most of that extra range in greens and cyans.
This wider gamut matters for print because modern inkjet printers can reproduce colors beyond sRGB. Professional pigment-based printers, especially those using 8 or more ink colors, can output saturated greens and cyans that sRGB simply cannot describe.
Working in Adobe RGB gives you more editing headroom. When you adjust colors during processing, you have more data to work with. Gradual color transitions stay smoother because more distinct color values exist between the extremes.
The trade-off is complexity. Adobe RGB requires a color-managed workflow from capture to print. Your monitor must support the wider gamut to see those extra colors. Your editing software must be configured correctly. And your printer or lab must accept Adobe RGB files.
I use Adobe RGB for fine art prints, gallery work, and any project where maximum color fidelity matters. The extra color information shows in saturated foliage, deep skies, and vibrant clothing. But only if every step of my workflow supports it.
sRGB vs Adobe RGB: Key Differences
The core difference between sRGB and Adobe RGB is gamut size. Adobe RGB covers about 35% more colors, concentrated in the green-cyan region. This table shows how they compare across key factors:
Color Gamut: Adobe RGB wins with a significantly larger gamut. It captures approximately 50% of the colors in the CIE LAB color space versus sRGB’s 35%. Most of that advantage appears in saturated greens and cyans.
Compatibility: sRGB wins hands down. Every device, browser, and platform handles sRGB correctly. Adobe RGB images often look washed out on non-color-managed systems because the extra color information gets lost.
Print Quality: Adobe RGB wins for professional printing. High-end inkjet printers can reproduce colors that Adobe RGB captures but sRGB cannot. The difference is most visible in saturated colors and smooth gradations.
Web Display: sRGB is essential. If you upload an Adobe RGB image to most websites, browsers strip the profile and colors shift. Your vibrant greens become muted. Your deep cyans wash out. sRGB prevents this problem.
Editing Flexibility: Adobe RGB provides more headroom for color adjustments. More color data means smoother gradients and less banding when you push colors during editing. This matters most for landscape and product photography.
Workflow Complexity: sRGB is simpler. Set it once and forget it. Adobe RGB requires monitor calibration, proper software settings, and careful output management. One wrong step and you lose the benefits.
Print-Ready Workflow: Setting Up for Success
Getting print-ready files right requires attention to detail at every step. I have developed this workflow over years of printing my own work and preparing files for professional labs.
Step 1: Configure Your Camera
For RAW shooters, the color space setting affects only your JPEG previews and in-camera histograms. RAW files contain all color data regardless of this setting. Set your camera to Adobe RGB if you want accurate previews of your full gamut captures.
For JPEG shooters, this setting matters more. Choose Adobe RGB if you plan to print professionally. Choose sRGB if you plan to share images online or print at consumer labs. You can convert later, but starting right saves effort.
Step 2: Set Up Your Editing Software
In Lightroom, the software uses ProPhoto RGB internally for RAW processing. You cannot change this. When exporting, choose your output color space based on destination. Use Adobe RGB for print, sRGB for web.
In Photoshop, go to Edit > Color Settings and select your working space. For print workflows, choose Adobe RGB (1998). Enable “Ask When Opening” for profile mismatches so you catch any files in the wrong space.
Step 3: Calibrate Your Monitor
You cannot edit what you cannot see accurately. Use a hardware calibration device to profile your monitor. This matters even more when working in Adobe RGB because you need to see those extra colors to make decisions about them.
Standard consumer monitors often display only sRGB. For serious Adobe RGB work, invest in a wide-gamut display that covers 99% or more of Adobe RGB. Otherwise, you edit colors you cannot see.
Step 4: Use Soft-Proofing
Soft-proofing shows how your image will look when printed on specific paper with specific inks. In Lightroom, enable Soft Proofing in the Develop module. In Photoshop, go to View > Proof Setup and select your printer profile.
This step reveals colors that fall outside your printer’s gamut. Some colors that look fine on screen will print differently. Soft-proofing lets you adjust before you waste paper and ink.
Step 5: Embed Color Profiles
Always embed the ICC profile when saving files for print. In Photoshop, check “ICC Profile” in the Save dialog. In Lightroom, ensure “Include Profile” is selected in export settings. Without the profile, printers assume sRGB, which causes color shifts in Adobe RGB files.
Step 6: Verify Before Sending
Before sending files to a lab, verify your color space. In Photoshop, check Image > Mode and confirm the correct profile. In Windows, right-click the file and check Properties > Details. On Mac, use Preview > Tools > Show Inspector.
Ask your print lab which color space they prefer. Some labs want sRGB for consistency. Others accept and prefer Adobe RGB for maximum quality. Following their guidance produces better results than guessing.
When to Use Each Color Space
Choosing between sRGB and Adobe RGB depends on your output destination and workflow capabilities. Here is my decision framework after years of testing both.
Use sRGB When:
You share images primarily online or on social media. Facebook, Instagram, and most websites expect sRGB. Anything else risks color shifts that make your work look amateur.
You deliver files to clients who may not understand color management. Most clients view images on uncalibrated monitors. sRGB ensures they see something close to what you intended.
You print at consumer labs or drugstores. These services assume sRGB input and may not handle Adobe RGB correctly. The extra color information causes more problems than it solves.
You want simplicity. If color management feels overwhelming, sRGB removes variables. You get consistent results with minimal effort.
Use Adobe RGB When:
You print on professional inkjet printers with pigment inks. These printers reproduce colors that sRGB cannot describe. Adobe RGB captures those colors for output.
You photograph subjects with saturated greens and cyans. Landscapes, underwater scenes, and fashion work often contain colors that exceed sRGB’s range.
You work with a color-managed workflow from capture to print. You have a calibrated wide-gamut monitor, proper software settings, and a lab that accepts Adobe RGB.
You need maximum editing flexibility. The extra color data gives you more room to adjust colors without banding or posterization.
RAW vs JPEG Considerations:
If you shoot RAW, the camera’s color space setting affects only JPEG previews. Your RAW files contain full color data regardless. You choose the output color space when processing in Lightroom or similar software.
If you shoot JPEG, the camera permanently tags the file with your chosen color space. You can convert later, but any colors outside sRGB are already clipped if you shot in sRGB. Start in Adobe RGB if you might print later.
Common Mistakes to Avoid
After helping many photographers troubleshoot color problems, I see the same mistakes repeatedly. Here is what to watch for.
Mistake 1: Using Adobe RGB for Web Display
Uploading Adobe RGB images directly to websites causes washed-out colors. Most browsers do not color-manage web content consistently. Convert to sRGB before any online sharing.
Mistake 2: Editing Without Monitor Calibration
An uncalibrated monitor shows inaccurate colors. You make adjustments based on wrong information. Then your prints look nothing like your screen. Calibrate monthly with a hardware device.
Mistake 3: Converting Carelessly
Converting from Adobe RGB to sRGB can cause color shifts if done wrong. Use “Convert to Profile” not “Assign Profile” in Photoshop. Conversion adjusts colors to the closest match. Assignment just changes the label without adjusting colors.
Mistake 4: Forgetting to Embed Profiles
Saving files without embedded profiles creates guesswork for printers and viewers. They assume sRGB, which ruins Adobe RGB files. Always check that profiles are embedded before sending files anywhere.
Mistake 5: Ignoring Lab Requirements
Different print labs have different capabilities. Some handle Adobe RGB perfectly. Others convert everything to sRGB anyway. Ask your lab before assuming they want Adobe RGB files.
Frequently Asked Questions
Is Adobe RGB or sRGB better for printing photos?
Adobe RGB is generally better for printing photos because it offers a wider color gamut, particularly in greens and cyans, which modern inkjet printers can reproduce. However, sRGB produces acceptable prints and is the safer choice if you are unsure about your print lab’s capabilities or if the images will also be used online. For professional fine art printing, Adobe RGB gives you more color information to work with.
Should you shoot in Adobe RGB or sRGB?
If you shoot RAW, the color space setting does not affect your image data, so you can choose either. If you shoot JPEG, use sRGB for images destined for web or social media, and Adobe RGB for images specifically intended for high-quality printing. Many professional photographers recommend sRGB for simplicity unless you have a specific print workflow that requires Adobe RGB.
Does Lightroom use sRGB or Adobe RGB?
Lightroom uses ProPhoto RGB as its internal working color space when processing RAW files, regardless of your camera settings. You cannot change this. When exporting from Lightroom, you can choose to convert to sRGB, Adobe RGB, or other color spaces based on your intended output destination.
Is sRGB good for photography?
Yes, sRGB is excellent for photography and is the standard color space for web display, social media, and most consumer applications. It ensures consistent colors across different devices and platforms. While it has a smaller color gamut than Adobe RGB, sRGB produces perfectly acceptable prints for most purposes and is the safer choice for general use.
Which is best, sRGB or Adobe RGB?
Neither is universally best. sRGB is best for web display, social media, client delivery, and consumer printing because of its universal compatibility. Adobe RGB is best for professional printing on wide-gamut printers, fine art reproduction, and situations where you need maximum color information. The best choice depends entirely on your output destination and workflow capabilities.
Final Verdict
After years of working with both sRGB vs Adobe RGB for print-ready photography, my advice is simple. Match your color space to your output.
Use sRGB if you primarily share images online, deliver files to clients, or print at consumer labs. It works everywhere without fuss. Most photographers never need anything else.
Use Adobe RGB if you print professionally, work with wide-gamut printers, or need maximum color fidelity for fine art reproduction. The extra color information shows in your final prints, but only if your entire workflow supports it.
The wrong choice causes problems. Adobe RGB files look washed out online. sRGB files lose color information that better printers could reproduce. Neither is inherently better. The right choice depends entirely on what you plan to do with your images.
For most photographers in 2026, I recommend starting with sRGB and switching to Adobe RGB only when you hit its limitations. You will know when you need more color. Until then, sRGB keeps things simple and consistent.