After shooting a wedding with 2,500 photos or returning from a landscape trip with 800 raw files, the real work begins. Culling thousands of images can feel overwhelming without a system. That’s where star ratings, flags, and color labels transform chaos into an organized workflow in Lightroom Classic. I’ve spent years refining my culling process, and the combination of these three rating tools has cut my editing time in half while improving my final image selection.
This guide shows you exactly how to use star ratings, flags, and color labels together to build an efficient culling workflow. You’ll learn what each rating system does, when to use each one, keyboard shortcuts for speed, and a step-by-step process that works for any photography genre. By the end, you’ll have a repeatable system that handles everything from quick portrait sessions to massive event shoots.
Why an Efficient Culling Workflow Matters
Professional photographers often follow the 20-60-20 rule: roughly 20% of photos are keepers, 60% are acceptable but not outstanding, and 20% should be deleted immediately. Without a structured culling workflow, you might spend hours editing mediocre images or struggle to find your best work months later.
An efficient culling system does more than save time. It reduces decision fatigue by giving you clear criteria for each image. It prevents you from wasting editing effort on photos that won’t make the final cut. Most importantly, it helps you consistently deliver your best work to clients or build stronger portfolios.
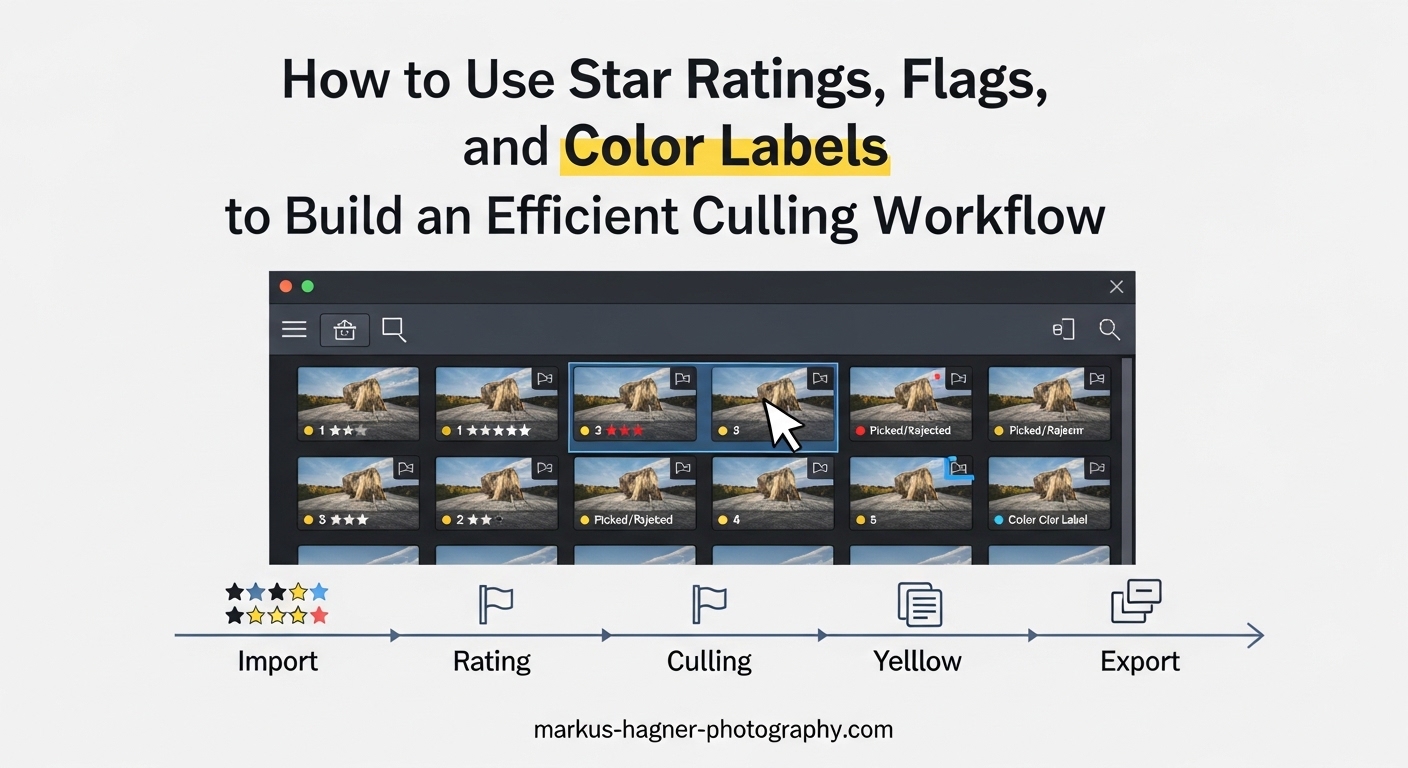
The three rating systems in Lightroom Classic each serve different purposes. Star ratings measure image quality. Flags make quick keep-or-reject decisions. Color labels track workflow stages or categorize images for specific outputs. Used together, they create a powerful organizational framework that scales from small shoots to massive archives.
Understanding the Star Rating System in Lightroom
Star ratings in Lightroom Classic use a 1-5 scale to indicate image quality. This is the most detailed of the three rating systems and works best for your second or third pass through a shoot after initial culling with flags.
What Each Star Rating Means
Defining clear meanings for each star level keeps your ratings consistent across all shoots. Here’s the system I use and recommend:
1 star – Usable but basic: The image is technically acceptable but lacks impact. Maybe the composition is ordinary or the moment isn’t special. These photos might work for documentation but rarely for portfolios or client delivery.
2 stars – Above average: Better than a snapshot with some redeeming qualities. Good enough for personal use or social media, but not portfolio material. These images often get edited if time permits.
3 stars – Solid keepers: Good photos that meet your standards. These are images you’d be happy to show clients or include in a gallery. Most delivered photos fall into this category.
4 stars – Excellent: Strong images that stand out from the shoot. These represent your best work and deserve priority editing time. Portfolio candidates for sure.
5 stars – Exceptional: The absolute best shots from the shoot. Award-worthy images that define your style. Use 5 stars sparingly to maintain their value as truly special photos.
How to Apply Star Ratings
Applying star ratings is straightforward. In the Library module, select a photo and press the number keys 1-5 on your keyboard. The stars appear beneath the thumbnail in Grid View and in the toolbar. You can also click directly on the stars beneath any thumbnail.
To remove a star rating, press 0 (zero) or click the existing stars to clear them. Lightroom also offers a half-star option by holding Shift while pressing a number key, though most photographers find the basic 1-5 scale sufficient.
Keyboard Shortcuts for Star Ratings
Speed matters when culling hundreds of photos. These keyboard shortcuts keep your hands on the keyboard and your eyes on the images:
Press 1 for one star, 2 for two stars, and so on up to 5. Press 0 to remove all stars. The rating applies immediately and Lightroom can auto-advance to the next photo if you enable Auto Advance mode (more on that later).
Filtering by Star Ratings
Once rated, filtering helps you work with specific quality levels. Click the filter icon in the Library module’s filter bar, then select the star rating you want. You can filter for photos with exactly 3 stars, or photos with 3 stars and above, or photos with 3 stars and below.
The filter bar also lets you combine star filters with other criteria like date, camera, lens, or keyword. This combination filtering becomes powerful when you need to find your best landscape shots from a specific trip or your top-rated portraits from last month.
Using Flags for Quick Culling Decisions
Flags are the fastest rating system in Lightroom. They offer three states: Pick, Reject, and Unflagged. Use flags during your first pass through a shoot to make quick keep-or-reject decisions without getting caught up in quality nuances.
What the Flags Mean in Lightroom
Pick flag (white flag): This image is a keeper. It passed your initial quality check and deserves further review or editing. Pick flags don’t mean the photo is perfect, just that it’s worth your time.
Reject flag (black X): This image should be deleted. Obvious failures like missed focus, bad exposure, or unflattering expressions get the reject flag. You can filter for rejected photos and delete them in batch.
Unflagged: The neutral state. Photos you haven’t evaluated yet, or photos that don’t clearly fall into pick or reject categories. You might leave marginal images unflagged for a second review pass.
Keyboard Shortcuts for Flags
Press P to flag as Pick. Press X to flag as Reject. Press U to unflag and return to neutral. These three keys become second nature after a few culling sessions.
The real speed boost comes from the caps lock trick. Turn on Caps Lock, and Lightroom automatically advances to the next photo after you apply a flag. Combine this with the P and X keys, and you can cull hundreds of photos in minutes without touching the arrow keys.
When to Use Flags vs Star Ratings
Think of flags as your first-pass tool and star ratings as your second-pass tool. Flags handle the binary question: “Is this photo worth keeping?” Star ratings answer the nuanced question: “How good is this photo?”
For a 1,000-photo wedding, start by flagging picks and rejects. This might cut your selection down to 400 keepers. Then apply star ratings to those 400 to identify your 4-star and 5-star hero shots for priority editing.
Flags have one limitation: they’re specific to Lightroom and don’t export to other software. If you switch to Capture One or share photos with an assistant using different software, star ratings and color labels travel better because they’re stored in standard metadata.
Deleting Rejected Photos
After flagging rejects, you’ll want to remove them from your catalog. Go to Photo > Delete Rejected Photos. Lightroom shows you all rejected images and asks whether to delete them from disk or just remove from the catalog. I recommend deleting from disk to free up storage space.
Color Labels for Workflow Organization
Color labels add another layer of organization beyond quality ratings. While stars measure how good a photo is, color labels can indicate what the photo is for, where it is in your editing process, or any custom category you define.
Available Color Labels
Lightroom Classic offers five color labels: red, yellow, green, blue, and purple. Unlike stars and flags, color labels have no inherent meaning. You define what each color represents for your workflow.
Common Color Label Systems
Here are proven color label systems photographers use:
Editing Progress System: Red means needs editing, yellow means editing in progress, green means finished editing, blue means exported, purple means delivered to client.
Output Destination System: Red for portfolio candidates, yellow for social media, green for client delivery, blue for print, purple for stock or licensing.
Priority System: Red for urgent edits, yellow for normal priority, green for low priority or optional edits.
Category System: Red for detail shots, yellow for ceremony, green for portraits, blue for reception, purple for group shots. This works well for wedding photographers.
Keyboard Shortcuts for Color Labels
Press 6 for red label, 7 for yellow, 8 for green, and 9 for blue. There’s no default shortcut for purple, but you can create one in Lightroom’s keyboard shortcut editor.
To remove a color label, press the same number again to toggle it off, or use the Photo > Set Color Label > None menu option.
Customizing Color Label Meanings
You can rename color labels to match your workflow. Go to Metadata > Color Label Set > Edit. This opens a dialog where you can rename each color. For example, change “Red” to “To Edit” and “Green” to “Completed.”
Saving custom color label sets lets you switch between different systems for different types of photography. Your wedding workflow might use one set while your landscape photography uses another.
Filtering by Color Labels
The filter bar includes color label filters. Click the filter icon, then select one or more colors. You can also combine color label filters with star ratings and flags. For example, show all 4-star photos with a green label to see your finished portfolio candidates.
Building an Efficient Culling Workflow
Now let’s put all three rating systems together into a practical workflow. This multi-pass approach handles large shoots efficiently while maintaining quality standards.
The Multi-Pass Culling Strategy
Trying to rate photos perfectly in one pass leads to decision fatigue and inconsistent results. Instead, use multiple quick passes, each with a specific goal. This approach works because it separates different types of decisions.
First Pass: Quick Flag Culling
Start with flags only. Your goal is fast binary decisions: keep or reject. Don’t zoom in to check focus. Don’t compare similar shots. Just flag obvious picks and obvious rejects.
Enable Auto Advance by pressing Caps Lock. Now pressing P or X automatically moves to the next photo. Work through your entire shoot at roughly one photo per second. Trust your first impression. Photos that don’t immediately grab you probably aren’t keepers.
After this pass, you’ll have a much smaller set of flagged picks to evaluate more carefully.
Second Pass: Star Rating for Quality
Now apply star ratings to your flagged picks only. This pass requires more attention. Zoom in to check critical focus. Compare similar shots in Survey View. Evaluate composition, lighting, and moment.
Start conservative with 3 stars for solid images. Reserve 4 stars for photos that genuinely excite you. Use 5 stars for images that could win awards or define your portfolio. Images that don’t reach 3-star quality get downgraded to 1-2 stars or unflagged entirely.
Use Survey View (press N) to compare similar shots side by side. Select 2-5 similar photos, press N, and pick the best one to rate highly. The others can get lower ratings or remain unrated.
Third Pass: Color Labels for Organization
With your best images identified, apply color labels based on your needs. This is where you categorize photos for specific purposes or track editing progress.
If using the editing progress system, apply red labels to all photos that need editing. As you edit each one, change the label to yellow for in-progress, then green when finished. This visual system keeps you organized across multiple editing sessions.
For output-based systems, apply labels indicating where each photo will go: portfolio, client gallery, social media, print, etc. A single photo might receive multiple labels over time as you use it for different purposes.
Creating Filter Presets for Efficiency
Filter presets save time when you repeatedly use the same rating combinations. Here’s how to create one:
First, set up your filter criteria in the filter bar. For example, filter for flagged picks with 3 stars or higher. Then click the preset dropdown menu in the filter bar and choose Save Current Settings as New Preset. Name it something like “Best Keepers” or “Edit Priority.”
Create presets for common tasks: “Unedited Photos” (red label), “Ready to Export” (green label, 3+ stars), “Portfolio Candidates” (4+ stars), or “Delete Candidates” (rejected flag). One click applies all your filter criteria.
Using Smart Collections for Automation
Smart Collections automatically group photos based on rating criteria. Unlike regular collections that you populate manually, Smart Collections update themselves as you rate photos.
Create a Smart Collection by clicking the Plus icon in the Collections panel and choosing Create Smart Collection. Set your rules: for example, “Rating is greater than or equal to 4 stars” and “Color Label is green.” Name it “Portfolio Ready” and it will automatically include all your finished 4 and 5-star photos.
Useful Smart Collections include: “Needs Editing” (red label), “This Week’s Selects” (5 stars, captured in last 7 days), or “Client Delivery” (3+ stars, specific color label).
Advanced Techniques for Power Users
Once you master the basics, these advanced techniques take your workflow further.
Combination Filtering
Lightroom’s filter bar supports multiple criteria. Combine star ratings, flags, and color labels to find exactly what you need. For example, filter for flagged picks with 4+ stars and a green label to see your best finished work.
The Library Filter (press backslash to toggle) offers even more options. Add columns for metadata like camera, lens, or ISO alongside your rating filters. This helps answer questions like “What are my best low-light shots?” or “Which lens produced my highest-rated portraits?”
Backing Up Ratings with XMP Files
Star ratings and color labels are stored in Lightroom’s catalog, but you can also save them to XMP sidecar files. This protects your work and makes ratings visible in other software.
Enable automatic XMP saving in Catalog Settings > Metadata > Automatically write changes into XMP. Now your ratings travel with your files if you move them to another computer or open them in Camera Raw, Bridge, or Capture One.
Note that flags are Lightroom-specific and don’t export to XMP. If you need your pick/reject decisions to transfer, convert flags to star ratings before exporting: picks become 3 stars, rejects become 1 star.
Workflow Variations by Photography Type
Different photography genres benefit from different culling approaches:
Wedding Photography: Speed is essential. Use aggressive flag culling first, then rate only the picks. Color labels help track which photos go to the client, which go to albums, and which are for your portfolio.
Landscape Photography: Take your time. You probably have fewer photos but each deserves careful evaluation. Compare similar compositions in Survey View. Star ratings matter more than speed here.
Portrait Photography: Focus on expressions and poses. Cull for closed eyes and awkward moments first. Then rate for flattering angles and genuine expressions. Color labels can track which poses the client requested.
Event Photography: Similar to weddings but often with tighter deadlines. Flag ruthlessly, rate quickly, and use color labels to separate must-have moments from general coverage.
AI Assisted Culling in Lightroom
Adobe introduced AI-assisted culling features in recent Lightroom updates. The software can analyze photos and suggest which ones are sharpest, which have the best compositions, or which capture key moments in group shots.
Access AI culling through the Library module’s filtering options. While AI suggestions are helpful, they work best as a starting point rather than a replacement for human judgment. Use AI to identify technical quality, then apply your own creative ratings.
Keyboard Shortcuts Quick Reference
Print this section or bookmark it for daily use. These shortcuts dramatically speed up your culling workflow.
Star Ratings:
1-5: Apply 1-5 stars
0: Remove star rating
Flags:
P: Flag as Pick
X: Flag as Reject
U: Unflag (remove flag)
Color Labels:
6: Red label
7: Yellow label
8: Green label
9: Blue label
Navigation:
Left/Right Arrow: Previous/Next photo
Caps Lock + Rating: Auto-advance after rating
Views:
G: Grid View
E: Loupe View
N: Survey View (compare selected photos)
C: Compare View (compare two photos)
: Toggle Library Filter bar
Common Mistakes to Avoid
Even experienced photographers make these culling mistakes. Awareness helps you avoid them.
Over-rating photos: If everything gets 4 or 5 stars, the ratings lose meaning. Reserve high ratings for truly exceptional images. A shoot with 500 photos should have maybe 5-10 five-star images.
Inconsistent rating criteria: Define what each rating means to you and stick with it. Document your system if needed. Inconsistency makes it impossible to find your best work later.
Not using keyboard shortcuts: Mouse-based rating is slow and breaks your visual flow. Learn the shortcuts and practice until they’re automatic. Your culling speed will triple.
Rating before culling: Don’t waste time rating photos you’ll eventually delete. Flag first to eliminate obvious rejects, then rate the keepers.
Too complex systems: If you need a cheat sheet to remember what your color labels mean, your system is too complicated. Simplify until it’s intuitive.
Skipping the reject flag: Many photographers only flag picks, leaving rejects mixed with unreviewed photos. Flagging rejects lets you delete them in batch and keeps your catalog clean.
Frequently Asked Questions
What do the flags mean in Lightroom?
Flags in Lightroom have three states: Pick (white flag) marks photos as keepers worth keeping, Reject (black X) marks photos for deletion, and Unflagged is the neutral state for photos not yet evaluated. Use flags for quick binary decisions during your first culling pass.
What is the shortcut for star rating in Lightroom Classic?
Press number keys 1-5 to apply 1-5 stars respectively. Press 0 to remove all stars. For faster culling, enable Caps Lock to auto-advance to the next photo after rating.
What is the 20-60-20 rule in photography?
The 20-60-20 rule states that in a typical photo shoot, roughly 20% of images are strong keepers, 60% are acceptable but not outstanding, and 20% should be deleted. This guideline helps photographers set realistic expectations and focus culling efforts on finding the top 20%.
Should I use stars or flags in Lightroom?
Use both for different purposes. Flags work best for quick first-pass culling to separate keepers from rejects. Star ratings work better for second-pass evaluation to rank photo quality. Combining both creates an efficient multi-stage workflow.
How do I filter by multiple ratings in Lightroom?
Use the Library Filter bar (press backslash to toggle) to combine multiple criteria. You can filter by star rating, flag status, and color label simultaneously. For example, show only flagged picks with 4+ stars and a green label. Save filter presets for common combinations.
Conclusion
Building an efficient culling workflow with star ratings, flags, and color labels transforms how you handle large photo shoots. The three systems work together: flags for quick keep-or-reject decisions, star ratings for quality assessment, and color labels for workflow organization and categorization.
Start with a simple multi-pass approach. First pass uses flags to cull obvious rejects. Second pass applies star ratings to your keepers. Third pass adds color labels for specific purposes or editing stages. As you get comfortable, add filter presets and Smart Collections to automate your workflow.
The key is consistency. Define what each rating means to you, learn the keyboard shortcuts, and apply your system to every shoot. Over time, your culling workflow becomes second nature, and you’ll spend less time managing files and more time creating great images.
Remember that your star ratings flags and color labels culling workflow should serve your needs, not the other way around. Start simple, refine as you go, and build a system that helps you find your best work quickly and deliver quality results to clients consistently.