Rain transforms ordinary scenes into something extraordinary. Puddles become mirrors, streets turn reflective, and the diffused light creates a moody atmosphere that sunny days simply cannot match. But here is the problem: cameras and water do not mix. One wrong move and you could be looking at hundreds or thousands of dollars in repairs. That is where a camera rain cover becomes essential gear for any photographer who refuses to stay indoors when the weather turns wet.
In this guide, I will show you exactly how to use a camera rain cover to protect your equipment while capturing stunning images in wet conditions. After shooting in everything from light drizzle to heavy downpours over the years, I have learned what works and what leaves your gear vulnerable. Whether you are a wildlife photographer waiting for the perfect shot or a wedding photographer who cannot reschedule, this guide will help you shoot confidently in any weather.
Why You Need to Protect Your Camera from Rain?
Water is the enemy of electronics, and your camera is packed with sensitive components that moisture can destroy. Even a small amount of water seeping into your camera body can cause short circuits, corrode internal contacts, and permanently damage your sensor. The repair bills often exceed the cost of a new camera.
Many photographers believe their weather-sealed camera makes them immune to water damage. This is a dangerous misconception. Weather sealing means your camera has some resistance to dust and moisture, not that it is waterproof. The rubber gaskets and sealed buttons help, but they are designed for light rain and occasional splashes, not sustained exposure to heavy downpours.
Salt water poses an even greater threat than fresh water. If you shoot near the ocean, salt spray can work its way into tiny crevices and cause corrosion that destroys your gear over weeks or months. I have seen cameras fail months after a beach shoot because salt residue was never properly cleaned from the body. A quality camera rain cover provides the barrier you need to shoot confidently in these conditions.
Condensation is another hidden danger. When you move your camera from a cold outdoor environment to a warm indoor space, moisture can form inside the lens and body. This internal condensation is difficult to remove and can lead to mold growth on your lens elements. Proper protection and gradual temperature changes help prevent this issue.
Types of Camera Rain Covers: DIY vs Commercial
Not all rain protection is created equal. Your choice depends on your budget, shooting style, and how often you expect to shoot in wet conditions. Let me break down the options so you can make an informed decision.
DIY Rain Covers: Budget-Friendly Protection
The simplest DIY option costs almost nothing. A clear plastic grocery bag or gallon-sized ziplock bag can provide basic protection in a pinch. Cut a hole for your lens to poke through, secure it with a rubber band, and you have instant rain protection. I have used this method countless times when caught in unexpected rain, and it works surprisingly well for short shoots.
A shower cap makes an excellent quick cover for smaller cameras and prime lenses. The elastic band creates a snug fit around the lens, and you can easily slip your hands underneath to access controls. Many hotels provide free shower caps, making this a zero-cost option that you can keep in your camera bag.
For longer telephoto lenses, a large trash bag with gaffer tape works better than small bags. Gaffer tape leaves less residue than duct tape and creates a more secure seal around the lens hood. Cut a hole slightly smaller than your lens diameter, tape the edges, and you have a rain cover that can handle heavier rain for extended periods.
The downside of DIY options is usability. Plastic bags rustle loudly, which can spook wildlife. They also obscure your view of controls and make operating touchscreens nearly impossible. For casual shooting, DIY works fine, but professional work demands better solutions.
Budget Commercial Rain Covers
Commercial rain covers in the $10 to $30 range offer significant improvements over DIY options. These typically feature clear plastic windows for viewing your LCD screen, drawstring closures for a secure fit, and designs shaped specifically for camera bodies.
OP/TECH Rainsleeves are the most popular budget option among photographers I know. They cost around $10 for a pack of two and work reliably in light to moderate rain. The clear plastic lets you see your controls, and the drawstring closure adapts to different lens sizes. Many wildlife photographers keep several in their bags as backup protection.
Altura Photo makes similar rain covers with added features like arm sleeves that let you access controls while keeping your hands relatively dry. These cost slightly more but provide better protection for longer shoots. The plastic is thicker and more durable than basic sleeves.
Budget covers work well for occasional use, but they have limitations. The thin plastic can tear on sharp edges or rough handling. The fit may be loose on smaller cameras or tight on larger bodies with battery grips. Still, for the price, they provide excellent value for photographers who only occasionally shoot in rain.
Professional Rain Covers
Professional-grade rain covers from companies like Think Tank Photo, Peak Design, and Lenscoat offer the best protection and usability. These covers feature durable materials, precise fit, and thoughtful design elements that make shooting in rain almost as easy as shooting in dry conditions.
Think Tank Photo rain covers include features like clear windows that actually let you see your LCD screen, arm ports that seal around your wrists, and attachment points for tripod mounting. The materials are thick enough to resist tearing but flexible enough to operate controls through. Expect to pay $50 to $150 depending on size and features.
Peak Design Shell offers a sleek, form-fitting design that works exceptionally well for mirrorless cameras. It stretches over your camera and lens, creating a tight seal that stays put even in wind. The clear back lets you use your touchscreen with reasonable accuracy, and the whole cover packs down small enough to fit in a pocket.
Lenscoat rain covers are popular with wildlife photographers for their camouflage patterns and durable construction. They offer various sizes to fit everything from compact mirrorless cameras to massive telephoto lenses. The premium materials resist UV damage and remain flexible in cold temperatures.
Which Type Should You Choose?
For occasional use or emergency backup, DIY options and budget commercial covers work perfectly. Keep a few OP/TECH sleeves in your bag and you will always be prepared. If you shoot professionally in rain or need to access controls frequently, invest in a quality professional cover. The improved usability justifies the higher cost when your livelihood depends on getting the shot.
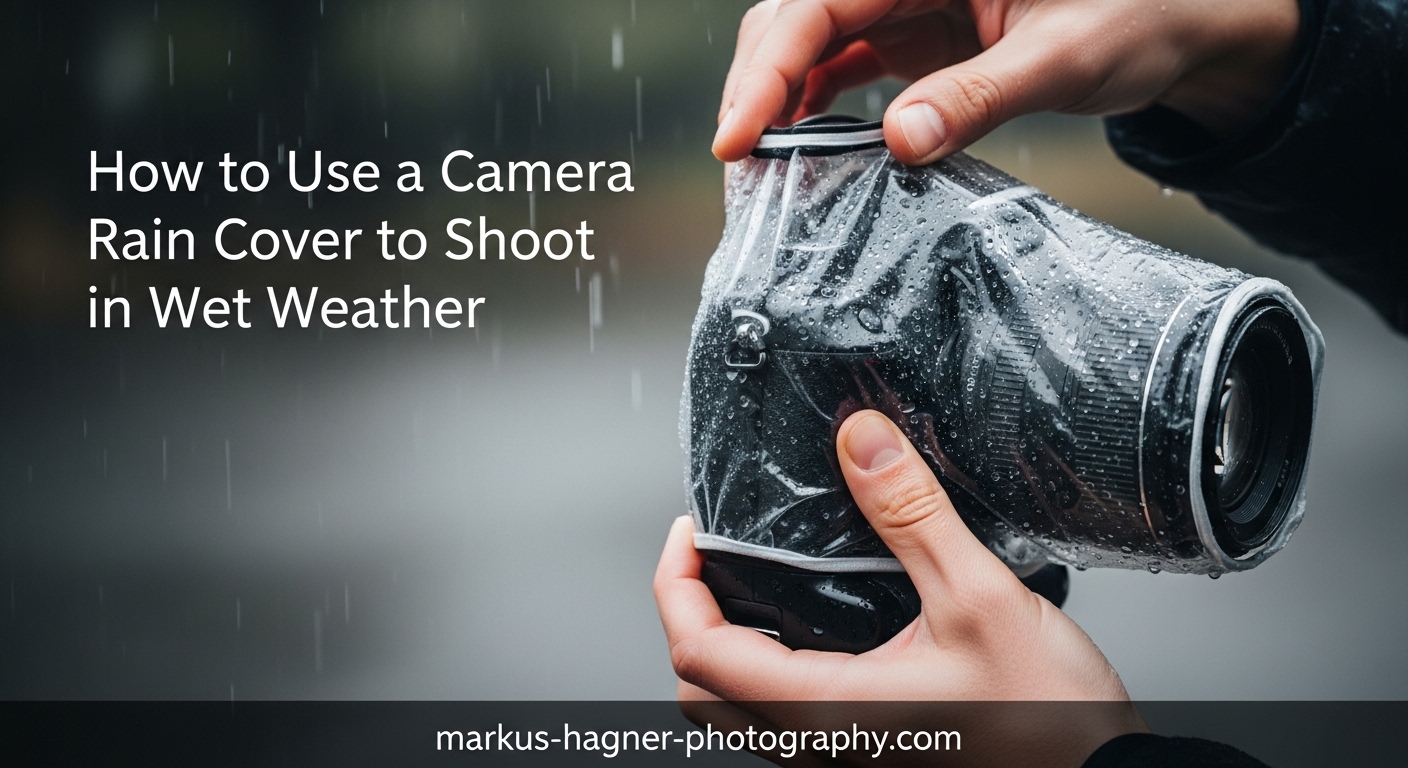
How to Use a Camera Rain Cover: Step-by-Step Guide
Using a rain cover effectively requires more than just slipping it over your camera. Follow these steps to ensure complete protection while maintaining full control of your equipment.
Step 1: Prepare Your Gear Before Heading Out
Start by attaching your lens hood. The hood provides the first line of defense against raindrops hitting your front element and gives the rain cover something to grip around. A properly sized hood also keeps the cover from pressing against your lens, which can cause condensation.
Check that your cover is the right size for your lens and camera combination. A cover that is too small will not fit properly, while one that is too large may sag and pool water. Most covers come in small, medium, and large sizes. Measure your setup from the back of the camera to the front of the lens hood to determine the right size.
Attach a microfiber cloth to your camera strap or keep one easily accessible. You will need it to wipe condensation from your viewfinder and any water that manages to sneak past your protection.
Step 2: Install the Rain Cover Before You Need It
The biggest mistake photographers make is waiting until it starts raining to put on their rain cover. By then, your hands are wet, your camera is already getting splashed, and fumbling with a cover becomes difficult. Install your cover at the first sign of threatening weather.
Slide the cover over your camera from the back. Most covers have a designated front opening for your lens. Guide your lens through this opening first, then work the cover back over the camera body. If your cover has a drawstring, keep it loose until the cover is properly positioned.
For covers with arm sleeves, thread your dominant hand through first. This lets you maintain control of the camera while adjusting the rest of the cover with your other hand. Position the arm sleeve so your hand can reach the shutter button and main control dial comfortably.
Step 3: Secure the Cover Around Your Lens
Tighten the drawstring or fasten the velcro closure around your lens hood, not the lens barrel itself. The hood provides a larger, more stable surface for the closure to grip. If you tighten directly on the lens, the cover may slip forward during shooting.
Check that the cover extends past the front of your lens hood by at least an inch. This overlap prevents rain from blowing directly onto your front element. Some photographers add a UV filter as extra protection for their front element in case any water gets through.
If your cover has an elastic band instead of a drawstring, position it carefully. Elastic bands work well but can slip on smooth lens surfaces. The texture of a lens hood provides better grip for elastic closures.
Step 4: Position the Viewfinder Opening
Most quality rain covers include an opening for your viewfinder. Position this opening directly over your viewfinder eyepiece. Some covers have a clear plastic window that lets you see through the viewfinder while keeping rain out.
If your cover has a large viewfinder opening that exposes your eye to rain, consider wearing a hat with a brim. The brim channels water away from your face and keeps rain from dripping into the viewfinder area while you compose your shot.
For cameras with electronic viewfinders, the clear window approach works well. Optical viewfinders may require you to press your eye closer to compensate for the plastic layer. Take a moment to adjust to this slight difference before your shoot begins.
Step 5: Test Your Access to Controls
Before you start shooting, verify that you can reach all essential controls. Can you adjust your shutter speed and aperture? Can you access your ISO button and exposure compensation dial? Can you review images on your LCD screen?
Touchscreens present the biggest challenge with rain covers. The plastic layer interferes with capacitive touch sensitivity. Practice using your camera with the cover on before you are in a critical shooting situation. Some photographers switch to using physical buttons exclusively when shooting in rain.
If your cover has clear windows, position them over your LCD screen and any buttons you need to see. Budget covers often have limited visibility, so memorize button locations before covering your camera. Muscle memory becomes essential when you cannot see your controls.
Step 6: Shoot with Confidence
With your cover properly installed, you can focus on photography instead of worrying about your gear. Keep your movements deliberate to avoid dislodging the cover. Check periodically that water is not pooling on top of the cover or seeping through openings.
If you need to change lenses, move to a sheltered area first. Never change lenses in the rain, even with a cover on. The moment your sensor is exposed, it becomes vulnerable to water damage. Plan your lens choices before heading out to minimize the need for changes.
When using a tripod, position the cover so the tripod mount remains accessible. Some covers have dedicated openings for tripod plates. If yours does not, carefully position the cover to avoid blocking the mounting point.
Step 7: Remove and Dry Your Gear Properly
When you finish shooting, remove the cover in a dry location. Do not remove it while still standing in the rain. Carefully peel the cover back, allowing any water on the surface to drip away from your camera.
Wipe down your camera and lens with a microfiber cloth immediately after removing the cover. Check for any moisture that may have penetrated and dry it promptly. Leave your camera out of its bag to air dry completely before storing it.
Allow your rain cover to dry fully before packing it away. Storing a wet cover can lead to mold and unpleasant odors. Most covers dry quickly when hung in a well-ventilated area.
Essential Tips for Shooting in Wet Weather
Protecting your gear is only half the battle. Shooting in rain requires different techniques than fair weather photography. Here are the techniques I use to capture compelling images in wet conditions.
Camera Settings for Rain Photography
Your shutter speed choice determines how rain appears in your images. Fast shutter speeds of 1/500 or higher freeze raindrops as sharp streaks or dots. Slower speeds around 1/60 turn rain into long streaks that show the motion and direction of the fall. Experiment with different speeds to achieve the effect you want.
Aperture affects depth of field and how visible raindrops appear in your frame. A wide aperture like f/2.8 creates a shallow depth of field that can make foreground raindrops appear as soft bokeh while keeping your subject sharp. Smaller apertures render more of the rain in focus, which can be distracting or dramatic depending on your vision.
Overcast rainy days provide soft, even light that is excellent for portraits and details. However, the reduced light means you may need to raise your ISO. Do not be afraid to push your ISO higher than usual. Modern cameras handle high ISO well, and a bit of noise is preferable to a blurry shot from too slow a shutter speed.
Capturing Raindrops Effectively
Raindrops are nearly invisible against light backgrounds. Position your subject against darker elements like trees, buildings, or storm clouds to make the rain pop. The contrast between dark background and illuminated drops creates the most dramatic rain photography.
Backlighting transforms ordinary rain into something magical. When light comes from behind the rain, each drop catches and reflects the light. This works beautifully at sunset when warm light streams through falling rain. Position yourself so the light source is behind the rain but not directly in your frame.
Using flash can make raindrops visible, but it requires careful technique. Direct flash creates harsh, unflattering reflections off each drop. Bounce your flash or use a diffuser to soften the light. Lower your flash power so it just adds a touch of illumination rather than overpowering the ambient light.
The Importance of a Lens Hood
Your lens hood does more than prevent flare. In rainy conditions, it keeps water off your front element, which is critical for sharp images. Every drop on your lens creates soft spots and flare in your images. A properly sized hood provides significant protection.
If you must shoot without a hood, constantly check your front element and wipe it with your microfiber cloth. Even small drops can ruin an otherwise perfect shot. I keep my cloth draped over my left hand while shooting so I can quickly wipe without searching for it.
Working with Your Microfiber Cloth
A microfiber cloth is your most essential accessory for rain photography. Use it to wipe your viewfinder, your front element, and any condensation that forms on your LCD screen. Carry at least two cloths, as one will quickly become too wet to be effective.
Attach your cloth to your camera strap with a small clip or carabiner. This keeps it instantly accessible and prevents it from blowing away in wind. Some photographers tuck the cloth into their sleeve for even faster access.
Common Mistakes to Avoid When Using Camera Rain Covers
Even experienced photographers make errors when shooting in rain. Learn from these common mistakes to protect your gear and get better results.
Condensation Buildup Inside the Cover
The most frustrating issue with rain covers is condensation forming on the inside. This happens when warm, moist air from your hands and breath gets trapped inside the cover. The temperature difference between inside and outside causes moisture to condense on your camera.
To prevent this, avoid putting your ungloved hand inside the cover for extended periods. Your body heat and sweat introduce moisture that has nowhere to escape. Use the arm sleeve openings as designed, with your hand entering through the proper port rather than slipping inside the main cover.
Some photographers add small silica gel packets inside their rain covers to absorb moisture. This helps in humid conditions but requires replacing the packets periodically as they become saturated.
Choosing the Wrong Size
A rain cover that is too small will not fit over your camera and lens combination. Forcing it risks tearing the material and exposing your gear to water. Always measure your setup before purchasing and err on the side of slightly larger rather than smaller.
Covers that are too large present different problems. Excess material can sag and pool water, which eventually finds its way to your camera. Large covers also catch more wind, making them harder to control in stormy conditions. Drawstrings help adjust the fit, but starting with the right size is always better.
Touchscreen Frustration
Most rain covers interfere with touchscreen operation to some degree. The plastic layer creates a barrier that reduces sensitivity. Photographers who rely heavily on touchscreens for focusing and menu navigation often struggle in wet conditions.
Before your shoot, practice using physical buttons for essential functions. Learn to change settings without touching the screen. If you must use the touchscreen, press slightly harder than usual and be patient with the reduced responsiveness. Some newer covers claim better touchscreen compatibility, but results vary.
Noise Problems for Wildlife Photography
Budget plastic rain covers make noise. Every movement creates a rustling sound that can spook wildlife and ruin your chances of getting close to shy subjects. For wildlife photography, invest in a quieter cover or use fabric covers specifically designed to minimize noise.
The OP/TECH sleeves I mentioned earlier work well for many situations but do rustle. Lenscoat covers use softer materials that are significantly quieter. If you shoot wildlife regularly in wet conditions, the investment in a quality, quiet cover pays off quickly.
Forgetting Post-Shoot Care
The protection does not end when you stop shooting. Many photographers make the mistake of putting wet gear directly into their camera bags. This traps moisture against your equipment and can lead to mold, corrosion, and permanent damage.
Always dry your gear thoroughly before storage. Remove memory cards and batteries to allow air circulation. Leave battery and card doors open to promote drying. If you suspect any water got inside your camera, place it in a bag with silica gel packets for 24 hours to draw out moisture.
Frequently Asked Questions
How to shoot pictures even when it’s wet?
To shoot pictures in wet weather, use a camera rain cover to protect your equipment, attach a lens hood to keep water off your front element, and carry microfiber cloths for wiping your lens and viewfinder. Choose a rain cover with clear windows so you can see your controls, and practice installing it before you need it. For the actual photography, use faster shutter speeds to freeze raindrops or slower speeds to show motion, and position subjects against dark backgrounds to make the rain visible in your images.
How to use a camera rain cover?
First, attach your lens hood and prepare your cover in a dry location. Slide the cover over your camera from back to front, guiding your lens through the front opening. Secure the drawstring or closure around your lens hood. Position the viewfinder opening over your eyepiece. Thread your hand through any arm sleeve for control access. Test that you can reach essential buttons before heading into rain. Remove the cover only in a dry location and wipe down your gear immediately after use.
Do camera rain covers work?
Yes, camera rain covers work effectively to protect your equipment from water damage. They create a waterproof barrier over your camera while allowing you to continue operating controls. Budget covers work well for light to moderate rain, while professional covers handle heavy downpours and extended exposure. The key is proper installation before rain starts and ensuring the cover fits your specific camera and lens combination. Even weather-sealed cameras benefit from rain covers in sustained wet conditions.
Are camera rain covers necessary with weather sealed cameras?
Weather-sealed cameras have rubber gaskets and sealed buttons that resist dust and moisture, but they are not waterproof. Weather sealing handles light rain and occasional splashes, not sustained heavy downpours. Salt water and spray pose particular risks even to sealed cameras. A rain cover adds an extra layer of protection that can prevent expensive repairs. For professional work or any situation where you cannot afford equipment failure, using a rain cover with a weather-sealed camera is wise insurance.
How do I prevent condensation inside my rain cover?
Condensation forms when warm, moist air from your hands and breath gets trapped inside the cover. To prevent it, avoid putting ungloved hands inside the cover for extended periods and use the arm sleeve openings as designed. Some photographers add silica gel packets inside their covers to absorb moisture. Choose covers with ventilation if available, and work efficiently to minimize time in humid conditions. If condensation appears, open the cover briefly in a sheltered spot to let moist air escape.
Conclusion
Shooting in rain opens up creative possibilities that fair weather cannot match. With the right camera rain cover and proper technique, you can capture these moments without risking your equipment. Remember to install your cover before the rain starts, choose the right size for your gear, and always dry your equipment thoroughly after shooting. Practice these steps at home so they become second nature before you need them in the field. The next time storm clouds gather, you will be ready to head out and create compelling wet weather photography instead of watching the rain from indoors.