I’ve been photographing for over a decade, and one of the most heartbreaking stories I ever heard was from a fellow photographer who lost 12 years of wedding photos because of a single hard drive failure. No warning. No second chance. Just gone. That story changed how I think about storing my work and my memories forever.
If you shoot RAW files, travel with your gear, or simply have years of family photos on a single drive, you are one hardware failure — or one ransomware attack — away from losing everything. The good news is there is a proven, simple system that virtually eliminates that risk: the 3-2-1 backup strategy.
In this guide, I will walk you through exactly how to set up a 3-2-1 backup strategy to protect your photo library from data loss, whether you are a weekend shooter or a full-time professional.
What Is the 3-2-1 Backup Rule for Photos?
The 3-2-1 backup rule is a data protection strategy that keeps three copies of your data across two different types of storage media, with at least one copy stored off-site. It was originally developed for enterprise IT systems, but photographers quickly adopted it because it solves the exact problem of irreplaceable files.
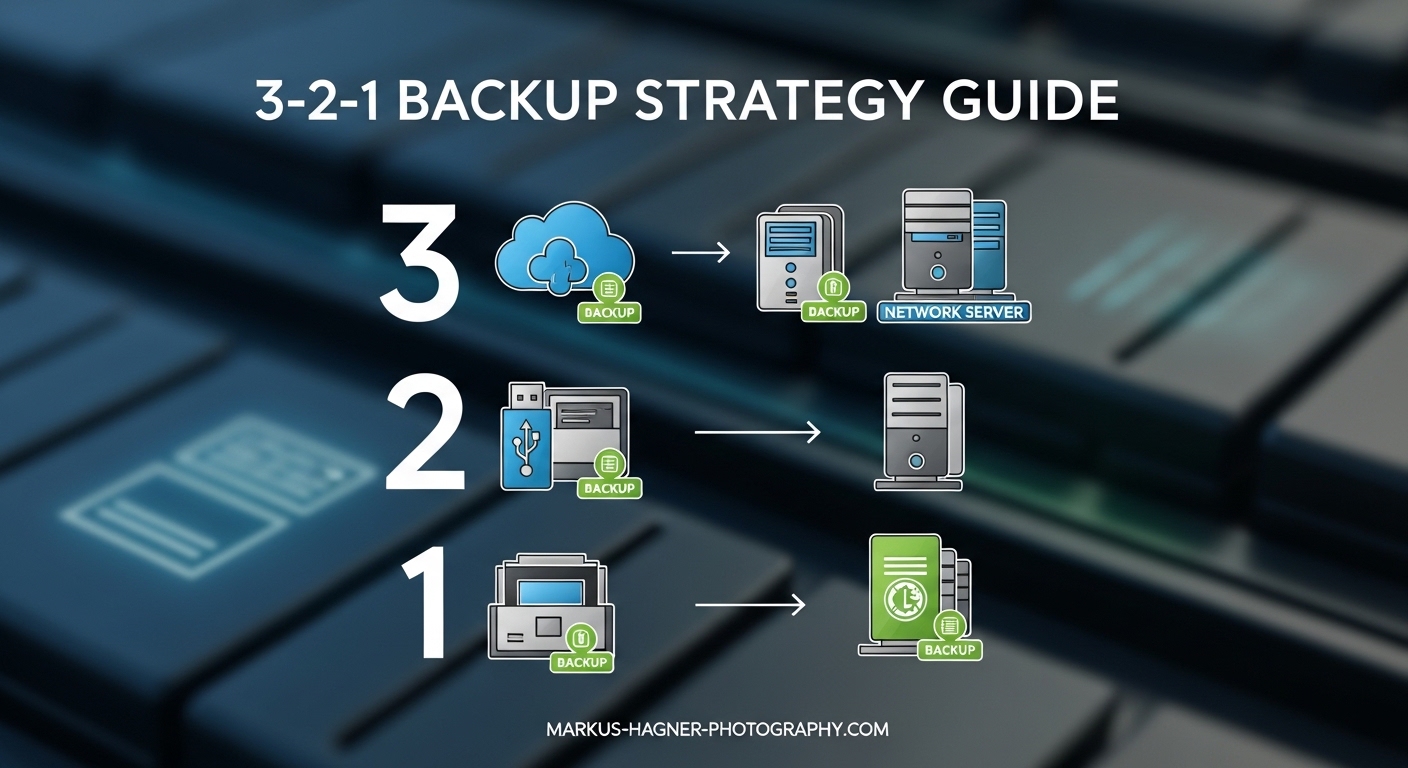
Here is what the three numbers mean:
- 3 copies of your data — your original working copy plus two independent backups
- 2 different storage media types — for example, an internal SSD and an external hard drive (not two of the same kind)
- 1 copy stored off-site — in a physically separate location, such as cloud storage or a drive kept at a different address
The logic is elegant in its simplicity. Having three copies means a single failure never wipes everything out. Using two different media types protects against media-specific failures (such as all your external drives dying in a flood). Keeping one copy off-site protects against location-specific disasters like fire, theft, or flooding.
According to guidelines from NIST and US-CERT, the 3-2-1 rule is still considered the baseline standard for personal data protection in 2026. Many professional photographers swear by it as the minimum acceptable setup.
Why Your Photo Library Needs a Proper Backup Strategy
Hard drives fail at a rate of 1–5% per year, depending on the manufacturer and age. If you have four drives running simultaneously in your studio — which is common for photographers storing large RAW archives — the statistical probability of at least one failure within five years is significant.
But hardware failure is only one of the threats your photo library faces. Here are the real risks:
- Hard drive and SSD failure — SSDs can fail suddenly without warning; HDDs often degrade over time but can also fail instantly
- Accidental deletion — one wrong click in Lightroom or Finder can permanently delete a folder of RAW files
- Ransomware attacks — malware encrypts your files and demands payment; it can spread to all drives connected to your computer
- Fire, flood, or theft — physical disasters destroy everything in one location simultaneously
- Software corruption — Lightroom catalog corruption or a bad firmware update can make files inaccessible
RAW files make this especially critical. A 45-megapixel RAW file can be 50–100 MB. A single shoot can generate 20–40 GB of data. But unlike a JPEG, a corrupted or lost RAW file has no “camera original” to recover — it is truly irreplaceable.
Beyond the technical risks, there is the emotional reality. Your personal photo library contains memories you cannot recreate: your children growing up, your grandmother’s last birthday, the trip you saved for years to take. Photographers on Reddit’s r/DataHoarder community consistently say that the fear of losing those images — not professional work — is what finally motivated them to set up proper backups.
How to Set Up a 3-2-1 Backup Strategy to Protect Your Photo Library from Data Loss
Setting up this system is simpler than most people expect. You need three components working together. Here is a step-by-step approach that works whether you are on Mac or Windows.
Step 1: Organize Your Primary Working Copy
Your primary copy is wherever your photos currently live — typically on your computer’s internal drive or an attached external SSD. This is the working copy you edit from, not a backup.
Before you set up backups, organize this copy well. Use a consistent folder structure (I use Year/Month/Shoot Name) and decide whether your photos will live on your internal drive or an external drive. The clearer this structure, the easier automation becomes later.
If your internal drive is filling up, move your library to an external SSD connected via USB 3.0 or Thunderbolt. Just make sure this primary copy is always accessible and current — it is the master version everything else copies from.
Step 2: Create a Local Backup on Different Media
Your second copy should be on different physical media than your primary. If your working copy is on an internal SSD, your local backup should be on an external hard drive (HDD), not another SSD in the same enclosure.
For Mac users, Time Machine is the simplest solution. Connect an external drive, enable Time Machine in System Settings, and it will automatically back up your library incrementally every hour. It also keeps version history, so you can recover a file you accidentally deleted three days ago.
For Windows users, File History works similarly. Set it to run every hour and point it at your photo folder. Both solutions are free and built into the operating system.
If you want a more robust setup, backup software like GoodSync, Arq, or Carbon Copy Cloner gives you more control over scheduling, filtering by file type, and managing incremental versus full backups. I run Carbon Copy Cloner on my Mac and schedule a full backup every night at 2 am.
Step 3: Add an Off-Site Backup (Cloud or Remote Drive)
This is the component most photographers skip — and the one that matters most when disaster strikes. Your off-site copy needs to be in a completely different physical location from the other two.
Cloud storage is the easiest way to achieve this. Services like Backblaze Personal Backup, Amazon Photos, or Google Photos automatically upload your library in the background. Once set up, this copy is maintained without any effort on your part.
Alternatively, if you have a family member or trusted friend with a spare external drive and decent internet, you could keep a rotating drive at their home. Swap it every few weeks or months. This is more work, but it is a valid off-site backup that costs almost nothing beyond the drive itself.
Step 4: Automate and Test Your Backups
The biggest pain point I see in photographer communities is that manual backups get skipped. Life gets busy. A month goes by without a backup. Then something fails.
Automate everything you can. Use Time Machine or File History for your local backup. Use a cloud service with continuous sync for your off-site backup. Set a calendar reminder quarterly to actually test that you can restore a file from each backup location.
A backup you cannot restore from is not a backup. Testing is not optional — it is the step that turns your setup from a false sense of security into actual protection.
Cloud Storage Options for Photographers
Choosing the right cloud storage for your photo library depends heavily on whether you shoot RAW, how large your library is, and your budget. Here is how the main options compare for photographers specifically:
Amazon Photos (Unlimited Photo Storage with Prime)
Amazon Photos offers unlimited full-resolution photo storage included with an Amazon Prime subscription. For JPEG shooters, this is an extraordinary deal — truly unlimited photos at no additional cost. However, RAW files count toward your 5 GB free storage limit and are not covered by the unlimited plan unless you pay for additional storage.
If you shoot primarily JPEG or want to store JPEG exports from your RAW workflow, Amazon Photos is the best value available. It also preserves original metadata and does not compress your images.
Backblaze Personal Backup
Backblaze is widely regarded as the best value for photographers who shoot RAW. For a flat monthly fee (around $9 per month as of 2026), it backs up your entire computer — including all attached external drives — with no storage cap. It backs up RAW files, PSDs, Lightroom catalogs, everything.
Setup takes about 10 minutes. After the initial backup (which can take days or weeks depending on your library size and internet speed), it runs continuously in the background. Restores can be done by downloading files or by having Backblaze mail you a physical drive. For serious photographers, Backblaze is the single best off-site backup investment you can make.
Google Photos
Google Photos offers 15 GB free, with paid plans through Google One starting at competitive monthly rates. It has excellent search and organization tools, but it does not support true RAW file backup — it will store the file but may not preserve the full RAW data in all cases. Better suited for a secondary cloud copy of JPEG exports than your primary off-site backup for RAW files.
iCloud Photos
For Apple-ecosystem photographers using iPhone and iPad alongside their mirrorless camera, iCloud Photos works seamlessly. It syncs your iPhone photos across all Apple devices automatically. However, iCloud syncs — it does not independently back up. If you delete a photo on one device, it is deleted everywhere. More on this distinction in the sync vs. backup section below.
Backblaze B2 / Cloud Object Storage
For professional photographers with multi-terabyte libraries, cloud object storage (Backblaze B2, Amazon S3, Wasabi) offers very low per-terabyte storage costs. The tradeoff is more complex setup — you need software like Arq or Rclone to manage uploads. But at scale, this approach can be significantly cheaper than consumer cloud services.
Local Backup Options: External Drives and NAS
Your local (on-site) backup forms the second copy in your 3-2-1 setup. For most photographers, an external hard drive is the right starting point. For professionals with larger libraries, a NAS (Network Attached Storage) device is worth considering.
External Hard Drives
A 4 TB external HDD costs well under $100 and is more than enough storage for most amateur and enthusiast photographers. HDDs are slower than SSDs but are significantly more cost-effective per gigabyte, which matters when you are storing terabytes of RAW files. Brands like Western Digital My Passport or Seagate Backup Plus are reliable choices for backup use.
If your primary copy is already on an external SSD, your local backup should ideally be on a different type — an HDD — to satisfy the “2 different media types” requirement of the 3-2-1 rule. Using two SSDs from the same manufacturer of the same age is slightly less ideal because they may share failure modes.
NAS with RAID for Professional Photographers
A NAS device is a small always-on server that connects to your home network and stores multiple drives. When configured with RAID 5 or RAID 6, it can survive one (or two) drive failures without data loss because the data is spread across multiple drives with redundancy.
Popular NAS options from Synology and QNAP start around $300–500 for the enclosure, plus the cost of drives. They support automated backup from your computer, cloud sync to off-site services, and remote access to your files.
One important note: RAID is not a backup. RAID protects against drive failure but not against accidental deletion, ransomware, or theft. A NAS with RAID should serve as your local backup copy in the 3-2-1 system — not as a replacement for having an off-site copy as well.
A Real-World Example: My Personal Photo Backup Setup
I want to be transparent about how I actually run my own photo backup system, because I think concrete examples are more useful than abstract advice.
My setup looks like this: My primary working copy lives on a 4 TB Samsung T7 Shield external SSD connected to my MacBook via Thunderbolt. This is where my Lightroom catalog and all my RAW files live.
My local backup is a Synology DS223j NAS running two 8 TB WD Red drives in RAID 1 (mirroring). Carbon Copy Cloner backs up my primary SSD to the NAS every night at 2 am. If a drive in the NAS dies, the second drive has a complete copy.
My off-site backup is Backblaze Personal Backup. It runs continuously and has a complete backup of my entire primary SSD — RAW files, Lightroom catalog, and everything else — stored on Backblaze’s servers. My initial backup took about three weeks on my home internet connection. Now it just stays current automatically.
This setup costs me roughly $9 per month for Backblaze plus the one-time hardware costs. For the peace of mind of knowing that even if my house burned down, my entire photo library would be recoverable, that is money I consider extremely well spent.
Going Further: The 3-2-1-1-0 Strategy
If you are a professional photographer or someone with a very large, irreplaceable archive, the 3-2-1 rule has an evolution worth knowing about: the 3-2-1-1-0 strategy.
The two additional numbers add:
- 1 immutable or air-gapped copy — a backup that cannot be modified or deleted by ransomware because it is either stored offline (a disconnected drive) or in write-once cloud storage (like Backblaze Object Lock)
- 0 errors after verification — all backups are tested and verified to restore successfully with zero errors
The immutable copy addresses the increasingly common ransomware threat. Standard 3-2-1 setups can fail against ransomware if the malware reaches all connected or synced drives. An offline drive or object-locked cloud copy is immune to this attack.
For most enthusiast photographers, true 3-2-1 is sufficient. For professionals whose entire income and archive depend on their files, 3-2-1-1-0 is the standard to aim for.
Sync vs. Backup: Understanding the Difference
This is one of the most common points of confusion I see in photography forums, and getting it wrong gives you a false sense of security. Synchronization and backup are not the same thing.
Sync mirrors your data in real time across devices or locations. If you delete a photo on your computer, that deletion syncs everywhere. iCloud Photos, Google Photos sync, and Dropbox all work this way. They are convenient for accessing your files from multiple devices — but they are not backups.
Backup creates an independent copy that does not immediately reflect deletions or changes. Time Machine, Carbon Copy Cloner, and Backblaze are backups. If you accidentally delete a folder of RAW files today, you can still recover it from a backup you made yesterday.
Many photographers think their iCloud account protects them. It does not — not in the way a backup does. If you shoot 500 photos on your iPhone, they sync to iCloud. If you then accidentally delete them all, they are deleted from iCloud too (though iCloud does have a 30-day recently deleted folder). Always pair sync with a dedicated backup system.
Frequently Asked Questions
What is the 3-2-1 backup rule for photos?
The 3-2-1 backup rule means keeping 3 copies of your photos, on 2 different types of storage media, with 1 copy stored off-site. For example: your working copy on an internal SSD, a local backup on an external hard drive, and a cloud backup like Backblaze for your off-site copy.
Can I rely solely on cloud storage for backing up my photos?
No. Relying on cloud storage alone violates the 3-2-1 rule and creates a single point of failure. Cloud services can experience outages, account closures, or price changes. You should always have at least one local copy alongside your cloud backup.
How often should I back up my photos?
After every shoot, at minimum. Ideally, your local backup should run automatically every day (Time Machine runs hourly by default), and your cloud backup should run continuously in the background. The longer the gap between backups, the more photos you risk losing.
What is the difference between synchronisation and a backup?
Sync mirrors your files in real time — if you delete a file, that deletion spreads to all synced locations. A backup keeps an independent copy that does not immediately reflect deletions. iCloud Photos and Google Photos sync your library but are not substitutes for a proper backup.
Why is it important to have both off-site and on-site backup strategies?
On-site backups are fast to recover from but vulnerable to the same physical disasters as your primary copy — fire, flood, and theft can destroy both simultaneously. Off-site backups (cloud or a drive stored elsewhere) protect against location-based disasters. You need both to be fully protected.
Start Protecting Your Photo Library Today
The 3-2-1 backup strategy to protect your photo library from data loss is not complicated — it just requires you to act before disaster strikes, not after.
Start simple. This week, set up one local backup with Time Machine or File History, and sign up for Backblaze or Amazon Photos as your off-site copy. That alone puts you in a vastly better position than the single-drive setup most photographers are running right now.
Then refine over time. Add a NAS if your library grows. Upgrade to a 3-2-1-1-0 system if your work becomes your livelihood. Test your restores every few months to make sure your backups actually work.
The photographer who lost 12 years of wedding photos had one copy on one drive. You are reading this guide, which means you have the chance to make a different choice. The time to set up your backup system is now — not the day after something goes wrong.