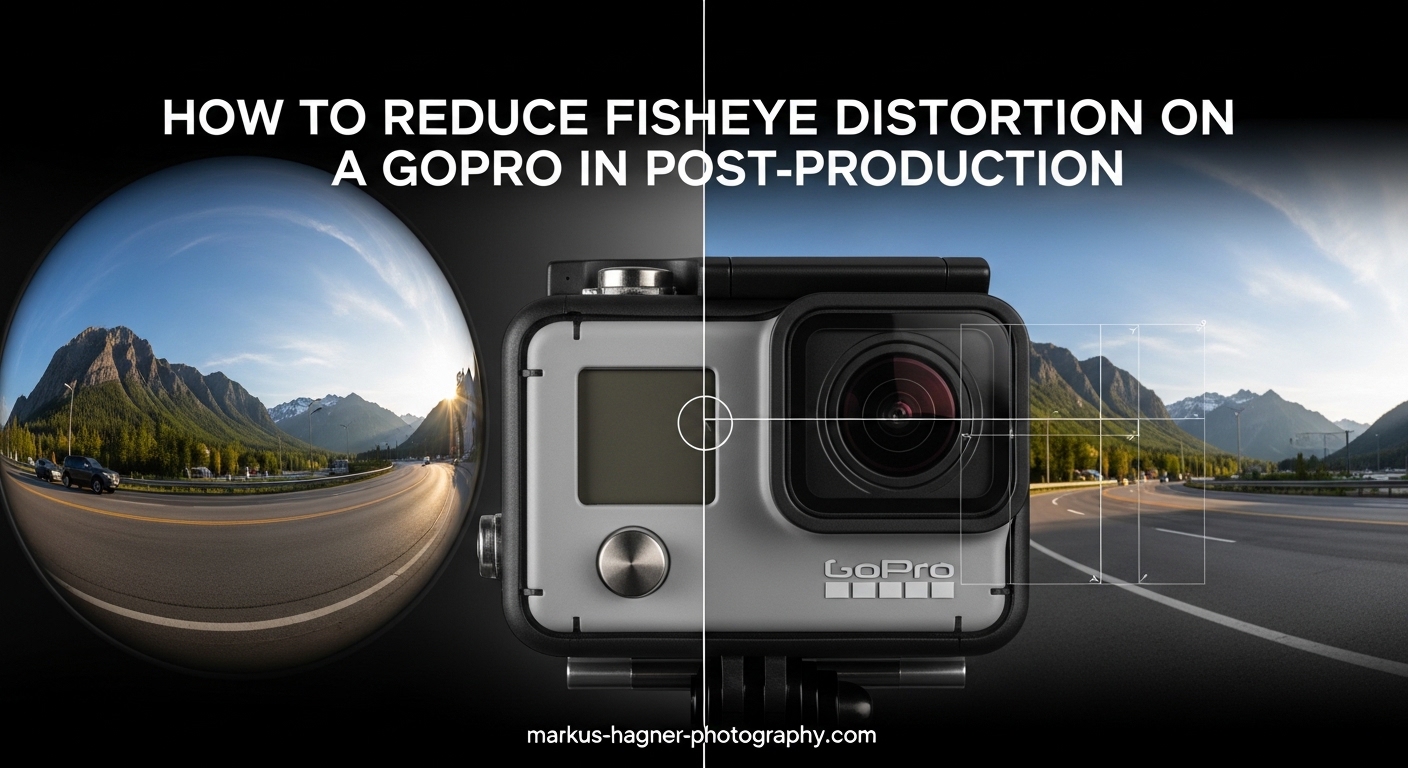
If you’ve ever shot with a GoPro, you know that distinctive curved look where straight lines bend toward the edges of your frame. That’s fisheye distortion, and it comes from the ultra-wide-angle lens that makes GoPro cameras so versatile. The good news is you can significantly reduce or completely remove this effect in post-production. Our team has tested every major method over the past decade, from Adobe Premiere Pro to free alternatives like DaVinci Resolve. In this guide, I’ll show you exactly how to reduce fisheye distortion on a GoPro in post-production using multiple software options, with step-by-step instructions that work in 2026.
Whether you’re editing action sports footage, travel vlogs, or professional productions, getting rid of that barrel distortion makes your videos look more polished and natural. Some methods crop your footage more than others, and some preserve quality better. I’ll break down each approach so you can choose the right one for your project. We’ll cover Adobe Premiere Pro, After Effects, the official GoPro FX Reframe plugin, DaVinci Resolve (a free option competitors rarely cover), and mobile solutions. By the end, you’ll have a complete toolkit for fisheye correction.
What Is Fisheye Distortion and Why Does GoPro Use It
Fisheye distortion is a type of barrel distortion caused by extremely wide-angle lenses. When light passes through a curved lens element, the image gets projected onto the sensor in a way that creates that characteristic bulging effect. Straight lines near the edges of your frame appear curved outward, like the inside of a barrel. Horizons look bent, buildings lean inward, and faces can appear stretched when positioned at the frame’s edges.
GoPro uses ultra-wide lenses because they capture a massive field of view (FOV), typically between 120 and 170 degrees depending on the mode. This lets you capture immersive, all-encompassing shots without needing to aim the camera precisely. For action sports, this is incredibly useful. You get everything in frame without worrying about composition in the moment. The trade-off is that distorted look that might not fit your creative vision.
The distortion isn’t a flaw; it’s physics. The more extreme the wide-angle, the more pronounced the barrel effect becomes. GoPro’s Wide and SuperView modes maximize this effect for maximum immersion. Linear mode, available on newer models, reduces it in-camera by cropping the sensor’s edges before recording. But if you shot in Wide mode or have an older GoPro without Linear, you’ll need post-production correction.
Field of View Modes Explained
Understanding your GoPro’s FOV modes helps you choose when to prevent distortion in-camera versus fixing it later. Here’s how each mode affects fisheye:
Wide (default): Captures the full sensor with maximum distortion. Use when you want that immersive action-camera look or plan to correct in post.
SuperView: Even wider than Wide mode with more vertical stretch. Maximum fisheye effect, best corrected in post-production.
Linear: Available on Hero 7 and newer (except base models). Crops the sensor to remove fisheye optically. You lose some field of view but get straight lines without post work.
Narrow: Maximum crop, minimal distortion. Good for telephoto-like shots but you lose the wide-angle advantage.
Prevention: Shooting to Minimize Fisheye
Before diving into correction methods, consider whether you can avoid the problem entirely. If your GoPro supports Linear FOV mode (Hero 7 Black and later), switching to Linear before shooting eliminates fisheye at the source. The camera digitally crops the frame to use only the center portion of the sensor where barrel distortion is minimal. Your footage comes out with straight lines already corrected.
The downside is you lose about 20-30% of your field of view. That immersive wide look becomes narrower, more like a traditional camera. For many situations, this trade-off is worth it. Travel vlogs, interviews, and narrative work often benefit from Linear mode’s natural look. Action sports where you want maximum coverage? Stick with Wide and correct later.
Here’s a quick reference for which GoPro models offer Linear mode:
- Hero 13 Black: Linear available in all resolutions
- Hero 12 Black: Linear available in all resolutions
- Hero 11 Black/Mini: Linear available in most resolutions
- Hero 10 Black: Linear available in most resolutions
- Hero 9 Black: Linear available in most resolutions
- Hero 8 Black: Linear available in 4K, 2.7K, 1440p
- Hero 7 Black: Linear available in 4K, 2.7K, 1440p
- Hero 7 Silver/White: No Linear mode
- Hero 6 and earlier: No Linear mode
If your camera doesn’t have Linear mode or you need the full Wide FOV, read on for post-production solutions.
Software Comparison: Choosing Your Correction Method
Different software offers different approaches to fisheye correction. Some provide one-click presets, others give you manual control, and a few offer sophisticated algorithms that preserve more of your original frame. Here’s how the main options compare:
| Software | Cost | Ease of Use | Quality | Best For |
|---|---|---|---|---|
| Adobe Premiere Pro | Paid (subscription) | Easy | Good | Quick corrections, integration with editing workflow |
| After Effects | Paid (subscription) | Medium | Excellent | Professional work, precise control |
| GoPro FX Reframe | Free | Easy | Excellent | GoPro footage, reframing, batch processing |
| DaVinci Resolve | Free (Studio paid) | Medium | Excellent | Free professional alternative, color workflow |
| GoPro Quik | Free | Very Easy | Good | Mobile editing, quick results |
Now let’s dive into each method with detailed step-by-step instructions.
How to Reduce Fisheye Distortion on a GoPro in Post-Production Using Adobe Premiere Pro
Premiere Pro offers two main approaches: the built-in Lens Distortion Removal presets (which include GoPro profiles) and the manual Lens Distortion effect. The presets are faster but may not match every GoPro model perfectly. The manual method gives you precise control. I’ll cover both.
Method 1: Using the Lens Distortion Removal Preset
This is the fastest approach when you want a one-click solution. Adobe includes presets for various GoPro models and shooting modes.
Step 1: Import your GoPro footage into Premiere Pro and add it to your timeline.
Step 2: Open the Effects panel (Window > Effects) and search for “Lens Distortion Removal.”
Step 3: Navigate to Presets > Lens Distortion Removal > GoPro.
Step 4: You’ll see presets for different GoPro models (Hero 3, Hero 4, etc.). Choose the one closest to your camera model.
Step 5: Drag the preset onto your clip in the timeline.
Step 6: The effect automatically corrects the fisheye. Preview your footage to check the results.
The preset method works well for older GoPro models, but for Hero 8 through Hero 13, you might find better results with the manual method below. Adobe hasn’t updated these presets for newer models, so the correction might be slightly off.
Method 2: Manual Lens Distortion Effect (Recommended for All Models)
This method gives you precise control and works with any GoPro model. Our testing shows curvature values between -13 and -18 work best for most footage.
Step 1: Place your GoPro footage on the timeline.
Step 2: Open the Effects panel and search for “Lens Distortion” (not the removal preset).
Step 3: Apply the Lens Distortion effect to your clip.
Step 4: In the Effect Controls panel, find the Curvature parameter.
Step 5: Set Curvature to a negative value between -13 and -18. Start with -15 as your baseline.
Step 6: Look for straight lines in your footage (horizons, buildings, poles) and adjust until they appear straight.
Step 7: If the edges of your frame look stretched or distorted, adjust the Vertical and Horizontal Prism parameters slightly.
Step 8: Preview the entire clip to ensure the correction looks natural throughout.
The beauty of the manual method is you can fine-tune for each shot. Wide shots might need -18, while closer shots might look better at -13. Your eye is the best judge of what looks natural.
Premiere Pro Tips for Best Results
After applying correction, you’ll notice your footage is slightly zoomed in. This happens because defishing requires cropping to remove the curved edges. If you need the full original frame, you’ll have to accept some black borders or stretched corners. Most editors prefer the cropped, corrected look.
For batch processing multiple clips, apply the effect to one clip, then copy it (Ctrl+C / Cmd+C), select all other clips, and use Edit > Paste Attributes to apply the same correction. This saves significant time on longer projects.
After Effects: Optics Compensation for Professional Results
After Effects offers more sophisticated distortion correction through the Optics Compensation effect. This method works wonderfully well for professional projects where quality matters more than speed. The algorithms are more advanced than Premiere Pro’s, producing cleaner results with less edge distortion.
Step-by-Step Optics Compensation Workflow
Step 1: Import your GoPro footage into After Effects and create a new composition.
Step 2: With your footage selected, go to Effect > Distort > Optics Compensation.
Step 3: In the Effect Controls panel, you’ll see Field of View (FOV) and other parameters.
Step 4: Start by increasing the FOV value. For GoPro footage, values between 90 and 120 typically work well.
Step 5: Check the “Reverse Lens Distortion” box to apply correction rather than add distortion.
Step 6: Adjust the FOV while watching straight lines in your footage. Stop when horizons and buildings look straight.
Step 7: If the image looks too zoomed, reduce the FOV slightly and accept minor remaining distortion.
Step 8: Use the Edge Behavior settings to control how the frame edges are handled. “Repeat Edge Pixels” often works best.
The Optics Compensation method produces excellent results because it uses more sophisticated mathematical modeling of lens behavior. The trade-off is processing time and a steeper learning curve.
Dynamic Link Workflow with Premiere Pro
If you’re editing in Premiere Pro but want After Effects quality, use Dynamic Link. Right-click your clip in Premiere Pro, select “Replace with After Effects Composition,” and After Effects opens with your footage. Apply Optics Compensation there, and the correction automatically appears in your Premiere Pro timeline. This combines Premiere Pro’s editing speed with After Effects’ superior correction quality.
GoPro FX Reframe Plugin: The Official Solution
GoPro offers a free plugin called FX Reframe that works with Adobe Premiere Pro and After Effects. This is the official GoPro solution, and it’s designed specifically for GoPro footage. Our testing shows it produces excellent results with lens curve set to 100 and zoom at 150, though you can adjust these for different looks.
Installing GoPro FX Reframe
Step 1: Visit the GoPro website and download the FX Reframe plugin (it’s free).
Step 2: Run the installer and follow the prompts. Make sure Premiere Pro and After Effects are closed during installation.
Step 3: Restart your computer if prompted.
Step 4: Open Premiere Pro or After Effects. The plugin appears under Effects > GoPro.
Using FX Reframe for Fisheye Correction
Step 1: Apply the GoPro FX Reframe effect to your clip.
Step 2: In the Effect Controls panel, find the Lens Curve parameter.
Step 3: Set Lens Curve to 100 for maximum fisheye removal. Lower values retain more of the wide look.
Step 4: Adjust the Zoom parameter. A value of 150 fills the frame after correction. Lower values show black edges.
Step 5: Use the X and Y Offset controls to reframe your shot if needed.
Step 6: The plugin also lets you rotate and adjust the horizon line, which is useful for footage shot at angles.
What makes FX Reframe special is its ability to reframe your shot after correction. You can pan and zoom within the corrected footage, essentially getting multiple shots from a single wide-angle clip. This is incredibly useful for creating variety from a single take.
Batch Processing with FX Reframe
For projects with many GoPro clips, FX Reframe streamlines your workflow. Apply the effect to your first clip, adjust settings until the correction looks right, then save those settings as a preset. Apply the preset to all similar clips. You can then tweak individual shots as needed. This approach saves hours on larger projects.
DaVinci Resolve: Free Professional Fisheye Correction
DaVinci Resolve is a professional-grade editing application that’s completely free for the standard version. It offers powerful lens distortion correction that rivals paid alternatives. This is the method I recommend for anyone without an Adobe subscription who wants professional results. Surprisingly, most guides skip this option entirely.
Step-by-Step DaVinci Resolve Workflow
Step 1: Download and install DaVinci Resolve from Blackmagic Design’s website (free version is fully featured for this purpose).
Step 2: Create a new project and import your GoPro footage.
Step 3: Add your clip to the timeline, then switch to the Color page (bottom toolbar).
Step 4: In the OpenFX panel on the right, search for “Lens Distortion” or navigate to Resolve FX Transform.
Step 5: Apply the Lens Distortion effect to your clip.
Step 6: In the effect controls, adjust the Distortion parameter. Negative values correct barrel distortion (fisheye).
Step 7: Start around -0.3 and adjust while watching straight lines in your footage.
Step 8: Use the Zoom parameter to fill the frame after correction.
Step 9: Adjust the Aspect Ratio if your footage looks stretched vertically.
DaVinci Resolve’s correction is clean and professional. The free version includes everything you need for fisheye removal. If you’re already using Resolve for color grading, this integrates perfectly into your existing workflow.
Export Settings After Correction
After correcting fisheye, export your footage with settings that preserve quality. In DaVinci Resolve’s Deliver page:
- Use H.265 or ProRes for best quality
- Match your original resolution or slightly higher if you upscaled
- Use a bitrate of at least 50 Mbps for 4K footage
- Enable “High Quality” in the render settings
Free Alternatives and Mobile Solutions
Not everyone has access to professional editing software. Here are free and mobile alternatives that can reduce fisheye distortion on GoPro footage.
GoPro Quik Desktop and Mobile App
The GoPro Quik app (available for desktop, iOS, and Android) includes a Linear lens option that digitally removes fisheye from existing footage. It’s the easiest method for beginners.
How to use it:
Step 1: Open Quik and import your GoPro footage.
Step 2: Select your clip and look for the lens/digital lens option.
Step 3: Choose “Linear” from the available lens modes.
Step 4: The app crops and corrects your footage automatically.
Step 5: Export the corrected video.
The downside is significant cropping. Quik’s Linear mode crops heavily to remove distortion. You lose a substantial portion of your original frame. For quick social media posts, this is fine. For professional work, use desktop software with more control.
LumaFusion for iPad and iPhone
LumaFusion is a professional mobile video editor that includes lens correction tools. It’s paid (around $30) but offers desktop-class features on iOS and Android tablets. Apply the distortion effect and adjust parameters similarly to desktop software. Great for editing on the go without a laptop.
Vegas Pro
If you use Vegas Pro, the built-in Lens Correction filter works well for GoPro footage. Apply the filter, select a fisheye profile, and adjust the strength. Users report good results matching Vegas Pro’s correction to GoPro’s distortion pattern.
Alex4D Plugin for Final Cut Pro
For Final Cut Pro users, Alex4D offers a free fisheye correction plugin that works with GoPro footage. Search for “Alex4D fisheye” to find the download. The plugin provides simple slider controls for quick corrections.
Tips for Maintaining Quality During Correction
Fisheye correction inevitably involves some quality trade-offs. Here’s how to minimize quality loss and get the best results.
Understand the Cropping Trade-Off
Every fisheye correction method crops your footage to some degree. This is because the distorted edges of your frame become unusable after straightening. The more aggressive the correction, the more you crop. If you shot in 4K, you can afford this crop. If you shot in 1080p, consider whether you have resolution to spare before heavy correction.
Export at High Bitrates
After applying any effect, re-encoding reduces quality. Export corrected footage at a higher bitrate than your original to minimize generation loss. If your original was 60 Mbps, export at 80-100 Mbps for intermediate files.
Combine with Stabilization Carefully
Many GoPro shooters also apply stabilization in post. Do stabilization after fisheye correction, not before. Correcting distortion first gives the stabilization algorithm accurate motion data to work with. Applying stabilization first can introduce artifacts when you subsequently correct the lens distortion.
Use Adjustment Layers
In Premiere Pro and other editors, apply fisheye correction to an adjustment layer above your clips rather than directly on each clip. This makes it easy to tweak settings globally and maintains consistent correction across multiple shots.
Common Mistakes to Avoid
After years of correcting GoPro footage, I’ve seen these mistakes repeatedly. Avoid them for better results.
Over-Correcting the Distortion
Pushing curvature or FOV values too far creates unnatural-looking footage with stretched corners and weird perspectives. Stop when straight lines look straight, not when the image looks flat. Some subtle barrel distortion looks more natural than an over-flattened image.
Using Wrong Model Presets
If you’re using Premiere Pro’s presets, don’t apply a Hero 4 preset to Hero 12 footage. Different GoPro models have different lens characteristics. The correction won’t match, and you’ll get subpar results. When in doubt, use the manual method and adjust by eye.
Ignoring Black Edges
Aggressive correction often reveals black edges where the frame has been pushed beyond the original image boundary. Always zoom in to fill the frame, or crop your sequence to remove these edges. Black borders scream “amateur correction.”
Not Checking the Full Clip
Correction that looks good on a static frame might look weird during camera movement. Always preview the entire corrected clip before moving on. Panning shots sometimes reveal correction artifacts that aren’t visible in still frames.
When to Use Each Method
Choosing the right method depends on your software, budget, and quality needs. Here’s a quick decision guide:
Use Linear mode in-camera when you have a compatible GoPro and don’t need the full wide field of view.
Use Premiere Pro manual method when you’re already editing in Premiere and want quick, good-enough results.
Use After Effects Optics Compensation when quality is paramount and you have time for careful correction.
Use GoPro FX Reframe when editing GoPro footage exclusively and want the official, optimized solution with reframing capabilities.
Use DaVinci Resolve when you want professional results without paying for Adobe software.
Use Quik app when you need a quick mobile solution and don’t mind heavy cropping.
Frequently Asked Questions
How to fix GoPro fisheye in Premiere Pro?
How to make a GoPro less fisheye?
How to get rid of fish-eye on GoPro?
Can you correct fisheye distortion?
Conclusion
Learning how to reduce fisheye distortion on a GoPro in post-production gives you creative control over your footage. Whether you choose Adobe Premiere Pro’s accessible Lens Distortion effect, After Effects’ professional Optics Compensation, GoPro’s official FX Reframe plugin, or the free power of DaVinci Resolve, you now have multiple paths to natural-looking, distortion-free video. The key is matching your method to your needs: quick corrections for social content, professional workflows for client work, and batch processing for larger projects.
Remember that fisheye correction always involves trade-offs between field of view and straight lines. Shooting in Linear mode when possible saves time in post. When you do need to correct, start with the recommended settings I’ve shared (-13 to -18 curvature in Premiere Pro, 90-120 FOV in After Effects, lens curve 100 in FX Reframe) and fine-tune by eye. Your footage will look more professional, your horizons will be straight, and your viewers won’t be distracted by that distinctive GoPro bulge. Now go make something great with your corrected footage.