Those frustrating horizontal stripes across your indoor photos? You’re not alone. Banding in photos shot under artificial lighting is one of the most common issues photographers face when working with LED and fluorescent lights.
I’ve spent years shooting in venues with challenging lighting conditions, and I’ve learned that banding can turn a perfect shot into unusable footage. The good news is that understanding what causes banding and knowing the right techniques can help you prevent and fix this issue.
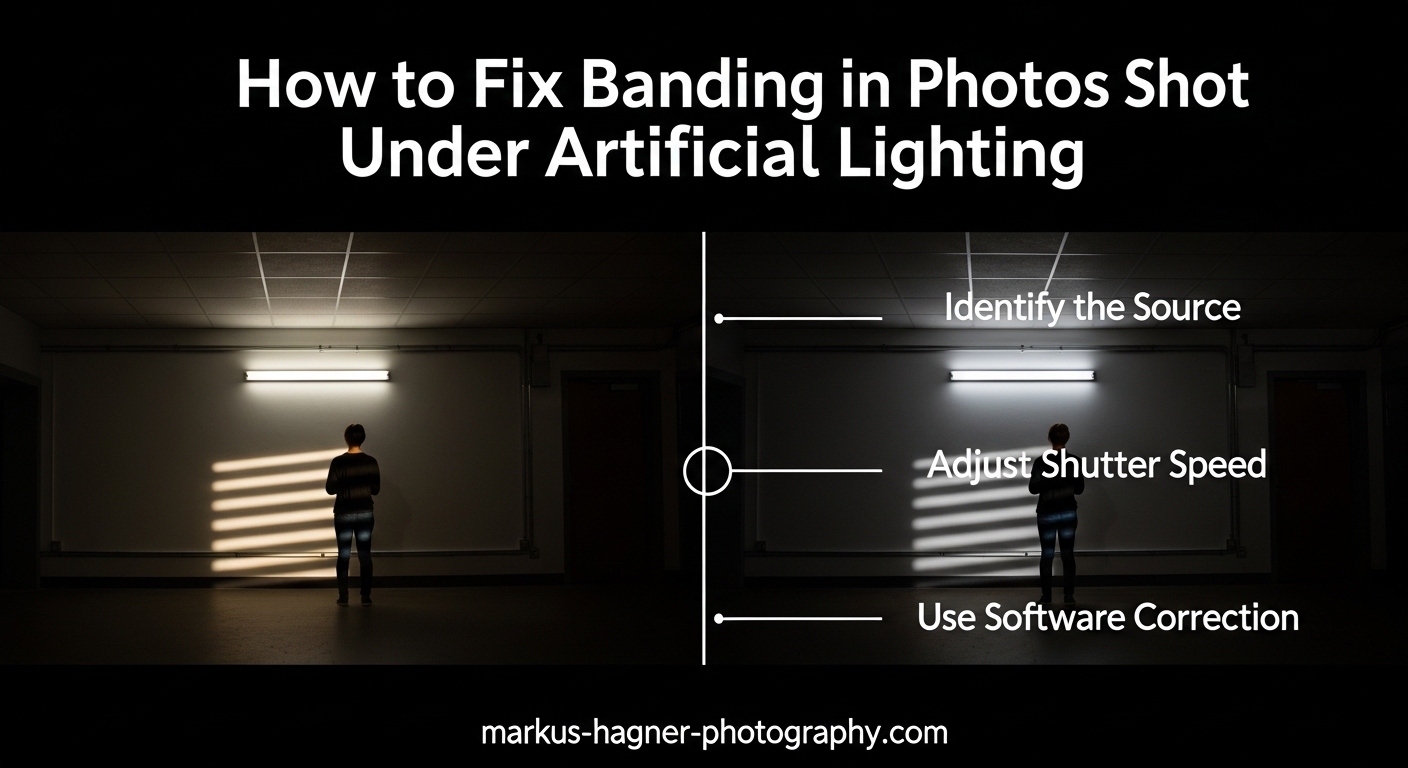
In this guide, I’ll walk you through exactly how to fix banding in photos shot under artificial lighting, covering both in-camera prevention methods and post-processing solutions that actually work.
What Causes Banding in Photography?
Banding appears as visible horizontal or vertical lines (lighter or darker stripes) across your image. These bands occur because of a mismatch between your camera’s shutter mechanism and the flickering of artificial lights.
Here’s what’s happening: LED and fluorescent lights don’t emit steady light. They flicker at electrical frequencies that are invisible to the human eye (50Hz in most countries, 60Hz in the Americas and parts of Asia). Your eyes can’t see this flicker, but your camera can.
When you use an electronic shutter, your camera reads the sensor line-by-line rather than capturing the entire image at once. This rolling shutter effect means different rows of pixels are captured at slightly different moments. If your shutter speed doesn’t synchronize perfectly with the light’s flicker cycle, some rows capture the light at its brightest while others catch it at its dimmest.
The result? Those annoying bands across your photo.
Several factors make banding more likely: faster shutter speeds, electronic front-curtain shutters, fully electronic silent shutters, and certain LED or fluorescent light types. This is especially common in concert photography, event venues, office environments, and product photography setups.
How to Fix Banding in Photos Shot Under Artificial Lighting
The most effective way to deal with banding is to prevent it in-camera. Here are the proven techniques that professional photographers use to eliminate banding before it happens.
1. Switch to Mechanical Shutter
This is the single most effective solution. A mechanical shutter opens and closes physically, exposing the entire sensor at once rather than reading it line-by-line. This global action eliminates the timing mismatch that causes banding.
I’ve tested this extensively across different venues, and mechanical shutter virtually eliminates banding in 95% of situations. The trade-off? You lose the silent shooting capability, and there’s a slight limit on maximum burst speed. But for critical shots under artificial lighting, it’s worth it.
To switch: Check your camera’s drive mode or shutter settings. Look for options like “Mechanical Shutter,” “EFCS Disable” (Electronic First Curtain Shutter), or avoid “Silent Shooting” and “Electronic Shutter” modes.
2. Sync Your Shutter Speed to Light Frequency
If you must use electronic shutter, synchronize your shutter speed with the electrical frequency of your location:
In 60Hz countries (Americas, parts of Asia): Use shutter speeds of 1/60, 1/120, 1/200. Avoid speeds like 1/80, 1/100, 1/160.
In 50Hz countries (Europe, most of Asia, Africa, Australia): Use shutter speeds of 1/50, 1/100, 1/200. Avoid speeds like 1/80, 1/125, 1/160.
The key is using multiples of the base frequency (1/60 or 1/50) or using exactly the base speed itself. These speeds ensure your shutter captures complete cycles of the light’s flicker, creating consistent exposure across all rows of pixels.
I recommend shooting a quick test series when you arrive at a venue. Take photos at 1/60 and 1/120 (or 1/50 and 1/100) and zoom in to check for bands. Once you find a clean speed, stick with it.
3. Enable Anti-Flicker Settings
Many modern cameras include anti-flicker or flicker reduction features designed specifically to combat banding. These settings automatically adjust the timing of your shots to match light flicker patterns.
To enable anti-flicker: Check your camera’s shooting menu. Look for “Anti-flicker Shoot,” “Flicker Reduction,” or similar options. You’ll typically need to set the frequency (50Hz or 60Hz) based on your location, though some cameras can auto-detect it.
From my experience, anti-flicker settings work well in many situations but aren’t 100% reliable. They help reduce banding significantly, but I still recommend combining them with proper shutter speed selection for the best results.
Quick Reference: Shutter Speed vs. Frequency
| Region | Frequency | Safe Shutter Speeds | Avoid These Speeds |
|---|---|---|---|
| Americas, parts of Asia | 60Hz | 1/60, 1/120, 1/200 | 1/80, 1/100, 1/160 |
| Europe, Asia, Africa, Australia | 50Hz | 1/50, 1/100, 1/200 | 1/80, 1/125, 1/160 |
Camera Brand Anti-Flicker Settings Guide
Different camera manufacturers implement anti-flicker features differently. Here’s how to access these settings on major camera brands:
Sony Cameras
Sony mirrorless cameras are particularly prone to banding with electronic shutter. To enable anti-flicker: Go to Camera Settings 4 (page 4 of the camera menu). Look for “Anti-flicker Shoot.” Set to “Enable.” You can also set the frequency manually or choose “Auto” for automatic detection.
For Sony users, I strongly recommend disabling the electronic front curtain shutter when shooting under artificial lights. This setting is found in the camera’s menu under “Shutter Type.”
Nikon Cameras
Nikon Z-series cameras have built-in flicker reduction. Access it through: Photo Shooting Menu > Flash Options > Flicker Reduction. Choose “Enable” and set the appropriate frequency (50Hz or 60Hz).
Some Nikon models allow you to set this in the camera’s “Shutter Type” menu. Choose “Mechanical Shutter” for maximum reliability under artificial lighting.
Canon Cameras
Canon’s anti-flicker implementation is among the best. Find it in: Shooting Menu 4 > Anti-flicker Shooting. Set to “Enable.” Canon cameras can often auto-detect the frequency, but manual setting is more reliable in mixed lighting environments.
Canon users should also disable “Silent LV Shooting” in Live View when banding is a concern.
Fujifilm Cameras
Fujifilm includes flicker reduction in most X-series cameras. Access via: Shooting Menu > Image Quality Setting > Flicker Reduction. Choose the frequency matching your location.
Fujifilm’s mechanical shutter is excellent at preventing banding, so consider using “Mechanical + Electronic” or “Mechanical” shutter mode when shooting under artificial lights.
How to Remove Banding in Post-Processing
Sometimes you discover banding after the fact, or you had no choice but to shoot with settings that caused it. Don’t worry, several post-processing techniques can significantly reduce or eliminate banding artifacts.
Photoshop Surface Blur Technique
This is my go-to method for moderate banding. Surface Blur smooths the bands while preserving edge detail surprisingly well:
- Open your image in Photoshop
- Create a duplicate layer (Ctrl/Cmd + J)
- Go to Filter > Blur > Surface Blur
- Set Radius to 3-5 pixels
- Set Threshold to 10-20 levels
- Adjust until bands blend while detail remains
- Add a layer mask and paint the effect only where needed
The key is subtlety. Too much Surface Blur creates an unnatural plastic look. I recommend starting with low settings and gradually increasing until the bands become less visible without destroying image quality.
Dodge and Burn Method
For stubborn bands that require precise treatment, the Dodge and Burn tools can work wonders:
- Create a new blank layer
- Set blending mode to “Soft Light” or “Overlay”
- Fill with 50% gray
- Select the Dodge tool (set to Midtones, 10-15% exposure)
- Lightly paint over darker bands to brighten them
- Select the Burn tool (set to Midtones, 10-15% exposure)
- Lightly paint over lighter bands to darken them
- Build up the effect gradually with multiple passes
This technique takes more time but produces the most natural-looking results. It’s particularly effective for critical images where quality matters most.
Dust & Scratches Filter
An often-overlooked option, the Dust & Scratches filter can help with severe banding:
- Duplicate your background layer
- Go to Filter > Noise > Dust & Scratches
- Set Radius to 2-4 pixels
- Set Threshold to 10-20
- Add a layer mask
- Invert the mask (Ctrl/Cmd + I)
- Paint white over areas with banding to reveal the effect
This works similarly to Surface Blur but with different algorithms. Some images respond better to one method versus the other, so it’s worth trying both.
Lightroom Gradient Banding Fix
For gradient banding (smooth color transitions showing visible steps), Lightroom offers some solutions:
- Import your image into Lightroom
- Go to the Develop module
- Add a small amount of Noise (+10 to +20)
- This adds subtle grain that breaks up the bands
- Use the Adjustment Brush with “Noise” to target specific areas
For color banding specifically, try working in 16-bit mode if available, and avoid pushing saturation too hard in gradients. Adding dithering (subtle noise) is often the most effective solution for color banding.
Frequency Separation Method
Advanced users can employ frequency separation to target banding without affecting overall image detail:
- Duplicate your background layer twice
- Name the top layer “High Frequency” and middle layer “Low Frequency”
- Hide High Frequency, select Low Frequency
- Apply Gaussian Blur (Radius 3-6 pixels)
- Select High Frequency, go to Image > Apply Image
- Settings: Layer=Low Frequency, Blending Mode=Subtract, Scale=2, Offset=128
- Set High Frequency blending mode to Linear Light
- Work on the Low Frequency layer with blur tools to smooth bands
This technique separates detail from color and tone, allowing you to treat banding in the low-frequency layer while preserving high-frequency detail. It’s more complex but offers professional-grade results.
AI-Powered Banding Removal
Emerging AI tools are showing promise for banding removal. Plugins like Topaz DeNoise AI and specialized noise reduction software can sometimes address banding as part of their processing. While not specifically designed for banding, their machine learning algorithms can recognize and reduce the artificial patterns created by banding.
I recommend testing these tools on a copy of your image first. Results vary depending on the severity and type of banding, and some images respond better than others.
Prevention Checklist for Event and Concert Photographers
After years of shooting concerts and events under challenging lighting, I’ve developed a pre-event checklist that has saved me countless times:
Before the Event
- Research the venue’s lighting type (LED vs fluorescent makes a difference)
- Check the region’s electrical frequency (50Hz or 60Hz)
- Pack a camera with reliable mechanical shutter
- Bring backup batteries (electronic shutter saves power, but mechanical doesn’t)
On Location Setup
- Arrive early if possible to test settings
- Switch to mechanical shutter immediately
- Enable anti-flicker mode and set correct frequency
- Take test shots at 1/60 and 1/120 (or 1/50 and 1/100)
- Zoom in to 100% on test shots to check for bands
- Find a clean shutter speed and stick with it
During the Event
- Monitor your histogram and highlight warnings
- Take quick test shots if lighting changes (different stage areas, etc.)
- Don’t rely solely on the camera’s LCD – zoom in regularly
- If banding appears, switch shutter speeds or switch to mechanical
Silent Shutter Emergency
Some venues require silent shooting. If you’re forced to use electronic shutter under problematic lighting:
- Use the anti-flicker setting if available
- Stick to safe shutter speeds (1/60, 1/120 for 60Hz; 1/50, 1/100 for 50Hz)
- Accept that some shots may have minor banding
- Plan for post-processing cleanup on critical images
- Consider shooting RAW for more recovery options
Frequently Asked Questions About Photo Banding
How to get rid of light banding in photos?
The fastest way is to switch to mechanical shutter mode. If that’s not possible, sync your shutter speed to the light frequency: use 1/60 or 1/120 in 60Hz countries (Americas), or 1/50 and 1/100 in 50Hz countries (Europe, Asia). Enable your camera’s anti-flicker setting if available. For existing photos, use Photoshop’s Surface Blur filter with Radius 3-5 and Threshold 10-20 to reduce visible bands.
How to remove horizontal banding caused by LED lighting?
For LED banding in post-processing, try Photoshop’s Surface Blur filter (Filter u0026gt; Blur u0026gt; Surface Blur) with Radius 3-5 and Threshold 10-20. Alternatively, use the Dodge and Burn tools on a Soft Light layer to manually even out the bands. Some photographers also report success with the Dust u0026amp; Scratches filter or frequency separation techniques for severe cases.
What causes banding in a photograph?
Banding is caused by the interaction between your camera’s electronic shutter and the flickering of artificial lights like LED and fluorescent bulbs. These lights flicker at electrical frequencies (50Hz or 60Hz) invisible to the human eye. Electronic shutters read the sensor line-by-line, capturing different rows at different moments. When the readout doesn’t sync with the light’s flicker cycle, some rows capture bright moments while others capture dim moments, creating visible bands across the image.
How to get rid of color banding?
Color banding in gradients can be reduced by working in 16-bit color depth instead of 8-bit. Add subtle noise or grain to break up the visible steps between colors. In Lightroom, try adding +10 to +20 of noise to introduce dithering. Avoid over-editing saturation in smooth gradient areas. For severe cases, use selective gradient adjustments or apply blur specifically to banded areas while masking out important details.
Anti banding 50hz vs 60hz which is better?
Neither is inherently better – you should match your camera’s anti-banding setting to your location’s electrical frequency. Use 50Hz in Europe, most of Asia, Africa, and Australia. Use 60Hz in the Americas, parts of Asia, and some other regions. Using the wrong setting can actually make banding worse. If your camera has an auto-detect feature, enable it, but manually setting the correct frequency is more reliable in challenging lighting situations.
Conclusion
Banding in photos shot under artificial lighting is frustrating, but it’s entirely preventable and often fixable. The most reliable solution is switching to mechanical shutter, which eliminates the root cause by exposing the entire sensor simultaneously rather than reading it line-by-line.
When you must use electronic shutter, synchronize your shutter speed to the local electrical frequency (1/60 or 1/120 for 60Hz regions; 1/50 or 1/100 for 50Hz regions) and enable your camera’s anti-flicker setting. Test your settings on-location before the critical moments.
For existing images with banding artifacts, Photoshop’s Surface Blur filter, Dodge and Burn techniques, and frequency separation methods can significantly reduce or eliminate the bands while preserving image quality. AI-powered tools are emerging as another option worth exploring.
The key is understanding why banding occurs and being prepared with the right settings and techniques before you shoot. With these tools in your photography toolkit, you can confidently tackle any artificial lighting situation without fear of banding ruining your shots.