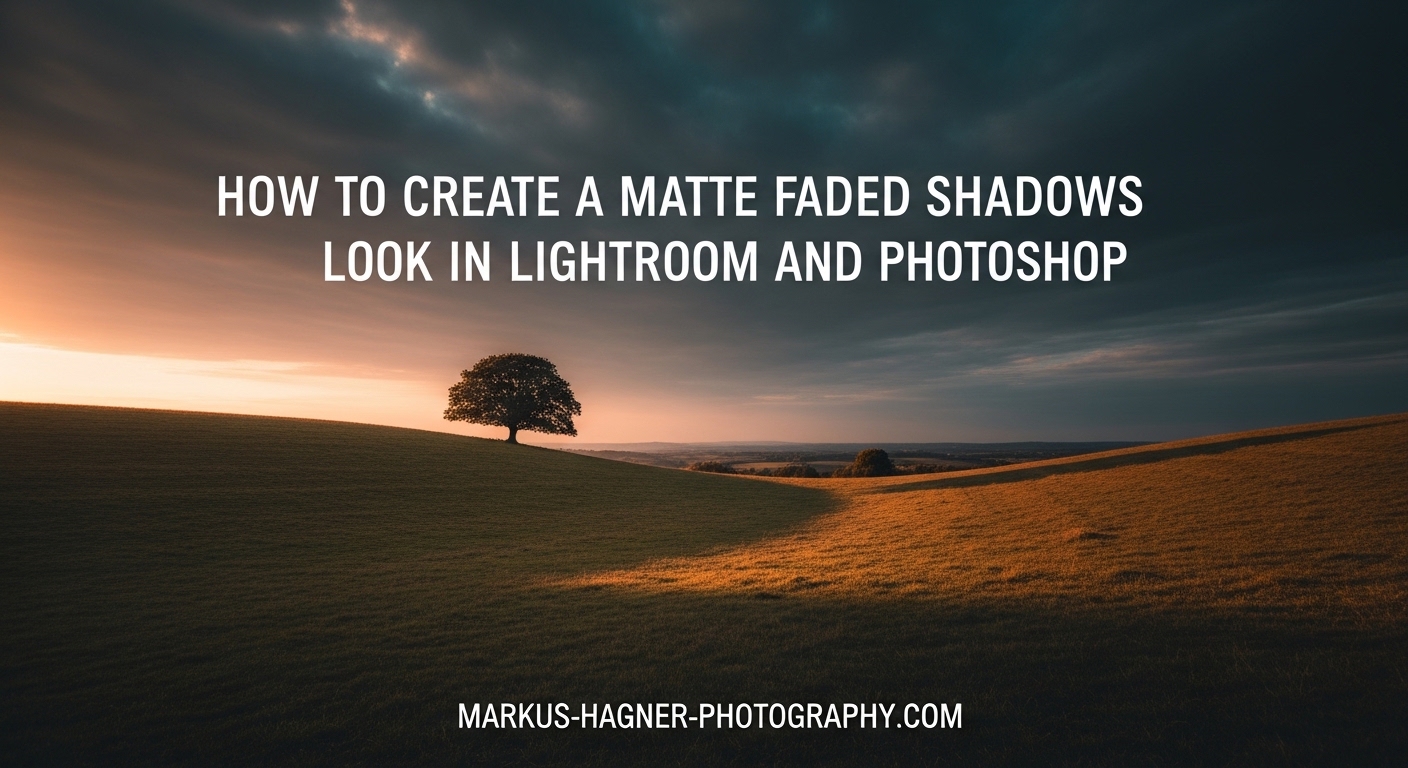
The matte faded shadows look has become one of the most sought-after editing styles in modern photography. This soft, dreamy aesthetic removes clinical digital perfection and replaces it with the nostalgic charm of vintage film. I’ve used this technique extensively in my wedding and portrait work, and I’m going to show you exactly how to achieve it in both Lightroom and Photoshop.
This comprehensive guide will walk you through everything you need to know about creating the matte faded shadows look, from understanding the technical foundations to advanced variations that will make your photos stand out in 2026. Whether you’re editing lifestyle portraits, wedding moments, or street photography, mastering this technique will add emotional depth to your images.
What is a Matte Faded Shadows Look?
A matte faded shadows look is a photo editing style that reduces contrast by lifting the black point and creating a soft, ethereal quality. Instead of having deep, pure blacks in your shadows, you shift them toward dark gray. This creates that faded, vintage appearance reminiscent of film photography from the 1970s and 1980s.
The effect works by manipulating the tonal range of your image. When you lift the blacks, you’re essentially telling the software that the darkest parts of your photo shouldn’t be pure black but rather a dark shade of gray. This reduces overall contrast and creates that characteristic matte finish that’s so popular on Instagram and in professional wedding photography today.
What makes this look particularly appealing is how it “de-digitalizes” clinical images. Modern digital cameras capture incredibly clean, sharp photos with deep blacks and bright whites. While technically perfect, these images can sometimes lack emotion. The matte effect adds a layer of nostalgia and softness that makes viewers feel something when they look at your photos.
How to Create a Matte Faded Shadows Look in Lightroom
Lightroom Classic offers the most intuitive way to create a matte faded shadows look. The Tone Curve tool is your primary weapon, and I’ll walk you through my exact workflow that I’ve refined over thousands of edits. Here’s the step-by-step process I use for professional results.
Step 1: Start with Your Basic Edits
Before applying the matte effect, make your basic adjustments first. Open your image in the Develop Module and address exposure, white balance, and overall tonality. Think of the matte effect as a finishing touch, not a foundation. I typically adjust exposure, recover highlights, and boost shadows slightly before moving to the curve.
Work your way down the Basic panel but save contrast and clarity adjustments for after you’ve applied the matte effect. These sliders interact strongly with the tone curve, and you’ll get more predictable results if you apply them in the right order.
Step 2: Access the Tone Curve Panel
Scroll down to the Tone Curve panel in the Develop Module. You’ll see a graph with a diagonal line running from bottom-left to top-right. This represents the tonal mapping of your image. The bottom-left corner is your shadows/blacks, and the top-right is your highlights/whites.
Make sure you’re using the Point Curve rather than the Parametric Curve. Click the small curve icon at the top-right of the panel to switch if needed. The Point Curve gives you precise control with anchor points, while the Parametric Curve uses slider adjustments that are less intuitive for creating matte effects.
Step 3: Lift the Black Point
Here’s where the magic happens. Click directly on the bottom-left point of the tone curve (the black point). Drag this point upward and to the right. This is the single most important adjustment for creating a matte look.
For a subtle matte effect, lift the black point to about 10-15 input/output. For a more pronounced faded look, go to 20-25. You’ll notice immediately that your darkest shadows are no longer pure black—they’ve become a rich dark gray. This is the foundation of the matte aesthetic.
Be careful not to lift too far. If you go above 30, your image will start to look washed out and flat. The goal is a gentle fade, not a complete removal of contrast. I find that 15-20 is the sweet spot for most portraits and lifestyle images.
Step 4: Add a Midtones Control Point
Click once in the exact center of the tone curve to create an anchor point in the midtones. This point should be at input 128, output 128. Don’t move it—just place it there. This anchor prevents the entire curve from shifting when you make your next adjustment.
The reason this matters is that without a midtones anchor, lifting the blacks can sometimes cause an unwanted shift in your midtones and highlights. By anchoring the middle of the curve, you ensure that only the shadows are affected by your matte adjustment.
Step 5: Optional S-Curve for Highlight Pop
If you want to maintain some contrast in your highlights, create a slight S-curve. Click on the tone curve in the highlights area (around input 200-220) and drag upward slightly. Then click again in the upper shadows (around input 60-80) and pull down just a tiny bit.
This subtle S-curve preserves highlight contrast while keeping the matte shadow look. It’s particularly effective for backlit portraits or images with bright skies. Just keep it gentle—too much and you’ll lose the soft matte quality you’re trying to achieve.
Step 6: Enhance with Color Grading
The matte effect pairs beautifully with subtle color shifts. Open the Color Grading panel (in newer Lightroom versions) or Split Toning panel (in older versions). For a classic faded look, add a slight warm tone to your shadows and a cool tone to your highlights.
In the Color Grading panel, select Shadows and choose a warm hue around 30-40 with saturation at 8-12. Then switch to Highlights and choose a cool hue around 200-220 with similar saturation. This warm-cool split adds depth to the matte effect and creates that signature professional fade.
For a more vintage faded look, try desaturating the blues and aquas. Open the Color Mixer panel, select the Blue channel, and reduce saturation to -10 or -15. Do the same for the Aqua channel. This mimics the color response of vintage film and enhances the faded aesthetic.
Step 7: Add Film Grain
Grain is the secret ingredient that makes the matte look feel authentic rather than just low-contrast. Scroll to the Effects panel and find the Grain section. I recommend setting Amount to 20-30, Size to 25-35, and Roughness to 50-60.
The grain texture ties everything together by adding that film quality that complements the faded tones. It’s especially effective at higher ISOs where you already have some natural noise. The grain masks digital artifacts and gives your image a cohesive, film-like appearance.
Step 8: Save as a Preset
Once you’ve dialed in your perfect matte look, save it as a preset so you can apply it with one click in the future. Go to the Develop menu and select New Preset. Check only the boxes for the adjustments you’ve made—Tone Curve, Color Grading, Color Mixer, and Grain.
Name it something descriptive like “Matte Fade – Subtle” or “Matte Fade – Strong” so you’ll remember the intensity. You can create multiple versions for different situations—a subtle preset for outdoor portraits, a medium one for weddings, and a strong one for moody street photography.
How to Create a Matte Faded Shadows Look in Photoshop
Photoshop offers even more control over the matte faded shadows look, particularly when you want to apply the effect selectively or combine it with more complex adjustments. The Adjustment Layers workflow makes it completely non-destructive, so you can always fine-tune your results.
Step 1: Open Your Image and Create a Curves Adjustment Layer
Open your image in Photoshop and go to Layer > New Adjustment Layer > Curves. Name it “Matte Curve” and click OK. This creates a non-destructive adjustment layer that you can modify or delete at any time without affecting your original image.
The Properties panel will open showing the Curves adjustment. You’ll see the same diagonal graph as in Lightroom, representing the tonal range of your image. The interface is slightly different but the principles are identical.
Step 2: Lift the Black Point
Click directly on the bottom-left anchor point of the curve. This is your black point. Drag it upward and to the right, just like in Lightroom. For a subtle matte effect, move it to approximately input 10, output 15. For a stronger fade, try input 15, output 25.
Watch your image as you make this adjustment. You’ll see the shadows lift immediately, creating that characteristic faded appearance. The histogram will also shift to the left, showing that you’ve reduced the amount of pure black in the image.
Step 3: Add Midtones and Highlights Anchor Points
Click once in the center of the curve at input 128, output 128 to create a midtones anchor. Then click in the highlights area around input 220, output 220. These anchor points give you more control and prevent unwanted shifts in other tonal ranges.
If you want to maintain some highlight contrast, you can create a subtle S-curve by dragging the highlights anchor point up slightly and creating another point in the upper shadows to pull down just a bit. This preserves contrast in the brightest areas while keeping the matte shadow look.
Step 4: Fine-Tune with a Second Curves Layer (Optional)
For more control, create a second Curves adjustment layer and name it “Contrast Curve.” Use this layer to add subtle contrast back into specific tonal ranges without affecting your matte adjustment.
For example, you might add a gentle curve that boosts contrast in the midtones while leaving the shadows lifted. This two-curve approach gives you professional-level control and is a technique I use for my most important commercial work.
Step 5: Add Color Grading with Color Balance
Go to Layer > New Adjustment Layer > Color Balance. Name it “Color Grade” and click OK. In the Properties panel, you can add the same warm-cool split that we did in Lightroom.
In the Shadows tonal range, move the sliders slightly toward yellow and red. For a vintage look, try Yellow +5 and Red +3. Then switch to Highlights and move toward blue and cyan—try Blue +8 and Cyan +5. This creates that professional faded color grade that complements the matte tonal adjustment.
Step 6: Apply Selectively with Layer Masking
One of Photoshop’s advantages is the ability to apply the matte effect selectively. Click on the Curves adjustment layer mask and paint with black to hide the effect in specific areas. For example, you might want the matte look in the background but prefer full contrast on your subject’s face.
Use a soft brush at 50% opacity for subtle transitions. This selective application is particularly useful for portraits where you want to maintain skin detail while still achieving the faded aesthetic in the overall image.
Step 7: Add Grain with the Noise Filter
To complete the film look, go to Filter > Noise > Add Noise. Set Amount to 3-5, select Gaussian distribution, and check Monochromatic. Click OK to apply the grain directly to your image.
For a non-destructive approach, convert your image to a Smart Object before applying the filter, or create a new layer filled with 50% gray, apply the noise filter to that layer, and set the blending mode to Overlay. This lets you adjust the grain intensity later by changing the layer opacity.
Advanced Matte Effect Variations
Once you’ve mastered the basic matte faded shadows look, you can explore more advanced variations that will give your photos a distinctive style. These techniques build on the foundation we’ve established and add creative nuances that will set your work apart.
Three Matte Intensity Levels
For a subtle matte effect that retains most contrast, lift your black point to 10-12 on the tone curve. This works beautifully for outdoor portraits and bright lifestyle shots where you want just a hint of fade without losing image impact. The effect is so subtle that viewers might not consciously notice it, but they’ll feel the softer, more approachable quality it creates.
Medium matte (black point at 15-20) is your versatile workhorse. This is what I use for most wedding photography and lifestyle portraits. It provides a noticeable fade without looking washed out. The image retains plenty of contrast while achieving that dreamy, nostalgic quality that makes photos feel timeless.
Strong matte (black point at 20-25) creates a dramatic, moody effect perfect for overcast days, indoor portraits, and street photography. This intensity pushes the aesthetic further and can create powerful emotional responses. Be careful with skin tones at this level—you may need additional adjustments to keep faces looking natural.
Cross-Processed Matte Effect
For a unique variation, try combining the matte look with cross-processing colors. In Lightroom’s Color Grading panel, push the shadows toward green-teal (hue 170-180, saturation 10-15) and the highlights toward warm orange (hue 30-40, saturation 12-18). This creates a cinematic color grade that pairs beautifully with the faded tonal quality.
This technique works exceptionally well for urban photography, golden hour portraits, and any image where you want a more stylized, contemporary look. The green-teal shadows add cool depth while the warm highlights provide a flattering glow on skin tones.
Hazy Dreamy Matte
To add a soft, hazy quality to your matte look, create a new Levels adjustment layer in Photoshop and drag the middle slider slightly to the left (around 1.10-1.15). Then create a layer mask filled with black and paint white with a soft brush only in the highlights and bright areas.
This selective brightening adds a dreamy, ethereal quality that enhances the matte effect. It’s particularly effective for backlit portraits and images with bright skies. Just use a light touch—too much haze will make your image look foggy rather than dreamy.
When to Use (and When NOT to Use) Matte Look
Understanding when the matte faded shadows look works best will help you make better editing decisions. Not every photo benefits from this style, and knowing when to apply it is as important as knowing how to create it.
The matte look excels in wedding photography, lifestyle portraits, and moody outdoor scenes. It adds emotional depth to candid moments and creates a cohesive aesthetic across entire wedding galleries. I use it for about 70% of my wedding work because it softens harsh digital reality and makes images feel more nostalgic and romantic.
Lifestyle and portrait sessions benefit tremendously from the matte effect. It creates a magazine-quality aesthetic that clients love. The soft, faded quality makes skin look more flattering and adds a professional polish to environmental portraits.
Street photography and urban scenes take on a cinematic quality with the matte treatment. Combine it with the cross-processed color variation mentioned earlier, and you’ll achieve that distinctive urban documentary look that’s popular in editorial work.
Avoid the matte look for high-contrast scenes where deep blacks are essential. Astrophotography, nightscapes, and dramatic silhouettes lose their impact when you lift the blacks. The power of these images comes from deep, rich shadows that contrast with bright highlights.
Product photography and architectural shots typically require full contrast and accurate color representation. The matte effect can make products look washed out and reduce perceived quality. Similarly, corporate headshots and real estate photography usually benefit from a clean, high-contrast look rather than a faded aesthetic.
Bright, sunny beach scenes can look strange with a heavy matte effect. The combination of bright highlights and lifted shadows often results in an image that feels flat rather than artistic. If you do apply matte to beach photos, use the subtle variation and maintain highlight contrast.
Troubleshooting Common Matte Look Issues
Even experienced editors encounter problems when creating the matte faded shadows look. Here are the most common issues I see in my workshops and how to fix them quickly.
My Photos Look Too Washed Out
You likely lifted the black point too far. Go back to your Tone Curve and reduce the black point lift to 15 or below. Another solution is to add a subtle S-curve by creating a slight upward bend in the highlights while keeping the shadows lifted. This restores some contrast while maintaining the matte quality.
You can also increase contrast slightly in the Basic panel. Set Contrast to +5 to +10, and bump Clarity to +8 to +12. These adjustments counteract the washed-out appearance while preserving the faded shadow look you want.
Loss of Shadow Detail
If your shadows look muddy or crushed after applying the matte effect, you may have lifted the blacks without adjusting the Shadows slider. Go to the Basic panel and increase Shadows to +20 or +30. This recovers detail in the darkest areas while maintaining the matte aesthetic.
Another approach is to use the Range Mask feature in Lightroom. When applying local adjustments, use the Range Mask to target specific tonal ranges, ensuring you don’t accidentally crush shadow detail while creating the matte effect.
Skin Tones Look Unhealthy
A strong matte effect can make skin look gray or sickly. The solution is to use a brush adjustment to remove the matte effect from skin areas. In Lightroom, select the Adjustment Brush and paint over skin. Then reduce the Tone Curve effect or increase Clarity and Contrast just for the brushed area.
For portraits, I recommend using only a subtle to medium matte intensity. Keep the black point at 12-15 maximum, and maintain slightly more contrast in the midtones. Your subjects will look dreamy rather than drained.
How to Recover from Over-Matte Effect
If you’ve gone too far and your image looks hopelessly flat, don’t worry. The Tone Curve is non-destructive, so you can always back off. Simply grab the black point and drag it back down. If you’ve made multiple adjustments, start fresh by resetting the Tone Curve and beginning again with a gentler approach.
In Photoshop, you can simply hide or delete the Curves adjustment layer and create a new one with more conservative settings. The beauty of adjustment layers is that your original image remains untouched, giving you complete freedom to experiment without consequences.
Frequently Asked Questions
How to create a matte effect in Lightroom?
How to create a faded look in Lightroom?
How to create a hazy look in Lightroom?
How to create a faded effect in Photoshop?
What is the difference between Split Toning and Color Grading in Lightroom?
Conclusion
Creating a matte faded shadows look in Lightroom and Photoshop is a straightforward technique that can dramatically transform your photos. Whether you’re editing wedding photos, lifestyle portraits, or personal projects, this soft, dreamy aesthetic adds emotional depth and nostalgic charm that viewers find irresistibly appealing.
The key is mastering the Tone Curve in both programs. Lift that black point to 15-20 for a professional matte effect, add subtle color grading with warm shadows and cool highlights, and finish with grain for authentic film texture. Save your settings as presets in Lightroom or actions in Photoshop to streamline your workflow and maintain consistency across projects.
Remember that the matte faded shadows look isn’t right for every image. Use it thoughtfully for portraits, weddings, and moody scenes where you want to evoke nostalgia and emotion. Avoid it for high-contrast landscapes, product shots, and situations where deep blacks are essential to the image’s impact.
Experiment with the three intensity levels—subtle, medium, and strong—to find what works for your style and subject matter. Don’t be afraid to combine the matte effect with other editing techniques like color grading, split toning, and selective adjustments to create a unique look that sets your photography apart in 2026.
The beauty of digital editing is that nothing is permanent. Try different variations, push the boundaries, and develop your own signature interpretation of the matte faded shadows look. With practice, you’ll develop an instinct for exactly when and how to apply this timeless technique to create images that resonate with viewers and stand the test of time.