If you’ve been color grading still photos in Lightroom or Photoshop and feel limited by their layer-based approach, DaVinci Resolve’s node-based workflow might be exactly what you need. I’ve been using Resolve for photo editing for the past three years, and the precision and control it offers is unmatched.
When you color grade still photos in DaVinci Resolve using the node-based workflow, you gain access to professional color tools that were previously only available to high-end video colorists. The free version of Resolve includes the same color page used in Hollywood films, making it an incredibly powerful option for photographers who want professional-level color control.
In this guide, I’ll walk you through everything you need to know to color grade still photos in DaVinci Resolve, from importing your images to exporting your final graded photos with stunning results.
Why Use DaVinci Resolve for Still Photos
DaVinci Resolve isn’t just for video color grading. More photographers are discovering that Resolve’s color tools offer advantages over traditional photo editors. The node-based workflow provides a visual way to build complex color grades that feel more intuitive than layer stacks in Photoshop.
I’ve worked with both Lightroom and Resolve extensively, and here’s what makes Resolve stand out for still photos: the color wheels (Lift, Gamma, Gain) provide more natural control than sliders, the video scopes (Waveform, Vectorscope, RGB Parade) give you precise feedback instead of guessing by eye, and the non-destructive node-based workflow lets you experiment without fear of ruining your original image.
Professional colorists have been using Resolve for years on feature films. Now, photographers can leverage the same color science and tools for their still images. Many users on forums like Reddit report finding Resolve’s color tools “insanely good” for photos once they understand the node-based approach.
The workflow also creates consistency between your video and photo work. If you’re a hybrid shooter who does both video and photography, using Resolve for both means your still photos match your video footage perfectly.
Getting Started – Importing Photos into the Color Page
Getting your photos into DaVinci Resolve for color grading is straightforward once you know the process. Here’s how I set up my photo workflow in Resolve.
Step 1: Create a New Project
Open DaVinci Resolve and create a new project. Name it something descriptive like “Photo Grading Session 2026.” Set your project settings to match your intended output – for web use, I typically work with HD resolution even if my photos are higher resolution, as Resolve scales images gracefully.
Step 2: Import Your Photos
Navigate to the Media page (the film strip icon at the bottom). In the media storage panel, locate your photos and drag them into the media pool. Resolve supports common photo formats including JPEG, PNG, TIFF, and even RAW files from most cameras.
Step 3: Create a Timeline
This is where many photographers get confused – Resolve is designed for video, so you need to place your photos on a timeline. Go to the Edit page (the clip icon), then drag your photo from the media pool onto the timeline. Each photo becomes a “clip” on your timeline.
Step 4: Set Clip Duration
By default, each photo might only be 1-2 seconds long on the timeline. For grading stills, this doesn’t matter much, but if you want more time to work, you can extend the duration. Select all clips on the timeline, right-click, and choose “Change Clip Duration.” Set it to something longer like 10 seconds – this gives you plenty of time to grade without the timeline marker moving.
Step 5: Access the Color Page
Click the Color page icon (the color wheel) at the bottom of the interface. This is where the magic happens. You’ll see your photo displayed in the viewer, the node graph on the right, and your grading tools at the bottom.
Step 6: Navigate Between Photos
If you have multiple photos, use the timeline to move between them. Each clip on the timeline can have its own grade, or you can copy grades between clips for consistent looks across a series of photos.
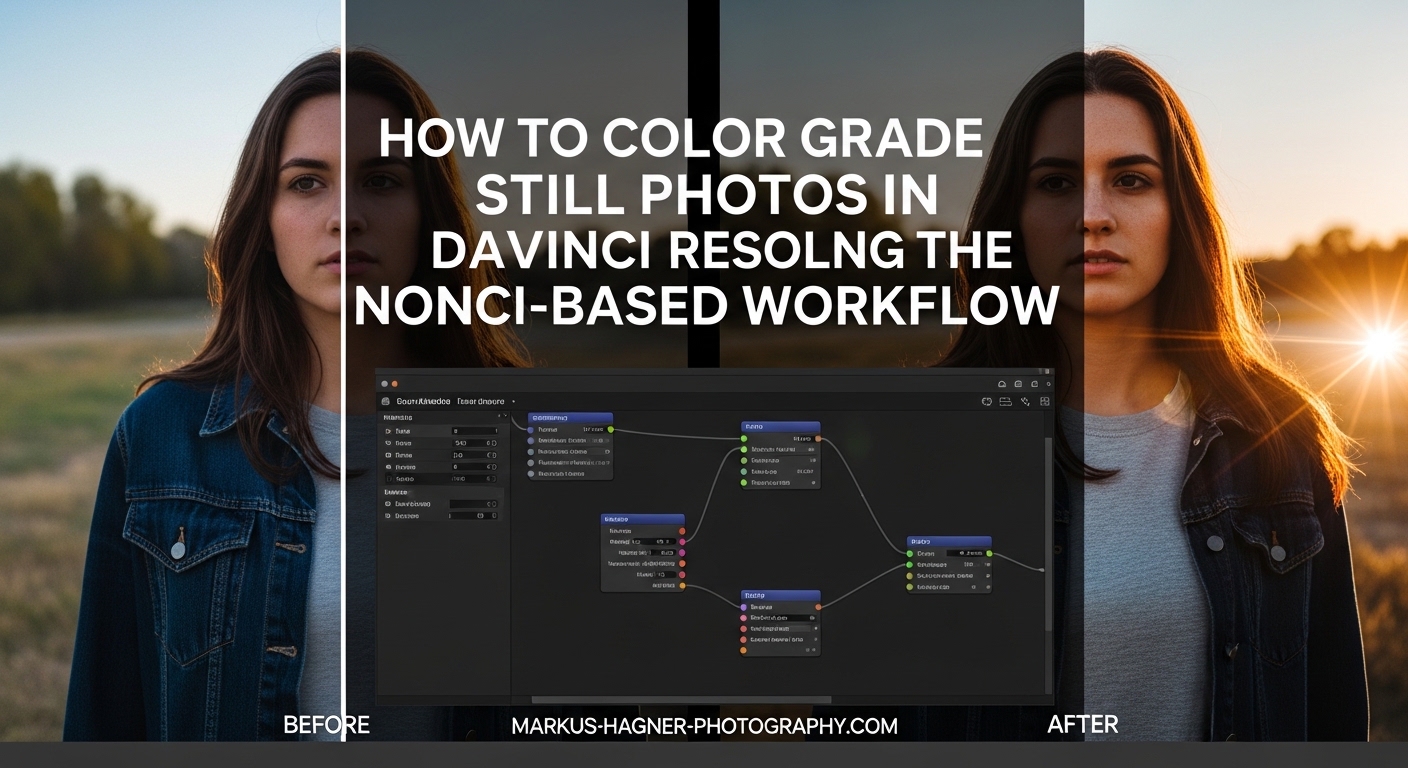
Understanding the Node Graph Interface
The node graph is the heart of DaVinci Resolve’s color grading power. When you first see it, it might look intimidating – but once you understand the concept, it becomes intuitive and incredibly efficient.
What is a Node-Based Workflow?
Think of the node graph like a flowchart for your color corrections. Each node is a self-contained correction that processes the image and passes it to the next node. Image information flows from left to right, like a river – everything downstream receives the changes from nodes upstream.
This is different from layer-based editors like Photoshop, where layers stack on top of each other. In Resolve, nodes connect in sequence, and you can see exactly how your corrections flow through the system.
Node Types Explained
DaVinci Resolve offers three main types of nodes, each with specific use cases for photo grading:
Serial Nodes: These process one after another in sequence. The output of Node 1 becomes the input of Node 2, and so on. Serial nodes are perfect for building up corrections step-by-step – use Node 1 for primary correction (overall balance), Node 2 for secondary correction (specific areas), and Node 3 for creative looks.
Parallel Nodes: These split your image into multiple paths that process independently, then combine back together. Parallel nodes are excellent for applying different corrections to different parts of your image – you might have one path adjusting the shadows and another path adjusting highlights, then blend them together.
Layer Nodes: These work like Photoshop layers, where one node’s output is composited over another. Layer nodes use blend modes like Screen, Multiply, and Overlay. They’re perfect for creative effects and looks that would require complex blending in traditional photo editors.
Signal Flow Basics
Understanding signal flow is crucial for effective node-based grading. Your image enters at the left of the node graph and travels right through each node in sequence. Each node can only affect what comes before it – you can’t go back and change earlier nodes without affecting everything downstream.
This is why the order of your nodes matters. I recommend this structure: Node 1 for technical correction (exposure, white balance), Node 2 for color balance, Node 3 for targeted adjustments, and Node 4 for creative looks.
Adding and Connecting Nodes
To add a new node, right-click in the node graph area and select “Add Serial Node,” or use the shortcut Alt+S (Windows) or Option+S (Mac). Nodes connect automatically in sequence. To create parallel or layer nodes, right-click and select the appropriate node type.
You can rearrange nodes by dragging them. The connection dots on each node show the input (left side) and output (right side). Disconnect and reconnect nodes by dragging the connection lines.
Primary Color Correction with Color Wheels and Video Scopes
Primary color correction is where you establish the overall look of your photo. This includes balancing exposure, setting white balance, and establishing your color tone. DaVinci Resolve’s color wheels and video scopes give you professional tools to get these technical aspects perfect.
The Color Wheels: Lift, Gamma, Gain
DaVinci Resolve’s primary color grading wheels are Lift, Gamma, and Gain – these control different tonal ranges of your image:
Lift: Controls the shadows/dark areas of your image. Moving the Lift wheel towards a color adds that color to your shadows. Moving it upward brightens shadows, moving it downward darkens them. This is perfect for fixing muddy shadows or adding shadow tint.
Gamma: Controls the midtones – the most important part of your image where most detail lives. Gamma adjustments affect the perceived brightness without crushing shadows or blowing out highlights. Use Gamma to set the overall mood and brightness.
Gain: Controls the highlights/bright areas. Gain adjustments affect the brightest parts of your image. Use Gain to recover highlight detail or add color to bright areas for creative effects.
Offset: Below the three main wheels is the Offset wheel, which shifts the entire image equally. This is useful for overall color cast removal – if your whole photo has a warm tint, move Offset toward blue to neutralize it.
Using Video Scopes for Precision
Video scopes are the secret weapon that separates amateur color grading from professional work. They give you objective feedback about your image’s brightness and color, taking the guesswork out of correction.
Waveform Monitor: The waveform shows luminance (brightness) information. The horizontal axis represents your image left-to-right, and the vertical axis shows brightness from black (bottom) to white (top). Use this to check your exposure – shadows should be near the bottom, highlights near the top, with good distribution throughout.
RGB Parade: This shows your red, green, and blue channels separately. You can see exactly which colors are present in each tonal range. If your shadows look muddy, check the RGB Parade – you might see one channel dropping out, indicating color cast.
Vectorscope: This displays color information as points on a color wheel. The center is neutral (no color), and moving outward shows more saturated color. The direction indicates hue – skin tones should fall along the flesh tone line. Use this to achieve accurate colors and consistent skin tones.
My Primary Correction Workflow
Here’s the primary correction process I use for every photo:
Start by resetting all corrections to zero – right-click the color wheels and select “Reset.” Open the Waveform monitor and assess your exposure. Are shadows crushed? Highlights blown out? Make initial adjustments using Lift and Gain to establish good tonal range.
Check the Vectorscope for color balance. Is there an overall color cast? Use Offset to neutralize it. Then open the RGB Parade to see individual color channels. Look for imbalances – if red is higher than blue in shadows, your shadows will look warm.
Use Gamma to set overall brightness and mood. This is your most important control – most of your look comes from Gamma adjustments. Make subtle moves and constantly reference your scopes.
Finally, use Lift and Gain for creative emphasis. Add cool shadows (Lift toward blue) and warm highlights (Gain toward orange) for a popular cinematic look. Or go the opposite direction for different moods.
Building a Node Tree for Photo Grading
Now that you understand primary correction, let’s build a complete node tree for professional photo grading. This structure gives you maximum control while keeping your workflow organized.
My 4-Node Photo Grading Structure
After grading hundreds of photos in Resolve, I’ve settled on a reliable 4-node structure that handles virtually any situation:
Node 1 – Color Space Transform: This is crucial for professional results. Add a Color Space Transform node (Effects Library > Color Space > Color Space Transform) as your first node. Set Input Color Space to match your camera’s color space (Rec.709 for JPEGs, or your camera LOG for RAW). Set Output Color Space to DaVinci Wide Gamut Intermediate and Tone Mapping to DaVinci Intermediate. This ensures all your corrections happen in a consistent, high-quality color space.
Node 2 – Primary Correction: This is where you do your technical correction – exposure, white balance, overall color balance. Use the color wheels with your video scopes to get the image technically correct. No creative moves yet – just accurate representation.
Node 3 – Secondary Correction: This is where you make targeted adjustments to specific parts of your image. Use Power Windows (the shapes under the viewer) to isolate areas. For example, create a Power Window around a sky, then useQualifier to select just the blue sky, and adjust only that. Or isolate skin tones for separate processing.
Node 4 – Creative Looks: Now apply your creative grade. Add film emulation using LUTs, create stylized looks, add vignettes, or apply any creative treatment. Because it’s in a separate node, you can adjust or disable it without affecting your technical correction.
Using Power Windows for Selective Adjustment
Power Windows are Resolve’s version of selection tools – they let you isolate parts of your image for separate color grading. The four main types are:
Curved Window: A free-drawn shape you define by clicking points. Perfect for irregular selections like product shots or selective areas.
Linear Window: A straight-line selection, great for horizon lines, buildings, or geometric shapes.
Circular Window: A simple circle, perfect for vignettes or highlighting central subjects.
Gradient Window: Creates a soft gradient transition, ideal for sky/ground splits or subtle adjustments.
Combine Power Windows with the Qualifier for precision – use the Qualifier to select based on color (like selecting just the blue sky), then refine with a Power Window to limit the selection to specific areas.
Advanced Node Structures
As you become comfortable with the basic 4-node structure, you can expand into more complex arrangements:
Create parallel node structures for split toning – one path processes shadows, another processes highlights, then combine them with a Layer Mixer node. This gives you control impossible to achieve with serial nodes alone.
Use Layer nodes with blend modes for creative effects – try adding a node in Soft Light blend mode for increased contrast, or Screen mode for brightening specific areas.
Group related corrections by using node groups – select multiple nodes, right-click, and choose “Group into Compound Node.” This keeps your node graph clean as your grades become more complex.
Exporting Still Photos from DaVinci Resolve
After perfecting your grade, you need to export your still photo. DaVinci Resolve offers several ways to save your work as an image file.
Export Single Frame
The most direct method is exporting a single frame from the timeline:
Position your timeline playhead on the frame you want to export. Go to the Deliver page (the world icon). In the Render Settings, choose “Single Clip” from the Format dropdown. Then select your image format – for highest quality, I recommend DPX or TIFF. For web use, JPEG or PNG work well.
Set your resolution – you can export at your original photo resolution, or choose a different size. Click “Add to Render Queue” then “Render All.” Resolve will save your graded photo as a high-quality image file.
Using the Grab Still Feature
For quick exports, use the Grab Still feature directly from the Color page:
Position your playhead on the desired frame. Right-click in the viewer and choose “Grab Still” or use the shortcut Ctrl+S (Windows) or Cmd+S (Mac). This immediately saves a full-resolution still to your Gallery, where you can access it later.
To export grabbed stills, go to the Gallery (the icon on the far right), select the stills you want to export, right-click, and choose “Export Stills.” Choose your format and destination, and Resolve exports them.
Export Settings for Different Purposes
For print output, export as 16-bit TIFF at your original camera resolution. This preserves maximum quality for printing. For web use, JPEG at 80-90% quality and 2048px on the long side is typically sufficient. If you need transparency, use PNG format.
Saving and Reusing Grades
One of Resolve’s most powerful features is saving grades as presets:
Right-click on any node and choose “Grab Still” to save that specific correction as a still. You can then right-click in the Gallery and choose “Save Grade” to create a reusable preset. Apply saved grades to other photos by dragging them from the Gallery onto your clip in the Color page.
Tips and Troubleshooting for Photo Color Grading
After helping dozens of photographers transition to DaVinci Resolve for photo editing, I’ve identified common issues and solutions that will save you time and frustration.
Common Issues and Solutions
My photo looks wrong after importing: This usually happens with RAW files. Make sure your project settings match your camera’s color space. If photos appear desaturated or oversaturated, check your Color Management settings in Project Settings.
My grade looks different when exported: This is typically a color space mismatch. Always use a Color Space Transform node as your first node to establish a consistent working color space. Export with appropriate color settings – Rec.709 for web, or match your print lab’s requirements.
The node graph is overwhelming: Start simple. Work with just 2-3 nodes initially – one for primary correction, one for creative. As you become comfortable, gradually add more nodes for targeted adjustments. Remember: every correction doesn’t need its own node.
I can’t match colors to my reference: Use the Split Screen feature (the split icon under the viewer). Load your reference image as a still in the Gallery, then use Split Screen to compare your current image with your reference side-by-side. The Waveform and Vectorscope help you match technical values exactly.
Efficiency Tips
Learn keyboard shortcuts for faster workflow – Alt+S adds serial nodes, Ctrl+Option+B toggles Split Screen, Ctrl+D resets the current node. These small time-savers add up over long editing sessions.
Use the Gallery for version comparison – save multiple versions of your grade as stills, then use the Gallery to quickly compare different approaches without losing previous work.
Create project templates for different photo types – I have templates for portraits (with skin tone protection nodes pre-built), landscapes (with sky enhancement nodes ready), and product photography (with color accuracy nodes set up). This saves time on every new project.
Working with Multiple Photos
For batch processing multiple photos, import all images to your timeline and grade them sequentially. Use “Copy Grades” from previous clip (the paintbrush icon) to apply the same grade to multiple photos. Then make individual adjustments as needed.
Use timeline level grading for consistent looks across photo series – grade at the timeline level instead of clip level to apply corrections to all clips at once. This is perfect for ensuring consistency across a photo set from the same shoot.
Frequently Asked Questions
Can you use DaVinci Resolve for photos?
Yes, DaVinci Resolve works excellent for photos. Many photographers use it instead of Lightroom or Photoshop because the node-based workflow provides more precise color control and professional video scopes for accurate grading.
How do I add a node in DaVinci Resolve shortcut?
Press Alt+S on Windows or Option+S on Mac to quickly add a serial node. For parallel nodes, right-click in the node graph and select Add Parallel Node. The keyboard shortcut becomes second nature with practice.
What is the proper workflow for color grading in DaVinci Resolve?
Start with Color Space Transform node to establish working color space. Then do primary correction for exposure and white balance. Add secondary corrections with Power Windows for targeted adjustments. Finally apply creative looks on separate nodes. Save grades as stills for reuse.
How to export photos from DaVinci Resolve?
Position playhead on the frame you want, go to Deliver page, choose Single Clip format, select your image format (TIFF for quality, JPEG for web), set resolution, then render. Alternatively, use Grab Still from the Color page for quick exports to your Gallery.
Is DaVinci Resolve better than Lightroom for color grading?
For color specifically, yes – Resolve offers professional color wheels and video scopes that provide more control than Lightroom’s sliders. However, Lightroom is better for overall photo management and cataloging. Many photographers use both – Lightroom for organization, Resolve for color work.
How do I use Color Space Transform node?
Add it as your first node from Effects Library. Set Input Color Space to match your source (Rec.709 for JPEGs, camera LOG for RAW). Set Output Color Space to DaVinci Wide Gamut Intermediate and Tone Mapping to DaVinci Intermediate. This ensures consistent color across all corrections.
What is the best node structure for color grading photos?
Start with Color Space Transform node. Then use serial nodes for primary correction, secondary correction with Power Windows, and creative looks. This 4-node structure handles most photo grading needs – technical correction first, then creative work on separate nodes.
Can you color grade RAW photos in DaVinci Resolve?
Yes, Resolve supports RAW files from most cameras. Import RAW files like any other photo. For best results, use appropriate Input Color Space in your Color Space Transform node to match your camera’s color science for maximum quality.
Conclusion
Learning to color grade still photos in DaVinci Resolve using the node-based workflow opens up professional-level color control that traditional photo editors can’t match. The non-destructive node system, professional color wheels, and precise video scopes give you tools previously reserved for Hollywood colorists.
Start with the 4-node structure I’ve outlined – Color Space Transform, Primary Correction, Secondary Correction with Power Windows, and Creative Looks. As you become comfortable with this workflow, you can expand into more complex node trees and advanced techniques.
Remember that color grading is both technical and creative. Use the scopes for technical accuracy, but trust your eye for the final look. The best grades combine precise technical foundation with creative vision.
Whether you’re a photographer looking to elevate your color work or a videographer who needs to match still photos to video footage, DaVinci Resolve’s node-based workflow provides the tools you need. Download the free version and experiment – you might be surprised at how quickly you prefer it to your traditional photo editing workflow.