Monitor calibration for photo editing uses two main methods: software-only calibration (free but inaccurate) or hardware calibration with a colorimeter ($100-$500+ and highly accurate). For photographers who print their work, hardware calibration is essential because it measures actual color output and creates a precise ICC profile that ensures what you see on screen matches what comes out of your printer.
When I first started printing my photos, I wasted hundreds of dollars on paper and ink trying to figure out why my prints looked nothing like my screen. The vibrant sunset I edited became a muddy mess on paper. Skin tones that looked natural on my display appeared jaundiced in print. After calibrating my monitor properly, I finally achieved consistent screen-to-print matching that saved me time, money, and frustration.
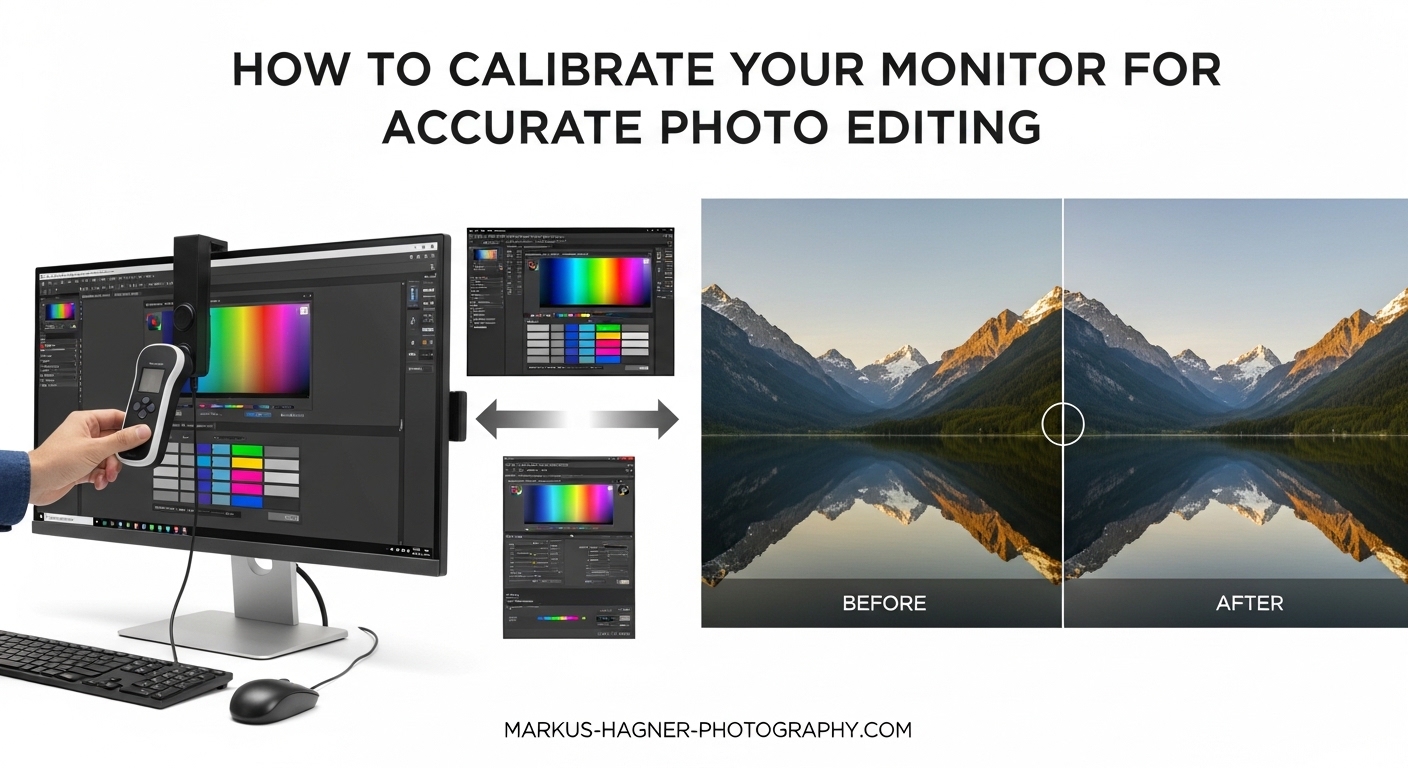
In this guide, I will walk you through everything you need to know about calibrating your monitor for accurate photo editing and print matching. You will learn the difference between hardware and software calibration, which tools work best, the exact settings to target, and how to troubleshoot common issues when your prints still do not match your screen.
Why Monitor Calibration Matters for Photographers
Without calibration, your monitor displays colors differently than what your camera captured and what your printer will produce. Every monitor has unique color characteristics based on its panel type, age, and manufacturing variations. Even two identical monitors from the same production batch can display colors differently.
The problem compounds when you consider that other people view your photos on their uncalibrated screens. A photo that looks perfect on your display might appear oversaturated, washed out, or color-shifted on someone else’s monitor. For web-only work, this inconsistency is frustrating but manageable. For print work, it becomes expensive fast.
I learned this lesson the hard way after sending a batch of wedding photos to a professional lab. The images looked stunning on my screen with rich, warm tones. When the prints arrived, the skin tones had a noticeable green cast that made everyone look slightly ill. The client was understanding, but I had to reorder the entire batch after recalibrating and re-editing every image.
Monitor calibration for photo editing solves these problems by ensuring your display meets established color standards. When your monitor shows accurate colors, your edits translate correctly to print and look consistent across other calibrated displays.
Who Needs Monitor Calibration
Not every photographer needs to calibrate their monitor. If you only share photos on social media and never print your work, calibration provides limited value since most viewers use uncalibrated screens anyway. However, calibration becomes essential if you fall into any of these categories:
Professional photographers who deliver printed work or client files need calibration to maintain quality standards and avoid costly reprints. Serious hobbyists who print their images at home or through labs benefit from accurate screen-to-print matching. Anyone submitting work to galleries, competitions, or publications needs calibration to ensure their images appear as intended.
Graphic designers, retouchers, and anyone working in color-critical fields should also calibrate their displays. The investment in a colorimeter pays for itself quickly when you consider the cost of wasted prints and client dissatisfaction.
Hardware vs Software Calibration: Which Should You Use?
Monitor calibration falls into two categories: software-only calibration and hardware calibration using a colorimeter. Understanding the difference helps you choose the right approach for your needs and budget.
Software calibration uses visual tests and your eyes to adjust monitor settings. Operating systems include built-in tools like Windows Display Color Calibration and macOS Display Calibrator. These tools guide you through adjusting gamma, brightness, contrast, and color balance using on-screen patterns. The problem is that human eyes adapt to color casts and cannot accurately measure absolute color values.
Hardware calibration uses a device called a colorimeter that physically measures the light your monitor produces. The colorimeter hangs over your screen and reads color patches displayed by calibration software. Based on these measurements, the software creates an ICC profile that tells your computer exactly how to adjust color output for accuracy.
Why Hardware Calibration Is Superior
Hardware calibration with a colorimeter delivers objective, repeatable results that software calibration cannot match. When I compared software calibration to hardware calibration on the same monitor, the difference was immediately obvious. My software-calibrated screen looked acceptable, but after hardware calibration, colors appeared more natural and print matching improved dramatically.
A colorimeter measures actual luminance values in cd/m2, color temperature in Kelvin, and color accuracy using Delta E calculations. These measurements create a profile based on what your monitor actually produces, not what your eyes think they see. Hardware calibration also accounts for monitor aging and manufacturing variations that visual calibration cannot detect.
For print matching specifically, hardware calibration is practically mandatory. The precision required to match screen colors to printed output exceeds what visual calibration can achieve. If you print your work professionally or at home, invest in a colorimeter rather than relying on free software tools.
When Software Calibration Makes Sense
Software calibration has its place despite its limitations. If you cannot afford a colorimeter yet, built-in calibration tools provide a reasonable starting point. They help you set appropriate brightness levels and remove obvious color casts. Software calibration also helps you understand the calibration process before investing in hardware.
Some photographers use software calibration for their laptop displays when traveling, reserving hardware calibration for their main editing workstation. This approach acknowledges that laptop screens have inherent calibration limitations due to viewing angle variations and lower color accuracy.
Recommended Calibration Hardware for Photo Editing
Choosing the right colorimeter depends on your monitor type, budget, and accuracy requirements. Several reputable brands offer reliable options at different price points.
Datacolor Spyder Series
Datacolor Spyder colorimeters have become popular among photographers for their ease of use and consistent results. The SpyderX Pro offers excellent value for most users, measuring color accuracy with a modern lens-based sensor design. The SpyderX Elite adds advanced features like multiple monitor calibration and ambient light monitoring.
I have used the SpyderX Pro for several years on various monitors with reliable results. The software guides you through each step clearly, making the process accessible even for first-time users. Spyder colorimeters work well with standard LED monitors and wide-gamut displays alike.
Calibrite and X-Rite Options
Calibrite now produces the colorimeters previously sold under the X-Rite brand. The Calibrite Display Pro HL offers excellent accuracy for high-brightness displays and wide-gamut monitors. Many professional photographers prefer Calibrite devices for their precise measurements and detailed calibration reports.
The Calibrite ColorChecker Display Plus handles the newest high-brightness monitors and advanced display technologies. If you use a professional-grade monitor like a BenQ SW series or EIZO ColorEdge, the Display Plus takes full advantage of your display’s capabilities.
What to Look for in a Colorimeter
When choosing a calibration device, consider your monitor technology first. Older colorimeters may struggle with LED backlighting or wide-gamut displays. Look for current-generation devices that specifically support your monitor type.
Software compatibility matters too. Most colorimeters include proprietary software, but some also work with DisplayCAL, a free open-source alternative that offers advanced calibration options. Check compatibility if you prefer using specific software.
Budget typically ranges from $150 for entry-level devices to $500+ for professional-grade colorimeters. For most photographers printing their work, a mid-range device like the SpyderX Pro or Calibrite Display Pro provides excellent results without unnecessary expense.
Setting Up Your Environment for Calibration
Successful calibration requires proper environmental conditions. Your room lighting affects how you perceive colors on screen and influences calibration results.
Ambient Lighting Requirements
Calibrate your monitor in lighting conditions that match your typical editing environment. Avoid direct sunlight hitting your screen or bright overhead lights that create reflections. Ideally, use controlled lighting with a color temperature around 5000-6500K to match common calibration targets.
I recommend using bias lighting, a soft light behind your monitor that reduces eye strain and provides consistent ambient illumination. Bias lighting with a 6500K color temperature complements standard calibration settings and helps you perceive colors more accurately.
Turn off any lights that change color temperature throughout the day, such as some LED bulbs with adjustable warmth. Consistent lighting ensures your calibration remains valid across editing sessions.
Monitor Preparation
Before starting calibration, let your monitor warm up for at least 30 minutes. Cold displays show different color characteristics than warmed-up panels. This warm-up period ensures accurate measurements during calibration.
Reset your monitor to factory defaults or its native settings. Disable any automatic brightness adjustment, dynamic contrast, or color enhancement features. These settings interfere with calibration by changing the display output after profiling.
Set your monitor to its native resolution and make sure no scaling is applied. Position the colorimeter carefully on the screen, ensuring it lies flat against the display surface. Most calibration software includes a diagram showing proper placement.
Step-by-Step Hardware Calibration Process
Follow this detailed process to calibrate your monitor using a colorimeter. The exact steps vary slightly between software packages, but the general workflow remains consistent.
Step 1: Pre-Calibration Checklist
Complete these tasks before connecting your colorimeter:
Warm up your monitor for 30 minutes minimum. Clean your screen with a microfiber cloth to remove dust and fingerprints that could affect measurements. Set your room lighting to your typical editing conditions. Close all applications that might change display settings during calibration.
Connect your colorimeter to a USB port and install the latest software from the manufacturer’s website. Updated software often includes improved calibration algorithms and better support for newer monitor technologies.
Step 2: Choose Your Calibration Targets
Selecting appropriate calibration targets determines how your monitor performs after calibration. These settings vary based on your intended use.
White Point (Color Temperature): Most photographers use D65 (6500K) as their white point, which matches daylight and works well for both print and web. Some print-focused photographers prefer D50 (5000K) to match standard viewing booth conditions. I use 6500K because it balances print matching with general editing needs.
Gamma: Set gamma to 2.2 for both Windows and macOS systems. This standard provides consistent tonal response across platforms and matches most print workflows.
Luminance (Brightness): This setting significantly impacts print matching. For general photo editing, 120 cd/m2 provides a good balance. For print-specific work, 80-100 cd/m2 better matches typical print viewing conditions. Brighter settings work better for web-focused editing.
Step 3: Run the Calibration
Launch your calibration software and follow the guided process. The software displays a series of color patches while the colorimeter measures each one. This process typically takes 5-15 minutes depending on your settings.
Stay nearby during calibration but avoid moving the colorimeter or bumping your desk. Some software shows real-time measurements as it progresses, helping you understand what adjustments occur.
The software measures grayscale accuracy, primary and secondary colors, and creates a lookup table that corrects any deviations from your target values. Modern calibration software measures dozens or hundreds of patches to build an accurate profile.
Step 4: Review Your Results
After calibration completes, review the generated report. Most software shows Delta E values indicating how far your monitor deviated from perfect accuracy before and after calibration. Look for average Delta E values under 2.0, which indicates excellent color accuracy.
Save your new ICC profile with a descriptive name that includes the date. This naming convention helps you track when you last calibrated and compare results over time.
Step 5: Verify Your Calibration
Test your calibration with reference images you know well. Compare how these images look now versus before calibration. Colors should appear natural rather than artificially enhanced. Pay attention to skin tones, neutral grays, and shadow detail.
Print a test image and compare it to your calibrated screen under appropriate viewing conditions. The match will not be perfect due to differences between additive (screen) and subtractive (print) color reproduction, but it should be reasonably close.
Print-Specific Calibration Settings
Photographers focused on print matching need different calibration targets than those editing primarily for web display. Understanding these differences helps you achieve better screen-to-print matching.
Lower Luminance for Print Matching
Prints appear much dimmer than monitors, so a screen calibrated to typical brightness levels looks far brighter than any print can match. Setting your luminance to 80-120 cd/m2 brings your monitor closer to print viewing conditions.
I use 100 cd/m2 for my print editing profile. At this level, my screen brightness approximates a print viewed under good lighting. This setting initially feels dark if you are used to brighter displays, but your eyes adjust quickly.
Soft Proofing in Your Editing Software
Soft proofing simulates how your image will appear in print using the ICC profile for your printer and paper combination. Both Adobe Lightroom and Photoshop include soft proofing features that help you predict print output.
To soft proof in Lightroom, enable the Soft Proofing checkbox in the Develop module. Select the ICC profile for your printer and paper combination. The display shows a simulation of your print, and you can make adjustments while seeing a closer approximation of final output.
Photoshop offers similar functionality through View > Proof Setup. Choose your printer profile and enable Proof Colors to see the simulation. Soft proofing does not replace proper calibration, but it provides an additional layer of accuracy for print matching.
Using Lab ICC Profiles
When sending photos to a professional lab, download and install their specific ICC profiles for the paper you choose. These profiles describe how that particular printer and paper combination reproduces colors.
Install lab profiles by right-clicking the downloaded file and selecting Install Profile on Windows, or copying the file to your ColorSync profiles folder on macOS. Once installed, these profiles appear in your soft proofing dropdown menus.
Soft proofing with lab profiles helps you anticipate how your images will look when printed by that specific service. This step catches potential problems before you spend money on prints.
Dual Calibration Profiles: Editing vs Everyday Use
One powerful workflow technique involves creating separate calibration profiles for different purposes. This approach addresses a common problem: print-focused calibration settings often feel too dark for general computer use.
Why Two Profiles Help
When I calibrated my monitor for print matching at 100 cd/m2, I found web browsing and general computer use uncomfortable. Everything appeared dim compared to my previous settings. Switching back to a brighter profile for everyday use made computing pleasant again while keeping my print editing accurate.
Wide-gamut monitors present another reason for dual profiles. An Adobe RGB profile works perfectly for photo editing but makes non-color-managed applications look oversaturated. A second sRGB profile handles everyday tasks where wide gamut causes problems.
Creating Your Editing Profile
For photo editing and print matching, use these target settings:
White point: 6500K (D65) or 5000K (D50) for print-focused work. Gamma: 2.2. Luminance: 80-120 cd/m2 depending on your print viewing conditions. Color space: Native or Adobe RGB if your monitor supports it.
Name this profile something like “Photo Editing [date]” so you can easily identify it when switching profiles.
Creating Your Everyday Profile
For general computer use and web browsing, consider these settings:
White point: 6500K (D65). Gamma: 2.2. Luminance: 150-200 cd/m2 for comfortable viewing. Color space: sRGB for better compatibility with non-color-managed applications.
This brighter profile works better for general tasks while maintaining reasonable color accuracy. Switch between profiles as needed based on your current work.
Understanding Delta E: Measuring Calibration Accuracy
Delta E represents the difference between requested colors and displayed colors. Understanding this metric helps you evaluate calibration quality and compare results.
What Delta E Measures
Delta E uses a mathematical formula to calculate the perceptual difference between two colors. A Delta E of 0 means perfect accuracy, while higher numbers indicate greater deviation. The scale is roughly perceptual, meaning Delta E values around 1.0 represent barely noticeable differences.
Calibration software reports Delta E values for grayscale, color patches, and overall average. These numbers help you understand how accurate your monitor became after calibration.
Target Delta E Values
For photo editing work, aim for average Delta E values under 2.0. Values under 1.0 indicate excellent accuracy that exceeds what most people can perceive. Professional monitors with hardware calibration often achieve Delta E under 1.0 across their color gamut.
Maximum Delta E matters too. Even with a good average, high maximum values indicate specific colors that deviate significantly. Check both average and maximum values when reviewing your calibration report.
Consumer-grade monitors and colorimeters typically achieve Delta E values between 1.5 and 3.0 after calibration. While not perfect, this accuracy significantly improves upon uncalibrated displays and provides good results for most photography work.
Calibration Schedule: How Often Should You Recalibrate?
Monitor calibration drifts over time as display components age and characteristics change. Establishing a regular calibration schedule maintains accuracy.
Recommended Calibration Frequency
Professional photographers should recalibrate every 2-4 weeks to maintain consistent accuracy. Serious hobbyists can calibrate monthly or quarterly depending on how much editing they do. Any monitor over 3-4 years old may need more frequent calibration as aging accelerates.
I calibrate my main editing monitor every two weeks as part of my regular workflow. This schedule ensures consistent results and catches any drift before it becomes significant. The process takes about 15 minutes, so it fits easily into my routine.
Signs Your Calibration Has Drifted
Watch for these indicators that recalibration is needed:
Colors in familiar images start looking different than expected. Prints no longer match your screen as closely as they once did. Skin tones appear shifted or unnatural when editing. Gray areas show color casts that were not present before.
Trust your visual assessment alongside scheduled calibration. If something looks wrong, verify your calibration even if it is not due yet.
Monitor Aging Considerations
Monitor backlights dim over time, sometimes significantly. A monitor that calibrated to 120 cd/m2 easily when new might struggle to reach 100 cd/m2 after several years. This dimming affects both luminance and color accuracy.
When your monitor cannot reach target luminance values, consider replacement. Professional-grade monitors typically last 5-7 years with good performance, while consumer monitors may need replacement sooner for color-critical work.
Troubleshooting Common Calibration Problems
Even with proper calibration, problems sometimes occur. Here are solutions to the most common issues photographers encounter.
Prints Still Do Not Match Screen
This remains the number one complaint even after calibration. Several factors beyond monitor calibration affect print matching:
View your prints under appropriate lighting. Daylight-balanced bulbs (5000-6500K) provide the most accurate print viewing. Household lighting often has strong color casts that make prints look different than intended.
Use soft proofing with the correct ICC profile for your printer and paper. Without this step, you edit blindly regarding how colors translate to print.
Recognize that monitors and prints use fundamentally different color reproduction. Monitors emit light (additive color) while prints reflect light (subtractive color). Perfect matching is impossible, but good calibration brings you close.
Colors Look Flat After Calibration
Many users initially dislike their calibrated monitor because colors appear less vibrant. This reaction is normal and actually indicates successful calibration.
Uncalibrated monitors often display oversaturated colors that look pleasing but are inaccurate. After calibration, colors appear more natural but less exciting. Give yourself a week to adjust before deciding calibration failed.
If colors genuinely appear washed out rather than natural, verify your calibration settings. Check that you selected appropriate targets and that the colorimeter functioned correctly during calibration.
Monitor Too Dark for Web Viewing
Print-focused calibration uses lower luminance that feels too dim for web browsing. This problem explains why dual calibration profiles work so well. Switch to your brighter everyday profile when not editing photos.
If you prefer a single profile, increase luminance to 140-160 cd/m2 as a compromise. This setting works reasonably well for both editing and general use, though print matching suffers slightly.
Inconsistent Results Between Calibrations
When calibration results vary significantly each time you profile your monitor, several factors could contribute:
Ensure consistent environmental conditions. Changes in ambient lighting or monitor warm-up time affect results. Let your monitor warm up for the same duration before each calibration session.
Check colorimeter placement. Inconsistent positioning on the screen introduces measurement variations. Some colorimeters include alignment guides to help with consistent placement.
Monitor stability matters too. New monitors sometimes drift more during their first few months of use. Older monitors may become less stable as components degrade.
Frequently Asked Questions About Monitor Calibration
How to calibrate a monitor to edit photos?
To calibrate a monitor for photo editing, use a hardware colorimeter device like the Datacolor SpyderX or Calibrite Display Pro. Install the included software, let your monitor warm up for 30 minutes, set targets to 6500K white point, 2.2 gamma, and 100-120 cd/m2 luminance, then run the calibration process. The colorimeter measures color patches on your screen and creates an ICC profile that corrects color accuracy.
Why calibrate a monitor for photography?
Calibrating your monitor ensures the colors you see on screen accurately represent your image files and match what others see on calibrated displays. Without calibration, your monitor may show incorrect colors that lead to poor editing decisions and prints that do not match your expectations. Calibration saves money on wasted prints and maintains professional quality standards.
What specs do you need for a photo editing monitor?
A good photo editing monitor should have an IPS panel for accurate color reproduction and wide viewing angles, at least 99% sRGB coverage minimum with Adobe RGB support preferred, resolution of 2560×1440 or higher, and brightness of at least 300 cd/m2. Professional monitors also offer hardware calibration support and factory-calibrated Delta E under 2.0.
How does monitor calibration work?
Monitor calibration works by measuring actual color output from your display and creating a correction profile. A colorimeter device hangs on your screen and measures color patches that the calibration software displays. Based on these measurements, the software creates an ICC profile that tells your operating system how to adjust color signals so your monitor displays accurate colors.
How often should you calibrate your monitor?
Professional photographers should calibrate every 2-4 weeks to maintain consistent accuracy. Serious hobbyists can calibrate monthly or quarterly. Monitors drift over time as backlights age, so regular calibration ensures ongoing accuracy. Calibrate more frequently for monitors over 3-4 years old or if you notice colors appearing inconsistent.
Do I really need to calibrate my monitor for photo editing?
Yes, if you print your photos or deliver files to clients, calibration is essential for accurate color reproduction. If you only share images on social media where most viewers use uncalibrated screens, calibration provides less value. However, calibration helps you make better editing decisions regardless of output destination and prevents surprises when you do print your work.
Can you calibrate a monitor without hardware?
Yes, you can use free software calibration tools built into Windows and macOS, but results are significantly less accurate than hardware calibration. Visual calibration relies on your eyes, which adapt to color casts and cannot measure absolute values. For serious photo editing and print matching, hardware calibration with a colorimeter is strongly recommended over software-only methods.
What is the best monitor calibration tool?
The best calibration tools for most photographers are the Datacolor SpyderX Pro or Calibrite Display Pro HL, both offering excellent accuracy around $150-200. For professional use with high-end monitors, the Calibrite ColorChecker Display Plus provides superior performance. X-Rite i1 Display Pro remains popular among professionals. Choose based on your monitor type, budget, and accuracy requirements.
Conclusion
Monitor calibration for photo editing transforms your workflow from guesswork into precision. By using a hardware colorimeter with appropriate target settings, you achieve the screen-to-print matching that saves money on wasted prints and delivers consistent professional results.
Start with the basics: warm up your monitor, control your ambient lighting, and calibrate to 6500K white point, 2.2 gamma, and 100-120 cd/m2 luminance for a good balance between print matching and everyday use. Create dual profiles if you find print-focused settings too dark for general computing.
Make calibration a regular part of your photography workflow. The 15 minutes you spend every few weeks ensures your edits translate accurately to print and look consistent across other displays. Your future self will thank you when your prints match your screen and your clients receive the quality they expect.