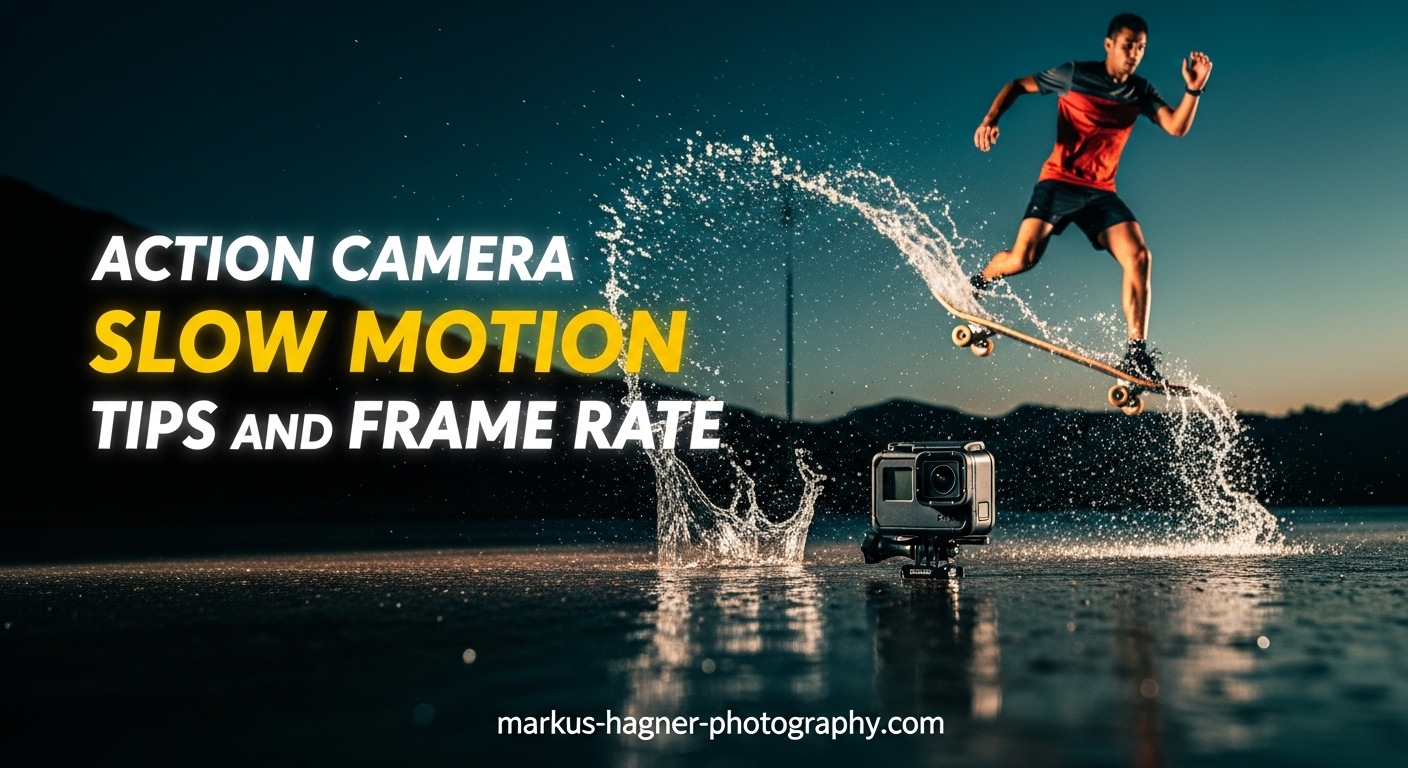
When I first started shooting action sports with my GoPro, I captured a perfect wave ride at 30fps. Later, when I tried to slow it down in editing, the footage turned into a choppy mess. That moment taught me something crucial about action camera slow motion: the frame rate you choose before hitting record determines everything about your final result. In this guide, I’ll share what I’ve learned after years of testing different frame rates on everything from mountain biking to surfing, so you can capture smooth, cinematic slow motion every time.
Slow motion video works by recording more frames per second than you play back. When you capture 120 frames in one second but play them over four seconds at 30fps, the action slows to 25% of its original speed. This reveals details invisible to the naked eye and adds dramatic impact to fast-moving subjects. For action camera users, understanding frame rates is essential because these cameras offer different capabilities than traditional video cameras.
In this article, you’ll learn exactly which frame rates to use for different slow motion effects, how shutter speed affects your results, and the specific settings that work best with popular action cameras like GoPro, DJI Osmo Action, and Insta360. I’ll also cover common pitfalls that create choppy or grainy footage and share practical solutions based on real-world testing.
What Is Frame Rate and Why Does It Matter for Slow Motion?
Frame rate, measured in frames per second (fps), tells you how many individual images your camera captures each second. Standard video typically uses 24fps, 25fps, or 30fps, which creates smooth motion when played back at normal speed. Higher frame rates capture more detail in fast-moving scenes, giving you more flexibility when slowing footage down.
Think of it like a flipbook. If you draw 30 pictures to show someone running across a page, flipping through at normal speed shows smooth motion. But if you draw 120 pictures of the same action and flip through at the same speed, the movement appears much slower and more detailed. That’s exactly how slow motion video works.
The math behind slow motion is straightforward. Divide your recording frame rate by your playback frame rate to find your slow motion percentage. Recording 60fps and playing at 30fps gives you 50% speed (2x slow motion). Recording 120fps at 30fps playback slows action to 25% speed (4x slow motion). Higher frame rates mean slower, smoother results.
Here’s a quick reference showing what each frame rate delivers when played back at 30fps:
Frame Rate Slow Motion Guide:
– 30fps: No slow motion (normal speed)
– 60fps: 50% speed (2x slow motion) – subtle slowdown, great for most action
– 120fps: 25% speed (4x slow motion) – moderate slow motion, reveals detail
– 240fps: 12.5% speed (8x slow motion) – dramatic super slow motion
– 480fps: 6.25% speed (16x slow motion) – extreme slow motion for very fast subjects
Frame rate also affects file size and storage needs. Recording at 120fps creates roughly four times more data than 30fps because you’re capturing four times as many frames. A 64GB memory card that holds two hours of 30fps footage might only store 30 minutes at 120fps. Planning your storage becomes critical for longer shooting sessions.
Choosing the Right Frame Rate for Action Camera Slow Motion
Selecting the right frame rate depends on what you’re filming and how much you want to slow it down. After testing different frame rates across various action sports, I’ve developed clear guidelines that work consistently well. The key is matching your frame rate to both your subject’s speed and your creative goals.
60fps: Best for Subtle Slow Motion
Sixty frames per second gives you 2x slow motion when played back at 30fps. This is perfect for activities that don’t move extremely fast, or when you want to emphasize a moment without making it feel exaggerated. I use 60fps for hiking shots, casual biking, and general travel footage where I want just a touch of slow motion.
What makes 60fps particularly useful is its versatility. The footage still looks natural at normal speed, so you can use clips either way in editing. It also performs better in lower light than higher frame rates because each frame gets more exposure time. If you’re unsure which frame rate to choose, 60fps is the safest starting point.
120fps: Best for Moderate Slow Motion
One hundred twenty frames per second creates 4x slow motion at 30fps playback. This is my go-to frame rate for most action sports including mountain biking, skateboarding, skiing, and surfing. It reveals details like spray off a surfboard or dust flying from tires while keeping the motion smooth and cinematic.
Forum discussions consistently show that experienced videographers prefer 120fps for most action camera work. The slowdown is dramatic enough to look impressive but not so extreme that it becomes tedious to watch. You can also slow 120fps to 40% speed on a 24fps timeline for frame-perfect results with no dropped frames.
240fps: Best for Dramatic Super Slow Motion
Two hundred forty frames per second delivers 8x slow motion at 30fps. This extreme slowdown works best for very fast subjects or moments you want to emphasize dramatically. Water splashing, a bat hitting a ball, or a BMX rider spinning through the air all benefit from 240fps capture.
The trade-off with 240fps is quality and light requirements. Many action cameras can only record 240fps at 1080p resolution rather than 4K. Each frame gets very little light, making this frame rate challenging in anything but bright conditions. I only use 240fps when I specifically need that dramatic effect and have good lighting.
When to Use Each Frame Rate:
– 60fps: General action, travel, hiking, casual sports, low light situations
– 120fps: Most action sports, biking, skiing, surfing, skateboarding
– 240fps: Water splashes, impacts, very fast movements, dramatic moments
– Mixed approach: Shoot key moments at higher fps, general footage at 60fps
Frame Rate vs Resolution Trade-offs
Action cameras often force you to choose between frame rate and resolution. Many cameras can shoot 4K at 60fps but drop to 1080p for 120fps or 240fps. I generally prefer 120fps at 1080p over 60fps at 4K when slow motion is my primary goal. The smoother slow motion matters more than resolution for most action shots.
Consider your final delivery platform too. If you’re posting to social media where videos play on small screens, 1080p slow motion often looks better than 4K normal speed. For larger screens or professional projects, the resolution might matter more. Test both approaches to see what works for your specific use case.
Action Camera Slow Motion Settings: Brand-Specific Tips
Different action camera brands handle high frame rates differently. Understanding your camera’s specific capabilities and limitations helps you get the best results. I’ve tested slow motion settings on all major action camera brands, and each has unique strengths worth knowing.
GoPro Slow Motion Capabilities
GoPro cameras excel at slow motion capture, with recent models offering impressive frame rates. The HERO12 Black shoots 5.3K at 60fps, 4K at 120fps, and 1080p at 240fps. GoPro’s “Slow Motion” mode automatically sets optimal settings, but I prefer manual control for better results.
One thing I’ve noticed with GoPro is that HyperSmooth stabilization works harder at higher frame rates. This can sometimes introduce micro-jitters in very slow footage. For the cleanest slow motion, I sometimes turn stabilization off and use a gimbal instead. The footage comes out sharper and more natural-looking.
GoPro’s Protune settings give you additional control. For slow motion, I set ISO Min to 100 and ISO Max as low as conditions allow, typically 800 or 1600. Higher ISO at high frame rates creates noticeable noise. Sharpness set to “Low” prevents over-processing artifacts that become visible in slow motion.
DJI Osmo Action Slow Motion Modes
DJI’s Osmo Action series offers competitive slow motion features. The Osmo Action 5 Pro records 4K at 120fps and 1080p at 240fps, matching GoPro’s capabilities. DJI’s RockSteady stabilization performs well at high frame rates, often with less of the micro-jitter I see in some GoPro footage.
DJI cameras include a dedicated slow motion mode that handles exposure automatically. In my testing, this works well in bright conditions but struggles in mixed lighting. For consistent results, I use manual exposure settings. Setting shutter speed manually ensures proper motion blur at any frame rate.
The Osmo Action’s horizon leveling feature is particularly useful for action camera slow motion. When you’re mounted on a moving bike or surfboard, the horizon can tilt dramatically. Horizon leveling keeps the horizon steady even when the camera rotates, making slow motion footage much more watchable.
Insta360 Slow Motion Options
Insta360 cameras approach slow motion differently because of their 360-degree capture. The X4 records 5.7K at 60fps and 4K at 100fps, with 8K at 30fps for standard footage. The unique advantage is reframing in post-production, which gives you creative options unavailable with traditional action cameras.
For slow motion, Insta360’s “Bullet Time” effect is worth mentioning. This uses extreme slow motion combined with the 360-degree field of view to create dramatic frozen-in-time shots. It requires a specific mounting setup but produces unique results impossible with standard cameras.
The FlowState stabilization on Insta360 cameras is excellent for slow motion. Because the camera captures everything around it, stabilization has more data to work with. Even at 240fps equivalent, the footage stays remarkably smooth without the artifacts I see on other systems.
Heat Management for High Frame Rates
Recording at high frame rates generates significant heat. Action cameras in waterproof housings are particularly prone to overheating at 120fps and above. I’ve had cameras shut down after 15-20 minutes of continuous 240fps recording in warm conditions.
To manage heat, I record in shorter bursts rather than continuous takes. For action sports, this rarely matters because most exciting moments are brief. I also remove the camera from its housing when possible and avoid leaving it in direct sunlight between shots. Some cameras have dedicated cooling vents that help when shooting high frame rates.
Storage Considerations for High Frame Rates
High frame rate recording fills storage cards quickly. At 120fps 4K, a single minute of footage can consume 400MB or more. I always use fast V30 or V60 rated cards to prevent dropped frames and carry multiple cards for longer shooting sessions.
Here’s a rough storage guide based on my experience:
– 60fps 4K: Approximately 400MB per minute
– 120fps 4K: Approximately 600MB per minute
– 240fps 1080p: Approximately 500MB per minute
– Recommended card: 128GB or larger, V30 rating minimum
Shutter Speed and the 180-Degree Rule for Smooth Slow Motion
Frame rate determines how much you can slow footage, but shutter speed determines how that slow motion looks. The relationship between these two settings is crucial for professional-looking results. Understanding this connection transformed my slow motion footage from amateur to cinematic.
The 180-Degree Shutter Rule Explained
The 180-degree shutter rule states that your shutter speed should be approximately twice your frame rate. For 60fps, use 1/120 second shutter speed. For 120fps, use 1/240 second. This creates natural-looking motion blur that our eyes expect from video.
Why does this matter? Each frame needs some motion blur to blend smoothly with the next. If your shutter speed is too fast, each frame becomes sharp and distinct, creating a stuttering effect sometimes called the “Saving Private Ryan look.” Too slow, and frames blur together, making motion look smeary.
Following the 180-degree rule gives you the right balance. The motion blur at this setting looks natural and cinematic. When you slow footage down, this blur helps smooth the transition between frames rather than showing distinct, jerky movements.
Shutter Speed Settings by Frame Rate:
– 60fps: 1/120 second shutter speed
– 120fps: 1/240 second shutter speed
– 240fps: 1/480 second shutter speed (or fastest available)
– 30fps timeline: Match recording frame rate, not timeline
Low Light Challenges with High Frame Rates
High frame rates combined with fast shutter speeds require lots of light. At 120fps with 1/240 second shutter, each frame gets only about 4 milliseconds of exposure. In dim conditions, this forces your camera to boost ISO, creating noise that becomes very visible in slow motion footage.
I learned this lesson shooting mountain biking in a forest. My 120fps footage looked great in sunny sections but turned grainy and noisy under tree cover. The difference in light wasn’t obvious to my eye, but the camera’s sensor struggled with the fast shutter speed required for proper slow motion.
Solutions for low light slow motion include shooting at lower frame rates (60fps instead of 120fps), adding artificial light when possible, or accepting some noise and reducing it in post-production. Many action cameras handle noise well up to ISO 1600, but anything higher usually shows obvious artifacts.
Using ND Filters with Action Cameras
ND (neutral density) filters reduce light entering your lens, allowing slower shutter speeds in bright conditions. For action cameras, ND filters are essential when shooting high frame rates in sunlight. Without them, your camera might use extremely fast shutter speeds that create that stuttery look.
I carry ND8, ND16, and ND32 filters for different lighting conditions. In bright sun at 120fps, an ND16 usually gets me close to the proper 1/240 shutter speed. The ND32 works for extremely bright conditions like snow or beach shooting. Many action camera brands make clip-on filter systems specifically for this purpose.
The investment in ND filters pays off immediately. Footage shot with proper motion blur looks professional and cinematic. Without filters, even expensive action cameras produce video that looks like cheap security camera footage when shooting high frame rates in daylight.
Motion Blur Considerations
Different subjects benefit from different amounts of motion blur. Fast action typically looks better with slightly more blur, while detailed technical movements might benefit from sharper frames. Experiment with breaking the 180-degree rule intentionally for creative effects.
For sports where you want to freeze individual moments within slow motion, try a slightly faster shutter speed. For flowing, dreamy footage, slightly slower shutter speeds create more blur. These variations give you creative control beyond the standard rules.
How to Edit Action Camera Slow Motion Footage In 2026?
Capturing great slow motion footage is only half the process. How you handle that footage in editing determines the final quality. There are two main approaches to creating slow motion: conforming footage and applying speed effects. Each has advantages depending on your needs.
Conforming Footage vs Speed Effects
Conforming means interpreting your footage at a different frame rate than it was recorded. When you conform 120fps footage to 30fps, every frame plays slower without any processing. This produces the cleanest results because you’re using actual captured frames rather than computer-generated ones.
Speed effects, applied in editing software, stretch or compress footage by interpolating between frames. This can create slow motion from any footage, but quality varies. For footage shot at high frame rates, conforming almost always produces better results than speed effects.
The forum discussions I’ve researched consistently recommend conforming over speed effects for action camera slow motion. Users report smoother playback and better quality when they conform properly rather than applying percentage-based speed changes. I follow this approach for all my professional work.
Step-by-Step Conforming Workflow
Here’s the workflow I use in most editing software:
Step 1: Import your high frame rate footage into your project.
Step 2: Create a sequence matching your delivery frame rate (usually 24fps or 30fps).
Step 3: Right-click your footage and select “Interpret Footage” or similar option.
Step 4: Change the frame rate to match your sequence (30fps or 24fps).
Step 5: Drag the conformed footage to your timeline – it now plays in slow motion.
This method preserves every captured frame and produces butter-smooth slow motion. The footage duration automatically extends based on the frame rate change. A 10-second clip at 120fps becomes 40 seconds when conformed to 30fps.
Timeline Frame Rate: 24fps vs 30fps
Your timeline frame rate affects how slow motion footage behaves. A 30fps timeline gives clean mathematical relationships with common frame rates. Sixty frames per second slows to exactly 50%, 120fps to 25%, and 240fps to 12.5%.
Twenty-four frames per second timelines create slightly different slowdowns. One hundred twenty frames per second at 24fps gives you 20% speed (5x slow motion). This can create smoother results for some frame rates but requires more planning. Choose your timeline frame rate based on your delivery needs and the specific slow motion effects you want.
For most action camera users, 30fps timelines work well because they match the common playback frame rates of online platforms. Twenty-four frames per second creates a more cinematic feel but requires more careful frame rate planning.
Speed Ramping Basics
Speed ramping transitions between normal speed and slow motion within a single clip. This technique adds energy and emphasis to key moments. Most editing software handles this by creating keyframes that control playback speed over time.
For effective speed ramps, start your clip at normal speed, then slow down as you approach the key moment, and return to normal speed after. The transition should feel natural, usually taking 10-15 frames. Shooting at higher frame rates gives you more flexibility for clean speed ramps because you have more frames to work with.
Optical Flow vs Frame Blending
When you need to slow footage beyond what the captured frame rate supports, software can generate intermediate frames. Frame blending averages adjacent frames together, which can look smeary. Optical flow analyzes motion and creates new frames based on pixel movement, producing cleaner results.
For action camera slow motion, I avoid both when possible by shooting at appropriate frame rates. But when you need extreme slow motion from 60fps or 120fps footage, optical flow usually produces better results than frame blending. Most modern editing software defaults to optical flow for speed changes.
Export Settings for Slow Motion
Export settings affect how your slow motion looks on different platforms. For YouTube and most online sharing, export at your timeline frame rate (24fps or 30fps) with a bitrate appropriate for your resolution. H.264 or H.265 codecs work well for most purposes.
For maximum quality, use higher bitrates than standard video. Slow motion footage often contains more detail that viewers scrutinize. A bitrate 20-30% higher than your normal settings helps preserve quality. For 4K slow motion, I typically export at 50-60 Mbps rather than the standard 35-45 Mbps.
Frequently Asked Questions
What frame rate is best for slow motion?
For action camera slow motion, 120fps is the best all-around choice, providing 4x slowdown at 30fps playback. Use 60fps for subtle 2x slow motion in good light, and 240fps for dramatic 8x slow motion of very fast subjects. The best frame rate depends on your subject speed, lighting conditions, and how dramatic you want the effect.
What is a good fps for an action camera?
A good fps for action cameras depends on your purpose. For general use, 60fps provides versatility with 2x slow motion capability. For action sports, 120fps gives you 4x slow motion that reveals detail while staying smooth. For maximum slow motion, 240fps works but often requires 1080p resolution and excellent lighting.
What does 120 and 240 mean in slowmo?
The numbers 120 and 240 refer to frames per second (fps). Recording at 120fps means capturing 120 individual frames each second, which creates 4x slow motion when played at 30fps. Recording at 240fps captures twice as many frames, creating 8x slow motion at 30fps playback. Higher numbers mean slower, more detailed slow motion.
Should I shoot in 24fps or 30fps?
Choose 24fps for a cinematic film look and 30fps for standard video. For slow motion, your timeline frame rate matters more than your base recording frame rate. A 30fps timeline gives cleaner mathematical relationships with common slow motion frame rates (60fps = 2x, 120fps = 4x). A 24fps timeline creates a more cinematic feel but requires different calculations (120fps = 5x slow motion).
What shutter speed should I use for slow motion?
Use the 180-degree shutter rule: set your shutter speed to approximately twice your frame rate. For 60fps slow motion, use 1/120 second shutter speed. For 120fps, use 1/240 second. For 240fps, use 1/480 second. This creates natural motion blur that makes slow motion look smooth and cinematic rather than stuttery.
Why is my slow motion footage grainy?
Slow motion footage becomes grainy when high frame rates force fast shutter speeds in low light. At 120fps with proper shutter speed, each frame gets only 4 milliseconds of exposure. In dim conditions, your camera boosts ISO to compensate, creating visible noise. Solutions include shooting at lower frame rates (60fps instead of 120fps), adding light, or reducing noise in post-production.
Final Tips for Action Camera Slow Motion
Getting great action camera slow motion comes down to matching your frame rate to your subject, following the 180-degree shutter rule, and understanding your camera’s specific capabilities. For most action sports, 120fps at 1080p delivers the best balance of smooth slow motion and manageable file sizes. Remember that light is your biggest limitation at high frame rates, so plan your shoots for bright conditions or accept some noise in lower light.
Experiment with different frame rates to find what works for your specific activities. The rules I’ve shared here are starting points, not absolutes. Once you understand the fundamentals, you can break them intentionally for creative effects. The most important step is to get out and shoot – your best slow motion footage is waiting to be captured.