Complex cutouts have frustrated photographers and designers for years. You spend hours carefully selecting hair strands, only to end up with blocky edges or ugly halos that ruin the final result. The Select and Mask Workspace in Photoshop solves this problem by giving you a dedicated environment packed with specialized tools for handling challenging selections.
In this guide, I’ll walk you through exactly how to use the Select and Mask Workspace for complex cutouts. You’ll learn the two-step workflow that professionals use, which tools to use for different edge types, and how to fix common problems like fringing and halo effects. By the end, you’ll be able to cut out hair, fur, and fine details with confidence.
What is the Select and Mask Workspace in Photoshop?
The Select and Mask Workspace is Photoshop’s dedicated environment for refining selections and creating precise masks. It replaced the old Refine Edge dialog in Photoshop CC 2015.5 and provides a more intuitive interface with better tools for handling complex edges like hair, fur, and transparent objects.
Inside this workspace, you’ll find specialized tools that aren’t available elsewhere in Photoshop. The Refine Edge Brush, for example, uses edge detection algorithms to automatically find and select fine details. You also get multiple view modes that help you see exactly what your selection looks like against different backgrounds before you commit to it.
Photographers use this workspace primarily for background removal and creating composites. Graphic designers rely on it for product photography cutouts and complex clipping paths. Digital artists use it to extract subjects from backgrounds for photo manipulation. If you’ve ever struggled to select someone’s hair or remove a subject from a busy background, this workspace was built for you.
How to Access the Select and Mask Workspace
You can open the Select and Mask Workspace in several ways. The most common method is through the Select menu at the top of your screen. Go to Select > Select and Mask. You can also press Ctrl+Alt+R (Windows) or Cmd+Option+R (Mac) as a keyboard shortcut.
Before entering the workspace, you typically want to make an initial selection. The Select Subject button uses Adobe Sensei AI to automatically identify and select the main subject in your image. You’ll find this button in the Options bar when any selection tool is active, or inside the Select and Mask Workspace itself.
Select Subject: Device vs Cloud Processing
When you use Select Subject, you have two processing options: Device and Cloud. Device processing runs locally on your computer. It’s faster and works offline, but may produce slightly less accurate results. Cloud processing sends your image to Adobe’s servers for analysis using more powerful AI models. This produces better selections but requires an internet connection and takes a few seconds longer.
For complex subjects with lots of hair or fine details, Cloud processing often delivers noticeably better initial selections. I recommend using Cloud when you have a good internet connection and need the highest quality. Use Device when speed matters more or when you’re working offline.
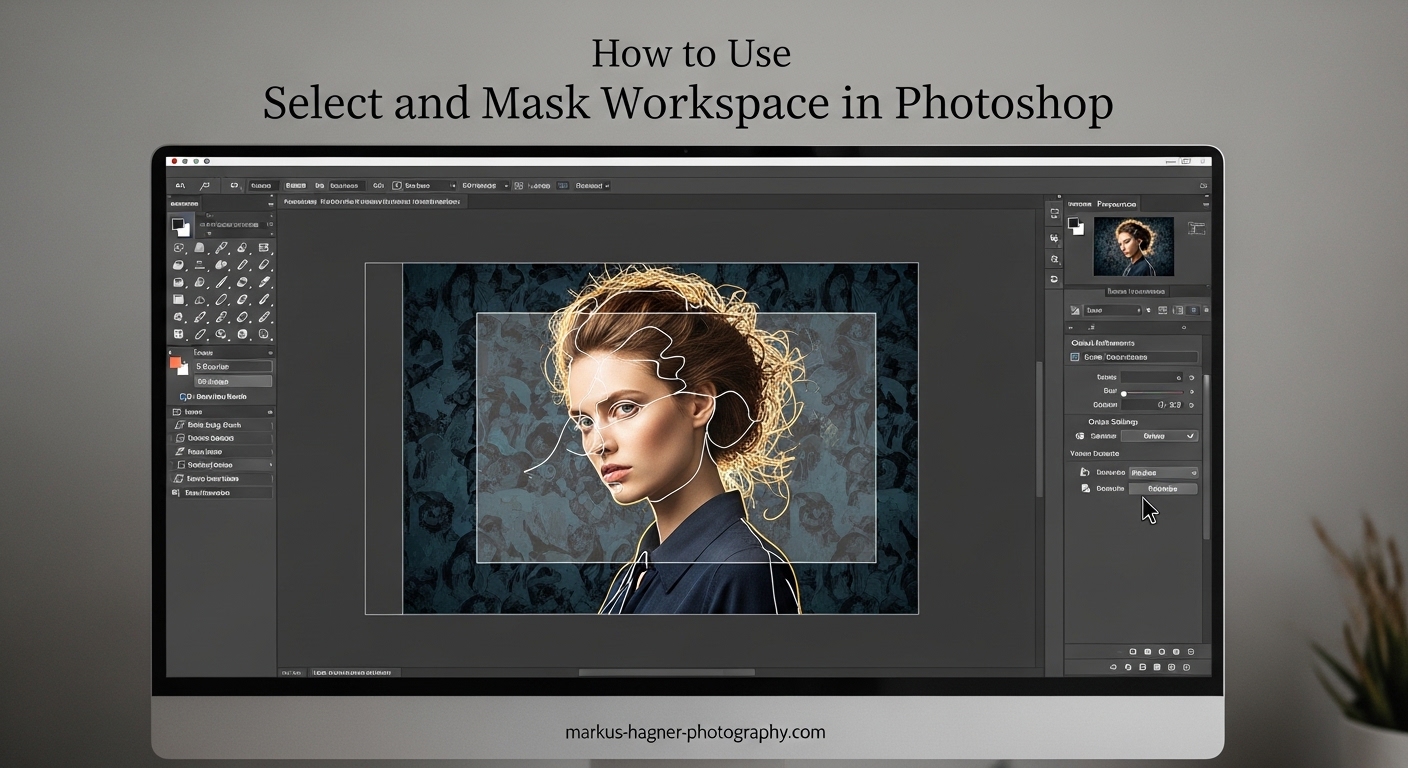
Understanding the Workspace Interface
The Select and Mask Workspace looks different from the main Photoshop interface. On the left side, you’ll find your selection and refinement tools. The right panel contains View Mode options, Edge Detection controls, Global Refinements sliders, and Output Settings at the bottom.
Take a moment to familiarize yourself with the layout. The Properties panel on the right is where most of your refinement work happens. The disclosure triangles (those small arrow icons next to section names) let you expand or collapse each section to save space.
Understanding View Modes in Select and Mask
View Modes are essential for evaluating your selection accurately. Each mode shows your selection against a different background, helping you spot problems you might miss with just one view. The View Mode buttons are located at the top of the Properties panel.
Onion Skin (press F) overlays your selection on a semi-transparent version of the original image. This helps you see how well your edges align with the original subject. It’s particularly useful for checking if you’ve accidentally included or excluded areas near the selection boundary.
On Black (press K, then cycle) displays your selection against a solid black background. Dark edges and hair show up clearly against this backdrop. If your subject has dark hair, you’ll easily spot gaps or incomplete selections.
On White (press K to cycle through) shows your selection against white. Light-colored edges become immediately visible. This is excellent for checking blonde or light-colored hair selections and spotting white fringing.
Overlay (press V) displays a colored overlay on unselected areas while keeping selected areas clear. You can change the overlay color and opacity in the View Mode settings. This mode feels natural if you’re used to working with Quick Mask mode.
Black and White shows your selection as a grayscale mask where white represents selected areas and black represents unselected areas. This gives you a clear view of your mask’s density and helps identify semi-transparent areas that might need attention.
View Mode Keyboard Shortcuts
Switching between view modes quickly will speed up your workflow significantly. Press F for Onion Skin view. Press K to cycle through On Black, On White, and Black and White views. Press V for Overlay mode. Press X to temporarily disable the view mode and see your original image.
Selection and Refinement Tools Explained
The Select and Mask Workspace provides several tools for building and refining your selection. Understanding when to use each tool is crucial for efficient workflow and professional results.
Quick Selection Tool
The Quick Selection Tool works by detecting edges as you paint across your image. Click and drag over areas you want to add to your selection. Hold Alt (Windows) or Option (Mac) and paint to subtract from your selection. This tool excels at quickly building rough selections on well-defined subjects.
Use the Quick Selection Tool for the initial selection pass on subjects with clear edges. It’s fast and intuitive, but it struggles with fine details like hair. Save detailed refinement for the Refine Edge Brush instead of trying to force Quick Selection to do everything.
Refine Edge Brush Tool
The Refine Edge Brush Tool is the star of the Select and Mask Workspace for complex cutouts. It uses edge detection technology to identify and select fine details automatically. Simply paint over the edge areas where you want better detail, and the tool analyzes the pixels to find hair strands, fur, or other fine elements.
For hair selection, paint along the hair edges with a brush size roughly matching the width of the hair detail area. Don’t paint over the entire subject—just the edges that need refinement. The tool works best when you let it find the edges rather than trying to paint every strand manually.
Brush Tool
The standard Brush Tool inside Select and Mask lets you manually add to or subtract from your selection. This gives you precise control for cleaning up specific areas that the automated tools missed. Use a soft brush for gradual transitions or a hard brush for clean edges.
Switch between Add and Subtract modes using the buttons in the Options bar, or use the Shift key to temporarily switch to subtract mode while painting. This tool is your safety net for fixing selection problems that the smarter tools couldn’t handle.
Object Selection Tool
The Object Selection Tool uses AI to identify and select objects automatically. Draw a rectangular or lasso selection around an object, and Photoshop analyzes the area to find the subject. This is particularly useful for multi-subject images where you only want to select one person or object.
In the Options bar, you can choose between Rectangle and Lasso modes. Lasso mode gives you more control to draw a loose outline around irregularly shaped subjects. The AI does the hard work of finding the actual edges within your drawn boundary.
Lasso and Polygonal Lasso Tools
These tools provide manual selection control for specific edge fixes. The standard Lasso Tool lets you draw freehand selections. The Polygonal Lasso Tool creates selections made of straight line segments, which is useful for architectural subjects or products with geometric shapes.
Use these tools when you need precise manual control over specific selection boundaries. They’re particularly helpful for fixing edges where the automated tools made mistakes or for adding geometric subjects to your selection.
How to Select Hair and Fine Details in Select and Mask
Hair selection is where the Select and Mask Workspace truly shines. The combination of the Refine Edge Brush and proper Edge Detection settings can transform an impossible task into a manageable one. Here’s the professional approach to handling hair and fine details.
The Two-Step Workflow for Mixed Edges
Most subjects have two types of edges: hard edges (shoulders, clothing, skin) and soft edges (hair, fur, transparent areas). Trying to refine both edge types in one pass is a common mistake that leads to problems. Global refinement sliders that help hard edges will destroy hair detail, while settings that help hair will make hard edges look blurry.
The solution is a two-step workflow. First, refine your hard edges using global refinements like Smooth and Contrast. Then, use the Refine Edge Brush specifically on hair and fine detail areas. This keeps your hard edges crisp while maintaining natural hair detail.
Using the Refine Edge Brush Effectively
Start by selecting the Refine Edge Brush Tool from the toolbar. Choose a brush size that roughly matches the width of the hair detail area you’re working on. Paint over the hair edges, covering both the subject’s hair and a bit of the background area where stray strands might extend.
The tool analyzes the contrast and texture in the painted area to identify individual hair strands. You’ll see the selection automatically refine to include fine details. If the results are too aggressive or too subtle, adjust the Edge Detection Radius slider.
Edge Detection Radius Settings
The Edge Detection Radius controls how far the tool looks from the selection boundary to find edges. A higher radius captures more detail but may include unwanted background elements. A lower radius is more conservative but might miss fine details.
For most hair selections, start with a radius between 3 and 10 pixels. Fine, wispy hair works better with lower values around 3-5 pixels. Thick, voluminous hair can handle higher values up to 10-15 pixels. Enable the Smart Radius option to let Photoshop automatically adjust the radius based on edge characteristics.
The Refine Hair Button
Photoshop includes a dedicated Refine Hair button in the Select and Mask Workspace. Click this button to apply an AI-powered hair refinement automatically. It’s essentially a one-click solution that analyzes your selection and applies appropriate edge detection specifically optimized for hair.
The Refine Hair button works best as a starting point. After clicking it, examine the results carefully and use the Refine Edge Brush to touch up any areas that need more attention. Don’t rely on it as your only hair refinement step—treat it as a head start.
Why Global Refinements Can Ruin Hair
Here’s a critical mistake many users make: applying global refinements after perfectly refining hair with the Refine Edge Brush. The Smooth slider, in particular, will blur and simplify your carefully selected hair strands. The Feather slider softens all edges equally, making hair look unnatural.
Apply global refinements before using the Refine Edge Brush. This way, your hard edges benefit from smoothing and contrast adjustments, while your hair detail is preserved and enhanced separately. Think of it as two independent refinement passes rather than one combined operation.
Global Refinement Sliders: When and How to Use Them
The Global Refinements section contains four sliders that affect your entire selection. Understanding what each slider does and when to use it will dramatically improve your cutout quality.
Smooth Slider
The Smooth slider reduces jagged edges and creates cleaner selection boundaries. Higher values remove more of the small irregularities that make selections look artificial. Use this on hard edges that appear blocky or pixelated.
Start with a value between 1 and 5 for most subjects. Portraits with skin edges typically need only 1-3. Product photography with clean edges might benefit from slightly higher values. Avoid going above 10-15 unless you specifically want a stylized, simplified edge.
Feather Slider
Feathering creates a soft transition between selected and unselected areas. This mimics the natural edge softness you see in real photographs. Use feathering when your subject has naturally soft edges or when you want a subtle blend between subject and background.
Most selections need only 0.5 to 2 pixels of feathering. Higher values create an obvious blur effect that looks unnatural. If you’re compositing a subject onto a new background, slight feathering helps the subject integrate more naturally.
Contrast Slider
The Contrast slider sharpens selection edges by increasing the difference between selected and unselected areas. Higher values create harder, more defined edges. This is useful when your selection edges are too soft or indistinct.
Use Contrast to counteract over-softening from the Feather slider. A value of 5-20% typically adds definition without creating harsh edges. Combine low Feather with moderate Contrast for clean, professional cutouts.
Shift Edge Slider
The Shift Edge slider expands or contracts your selection boundary. Negative values contract the selection (moving inward), while positive values expand it (moving outward). This is incredibly useful for removing edge fringing.
When your cutout shows a colored fringe from the original background, try contracting the edge by -5% to -15%. This moves the selection boundary inward, cutting away the contaminated edge pixels. Be careful not to overdo it, or you’ll lose legitimate subject detail.
When Not to Use Global Refinements
Global refinements aren’t always necessary. If Select Subject or your initial selection is already clean, adding refinements can actually degrade quality. Also, avoid applying global refinements to hair or fine details after using the Refine Edge Brush—the refinements will undo your careful edge work.
Think of global refinements as tools for fixing problems, not mandatory steps in every workflow. Examine your selection critically and only apply refinements where you see specific issues to address.
Advanced Techniques for Professional Results
Once you’ve mastered the basics, these advanced techniques will help you achieve even better results with challenging subjects.
Decontaminate Colors for Fringe Removal
Color contamination occurs when edge pixels retain colors from the original background. This creates an unwanted fringe that’s especially visible when you place your subject on a new background. The Decontaminate Colors option in Output Settings addresses this problem.
Enable Decontaminate Colors and choose the amount (typically 50-100%). Photoshop analyzes the edge pixels and replaces contaminated colors with colors sampled from your subject. This works exceptionally well for hair with background color reflections.
Note that Decontaminate Colors changes your output option to “New Layer with Layer Mask” because it modifies pixel values. The original layer remains untouched on a separate layer below.
Output Settings: Choosing the Right Option
The Output Settings determine how your refined selection is applied when you click OK. You have several options:
Selection returns you to the main Photoshop interface with an active selection. Use this when you want to perform additional operations on the selection before creating a mask.
Layer Mask adds a mask to your current layer based on your refined selection. This is the most common choice for background removal. The mask is non-destructive—you can edit it later by clicking on it and reopening Select and Mask.
New Layer with Layer Mask duplicates your layer and adds a mask. This preserves your original layer for comparison or backup. I recommend this option when working on important projects.
New Document creates a new Photoshop document containing your cutout. This is useful when you’re preparing assets for use in other compositions.
Minimum Filter for Edge Cleanup
After applying your mask, you can further refine edges using the Minimum filter. Go to Filter > Other > Minimum. This filter contracts white areas of a mask, effectively shrinking your selection slightly. It’s excellent for removing subtle fringing that survived the Select and Mask process.
Use a radius of 1-2 pixels for subtle cleanup. The Preserve options let you choose between Roundness (better for organic shapes like hair) and Squareness (better for geometric subjects). Apply this filter directly to the layer mask, not the image layer.
Editing Select and Mask After Clicking OK
Many users don’t realize you can return to the Select and Mask Workspace after applying your mask. Simply click on the layer mask thumbnail in your Layers panel, then click the “Select and Mask” button in the Properties panel. This reopens the workspace with your current mask loaded for further refinement.
This is invaluable when you notice problems after seeing your subject on a new background. You don’t have to start over—just reopen the workspace and make targeted adjustments.
Common Problems and How to Fix Them?
Even with proper technique, you’ll encounter issues. Here are solutions to the most common problems users report.
Halo Effects and How to Remove Them
Halos appear as bright or dark outlines around your subject after cutting it out. They’re caused by edge pixels that contain a mix of subject and background colors. To fix halos, use the Shift Edge slider with negative values (-5% to -15%) to contract your selection slightly. For stubborn halos, enable Decontaminate Colors or apply the Minimum filter to your mask.
Why Results Look Different After Clicking OK
If your selection looks perfect in the workspace preview but worse after clicking OK, the issue is usually the view mode you were using. Some view modes hide edge problems that become visible on different backgrounds. Before finalizing, cycle through all view modes to check your selection against various backgrounds. Also verify that your Output Settings match your expectations.
Settings Resetting When Reopening
Select and Mask settings reset to defaults each time you open the workspace. This is normal behavior, not a bug. Your previous adjustments are baked into the mask when you click OK. When you reopen the workspace, you’re refining the current mask state, not restoring your previous session. Keep notes on slider values that work well for specific subject types.
Blocky vs Smudgy Edges
Blocky edges appear when your selection is too sharp and pixelated. Smudgy edges look blurred and indistinct. Blocky edges need the Smooth slider and slight feathering. Smudgy edges need the Contrast slider and reduced feathering. In extreme cases, use the Refine Edge Brush to rebuild the edge entirely.
Select and Mask Not Working Properly
If Select and Mask behaves unexpectedly, check a few things. Ensure you’re working on a standard pixel layer, not an adjustment layer or smart object (though smart objects do work). Verify your image resolution is sufficient—at very low resolutions, edge detection struggles. Reset the workspace by closing and reopening it. If problems persist, try making your initial selection outside the workspace and then entering Select and Mask for refinement only.
Mastering Select and Mask for Complex Cutouts
The Select and Mask Workspace transforms one of Photoshop’s most challenging tasks into a manageable process. By combining automated AI tools with manual refinement options, you can achieve clean cutouts even on subjects with complex hair, fur, or fine details.
Remember the key principles: start with a good initial selection using Select Subject, use the two-step workflow to handle hard and soft edges separately, leverage view modes to catch problems early, and apply global refinements strategically rather than automatically. With practice, you’ll develop an intuition for which tools work best on different subject types.
The next time you face a challenging cutout, don’t reach for the Pen Tool first. Give Select and Mask a chance—it’s designed specifically for these difficult selections and will often produce better results in less time.
Frequently Asked Questions
What is the purpose of the Select and Mask workspace in Photoshop?
The Select and Mask workspace is Photoshop’s dedicated environment for refining selections and creating precise masks. It provides specialized tools like the Refine Edge Brush, multiple view modes for evaluating selections, and global refinement sliders. The workspace is designed specifically for handling complex edges like hair, fur, and fine details that would be extremely difficult to select manually.
How do I select complex shapes in Photoshop?
For complex shapes, start with Select Subject to get an AI-generated initial selection. Then open Select and Mask to refine the edges. Use the Refine Edge Brush for areas with fine details like hair. Apply global refinements (Smooth, Contrast) for hard edges. For geometric shapes, the Polygonal Lasso Tool provides precise control. Cycle through view modes to verify your selection quality before outputting.
How do I select and mask multiple objects in Photoshop?
To select multiple objects, use the Object Selection Tool in Lasso mode. Draw a loose outline around each object you want to select. The AI identifies the subject within your boundary. Alternatively, make separate selections and combine them using the Load Selection command. For subjects in the same image, Select Subject may capture all of them—use the Object Selection Tool to target specific objects individually.
How do I make a mask cutout in Photoshop?
First, make your initial selection using Select Subject or selection tools like Quick Selection. Open Select and Mask from the Select menu. Refine edges using the Refine Edge Brush for hair and Global Refinements for hard edges. Check your work using different view modes. Under Output Settings, choose ‘New Layer with Layer Mask’ to create a non-destructive cutout. Click OK to apply your refined mask.