You captured the perfect landscape composition. The foreground is exactly what you envisioned, the subject placement works beautifully, and the exposure is spot-on. There is just one problem: the sky looks like a flat, gray blanket stretched across the top of your frame.
I have been there more times than I can count. After years of landscape photography, I learned that sky replacement in Photoshop is not about cheating or creating fake images. It is about salvaging good photos that happened to have bad weather. The real challenge is not the replacement itself but keeping the lighting realistic so your final image does not scream “obviously edited.”
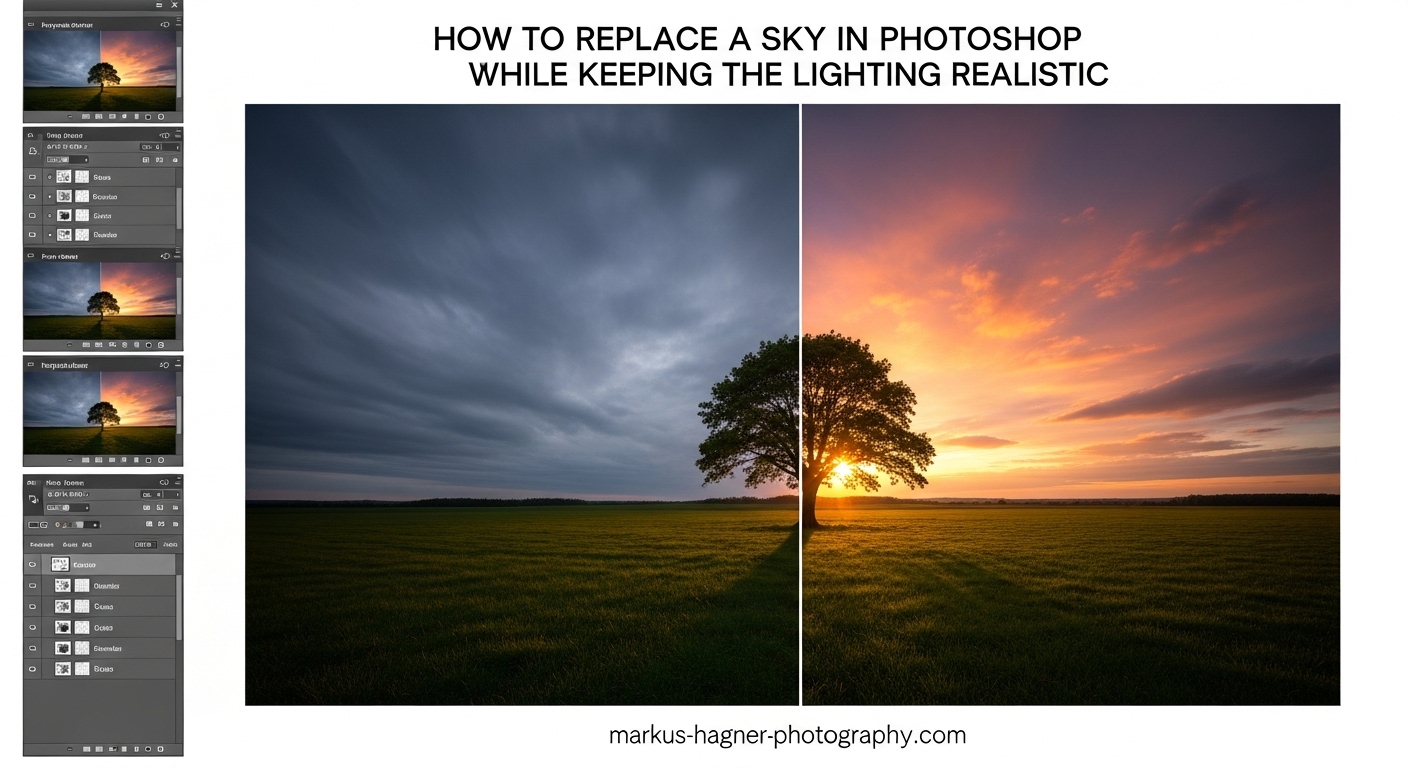
In this guide, I will walk you through how to replace a sky in Photoshop while keeping the lighting realistic. We will cover both the automated Sky Replacement tool and manual methods, plus the critical steps most tutorials skip: matching lighting direction, color temperature, and atmospheric depth. By the end, you will have a complete workflow for believable sky composites.
What You Need Before Starting
Before diving into the actual replacement process, you need a few things in place. Trust me, skipping these preparation steps is what causes 90% of unrealistic results.
Photoshop Version Requirements
The built-in Sky Replacement tool requires Photoshop 2021 or later (version 22.0+). If you have an older version, you can still use the manual method I cover later in this guide. To check your version, go to Help > System Info in Photoshop.
If Sky Replacement is greyed out in your Edit menu, you are likely using an older version or your image is in a non-supported mode (like Indexed Color).
Choosing the Right Sky Image
The sky you choose matters more than any masking technique. Here is what I look for:
- Matching lighting direction: If your original photo has light coming from the right, your replacement sky needs light from the same side.
- Similar color temperature: A warm sunset sky paired with a cool, blue-toned foreground will always look wrong.
- Appropriate scale: Clouds that look like cotton balls will give away your edit instantly.
- Matching weather conditions: A dramatic storm sky might look great, but not if your foreground suggests clear weather with hard shadows.
I recommend building your own sky library by photographing interesting skies whenever you see them. Stock skies work, but skies you captured yourself will always feel more authentic to your photography style.
Why Smart Objects Matter
Always convert your image to a Smart Object before starting. Right-click your background layer and select “Convert to Smart Object.” This preserves your original image and lets you re-edit your sky replacement later. Non-destructive editing is not just a best practice; it is essential for professional results.
How to Replace a Sky in Photoshop While Keeping the Lighting Realistic: Two Methods
There are two main approaches to sky replacement in Photoshop. Each has its place depending on your image complexity and how much control you need.
Method 1: The Built-in Sky Replacement Tool is fast and works well for simple images with clear horizon lines. It uses AI to handle masking and color adjustments automatically.
Method 2: Manual Selection and Masking takes longer but gives you complete control over every edge and transition. This is essential for complex images with trees, buildings, or semi-transparent objects.
I use both methods depending on the situation. Let me walk you through each one.
Method 1: Using Photoshop’s Built-in Sky Replacement Tool
Photoshop’s AI-powered Sky Replacement tool handles most of the heavy lifting. Here is the step-by-step process.
Step 1: Open the Sky Replacement Dialog
With your image open in Photoshop, go to Edit > Sky Replacement. A dialog box will appear with preview thumbnails of available skies.
If this option is greyed out, make sure your image is in RGB mode (Image > Mode > RGB Color) and you are using Photoshop 2021 or later.
Step 2: Choose Your Sky
Browse through the built-in presets organized into categories: Blue Skies, Spectacular, and Sunset. Click on any sky to see a live preview on your image.
To add your own skies, click the gear icon in the sky preview area and select “New Sky.” Navigate to your sky image file. Photoshop supports JPEG, TIFF, and PNG formats.
Step 3: Adjust Sky Replacement Settings
The dialog offers several controls for fine-tuning:
- Shift Edge: Moves the mask boundary inward or outward. Increase this slightly if you see thin halos around edges.
- Fade Edge: Softens the transition between sky and foreground. Lower values create sharper edges; higher values create softer blends.
- Brightness: Adjusts the overall exposure of the replacement sky.
- Temperature: Warms or cools the sky. Match this to your foreground’s color temperature.
- Scale: Changes the size of clouds and sky elements. Watch for clouds that look too large for your scene.
Step 4: Enable Sky Adjustments and Foreground Lighting
Check the boxes for Sky Adjustments and Foreground Lighting. These options tell Photoshop to analyze your foreground and adjust colors to match the new sky’s temperature and lighting.
The Foreground Lighting adjustment is what separates a believable composite from an obvious edit. It subtly warms or cools your foreground to match the sky’s color cast.
Step 5: Output Your Result
In the Output section, choose “New Layers” to keep everything editable. This creates separate layers for the sky, mask, and adjustments. Click OK to apply.
You can now fine-tune each layer independently. I often adjust the foreground lighting layer’s opacity to reduce the intensity of the color shift.
Method 2: Manual Sky Replacement for Maximum Control
For complex images with trees, buildings, or other detailed edges, manual masking gives you the precision that AI tools cannot match.
Step 1: Prepare Both Images as Smart Objects
Open both your main image and your sky image in Photoshop. Convert both to Smart Objects. This lets you apply Camera Raw adjustments non-destructively.
Step 2: Match Color Temperature Before Compositing
Before combining images, open both in Camera Raw (Filter > Camera Raw Filter). Look at the white balance of each image.
If your foreground has a temperature of 5500K and your sky is at 6500K, adjust one to match. I usually adjust the sky since it has fewer critical color relationships to preserve.
Step 3: Create Your Sky Selection
With your main image active, go to Select > Sky. Photoshop’s AI will automatically detect and select the sky area. This works surprisingly well for most images.
For more control, use the Select and Mask workspace (click “Select and Mask” in the options bar). Here you can refine edges with the Refine Edge Brush Tool, especially useful for tree branches and other complex boundaries.
Step 4: Place and Position Your Sky
With the sky selected, copy your sky image and paste it into the selection. Or drag your sky layer below your foreground layer and add a layer mask to the foreground based on your sky selection.
Use Free Transform (Ctrl/Cmd + T) to position and scale your sky. Pay attention to the horizon line. The horizon in your sky should align with the horizon in your foreground.
Step 5: Refine the Mask
Click on your layer mask and use the Select and Mask workspace to refine edges. Two settings I always check:
- Decontaminate Colors: Removes color fringing from semi-transparent edges. This is essential for eliminating halos around trees and buildings.
- Shift Edge: Contract the selection slightly to remove any remaining light halos. A value of -5 to -15% often works well.
Step 6: Final Color Grading
After masking, create a unified color grade using adjustment layers clipped to both layers. A Photo Filter or Color Balance adjustment can help unify the composite. Apply the same slight warm or cool tone to both sky and foreground.
Matching Lighting Direction: The Secret to Realistic Results
Here is what separates amateur composites from professional ones: lighting direction. I cannot stress this enough. You can have perfect masking, but if your light sources do not match, your sky replacement will always look fake.
Analyzing Light Source Position
Look at your foreground image. Where is the light coming from? Check shadows on buildings, the direction of light on tree trunks, and the angle of illuminated surfaces.
Now look at your sky image. Where is the sun positioned? If your sky shows sun rays from the left but your foreground has shadows falling to the left, you have a mismatch.
When to Flip Your Sky
The simplest fix is often the most overlooked: flip your sky horizontally. Go to Edit > Transform > Flip Horizontal. This instantly reverses the lighting direction.
I flip skies in about 70% of my composites. It is such a simple step, yet most beginners never think to do it.
Matching Sun Position
For the most believable results, match the sun’s vertical position too. A low sun in your sky should pair with long shadows in your foreground. A high midday sun should match with shorter shadows below.
If your foreground was shot at golden hour, do not pair it with a harsh midday sky. The light quality will feel wrong even if viewers cannot identify why.
Common Lighting Mistakes
- Multiple light sources: Your sky shows light from one direction, but your foreground suggests another.
- Wrong time of day: Pairing a dramatic sunset sky with a foreground shot at noon.
- Inconsistent shadow direction: Shadows in your foreground point toward the light in your new sky.
Color Temperature and Exposure Matching
Even with correct lighting direction, color temperature mismatches will make your composite feel wrong. Our eyes are incredibly sensitive to color relationships.
Understanding Warm vs Cool Color Temperatures
Daylight ranges from warm golden hour light (around 3200K) to cool blue sky (around 8000K+). Your sky and foreground need to exist in the same color temperature range.
Here is a quick test: desaturate both images (Ctrl/Cmd + Shift + U) and look at the tonal values. Do the highlights and shadows have similar brightness relationships? If not, you need exposure adjustments.
Using Camera Raw Filter for Adjustments
I do most of my color matching in Camera Raw (Filter > Camera Raw Filter) before compositing. The controls are more intuitive than Photoshop’s adjustment layers.
- Temperature slider: Match the overall warmth between images.
- Tint slider: Correct green/magenta shifts.
- Exposure: Match overall brightness.
- Highlights and Shadows: Ensure similar tonal ranges.
Why Exposure Matching Comes Before Masking
Many photographers spend hours perfecting their mask, only to realize the sky looks wrong because the exposure does not match. Get your exposure and color close before you start masking. You will save yourself significant rework.
As a rule of thumb, your sky should be slightly brighter than your foreground near the horizon. This mimics natural atmospheric scattering.
Advanced Techniques for Seamless Results
Once you have the basics down, these advanced techniques will take your sky replacements from good to undetectable.
Removing Halo Effects and White Edges
Halos are the most common giveaway of sky replacement. They appear as white or light-colored outlines around objects against the sky.
Using Decontaminate Colors
In the Select and Mask workspace, check Decontaminate Colors. This replaces the color of edge pixels with colors from nearby areas inside the selection. It effectively removes color fringing.
Shift Edge Slider
Move the Shift Edge slider to the left (negative values) to contract your mask. This pushes the selection boundary inward, hiding thin halos. Values between -5% and -20% usually work well.
Blend If Sliders
For a more advanced approach, use the Blend If sliders in the Layer Style dialog (double-click the layer). Under “Blend If: Gray,” adjust the “Underlying Layer” sliders. Hold Alt/Option while dragging to split the slider for smoother transitions.
This technique hides the new sky in bright edge areas, letting the original lighter edges show through naturally.
Manual Edge Cleanup
For stubborn halos, paint directly on your layer mask with a soft brush set to low opacity (10-20%). Sample colors from nearby areas and carefully paint along problem edges.
Handling Complex Edges: Trees, Fences, and Semi-Transparent Objects
Automatic selection tools struggle with semi-transparent objects. Tree branches, chain-link fences, and sheer fabrics all present challenges.
The Challenge
The issue is that these objects are partially transparent. A hard mask treats them as solid, creating unnatural edges. The new sky shows through, but at full opacity, which looks wrong.
Solution: Refine Edge Brush
In Select and Mask, use the Refine Edge Brush Tool (second tool in the left toolbar). Paint over complex edges. Photoshop analyzes the texture and transparency, creating a more natural mask that lets some of the original sky show through.
Color Decontamination
For trees with foliage, the original sky color often contaminates the leaves. Use Decontaminate Colors to shift leaf colors toward warmer tones that match your new lighting conditions.
Creating Atmospheric Depth in Your Composites
Real landscapes have atmospheric perspective. Distant objects appear lighter, cooler, and less contrasted than nearby objects. Your sky replacement should respect this.
Adding Haze Near the Horizon
Create a new layer above your sky. Sample a light color from near the horizon. Use a soft brush at very low opacity (5-10%) to add subtle haze near the horizon line. This creates natural depth.
Gradient Masks for Natural Transitions
Instead of a hard-edged mask, use a gradient mask near the horizon. Select the Gradient Tool (G) and choose a black-to-white gradient. On your mask, drag from the horizon upward. This creates a smooth transition between foreground and sky.
Matching Atmospheric Perspective
Look at distant hills or mountains in your foreground. Are they cooler and lighter than nearby objects? Your sky should match this atmospheric quality. Use a Photo Filter adjustment layer with a cooling filter (blue) at low opacity over your sky near the horizon.
Troubleshooting Common Sky Replacement Problems
Even with careful work, issues arise. Here are solutions to the most common problems.
Why Is Sky Replacement Greyed Out?
If the Sky Replacement option is unavailable, check these issues:
- Photoshop version: You need Photoshop 2021 (version 22.0) or later.
- Image mode: Convert to RGB Color (Image > Mode > RGB Color).
- Bit depth: Some older versions require 8-bit images.
- Layer type: The option does not work on background layers locked in certain ways.
Fixing Color Balance Shifts in Foreground
If the Sky Replacement tool shifts your foreground colors too much:
- Reduce the Foreground Lighting intensity in the Sky Replacement dialog.
- After applying, reduce the opacity of the foreground adjustment layer.
- Apply a Color Balance or Photo Filter adjustment clipped to your foreground layer to correct.
Dealing with Scale Issues
Clouds that look too big or too small are an instant giveaway. Use the Scale slider in Sky Replacement or Free Transform to adjust. Compare cloud sizes to objects in your foreground for reference.
Blending Problems at the Horizon
If the transition at the horizon looks unnatural:
- Increase Fade Edge in the Sky Replacement dialog.
- Add a gradient mask near the horizon.
- Use a soft brush to manually blend the transition area.
- Add atmospheric haze to obscure the exact transition point.
Why Your Sky Replacement Looks Fake: A Checklist
If something feels off but you cannot identify the issue, check each item:
- Does the lighting direction match between sky and foreground?
- Are color temperatures similar?
- Is the scale of clouds appropriate?
- Are there visible halos around edges?
- Does the horizon transition look too sharp?
- Do distant objects have atmospheric perspective?
- Is the exposure balanced between sky and foreground?
Frequently Asked Questions
How do you replace the sky in Photoshop?
How do you replace the sky in a picture?
How to fix blown out sky in Photoshop?
How to do sky replace?
Conclusion
Learning how to replace a sky in Photoshop while keeping the lighting realistic comes down to three core principles: matching lighting direction, balancing color temperature, and refining edges carefully. The tools matter less than understanding why these elements make or break a composite.
Start with Photoshop’s Sky Replacement tool for simple images, then graduate to manual masking when you need more control. Always work non-destructively with Smart Objects. Take time to analyze your light sources before choosing a sky. And never skip the color temperature matching step.
I encourage you to build your own sky library. Photograph interesting skies whenever you see them. You will always have better results with skies you captured yourself versus stock images.
Finally, know when not to replace skies. Some photographs are meant to document authentic moments and conditions. Sky replacement is a tool for creative enhancement, not deception. Use it thoughtfully, and your images will be stronger for it.