Removing unwanted objects from photos has always been part of a photographer’s workflow. But when those objects are large like vehicles, people, or distracting elements that dominate your frame, traditional retouching methods can take hours. That’s where Content-Aware Fill in Photoshop becomes invaluable.
Content-Aware Fill analyzes the pixels surrounding your selection and intelligently recreates the area to match the surrounding texture, color, and patterns. In this guide, I’ll show you exactly how to use Content-Aware Fill to seamlessly remove large objects from your photos, troubleshoot common issues, and achieve professional results every time.
Whether you’re a photographer cleaning up landscape shots, a real estate editor removing cars from property photos, or just want to eliminate distractions from your images, this tutorial covers everything you need to know about Content-Aware Fill in 2026.
What Is Content-Aware Fill in Photoshop?
Content-Aware Fill is a powerful Photoshop feature that automatically analyzes your image to remove unwanted objects and fill the space with matching surrounding content. First introduced in Photoshop CS5 and significantly improved in Photoshop CC 2019, this tool uses advanced algorithms to examine pixels around your selection and recreate the area naturally.
The magic happens through pattern recognition. When you select an object to remove, Photoshop compares the surrounding pixels to other areas in your image. It identifies textures, patterns, and colors that should continue through the removed area, then generates new pixels that blend seamlessly with the rest of your photo.
Unlike manual cloning or healing, Content-Aware Fill does the heavy lifting for you. Instead of sampling pixels one area at a time, the algorithm considers the entire image context to produce realistic results. For large objects especially, this saves hours of tedious retouching work.
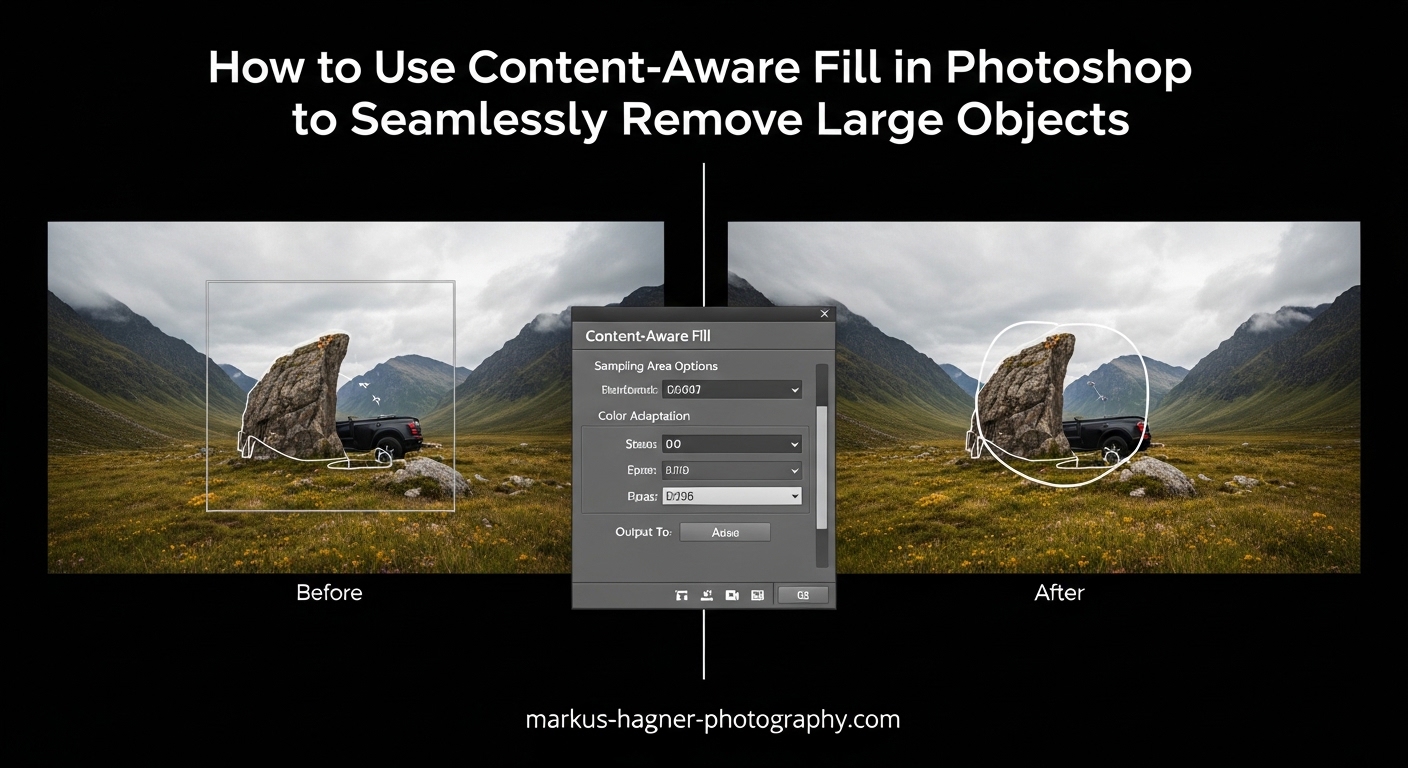
The dedicated Content-Aware Fill workspace, added in Photoshop CC 2019, gives you precise control over how Photoshop samples and fills your selection. You can see a live preview, adjust which areas Photoshop references, and fine-tune settings for different scenarios.
Prerequisites: What You Need Before Starting
Before diving into Content-Aware Fill, make sure you have the right setup. You’ll need Photoshop CC 2019 or later to access the full Content-Aware Fill workspace with all its controls. Earlier versions have a basic version accessible through the Edit menu, but the dedicated workspace offers significantly more control.
Always work on a copy of your original image. While Content-Aware Fill can work non-destructively, having a backup ensures you can always start fresh if needed. Save your working file as a PSD to preserve layers for future editing.
For best results, your image should have enough resolution and surrounding context around the object you want to remove. The algorithm needs reference pixels to work with, so extremely tight crops may limit the tool’s effectiveness.
How to Use Content-Aware Fill in Photoshop to Seamlessly Remove Large Objects
The core process involves seven straightforward steps. Here’s my complete workflow for removing large objects with Content-Aware Fill.
Step 1: Open Your Image in Photoshop
Launch Photoshop and open your image file. Go to File > Open or use the keyboard shortcut Ctrl+O (Windows) or Cmd+O (Mac). Navigate to your image and click Open. For RAW files, the Camera Raw dialog will appear first. Make your initial adjustments, then hold Shift and click Open Image to open as a Smart Object if you want maximum flexibility.
Step 2: Make Your Selection Around the Object
Choose a selection tool based on your object and background complexity. For most large objects, I recommend one of these approaches:
Object Selection Tool (W): The fastest option for clear subjects. Simply drag a rectangle or lasso around your object, and Photoshop automatically detects edges. This works best when there’s good contrast between the object and background.
Lasso Tool (L): For more control, trace around your object manually. Set the Feather value to 20-30 pixels in the Options bar for smoother blending. This soft edge helps Content-Aware Fill create more natural transitions.
Quick Selection Tool (W): Paint over the object to select it. This tool works well for irregular shapes and lets you add or subtract from the selection easily. Hold Alt/Option to subtract areas if the tool grabs too much.
Don’t worry about being perfectly precise. Content-Aware Fill actually works better with a slightly loose selection that includes a bit of the background around your object’s edges.
Step 3: Expand and Feather Your Selection
For large objects, expanding your selection slightly improves results. Go to Select > Modify > Expand and choose 5-10 pixels. This ensures Photoshop captures the entire object including any subtle edge details.
Next, feather the selection for smoother blending. Go to Select > Modify > Feather and enter 5-15 pixels depending on your image resolution. Higher resolution images can handle more feathering. A soft edge helps the filled area blend naturally with surrounding pixels.
Step 4: Open the Content-Aware Fill Workspace
With your selection active, access Content-Aware Fill using any of these methods:
Menu method: Go to Edit > Content-Aware Fill
Right-click method: Right-click inside your selection and choose Content-Aware Fill from the context menu
Keyboard shortcut: Press Shift+Backspace (Windows) or Shift+Delete (Mac), then select Content-Aware from the dropdown
The Content-Aware Fill workspace opens, showing your image with a live preview of the fill result on the left and sampling controls on the right.
Step 5: Adjust the Sampling Area
The sampling area determines which pixels Photoshop uses to generate your fill. The workspace shows this as a green overlay on your image. Only areas highlighted in green will be sampled for the fill.
Use the Sampling Area Options in the right panel to control this:
Auto: Photoshop automatically determines the best sampling area. This works well for simple backgrounds and is the default setting.
Rectangular: Creates a rectangular sampling zone around your selection. Useful when you want Photoshop to only sample from adjacent areas.
Custom: Gives you complete control using the Sampling Brush Tool. Paint over areas you want to include (adds green overlay) or exclude (removes green overlay) from sampling.
For large objects with complex backgrounds, Custom sampling often produces the best results. Exclude areas with different textures or colors that shouldn’t influence the fill.
Step 6: Configure Fill Settings
The Fill Settings panel offers several options to fine-tune your results:
Color Adaptation: Controls how much Photoshop adjusts color tones in the fill to match surrounding areas. Default works for most situations. Increase this when removing objects from areas with significant color gradients.
Rotation Adaptation: Helps when filling areas with patterns at specific angles. If your background has directional textures, enable this. Set to Low for minimal adjustment, Medium for moderate, or High for maximum rotation matching.
Scale: Allows Photoshop to scale sampled textures to fit. Useful when the fill area is significantly larger or smaller than surrounding textures.
Mirror: Reflects sampled content horizontally. This helps with symmetrical subjects or when you want more variation in the fill.
Start with default settings and adjust based on your preview. The live preview updates in real-time as you change settings.
Step 7: Output and Apply Your Fill
In the Output Settings panel, choose how to apply your fill:
Current Layer: Applies the fill directly to your active layer. This is destructive and cannot be easily undone after saving and closing.
New Layer: Creates a new layer with the fill. This is my recommended approach for non-destructive editing. You can adjust opacity, add layer masks, or delete the layer if you want to try again.
Duplicate Layer: Duplicates your current layer with the fill applied. Useful when you want to preserve the original layer state.
Click OK to apply the fill and return to the main Photoshop workspace. Your object is now removed and replaced with content that matches the surrounding area.
Understanding the Content-Aware Fill Workspace
The Content-Aware Fill workspace provides a dedicated environment for fine-tuning your object removal. Understanding each component helps you achieve better results, especially with challenging large objects.
The Preview Panel
The large preview panel on the left shows exactly how your fill will look. This updates in real-time as you adjust settings, so you can see the impact of each change immediately. Zoom in to check details and edge blending quality before committing.
The preview shows both the filled area and surrounding context, helping you evaluate how well the new content integrates with the rest of your image.
Sampling Area Overlay
The green overlay indicates which pixels Photoshop samples to create your fill. This visual feedback is essential for understanding what content influences the final result. Areas without green overlay are ignored entirely.
You can toggle the overlay visibility using the checkbox in the Sampling Area Options. Sometimes hiding the overlay helps you evaluate the preview more objectively.
Sampling Brush Tool
The Sampling Brush Tool (B) lets you paint to add or remove areas from the sampling zone. Use the Add Sampling brush to include more reference pixels, or the Subtract Sampling brush to exclude unwanted areas.
Adjust brush size with the bracket keys [ and ]. A larger brush works faster for broad areas, while a smaller brush gives precision for detailed sampling adjustments.
For complex backgrounds, spend time refining your sampling area. The quality of your sampling directly impacts fill quality.
Fill Settings in Detail
Each fill setting addresses specific challenges:
Color Adaptation ranges from None to Very High. When your selection spans areas with different tones or lighting, higher Color Adaptation helps blend these transitions. For evenly lit backgrounds, None or Default works fine.
Rotation Adaptation helps with directional patterns. Think of grass fields, brick walls, or fabric textures that have a specific orientation. Enable this when your fill shows misaligned patterns.
Scale is particularly useful for large object removal. When filling a large area, sampled textures might be too small. Scale allows Photoshop to stretch or compress textures to better fit the space.
Mirror creates reflections of sampled content. This adds variation and can prevent obvious repetition patterns in the fill. Use it when you notice the same texture repeating unnaturally.
Output Settings
Always prefer New Layer for output. This non-destructive approach preserves your original image and gives you flexibility to make further adjustments. You can blend multiple fill attempts, mask out problem areas, or combine Content-Aware Fill with other retouching techniques.
Sampling Area Options: Auto, Rectangular, and Custom
Choosing the right sampling mode significantly impacts your results. Each option serves different scenarios.
Auto Sampling
Auto sampling lets Photoshop decide which areas to sample. The algorithm analyzes your image and selects regions with similar textures and colors to your fill area. This works well for simple backgrounds like sky, grass, or uniform walls.
Use Auto when your background has consistent texture throughout. The speed and simplicity make it ideal for quick edits on straightforward images.
Rectangular Sampling
Rectangular sampling creates a defined box around your selection. Only pixels within this rectangle contribute to the fill. This prevents Photoshop from pulling content from distant parts of your image that might not be contextually appropriate.
Choose Rectangular when your image has distinct zones with different content. For example, if you’re removing an object near the boundary between a beach and water, rectangular sampling ensures the fill only uses relevant pixels.
You can adjust the rectangle size by dragging its edges directly in the preview.
Custom Sampling
Custom sampling gives you complete control over which pixels Photoshop references. This is essential for complex backgrounds and large objects where Auto sampling might include inappropriate content.
Activate Custom sampling, then use the Sampling Brush Tool to paint areas green (include) or remove green (exclude). Think about what content should logically fill the space and sample only those areas.
For removing a person from a landscape, you might exclude other people, buildings, or objects that shouldn’t appear in the fill. For architectural shots, exclude windows or doors that would look wrong if duplicated.
Custom sampling takes more time but produces the most predictable results. For professional work on challenging images, this extra effort is worthwhile.
Special Techniques for Removing Large Objects
Large objects present unique challenges. The bigger the area to fill, the more opportunity for visible artifacts and unnatural results. Here are techniques I’ve developed for handling substantial removals.
Why Large Objects Are Harder
When you remove a small sensor spot or minor blemish, Photoshop has abundant surrounding pixels to work with. But large objects leave massive gaps. The algorithm must generate more content with fewer reference pixels, increasing the chance of repetition, distortion, or unnatural patterns.
Large selections also span more background variation. A selection covering a person standing in front of a building might include sky, brickwork, windows, and ground. Each zone needs appropriate content, making simple fills problematic.
The Multiple Selections Technique
Instead of selecting the entire object at once, break it into smaller selections. Remove the object in sections, working from one edge to another. This gives Photoshop more manageable areas to fill.
For example, when removing a car from a street scene, select and fill the portion against the sky first. Then tackle the section overlapping the building. Finally, handle the area against the ground. Each smaller fill has more specific context to work with.
Working with Complex Backgrounds
Complex backgrounds with multiple textures, patterns, or elements require careful sampling. Use Custom sampling mode and take time to exclude areas that would create obvious problems.
Look for repeating patterns in your preview. If you see the same window appearing multiple times, exclude that area from sampling. If grass textures look stretched, adjust Scale settings or try a different sampling approach.
For backgrounds with clear horizon lines or architectural features, ensure your sampling respects these boundaries. Don’t let Photoshop pull sky content into a ground area or vice versa.
The Multiple Passes Method
Sometimes one Content-Aware Fill pass doesn’t produce perfect results. Apply a fill, then make additional selections on any remaining problem areas. Run Content-Aware Fill again on these smaller zones.
This iterative approach works well for stubborn areas. Each pass builds on the previous one, gradually improving the result. Working on a new layer for each pass lets you blend the best parts of multiple attempts.
Combining with Other Tools
Content-Aware Fill doesn’t have to work alone. Combine it with other retouching tools for best results:
Use the Clone Stamp Tool to fix specific artifacts or repetition patterns. Sample from appropriate areas and paint over problems.
The Healing Brush blends your corrections with surrounding pixels for seamless integration.
The Patch Tool works well for relocating specific textures to problem areas.
For edges that don’t blend perfectly, a soft brush with low opacity on a layer mask can smooth transitions.
Content-Aware Fill vs Generative Fill: Which Should You Use?
With the introduction of Generative Fill in Photoshop 2026, many photographers wonder which tool to use. Both remove objects, but they work differently and suit different situations.
How They Differ
Content-Aware Fill samples pixels from your actual image. It recombines existing content to fill your selection. The results are deterministic and based entirely on your photo’s content.
Generative Fill uses Adobe’s AI (Firefly) to generate entirely new pixels. It understands the context of your image and creates content that might not exist anywhere in your original photo.
When to Use Content-Aware Fill
Choose Content-Aware Fill when you want predictable, controllable results based on your actual image content. It excels at:
Removing objects from uniform or predictable backgrounds like skies, walls, grass, or water. When there’s enough similar content to sample, Content-Aware Fill produces natural results without introducing foreign elements.
Work requiring high resolution. Content-Aware Fill works at your image’s native resolution. Generative Fill currently outputs at lower resolution that may need upscaling.
Situations where you want precise control over sampling. The Content-Aware Fill workspace gives you exact control over which pixels influence the result.
When to Use Generative Fill
Generative Fill shines when your background lacks sufficient reference material. If you’re removing an object from an area with no similar content nearby, Generative Fill can create appropriate fill content.
It also handles complex scenarios where you need context-aware content generation. For example, removing a person from a crowd might require generating new people in the background, which Generative Fill can do.
Resolution Considerations
For professional work, resolution matters. Content-Aware Fill preserves your image’s full resolution because it uses existing pixels. Generative Fill generates content at a fixed resolution that might not match high-resolution source files.
If you’re working on large files for print or high-detail work, Content-Aware Fill often produces sharper results. For web and social media where resolution is less critical, Generative Fill’s convenience might outweigh this limitation.
Essential Keyboard Shortcuts for Faster Workflow
Speed up your Content-Aware Fill workflow with these essential shortcuts:
Selection Tool Shortcuts
Lasso Tool: L
Object Selection Tool: W (cycles through selection tools)
Quick Selection Tool: W (cycles through selection tools)
Marquee Tools: M
Selection Modification
Deselect: Ctrl+D (Windows) / Cmd+D (Mac)
Feather Selection: Shift+F6
Inverse Selection: Ctrl+Shift+I (Windows) / Cmd+Shift+I (Mac)
Content-Aware Fill Access
Fill Dialog: Shift+F5 (then select Content-Aware from dropdown)
Content-Aware Fill Workspace: Edit > Content-Aware Fill (no direct shortcut, customize in Edit > Keyboard Shortcuts if desired)
Workspace Navigation
Sampling Brush Tool: B (in Content-Aware Fill workspace)
Hand Tool: H (for panning)
Zoom Tool: Z
Temporarily switch to Hand Tool: Hold Spacebar
Brush Adjustments
Increase Brush Size: ]
Decrease Brush Size: [
Increase Brush Hardness: Shift+]
Decrease Brush Hardness: Shift+[
Troubleshooting: When Content-Aware Fill Doesn’t Work Seamlessly
Sometimes Content-Aware Fill produces less-than-perfect results. Here’s how to diagnose and fix common problems.
Problem: Obvious Repetition Patterns
If you see the same texture or element repeating in your fill, the sampling area might be too limited. Try switching to Custom sampling and adding more diverse areas to the green overlay. Enable Mirror to add variation, or use Scale to change texture sizes.
Multiple smaller fills often work better than one large fill when repetition is an issue.
Problem: Color Doesn’t Match
When the fill color looks wrong, increase Color Adaptation. This setting tells Photoshop to adjust tones in the fill to better match surrounding areas. If the problem persists, your sampling area might include regions with different lighting or colors.
Use Custom sampling to exclude areas with significantly different tones from your sampling zone.
Problem: Blurry or Soft Results
Blurry fills often result from over-feathering or sampling areas that are too small. Reduce feathering on your selection and expand your sampling area to include sharper reference content.
Also check if Scale is stretching textures too much. Reduce Scale or disable it entirely.
Problem: Edges Don’t Blend
Hard edges at the fill boundary indicate insufficient feathering. Return to your selection and add more feathering before running Content-Aware Fill. The soft transition zone helps the fill blend naturally.
Alternatively, use a soft brush on a layer mask to manually blend edges after applying the fill.
Problem: Wrong Content Appears
If inappropriate content appears in your fill (like random objects or people), your sampling area includes too much. Switch to Custom sampling and carefully exclude areas that shouldn’t influence the result.
This commonly happens with Auto sampling on busy images. Taking time to refine sampling prevents this issue.
Problem: Fill Looks Flat or Artificial
When fills lack texture depth, the algorithm might be averaging too many samples. Try using a smaller, more specific sampling area. Focus on regions with similar texture characteristics to what should appear in the fill.
Combining Content-Aware Fill with manual retouching often produces the most natural results. Use Content-Aware Fill for the bulk of the work, then refine with Clone Stamp or Healing Brush.
Step-by-Step Troubleshooting Guide
When results aren’t seamless, follow this systematic approach:
1. Check your selection: Ensure it fully covers the object with a slight margin. Add feathering for smooth edges.
2. Review sampling: Switch to Custom mode and verify that only appropriate areas are green. Exclude anything that shouldn’t influence the fill.
3. Adjust fill settings: Try different Color Adaptation levels. Enable Rotation Adaptation if patterns seem misaligned.
4. Try multiple passes: If the overall fill is good but has problem spots, make smaller selections on those areas and run Content-Aware Fill again.
5. Manual cleanup: Use Clone Stamp, Healing Brush, or Patch Tool to fix remaining issues.
6. Consider alternatives: If Content-Aware Fill consistently fails, try Generative Fill or the Remove Tool for that specific area.
Related Tools: When to Use Alternatives
Content-Aware Fill isn’t always the best choice. Understanding related tools helps you select the right approach for each situation.
Spot Healing Brush (J)
The Spot Healing Brush works best for small objects like sensor dust, skin blemishes, or minor distractions. It samples automatically from surrounding pixels and blends seamlessly. For anything larger than a few percent of your image, Content-Aware Fill gives better control.
Use Spot Healing Brush for quick fixes on small problems where you don’t need sampling control.
Patch Tool
The Patch Tool lets you select a problem area and drag to a source region. It blends the source content into your selection. This works well when you know exactly which area should replace another.
Choose the Patch Tool for texture matching where you want specific control over the source. It’s particularly effective for repairing damaged areas or replacing specific textures.
Remove Tool
The Remove Tool (introduced in recent Photoshop versions) combines AI-powered object removal with brush-based control. Simply paint over the object, and Photoshop removes it automatically. It’s faster than Content-Aware Fill for medium-sized objects but offers less fine-tuning control.
Use the Remove Tool for quick removals when speed matters more than precision. It’s excellent for cleaning up minor distractions across multiple images.
Content-Aware Move Tool
This tool relocates objects rather than removing them. Select an object, drag it to a new position, and Photoshop fills both the original location and blends the object into its new spot.
Use Content-Aware Move when you want to reposition elements rather than eliminate them entirely.
Best Practices for Seamless Results
Follow these best practices to consistently achieve professional results with Content-Aware Fill.
Always Work Non-Destructively
Output your fills to new layers whenever possible. This preserves your original image and allows for adjustments later. You can lower layer opacity to blend multiple attempts, add layer masks to combine the best parts of different fills, or completely redo the fill if needed.
For maximum flexibility, convert your background layer to a Smart Object before starting. This enables Smart Filters and other non-destructive adjustments.
Perfect Your Selection Technique
The quality of your selection directly impacts fill quality. Take time to create accurate selections with appropriate feathering. Expand selections slightly beyond object edges to ensure complete coverage.
For complex objects, consider using Select and Mask to refine edges before running Content-Aware Fill.
Match Tool to Task
Don’t force Content-Aware Fill to handle every removal. Small spots respond better to Spot Healing Brush. Complex removals might benefit from Generative Fill. Match your tool choice to the specific challenge.
Iterate and Refine
Professional retouching rarely happens in a single step. Plan for multiple passes, combining Content-Aware Fill with other tools to achieve seamless results. The goal is natural-looking images, not proof that you used a specific tool.
Check at Different Zoom Levels
Review your work at 100% zoom to check for artifacts and blending issues. Then zoom out to evaluate overall coherence. Problems visible at one zoom level might not appear at another, and vice versa.
Frequently Asked Questions
How to use content aware fill in Photoshop to remove objects?
How to remove something seamlessly in Photoshop?
How do you remove large objects in Photoshop?
What is the difference between generative fill and content-aware fill?
Why is my Content-Aware Fill not working?
Conclusion
Content-Aware Fill remains one of Photoshop’s most powerful retouching tools for removing unwanted objects. When you understand how to control the sampling area, configure fill settings appropriately, and apply the right techniques for large objects, you can achieve seamless results that save hours of manual work.
The key to mastering Content-Aware Fill lies in understanding when to use it and how to guide the algorithm. Take time to create proper selections with appropriate feathering. Use Custom sampling when backgrounds are complex. Don’t expect perfection from a single pass on challenging images. Combine tools and techniques to achieve natural-looking results.
As you practice these techniques, you’ll develop intuition for which approach works best in different situations. Remember that Content-Aware Fill is just one tool in your retouching arsenal. Knowing when to switch to Generative Fill, the Remove Tool, or traditional cloning makes you a more versatile editor.
Start with simple removals to build confidence, then tackle more complex scenarios as your skills develop. With practice, removing large objects seamlessly becomes second nature, transforming tedious retouching work into quick, efficient edits.