After 15 years of working in Lightroom Classic, I’ve learned that photo organization can make or break your workflow. When I first started, my catalog was a mess. I had thousands of photos scattered across random folders with no consistent naming. Finding a specific image from a client shoot took hours of frustration.
That all changed when I discovered the power of combining three organization methods: folders, collections, and keywords. Each serves a distinct purpose, and together they create a system where I can find any photo in seconds. Whether you’re a beginner starting fresh or a professional drowning in disorganized images, this guide will show you exactly how to organize photos using folders, collections, and keywords in Lightroom Classic.
In this comprehensive tutorial, I’ll walk you through each method step by step. You’ll learn when to use folders versus collections, how to build an effective keyword hierarchy, and most importantly, how to integrate all three into a seamless workflow. By the end, you’ll have a complete organization system that scales with your photo library.
Understanding Folders vs Collections vs Keywords in Lightroom Classic
Before diving into the how-to, let me clarify what each organization method does and when to use it. This foundational understanding will save you from common mistakes I see photographers make constantly.
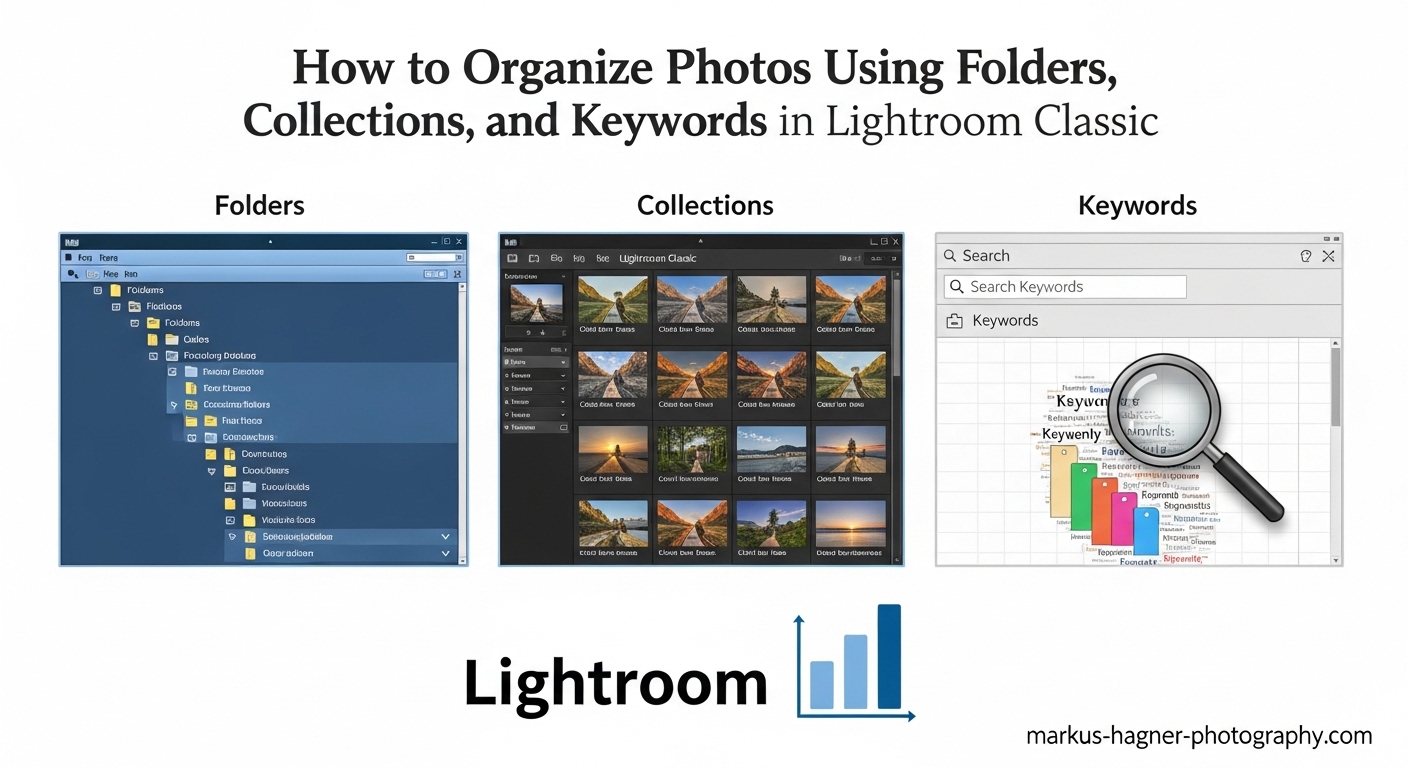
Folders represent the actual physical location of your photos on your hard drive. When you move a photo between folders in Lightroom, you’re actually moving the file on your computer. Folders are permanent and affect where your images live.
Collections are virtual groupings that don’t move or duplicate your photos. Think of them like playlists in music software. A single photo can appear in dozens of collections while existing in just one folder. Collections are flexible and perfect for project-based organization.
Keywords are searchable tags attached to your photos as metadata. They help you find images based on content, location, subject, or any criteria you choose. Keywords travel with your photos when you export them.
When to Use Each Method
Here’s a quick comparison to help you decide:
- Use Folders for: Permanent storage organization, backup management, chronological filing, separating different clients or years
- Use Collections for: Project groupings, portfolio selections, albums for clients, temporary editing sets, images sharing a theme across different shoots
- Use Keywords for: Content-based searching, subject identification, location tagging, style or mood categorization, finding specific types of shots
The magic happens when you use all three together. Your folders provide permanent structure, your collections create flexible project views, and your keywords enable instant searchability. I’ll show you exactly how this integrated workflow operates later in this guide.
Working with Folders in Lightroom Classic
Folders form the backbone of your Lightroom organization. They mirror the actual file structure on your computer, which means proper folder management is essential for both organization and backup. Here’s how to set up and manage folders effectively.
What Folders Represent in Lightroom
When you import photos into Lightroom Classic, the Folders panel shows where those images live on your drive. This isn’t just a visual reference. Lightroom tracks the actual file path of every photo in your catalog. If you move files outside of Lightroom using Finder or Explorer, you’ll break the link and see question marks appear.
The golden rule of Lightroom: always move, rename, or delete files from within Lightroom, never through your operating system. I learned this the hard way early in my career when I “organized” a folder structure in Finder and spent hours reconnecting missing files.
Creating Your Folder Structure During Import
The best time to establish your folder organization is during import. Here’s my recommended process:
Step 1: Connect your memory card or select source images and open the Import dialog (Ctrl+Shift+I / Cmd+Shift+I).
Step 2: In the Destination panel on the right, choose “Into Subfolder” and create a new folder.
Step 3: Use a consistent naming convention. I recommend “YYYY-MM-DD Event Name” for chronological sorting. For example: “2024-03-15 Smith Wedding” or “2024-06-20 Product Shoot – TechCorp.”
Step 4: Navigate to your main Photos folder as the parent directory. Lightroom will create the new subfolder there.
This approach ensures every import goes into a properly named folder from day one. You’ll thank yourself later when you need to find images from a specific date or event.
Best Practices for Folder Naming
Consistent folder naming transforms your photo library from chaos to order. After experimenting with various systems, here’s what works best:
- Start with date: YYYY-MM-DD format sorts chronologically automatically
- Add descriptive name: Client name, event type, or project title
- Include location if relevant: Especially useful for travel or destination shoots
- Keep it readable: Avoid special characters that might cause issues across different operating systems
Sample Folder Structure Template
Here’s the folder structure I use for my photography business:
Main Photos Folder
- 2024
- 2024-01-15 Johnson Family Portrait
- 2024-02-20 Corporate Headshots – Acme Inc
- 2024-03-10 Wedding – Martinez
- 2024-04-05 Product Photography – Local Bakery
- 2025
- 2025-01-08 Engagement Session – Williams
- 2025-02-14 Valentine Mini Sessions
This structure works because it’s scalable. Whether you have 100 photos or 100,000, finding a specific shoot takes seconds. The year folders prevent your main directory from becoming overwhelming.
Moving and Organizing Existing Folders
If you already have photos imported and want to reorganize your folder structure, do it from within Lightroom. Here’s how:
Step 1: In the Folders panel, right-click the folder you want to move.
Step 2: Select “Move to” and choose the new parent folder location.
Step 3: Lightroom will move the actual files on your drive and update all references in the catalog.
You can also create new folders directly in the Folders panel by right-clicking and choosing “Create Folder Inside.” Then drag and drop folders to reorganize. Lightroom handles all the file operations safely.
Common Folder Mistakes to Avoid
Based on forum discussions and my own experience, these mistakes cause the most headaches:
- Moving files outside Lightroom: Always use Lightroom’s folder tools to avoid broken links
- Too many subfolders: Three levels deep is usually enough. Deeper hierarchies become unwieldy.
- Inconsistent naming: Mixing “2024-03-15” with “March 2024” breaks automatic sorting
- Putting everything in one folder: A folder with 10,000 images defeats the purpose of organization
- Not creating year folders: After a few years, a flat list of hundreds of shoot folders becomes unmanageable
Creating and Managing Collections in Lightroom Classic
Collections are where Lightroom’s virtual organization power really shines. Unlike folders, collections let you group photos without moving or duplicating files. This flexibility makes collections essential for project-based workflows.
What Are Collections and Why They Matter
A collection is simply a saved reference to specific photos. Think of it like a music playlist. Adding a song to a playlist doesn’t create a duplicate file. The playlist just points to the original. Collections work the same way.
This means one photo can appear in unlimited collections without taking up extra disk space. Your “Best Portraits” collection, “Client Favorites” collection, and “Portfolio 2024” collection can all include the same image. When you edit that photo in one collection, the changes appear everywhere because it’s the same file.
Creating Regular Collections
Here’s how to create your first collection:
Step 1: In the Catalog panel, click the Plus icon next to Collections.
Step 2: Choose “Create Collection” from the dropdown menu.
Step 3: Name your collection descriptively. For example, “Smith Wedding – Highlights.”
Step 4: Check “Include selected photos” if you have images selected that you want to add immediately.
Step 5: Click Create.
To add photos to an existing collection, simply drag them from the grid view onto the collection name. You can also right-click a photo, choose “Add to Collection,” and select from your list.
Collection Sets for Hierarchical Organization
Collection Sets act as containers for organizing related collections. This is especially valuable for large projects or client work. Here’s how I structure wedding photography using Collection Sets:
Collection Set: Smith Wedding 2024
- Collection: Ceremony
- Collection: Reception
- Collection: Portraits
- Collection: Details
- Collection: Client Favorites
- Collection: Final Delivery
To create a Collection Set:
Step 1: Click the Plus icon in the Collections panel.
Step 2: Choose “Create Collection Set.”
Step 3: Name it and click Create.
Step 4: Drag existing collections into the set, or create new collections inside it.
Smart Collections with Automatic Rules
Smart Collections are dynamic collections that automatically include photos based on criteria you define. They’re incredibly powerful for finding images that match specific conditions.
To create a Smart Collection:
Step 1: Click the Plus icon in Collections and choose “Create Smart Collection.”
Step 2: Name your Smart Collection.
Step 3: Set your rules using the dropdown menus. For example:
- Capture date is in the last 30 days
- Rating is greater than or equal to 4 stars
- Keyword contains “portrait”
Step 4: Click Create.
Here are Smart Collections I use constantly:
- Recent Edits: Edit date is in the last 7 days
- Needs Keywording: Keywords is empty
- Five Star Favorites: Rating equals 5 stars
- Flagged for Export: Pick flag is flagged
- This Month’s Shoots: Capture date is in this month
Quick Collection for Temporary Grouping
Quick Collection is a temporary holding area perfect for culling sessions or gathering images for a quick export. Here’s how to use it:
To add photos: Press “B” while viewing any image, or click the circle in the top-right corner of the thumbnail.
To view Quick Collection: Click “Quick Collection” in the Catalog panel.
To remove photos: Press “B” again or click the circle to unmark.
To save as permanent collection: Click “Save Current” in the Quick Collection header, then name your new collection.
I use Quick Collection constantly during culling. I mark potential keepers with “B”, review them in Quick Collection, refine my selection, then save the final group as a permanent collection.
Target Collection for Faster Workflow
Target Collection lets you designate one collection to receive photos when you press “T” or click the target icon. This eliminates the drag-and-drop step for frequently used collections.
To set a Target Collection:
Step 1: Right-click any collection.
Step 2: Choose “Set as Target Collection.”
Step 3: A target icon appears next to the collection name.
Now pressing “T” while viewing any photo adds it to your target collection instantly. I typically set my “Current Project” or “To Edit” collection as the target during active work sessions.
Color Coding Collections
Lightroom lets you assign color labels to collections for visual organization. This helps distinguish collection types at a glance:
- Red: Urgent or active projects
- Yellow: Needs attention
- Green: Completed and delivered
- Blue: Personal work
- Purple: Portfolio candidates
To add a color label, right-click a collection and choose a color from the menu. You can also filter the Collections panel by color using the filter dropdown.
Syncing Collections to Mobile
One powerful feature is syncing collections to Lightroom mobile for viewing on your phone or tablet. Here’s how:
Step 1: Click the checkbox icon to the left of any collection name.
Step 2: Lightroom syncs those photos to the cloud.
Step 3: Open Lightroom on your mobile device to view and share.
Note that this does use cloud storage and uploads smart previews, not full-resolution files. It’s perfect for showing clients proofs or sharing work on social media from your phone.
Using Keywords for Searchability
Keywords transform your photo library from a collection of files into a searchable database. When you consistently apply keywords, finding specific images takes seconds instead of hours. Here’s how to build an effective keywording workflow.
Why Keywords Are Essential
Folders tell you where a photo is stored. Collections show you themed groups. But keywords tell you what’s actually in the photo. This distinction matters enormously when you need to find “all sunset photos” or “every image with the Eiffel Tower.”
Keywords also travel with your images when you export them. Stock agencies, clients, and other software can read your keywords, making them valuable beyond Lightroom.
The Keywording Panel Basics
Open the Keywording panel in the right sidebar of the Library module. You’ll see several views:
- Keyword Tags: Shows all keywords applied to selected photo
- Suggested Keywords: Lightroom suggests based on similar images
- Keywords from Caption: Parses caption text for potential keywords
To add keywords, simply type in the field and press Enter. Separate multiple keywords with commas or semicolons. You can also drag keywords from the Keyword List panel onto photos.
Creating a Keyword Hierarchy
Hierarchical keywords organize related terms under parent categories. This keeps your keyword list manageable and improves search accuracy. Here’s how to create hierarchy:
Step 1: Open the Keyword List panel.
Step 2: Click the Plus icon to create a new keyword.
Step 3: For parent categories, just enter the name (e.g., “Location”).
Step 4: For child keywords, right-click the parent and choose “Create Keyword Inside.”
Example hierarchy:
- Location
- United States
- California
- New York
- Arizona
- Europe
- France
- Italy
- Spain
- United States
When you apply “California” to a photo, Lightroom automatically includes “United States” and “Location” as parent keywords. This happens silently and improves search accuracy.
Keyword Sets for Efficiency
Keyword Sets let you save groups of related keywords for quick access. Instead of typing the same keywords repeatedly, you can click to apply a whole set. Here’s how to create one:
Step 1: In the Keywording panel, click the Keyword Set dropdown.
Step 2: Choose “Save Current Settings as New Preset.”
Step 3: First, add the keywords you want to your selected photo.
Step 4: Name your set (e.g., “Portrait Keywords,” “Landscape Keywords”).
I have keyword sets for each photography type I do regularly:
- Portrait Set: portrait, headshot, studio, natural light, candid, formal
- Wedding Set: wedding, ceremony, reception, bride, groom, details, formal portraits
- Landscape Set: landscape, nature, scenic, golden hour, sunset, sunrise, mountains
The Painter Tool for Fast Keywording
The Painter tool (spray can icon in the toolbar) lets you “spray” keywords onto multiple photos quickly. Here’s how to use it:
Step 1: Click the Painter tool icon in the toolbar (or press Ctrl+Alt+K / Cmd+Option+K).
Step 2: In the Painter settings, choose “Keywords” from the dropdown.
Step 3: Type the keyword you want to apply.
Step 4: Click on photos in the grid to spray the keyword.
Step 5: Press Escape or click Done when finished.
This is incredibly fast for batch keywording similar images. I use it constantly when processing large shoots where many photos share the same subject matter.
Synonyms and Export Settings
Adding synonyms to keywords improves searchability and helps with stock photography requirements. Here’s how to add them:
Step 1: Right-click a keyword in the Keyword List.
Step 2: Choose “Edit Keyword Tag.”
Step 3: Add synonyms in the Synonyms field, separated by commas.
For example, if your keyword is “automobile,” you might add synonyms: “car, vehicle, auto.” Now searching for “car” will also find photos keyworded with “automobile.”
The “Export” checkbox in keyword settings controls whether keywords are included when you export images. Generally, you want this checked for content-related keywords but might uncheck it for internal organization keywords like “needs editing” or “client favorites.”
Best Practices for Consistent Keywording
Consistency is the key to effective keywording. Here are practices that have saved me countless hours:
- Keyword immediately: Add keywords during import or right after. It’s much harder to go back later.
- Start broad, then get specific: Apply general terms first (portrait, outdoor), then specifics (female, blonde, blue dress)
- Use singular nouns: “Dog” not “Dogs” – searches will find both anyway
- Be consistent with spelling: Choose “blue sky” or “blue-sky” and stick with it
- Include obvious and non-obvious terms: Both “sunset” and “silhouette” might apply to the same image
- Don’t overdo it: 10-15 relevant keywords are more useful than 50 random ones
How to Organize Photos Using Folders Collections and Keywords: An Integrated Workflow
Now that you understand each method individually, let me show you how they work together in a complete workflow. This integrated approach is where the real power of Lightroom Classic organization shines.
Step-by-Step Integrated Workflow
Here’s the exact workflow I use for every photo shoot:
Step 1: Import with Folder Structure
During import, I create a dated folder using my YYYY-MM-DD Event Name convention. This establishes permanent physical organization from the start. I also apply initial keywords in the Import dialog for broad categories like “wedding” or “portrait.”
Step 2: Initial Culling
I use Quick Collection to mark potential keepers. Pressing “B” adds candidates, then I review the Quick Collection to make final selections. This keeps me focused on one shoot at a time.
Step 3: Create Collection Set
For significant projects, I create a Collection Set named after the event. Inside, I create collections for different aspects: “Ceremony,” “Portraits,” “Details,” “Deliverables.”
Step 4: Add Detailed Keywords
With final selections in collections, I add detailed keywords. I use keyword sets for common terms and the Painter tool for batch application. Location, subject names, and specific content all get keyworded now.
Step 5: Create Smart Collections
I have standing Smart Collections that automatically capture images: “Recent Work,” “5-Star Images,” “Needs Export.” These keep my workflow organized without manual maintenance.
Step 6: Build Final Collections
For client delivery, I create final collections pulling from across the shoot. My folder structure preserves the originals, while collections create the curated view clients see.
Workflow Variations for Different Photography Types
Different photography genres benefit from slightly different approaches:
Wedding Photography:
- Folders: One folder per wedding, dated and named
- Collections: Collection Set per wedding with collections for each part of the day
- Keywords: Names of key people, locations, specific moments
Portrait Photography:
- Folders: Organize by client name or session date
- Collections: Group best work for portfolio, separate collections per client
- Keywords: Client name, portrait type, location, style
Landscape Photography:
- Folders: Organize by location or trip
- Collections: Theme-based (sunsets, mountains, waterfalls) across different shoots
- Keywords: Location names, subject matter, time of day, weather conditions
Time-Saving Keyboard Shortcuts
These shortcuts dramatically speed up organization:
- B: Add to/remove from Quick Collection
- T: Add to Target Collection
- Ctrl+Shift+K / Cmd+Shift+K: Open Keywording panel focus
- Ctrl+Alt+K / Cmd+Option+K: Activate Painter tool
- Ctrl+N / Cmd+N: Create new collection
- Ctrl+Shift+N / Cmd+Shift+N: Create new collection set
- Ctrl+B / Cmd+B: Show Quick Collection
Learning these shortcuts took my organization speed from tedious to efficient. I can process a 500-image wedding in under an hour now.
Frequently Asked Questions
How to organize collections in Lightroom Classic?
To organize collections in Lightroom Classic, start by creating Collection Sets as containers for related collections. Click the Plus icon in the Collections panel, choose Create Collection Set, and name it appropriately. Then create individual collections inside the set for different aspects of your project. Use color labels to visually distinguish collection types, and set a Target Collection for frequently used groupings. Smart Collections automatically organize images based on rules you define, such as date ranges, ratings, or keywords.
Should I use folders or collections in Lightroom Classic?
Use both folders and collections together, as they serve different purposes. Folders organize your actual files on your hard drive and should follow a consistent naming structure like YYYY-MM-DD Event Name. Collections create virtual groupings without moving or duplicating files. Use folders for permanent storage organization and backup management. Use collections for project-based groupings, client albums, portfolio selections, and themes that span multiple shoots. The combination gives you both physical organization and flexible virtual views.
How do you organize keywords in Lightroom?
Organize keywords using a hierarchical structure with parent categories and child keywords. Create parent categories like Location, Subject, or Style in the Keyword List panel. Right-click parents and choose Create Keyword Inside for child keywords. Use Keyword Sets to save groups of frequently used keywords for quick access. The Painter tool lets you spray keywords onto multiple photos rapidly. Add synonyms to keywords for improved searchability. Always keyword consistently using singular nouns and apply keywords during import for efficiency.
What is the difference between folders and collections in Lightroom Classic?
Folders represent the actual physical location of your photos on your hard drive. Moving photos between folders in Lightroom actually moves the files on your computer. Collections are virtual groupings that reference photos without moving or duplicating them. A single photo can appear in unlimited collections while existing in only one folder. Folders are permanent and affect backup organization. Collections are flexible and perfect for project-based work, client albums, and themed groupings. Changes to photos apply everywhere since collections just point to the original file.
Will Lightroom Classic be discontinued?
Adobe has not announced any plans to discontinue Lightroom Classic. It remains actively developed with regular updates and new features. Lightroom Classic continues to be the preferred choice for professional photographers who need robust local storage, advanced organization tools, and powerful batch processing capabilities. The cloud-based Lightroom (formerly CC) serves a different market segment focused on mobile workflows and cloud sync. Both products coexist and serve different user needs.
Conclusion
Learning how to organize photos using folders, collections, and keywords in Lightroom Classic transforms your workflow from frustrating to fluid. Folders provide permanent physical organization. Collections offer flexible virtual groupings. Keywords enable instant searchability. Together, they create a complete system that scales with your photo library.
Start with folders during import using a consistent dated structure. Add collections for project-based organization and client work. Build a keyword hierarchy that grows with your photography. Most importantly, apply these methods consistently from day one.
Your future self will thank you when you can find any photo in seconds, export client albums effortlessly, and maintain a catalog that stays organized even as it grows to tens of thousands of images. The time you invest in organization today pays dividends every time you open Lightroom Classic.