Running an online store means your customers cannot touch, feel, or examine products before buying. This creates a fundamental challenge: how do you build enough confidence for someone to click purchase? A proper 360-degree product photography setup for ecommerce stores solves this problem by letting shoppers rotate and examine products from every angle, just like they would in a physical store.
In this guide, I will walk you through everything you need to create interactive 360 product spins. We will cover the essential equipment, lighting setups, camera settings, shooting techniques, and software options. By the end, you will have a complete roadmap for implementing 360 photography in your own ecommerce business.
Whether you are a small business owner working with a tight budget or a professional photographer looking to add 360 services, this guide has you covered. I have tested various setups over the years and will share what actually works, including common mistakes to avoid.
What is 360-Degree Product Photography?
360-degree product photography is a technique that captures a series of images of a product from multiple angles (typically 24-36 frames) that are stitched together to create an interactive, rotating view. This allows online shoppers to examine products from all sides by dragging or swiping to rotate the item on screen.
Think of it as bringing the in-store experience to your website. Instead of static images showing only one or two perspectives, customers get a complete visual understanding of what they are buying.
How 360 Product Photography Works
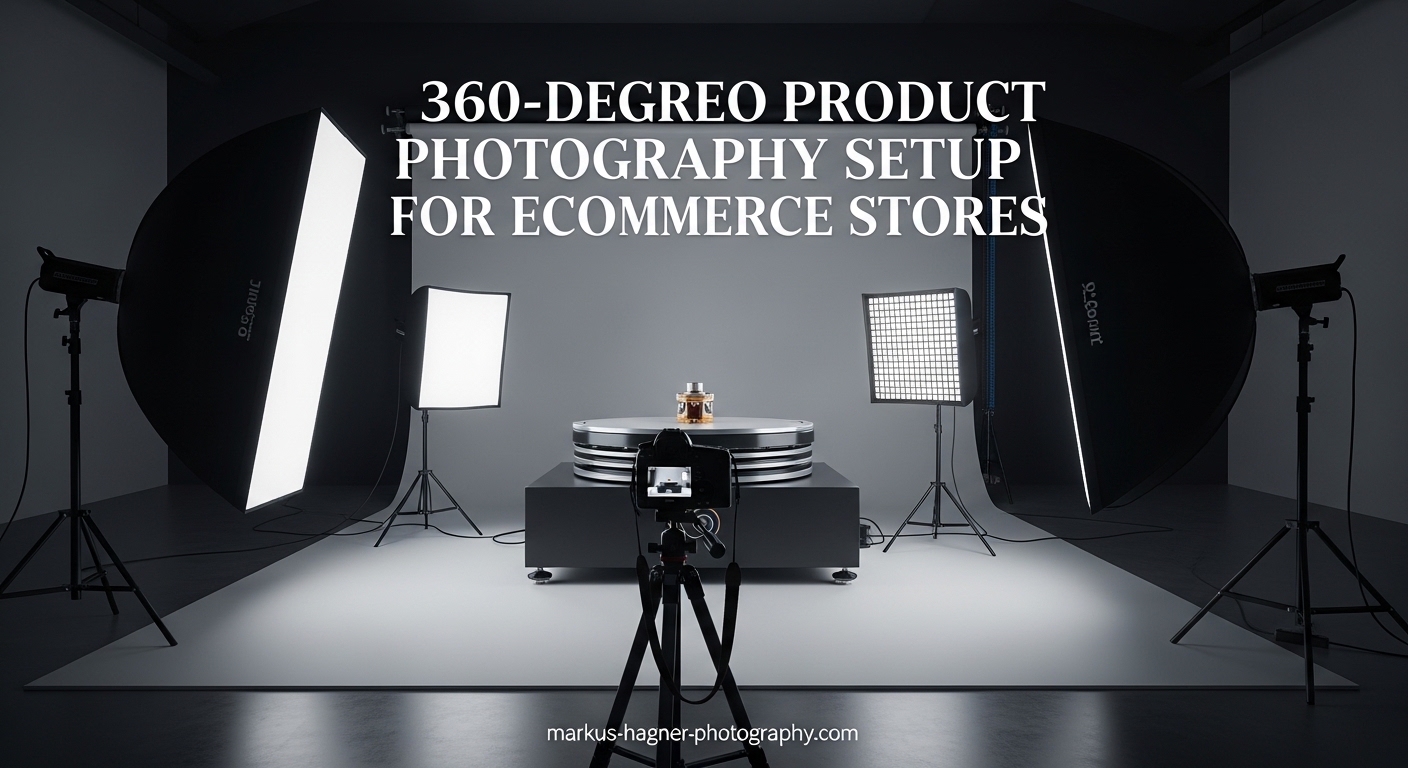
The process involves placing a product on a motorized turntable and capturing photos at consistent intervals as the product rotates. Most setups take a photo every 10-15 degrees, resulting in 24-36 individual frames. Specialized software then combines these images into a seamless interactive experience where viewers can drag to rotate the product.
The key is consistency. Every frame must have identical lighting, exposure, white balance, and focus. Any variation between frames will be immediately noticeable when the images animate together.
360 vs 3D Product Photography: What is the Difference?
While often confused, these are different approaches with distinct use cases:
360-degree photography captures real photos of an actual product. The result shows exactly what the item looks like, including textures, materials, and imperfections. It is photography-based and relatively straightforward to produce.
3D product photography (or photogrammetry) creates a digital 3D model by capturing hundreds of photos from multiple angles, including above and below the product. This allows viewers to pick up and manipulate the item in virtual space. It requires more equipment, time, and specialized software.
For most ecommerce applications, 360 photography provides the best balance of quality, cost, and production time. 3D becomes valuable for customizable products or augmented reality applications.
Types of 360 Product Spins
Single-row spins capture the product from one horizontal angle as it rotates. This is the most common type and works well for most products. Viewers can rotate the item left and right.
Multi-row spins (also called 3D spins or hemispherical) capture the product from multiple vertical angles. The camera tilts up and down while also rotating around the product. This allows viewers to see top and bottom details, useful for products like shoes or handbags.
Why Your Ecommerce Store Needs 360 Product Photography
The numbers speak for themselves. Stores implementing 360 product photography consistently see measurable improvements in key metrics.
Higher Conversion Rates
Interactive 360 views can increase conversion rates by 2-5 times compared to static images alone. When customers can examine products thoroughly, they feel more confident making a purchase decision. This is especially true for higher-priced items where buyers want to verify quality and details.
I have seen jewelry stores report conversion increases of over 40% after adding 360 views. Electronics retailers see similar gains when customers can inspect ports, buttons, and build quality from every angle.
Reduced Return Rates
Returns cost ecommerce businesses billions annually. One major cause? Products that do not match customer expectations. 360 photography helps close this expectation gap by showing products exactly as they are.
Studies show 360 product views can reduce return rates by up to 50%. When customers know exactly what they are getting, they are less likely to be disappointed upon delivery.
Increased Buyer Confidence
Online shopping requires trust. Customers cannot verify product quality, check stitching, or examine materials before buying. 360 views provide the visual information needed to build that trust.
This transparency signals confidence in your products. You are essentially saying, “Look at this from every angle. We have nothing to hide.” That builds credibility and encourages purchases.
Competitive Advantage
Despite the clear benefits, many ecommerce stores still rely on basic product images. Implementing 360 photography sets you apart from competitors. It creates a more premium shopping experience that customers remember.
Marketplaces like Amazon now support 360 views, and early adopters are seeing significant advantages in search visibility and customer engagement.
Which Products Benefit Most?
Not every product needs 360 photography. It provides the most value for items where:
Customers want to examine details from multiple angles (jewelry, watches, electronics). The product has functional elements visible from different sides (cameras, tools, appliances). Texture and material quality matter (clothing, leather goods, furniture). Customers might have specific questions about fit or design (footwear, bags, eyewear).
Simple commodity products with obvious appearances may not see the same ROI. Focus your 360 efforts on items where the extra detail drives purchasing decisions.
Equipment Needed for 360-Degree Product Photography Setup
Building your 360 photography setup requires several key components. The good news? You can start simple and upgrade as your needs grow.
Camera Options
DSLR or Mirrorless Camera: A dedicated camera gives you the most control and quality. You do not need the latest flagship model. Any camera with manual controls and the ability to trigger remotely works. Popular choices include Canon EOS series, Nikon Z mount cameras, and Sony Alpha bodies.
Smartphone: Modern smartphones can produce excellent results for smaller products. Apps exist that automate the 360 capture process. This is a viable starting point if budget is tight.
Key features to look for: Manual exposure control, remote triggering capability (wired, wireless, or app-based), hot shoe for mounting, and RAW file support for post-processing flexibility.
Turntable Options
The turntable is the heart of your 360 setup. It rotates the product in precise increments between each photo.
Motorized Turntables: These automatically rotate to preset positions and can trigger your camera at each stop. They ensure consistent spacing between frames. Prices range from $200 for basic models to several thousand for professional units. Look for options compatible with your camera system.
Manual Turntables: Budget-friendly alternatives where you rotate the platform by hand. Some include degree markings for consistency. They work fine for occasional use but slow down your workflow significantly.
DIY Options: Creative photographers have built functional turntables using lazy Susans, stepper motors, and Arduino controllers. This requires technical skill but can cost under $100.
Lighting Setup
Consistent lighting is critical. Every frame must look identical except for the product rotation.
Continuous Lighting: LED panels or fluorescent lights that stay on constantly. These let you see exactly how shadows fall before shooting. They are beginner-friendly and affordable. Softbox kits with daylight-balanced bulbs work well.
Strobe Lighting: Flash-based systems that fire with each shot. They provide more power for larger products and freeze any motion. Most professional setups use 2-4 strobes with softboxes or stripboxes. Popular brands include Godox (budget-friendly) and Profoto (professional grade).
Lighting configuration: A typical setup uses 2-4 lights positioned around the product. The goal is even illumination with soft shadows. Avoid harsh direct light that creates strong shadows or hot spots.
Background Considerations
Most 360 product photography uses pure white backgrounds. This matches standard ecommerce requirements and makes post-processing easier.
White infinity curves: Also called cyclorama or sweep backgrounds. The curved transition between floor and wall eliminates visible seams. Paper rolls work well and are replaceable when they get dirty.
Transparent surfaces: Acrylic or glass plates work for products that need to appear floating or for bottom-lit shots. These require more careful lighting to avoid reflections.
Tripod and Mounting
Your camera must remain absolutely stationary during the entire shoot. A sturdy tripod is non-negotiable.
Look for tripods with a center column that can mount horizontally or a dedicated camera arm. This allows positioning the camera directly above the turntable for flat-lay style shots.
Quick tip: Turn off any image stabilization when your camera is on a tripod. These systems can actually introduce blur when the camera is already stable.
Budget vs Professional Equipment Comparison
Budget Setup ($300-500): Entry-level DSLR or smartphone, manual turntable ($50-100), 2 LED softbox lights ($100-150), white paper background ($30), basic tripod ($50-100). This works for learning and occasional use.
Intermediate Setup ($1,000-2,500): Mid-range mirrorless camera, motorized turntable with camera trigger ($300-800), 2-3 strobe lights with modifiers ($500-1,000), quality tripod ($150-300), seamless background system ($100-200). Suitable for regular production work.
Professional Setup ($5,000+): High-resolution camera body, automated turntable system ($1,500-5,000), 4+ studio strobes ($1,500-3,000), professional tripod and camera arm ($500-1,000), dedicated shooting table, color management tools. For high-volume studios and demanding clients.
Step-by-Step 360-Degree Product Photography Setup Guide
Now let’s walk through the complete setup process from start to finish.
Step 1: Prepare Your Workspace
Choose a space large enough for your equipment and product movement. The area should be free from ambient light changes (no windows or use blackout curtains). A room with controlled lighting ensures consistency across all frames.
Clean everything thoroughly. Dust on your background shows up clearly in photos. Have cleaning supplies ready for products too.
Step 2: Position and Level Your Turntable
Place your turntable on a stable surface. It must be perfectly level. Even a slight tilt will cause the product to appear wobbly during rotation. Most turntables include built-in levels, or use a separate bubble level.
Position the turntable at a comfortable working height. You will be placing and adjusting products repeatedly, so ergonomics matter.
Step 3: Set Up Your Background
Position your white background behind and under the turntable. If using a paper sweep, create a smooth curve where the vertical and horizontal surfaces meet. Avoid wrinkles or creases that will show in photos.
For products on the turntable surface, you may need to place white material directly on the rotating platform. Ensure this does not interfere with rotation.
Step 4: Arrange Your Lighting
Position your lights to create even illumination across the entire product rotation. Here is a reliable starting configuration:
Two-light setup: Place lights at 45-degree angles on either side of the product, slightly above camera height. This creates soft, even lighting with gentle shadows. Adjust distance and power until the product is well-lit without harsh highlights.
Four-light setup: Add fill lights opposite your main lights, or position lights above and below for more complex products. This provides maximum evenness for challenging items.
Test your lighting by photographing the product from several angles. Check that brightness remains consistent as the product rotates.
Step 5: Position Your Camera
Mount your camera on the tripod at the desired angle. For most products, this means shooting level with or slightly above the product’s center point.
Frame your shot with some background visible around all edges of the product. You will need this margin for cropping and different display sizes.
Ensure your tripod is stable and will not be bumped during shooting. Any camera movement between frames ruins the 360 effect.
Step 6: Configure Camera Settings
Set your camera to full manual mode. Every setting must remain constant throughout the shoot.
Aperture: Use f/8 to f/16 for sufficient depth of field. This keeps the entire product in focus as it rotates.
ISO: Keep it low (100-200) to avoid noise. Higher ISO settings introduce grain that becomes obvious in 360 animations.
Shutter speed: Fast enough to avoid any motion blur, typically 1/125 or faster. If using strobes, sync speed limits apply.
White balance: Set manually using a grey card. Never use auto white balance, as it will shift between frames.
Focus: Set manually on the product’s center. Disable autofocus to prevent hunting during the shoot.
Step 7: Stage Your Product
Place your product at the exact center of the turntable. This is crucial. Off-center products will wobble orbit during rotation.
Use the center marking on your turntable, or create alignment guides. Some photographers use a laser pointer positioned above to verify centering.
Clean the product one final time. Remove any dust, fingerprints, or smudges that will appear in photos.
Step 8: Test and Shoot
Before committing to the full shoot, take test shots at several rotation positions. Check exposure, focus, and lighting consistency. Make any needed adjustments.
Once satisfied, begin your 360 capture. The standard approach captures 36 frames (one every 10 degrees) for smooth rotation. For jewelry and detailed products, 72 frames provides even smoother results.
With motorized systems, the turntable rotates and triggers the camera automatically. With manual turntables, rotate 10 degrees, trigger camera, repeat. Maintain a consistent rhythm.
Camera Settings and Shooting Techniques
Getting consistent, high-quality frames requires attention to several technical details.
Recommended Camera Settings
Aperture Priority vs Manual: Always use full manual mode. The camera must not change any settings between frames. Even small automatic adjustments will create visible flicker in the final animation.
Aperture range: f/8 to f/16 provides the sweet spot for product photography. Wider apertures (lower f-numbers) create shallow depth of field that may blur parts of the product. Narrower apertures (higher f-numbers) can introduce diffraction that softens the image.
ISO settings: Stay at ISO 100-200. Higher ISOs introduce noise that becomes very visible when frames animate together. If you need more light, adjust your aperture, shutter speed, or lighting instead.
White balance consistency: This is where many beginners struggle. Use a grey card to set custom white balance before shooting. Shoot in RAW format to allow adjustments later, but get it right in-camera when possible.
Handling Reflective Products
Reflective surfaces (jewelry, chrome, electronics) present special challenges. They show your studio environment, including you and your equipment.
Use larger light sources: Big softboxes or diffusion panels create broader, cleaner reflections than small light sources. The reflection becomes a smooth gradient rather than a bright point.
Build a tent: For highly reflective items, surround the product with white diffusion material. This creates a uniform white environment reflected in the product surface.
Angle your camera: Sometimes a slight change in camera angle eliminates unwanted reflections without changing the product’s appearance significantly.
Common Mistakes to Avoid
Inconsistent lighting: Any light variation between frames creates flicker. Block windows, use consistent artificial lighting, and avoid mixing light sources.
Product movement: Products must not shift during rotation. Secure lightweight items with museum wax or double-sided tape.
Off-center positioning: Products not centered on the turntable will orbit rather than rotate smoothly. Take time to center precisely.
Focus changes: Lock focus manually. If your camera hunts for focus between frames, the results will be inconsistent.
Skipping quality checks: Review your frames before breaking down the setup. Catching problems early saves reshooting.
How Many Frames Do You Need?
The number of frames affects animation smoothness and file size.
24 frames (15-degree intervals): Minimum for acceptable smoothness. Works for smaller images or when file size is critical.
36 frames (10-degree intervals): Standard for most ecommerce applications. Provides smooth rotation without excessive file sizes.
72 frames (5-degree intervals): Premium smoothness for jewelry, watches, and high-value products where detail matters.
More frames mean larger files and longer loading times. Balance smoothness against web performance for your specific use case.
Software Options for Creating 360 Product Views
After capturing your frames, software combines them into an interactive experience.
Free vs Paid Software
Free options: Several platforms offer free tiers for creating 360 views. Sirv provides a free plan with limited bandwidth. WebRotate 360 has a free version for smaller catalogs. These work well for testing and low-traffic sites.
Paid solutions: Professional software offers more features, customization, and support. Expect monthly fees ranging from $20 to several hundred dollars depending on catalog size and features needed.
Popular Software Options
Sirv: Cloud-based platform that hosts and serves your 360 views. Easy integration with most ecommerce platforms. Includes analytics to track viewer engagement.
WebRotate 360: Feature-rich solution with extensive customization options. Supports hotspots, zoom, and AR integration. Good documentation and community support.
Orbitvu: Combines hardware and software for integrated solutions. Popular with professional studios and high-volume retailers.
PhotoRobot: Enterprise-level automation with integrated software. Handles everything from capture through publishing.
Basic Post-Processing Workflow
Before creating your 360 view, you may need to process individual frames:
Import and organize: Download all frames to a dedicated folder. Maintain sequential naming for easy assembly.
Batch edit: Apply consistent adjustments to all frames simultaneously. This includes exposure correction, white balance tweaks, and background cleanup. Adobe Lightroom works well for this.
Background removal: If you need transparent backgrounds, this step removes the white backdrop. Many 360 software tools can automate this process.
Export: Save processed images in your software’s preferred format. Most accept JPG or PNG sequences.
File Optimization for Web
Large 360 files slow your website. Optimize before publishing:
Compress images: Use JPG compression appropriate for your image quality needs. A quality setting of 80-85 usually provides good results.
Choose appropriate resolution: Match image size to display size. 1000-1500 pixels wide works for most product pages.
Use lazy loading: Modern 360 viewers load images only when needed, reducing initial page load time.
Enable CDN delivery: Content delivery networks cache your 360 views globally for faster loading worldwide.
Integrating 360 Product Views Into Your Ecommerce Platform
Once your 360 views are created, they need to appear on your product pages.
Shopify Integration
Shopify makes 360 integration relatively straightforward. Most 360 software platforms offer dedicated Shopify apps or plugins. Install the app, connect your account, and embed 360 views using the provided tools.
Some apps automatically replace your main product image with the 360 view, while others add it as a separate element. Test both approaches to see which converts better for your products.
WooCommerce Setup
WordPress with WooCommerce supports 360 views through plugins. Look for options compatible with your chosen 360 software. Most use shortcodes or blocks that you place on product pages.
Ensure your theme displays the 360 viewer prominently. It should be immediately visible to visitors, not buried below the fold.
Custom Website Implementation
For custom-built sites, integration requires adding the 360 viewer’s JavaScript and HTML code to your product page templates. Most platforms provide copy-paste embed codes.
Work with your developer to ensure the viewer loads efficiently and displays correctly on all devices.
Mobile Optimization Tips
Mobile shoppers expect smooth experiences. Your 360 views must work well on phones and tablets.
Touch-friendly controls: Viewers should respond to swipe gestures naturally. Test drag-to-rotate on actual mobile devices.
Appropriate file sizes: Mobile connections vary. Consider serving smaller files to mobile devices or progressive loading.
Responsive design: The 360 viewer should scale appropriately for different screen sizes. Test on various devices before going live.
Loading indicators: Show progress when loading 360 views on slower connections. This prevents users from assuming the feature is broken.
Frequently Asked Questions
What equipment do I need for 360 product photography?
You need a camera (DSLR, mirrorless, or smartphone), a turntable (motorized or manual), 2-4 lights (continuous LED or strobes with softboxes), a white background, and a sturdy tripod. Software to stitch frames into a 360 view completes the setup. Budget setups start around $300-500, while professional configurations cost $2,000 or more.
How does 360 degree product photography work?
A product is placed on a turntable and photographed at consistent intervals (typically every 10 degrees) as it rotates. This produces 24-36 individual frames that software combines into an interactive view where customers can drag to rotate the product. Consistent lighting, exposure, and white balance across all frames is essential for smooth results.
How many frames do you need for a 360 product spin?
36 frames (captured every 10 degrees) is the standard for most ecommerce applications, providing smooth rotation without excessive file sizes. 24 frames works for smaller images or bandwidth-constrained situations. 72 frames creates premium smoothness ideal for jewelry and high-value products where detail matters most.
Can you do 360 product photography with a smartphone?
Yes, modern smartphones can produce quality 360 product photography for smaller items. Apps exist that automate the capture process, and some even include basic editing features. While not as controlled as dedicated camera setups, smartphone photography is a viable starting point for businesses on tight budgets.
How much does 360 product photography equipment cost?
A budget setup with a smartphone or entry-level camera, manual turntable, LED lights, and basic accessories costs $300-500. An intermediate setup with motorized turntable and strobe lighting runs $1,000-2,500. Professional systems with automation and high-end equipment start at $5,000 and can exceed $20,000 for complete studio installations.
Conclusion
Creating a 360-degree product photography setup for ecommerce stores is more accessible than ever. You can start with a modest budget and upgrade equipment as your business grows. The key principles remain the same: consistent lighting, precise camera settings, and careful product positioning.
The investment pays off through higher conversion rates, fewer returns, and more confident customers. Start by testing the process with products that benefit most from 360 views. As you become comfortable with the workflow, expand to more of your catalog.
Remember that consistency is everything. Every frame must match in exposure, white balance, and focus. Take time to set up properly, and the results will speak for themselves through improved customer engagement and sales.