The first time I taped a bright teal gel to my speedlight, I had no idea what I was doing. I pointed it at the background wall, fired a test shot, and genuinely laughed out loud at what came up on my camera screen. That dull beige wall was gone. In its place was a deep cyan backdrop that made my subject look like they’d stepped onto a movie set.
That’s what color gels for flash can do. They are one of the cheapest, most portable tools in portrait photography, and they produce results that would otherwise cost thousands in studio equipment or hours in post-processing.
In this guide, I’ll walk you through everything you need to know about how to use color gels on your flash for creative portrait effects — from what they are and how to attach them, to three specific lighting setups you can try today, plus the color theory basics that will stop you guessing and start helping you make intentional creative choices.
What Are Color Gels for Flash?
Color gels are thin, flexible sheets of colored acetate or polyester that you place in front of your flash head to tint the light before it leaves the unit. They are sometimes called color filters or gels (short for gelatin, the original material used before plastics took over).
There are two distinct categories of color gels, and understanding the difference between them matters a lot for portrait work:
Color correction gels are designed to change the color temperature of your flash so it matches existing ambient light. The most common are CTO (Color Temperature Orange), which warms the light to match tungsten or incandescent bulbs, and CTB (Color Temperature Blue), which cools the light toward the blue end of the spectrum to match daylight or fluorescent environments. These gels are about accuracy — they help your flash blend in seamlessly rather than creating obvious mixed lighting.
Color effect gels are the creative tools. Red, blue, green, purple, yellow, magenta — these gels are not trying to match anything. They intentionally color the light to create a mood, a dramatic atmosphere, or a visual contrast in the image. This is what most portrait photographers mean when they talk about “using color gels creatively.”
Both types come in varying densities. A full-strength red gel will produce a vivid, saturated color cast. A half-density version of the same gel gives you a softer, more subtle wash. Most gel kits include multiple densities of the same color, which gives you a lot of control over how intense the effect looks.
Types of Color Gels You Should Know
Walk into any photography store or browse online and you’ll find dozens of gel options. These are the ones worth understanding before you spend any money.
CTO (Color Temperature Orange): The workhorse of color correction gels. A full CTO shifts your flash from roughly 5500K (daylight) down to around 3200K (tungsten). This is what you use when shooting indoors under warm household lighting so your flash doesn’t produce a cold, clinical look on your subject. Photographers typically build a set of full, 1/2, 1/4, and 1/8 CTO gels so they can dial in the exact warmth they need.
CTB (Color Temperature Blue): The opposite direction. CTB cools your flash toward blue, useful when you need to match fluorescent lighting or create a cooler, more clinical feeling in portraits. It’s also used creatively to simulate moonlight or a cool night scene.
Primary and secondary color effect gels: Red, blue, green, yellow, cyan, magenta. These are the building blocks of creative gel work. Red and orange gels produce warm, dramatic, fire-like effects. Blue and teal gels suggest coolness, night, rain, or melancholy. Green can be used for an otherworldly or horror-adjacent mood, though it requires care because it can make skin tones look sickly if it hits your subject directly.
Gel density: This refers to how saturated the effect is. A full-density gel produces the most vivid color but also cuts the most light — you can lose 1.5 to 2 stops of exposure depending on the color and the specific gel material. Light-density gels are more transparent and reduce output less, but the color effect is more subtle. In practical terms, if you want bold, obvious color in your portrait, go with full-density gels on the background and hair lights, and be prepared to compensate by increasing your flash power.
How to Use Color Gels on Your Flash: Getting Started
The most commonly asked question I hear from photographers new to gel work is simply: how do you actually attach the gel to the flash? The answer depends on what type of flash you’re using and how often you want to swap gels.
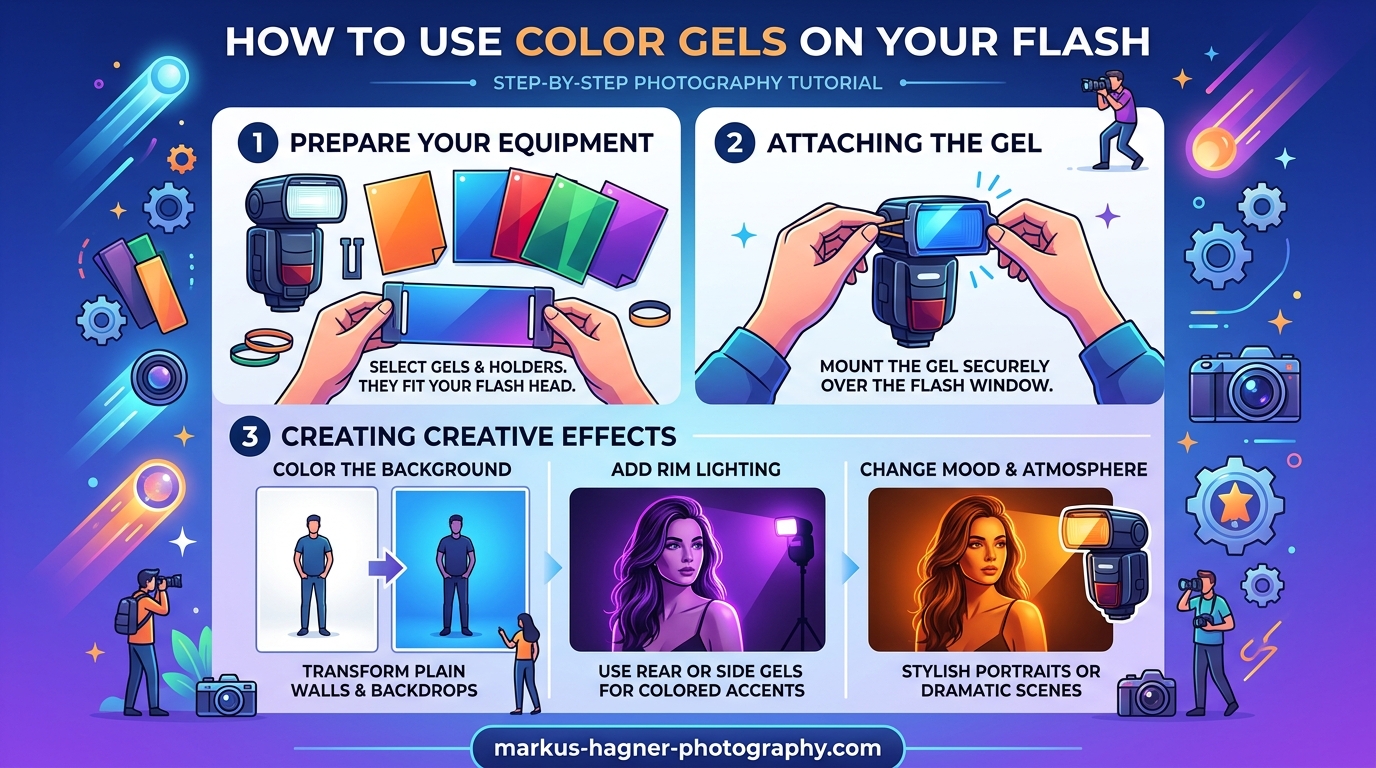
Here is a step-by-step approach to attaching and using color gels on your flash:
- Cut your gel to size. Standard gel sheets are large (typically 10 x 12 inches or full rolls). You’ll need to cut a piece that fits your flash head with a little overlap on each side. Speedlights typically need a piece around 3 x 4 inches. Studio strobes with larger heads need bigger pieces. Pre-cut gel kits designed for specific flash systems eliminate this step.
- Choose your attachment method. For occasional use, gaffers tape (not regular tape — gaffers tape is heat-resistant and won’t leave residue) works well. For frequent use, a dedicated gel holder is worth the investment. Systems like the MagMod MagGel snap directly onto the flash head magnetically and hold gels securely without any tape.
- Position the gel over the flash head. Make sure it covers the entire light-emitting surface. A gel that only partially covers the flash head will create a strange split-color effect unless that is intentional.
- Set your camera’s white balance. This is a step many beginners miss. If you shoot with Auto White Balance, your camera may try to neutralize the color cast, reducing the effect of your gel. For bold gel colors, set your white balance to Daylight (around 5500K) and leave it fixed. This lets the gels do their work without the camera fighting against them.
- Test fire and check your exposure. Dense gels reduce your flash output significantly. Take a test shot and adjust your flash power up by 1 to 2 stops as needed. The goal is correct exposure on your subject — the colored light on the background will take care of itself.
- Evaluate the color on your subject vs. the background. If the gel is on a dedicated background light, your main subject light should be un-gelled or have a different gel color. If the gelled flash is your key light, expect that the color will affect your subject’s skin tone.
A quick note on flash types: speedlights (hot-shoe flashes) work well with gels and are the easiest to experiment with on location. Studio strobes give you more power and more consistent color, but gel sheets need to be larger. Battery-powered strobes sit in between — plenty of power and usually compatible with gel attachment systems designed for specific brands.
Three Lighting Setups for Creative Portrait Effects
Theory is useful, but seeing actual setups makes things click. Here are three approaches I use regularly, ranging from simple to more complex.
Setup 1: Single Color Gel for Dramatic Backgrounds
This is the best starting point for anyone new to gel work. It uses just one light with a gel, aimed entirely at the background, while a second un-gelled light illuminates your subject naturally.
The setup: Place your subject a few feet in front of a plain backdrop (white, gray, or even a wall works well). Position your main light — a softbox or umbrella — to one side of your subject at roughly 45 degrees. Set up a second flash aimed directly at the background, and attach a bold color gel to it. Red, blue, teal, and magenta all work well for this.
The result: Your subject is lit naturally with a clean, professional look, while the background becomes whatever color you choose. It’s the fastest way to transform a boring location shoot into something dramatic, and it gives you creative control without complicating your subject lighting at all.
Technical tip: The further your background flash is from the backdrop, the softer and more gradual the color falloff. Move it closer for a more even, saturated wash. Move it further away and angle it for a spotlight-style color vignette effect at the center of the frame.
Setup 2: Complementary Colors for Striking Contrast
This is the setup you’ve seen in fashion photography and music portraits: two dramatically different colors, one hitting the subject from each side, creating a split-light effect with powerful visual tension.
The setup: Two flashes, one on each side of your subject. No key light in the traditional sense — both gelled lights serve as rim or edge lights, wrapping color around the subject. One flash gets a warm gel (orange or red), the other gets a cool gel (blue or teal). Position them behind your subject at roughly 45-degree angles, pointing back toward the camera, so they create highlights along the edges of the face, shoulders, and hair.
Complementary colors are those opposite each other on the color wheel: red and cyan, orange and blue, yellow and purple. When you use a pair like this in a portrait, the human eye naturally finds the contrast striking because of the color tension between the two hues.
Technical tip: Use a very dark or black backdrop for this setup, or shoot in a dark location. The complementary rim lights will carve your subject out of the background beautifully, but a bright background will compete with the effect. Underexpose your ambient light slightly — shoot at a fast shutter speed to reduce how much ambient light hits the sensor.
Setup 3: Monochromatic Mood with Matching Gels
The monochromatic approach uses different intensities or shades of the same color family across multiple lights. The result is a unified, cinematic mood that feels intentional rather than chaotic.
The setup: Use one light with a full-density gel of your chosen color as a background light. Then use a second light on your subject with a half-density version of the same gel, or even a quarter-density gel to just tint the light slightly without overwhelming the skin tone. The background reads as bold and saturated, your subject is slightly warmer or cooler than neutral, and the whole image has a consistent color palette.
Blue is an extremely effective color for this approach — it produces a melancholy, rain-soaked, film noir quality. Pink and magenta create a warm, romantic mood. Deep amber or orange evokes warmth and intimacy.
Technical tip: You can also introduce a neutral white fill light at very low power on the shadow side of your subject. This lifts the shadows without introducing a competing color, keeping the monochromatic theme intact while maintaining detail in the darker areas of the portrait.
Color Theory Basics for Flash Gels
You don’t need to have studied fine art to use color gels effectively, but a basic understanding of color relationships will save you from a lot of guesswork and failed experiments.
The color wheel is your reference tool. Colors that sit opposite each other on the wheel are called complementary colors. When you place these in the same image — say, orange and blue — they create strong visual contrast and each makes the other look more vivid. This is why complementary color setups in portraits feel so energetic and striking.
Analogous colors sit next to each other on the color wheel: red and orange, blue and purple, yellow and green. Using analogous gels together creates harmony rather than contrast. The image feels cohesive and flowing. This works well for romantic portraits, editorial fashion, and any subject where you want a smooth, pleasing feel rather than visual tension.
Monochromatic setups use different shades and densities of a single color. As described in Setup 3 above, this creates a unified, atmospheric image. It works especially well in black-and-white editing — shooting with a single color gel and then converting to black-and-white in post gives you a toned image with beautiful contrast between the lit and shadow areas.
In terms of practical color combinations that I’ve found consistently reliable: blue background with warm subject lighting is one of the most flattering and versatile. Red rim lights on a dark background read as dramatic without being cartoonish. Purple and gold together have a cinematic, royal quality. Avoid green as a key light on skin unless you specifically want an eerie or unnatural look — it’s much better used as a background accent.
Technical Considerations: Light Output and Power Levels
One of the most common frustrations photographers run into with color gels is unexpected underexposure. Gels reduce the light output from your flash, sometimes significantly, and if you don’t account for that, your images will come back dark or muddy.
How much light you lose depends on the density and color of the gel. A light-density CTO gel might only cost you half a stop. A full-density saturated color gel — especially darker colors like deep blue or red — can cost you 1.5 to 2 full stops. This means if your flash was set to 1/4 power to get correct exposure before the gel, you may need to push it to 1/2 or even full power with the gel attached.
This has a practical implication: if you’re shooting with a speedlight near its maximum power output, a dense gel may leave you without enough light to work with. In that case, you have a few options: move the light closer to the subject, use a lighter-density gel, or switch to a more powerful flash unit.
There is also a heat consideration worth knowing. When you fire a flash at high power repeatedly with a gel attached directly to the flash head using tape, the heat generated can warp or melt cheaper gel materials. This is a real problem that photographers on forums discuss regularly. The solution is either to use quality, heat-resistant gel material or to use a gel holder that keeps the gel slightly away from the flash head rather than in direct contact with it. The MagMod system and similar magnetic gel holders solve this neatly.
Common Mistakes to Avoid with Color Gels
I’ve made most of these mistakes myself at some point, and I’ve seen them come up again and again in photography communities online. Here’s what to watch for.
Not fixing your white balance. Shooting on Auto White Balance is the number one reason gel effects look weak or inconsistent in camera. Fix your white balance at Daylight (5500K) and the colors from your gels will render as you intended.
Gels not covering the full flash head. A gel that only partially covers the light source creates split coloring that looks like an accident, not a creative choice. Cut or select gels that fully cover the entire emitting surface of your flash.
Attaching gels with regular tape. Regular scotch tape leaves adhesive residue on your flash and can tear away suddenly. Use gaffers tape if you must tape, or invest in a proper gel holder system for consistent results.
Using a colored key light directly on your subject without testing first. Strong colors — especially green and yellow — react unpredictably with different skin tones. Always test before committing to a setup in a real shoot. What looks great in a test shot can look unflattering in the final portrait.
Not compensating for light loss. Dense gels rob you of 1-2 stops of flash output. Check your exposure after attaching any gel and adjust power accordingly before you start shooting seriously.
Clashing background and foreground colors without intention. Randomly assigning gel colors to different lights can produce images that look muddled and busy. Go into each shoot with a color intention: complementary, analogous, or monochromatic. Random color combinations rarely look good by accident.
Frequently Asked Questions
How do you use gels on a flash?
To use gels on a flash, cut your gel sheet to size so it fully covers the flash head, then attach it with gaffers tape or a magnetic gel holder like MagMod. Set your camera white balance to Daylight (5500K) so the gel color renders accurately. Take a test shot and increase flash power by 1-2 stops to compensate for the light output loss caused by the gel material.
What is the difference between CTO and CTB gels?
CTO (Color Temperature Orange) gels warm your flash light, shifting it from cool daylight (5500K) down toward warm tungsten (3200K). They are used to match flash output to incandescent indoor lighting. CTB (Color Temperature Blue) gels do the opposite, cooling your flash toward the blue end of the spectrum to match fluorescent or daylight environments. CTO is the more commonly used of the two in everyday flash photography.
Do color gels reduce flash output?
Yes, color gels reduce flash output. The amount depends on the gel density and color. Light-density gels may only cost half a stop of light, while full-density saturated gels — especially deep blues, reds, and purples — can reduce output by 1.5 to 2 full stops. Always take a test shot after attaching a gel and increase your flash power to compensate for the loss.
Can I use color gels with any flash?
Color gels work with most flash types including speedlights, battery-powered strobes, and studio monolights. The main consideration is how you attach the gel — some flash systems have dedicated gel holder accessories (like the MagMod system for speedlights), while others require cutting gel sheets and using gaffers tape. Check whether your specific flash model has a gel attachment system available, as dedicated holders produce more reliable results than tape.
What color gels should a beginner buy first?
For beginners, start with a CTO gel set (full, 1/2, and 1/4 densities), a CTB gel, and a small selection of effect colors including red, blue, and a teal or cyan. These cover the most common use cases and give you the flexibility to experiment with both color correction and creative effects. Pre-cut gel kits designed for speedlights are a practical starting point as they include a range of colors in the right size for most hot-shoe flashes.
Start Experimenting with Color Gels Today
Learning how to use color gels on your flash for creative portrait effects is one of those skills that pays off fast. The learning curve is short, the gear is inexpensive relative to what it produces, and the creative possibilities are genuinely broad.
Start simple: one gel, one background light, one plain wall. Take a hundred test shots and see what different colors do to the same setup. Once that clicks, add a second light and try a complementary color pair. After that, the monochromatic approach and the three-light setups feel natural.
The photographers I’ve seen get the most out of gel work are the ones who approach it with a sense of play rather than pressure. A gel pack costs very little. Gaffers tape and a plain backdrop are all you need to get started. The results, when you hit on the right color combination and light placement, are the kind of images that make clients ask how you did it.