I remember the first time I held my smartphone and thought, “This little device can actually take amazing photos?” Fast forward to today, and I’m here to tell you that mobile photography has completely revolutionized how we capture and share our world. Whether you’re snapping pictures of your kids, documenting your travels, or just want to impress your friends on Instagram, these 10 mobile photography tips will transform your photography game starting today.
You might be thinking, “But I’m not a professional photographer!” Trust me, neither was I when I started. What I discovered is that great photography isn’t about having the most expensive gear—it’s about understanding the fundamentals and applying them creatively. I’ve spent countless hours testing these techniques, making mistakes, and learning what actually works. And now, I’m sharing everything I’ve learned with you.
The best part? You already have everything you need to get started. That smartphone in your pocket is more powerful than professional cameras from just a few years ago. All it takes is knowing how to use it properly. So grab your phone, and let’s dive into these 10 game-changing tips that’ll take your mobile photography from amateur to amazing!
Tip 1: Master Your Camera Settings Before You Shoot
I can’t tell you how many amazing shots I’ve missed because I didn’t know my camera settings. When I first started with mobile photography, I’d just point and shoot, hoping for the best. But let me tell you something I discovered: taking 5 minutes to understand your camera settings will dramatically improve your photos.
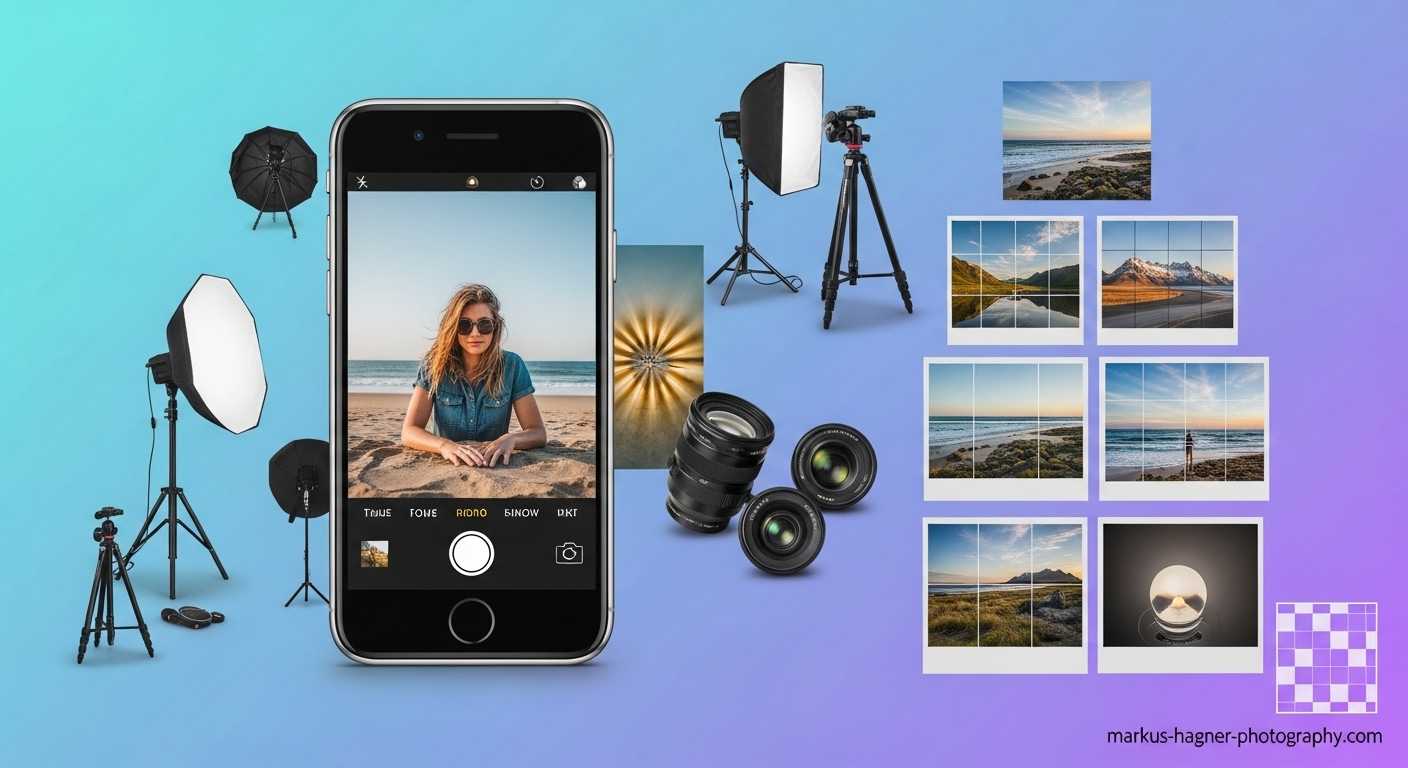
Enable the Grid Lines
First things first—turn on your grid lines! I can’t stress this enough. On most phones, you’ll find this in Settings > Camera > Grid. These lines aren’t just there for show; they’re your secret weapon for better composition. I use the rule of thirds constantly, placing my subject where the lines intersect. It’s amazing how this simple trick makes my photos look more professional and balanced.
Shoot in RAW for Maximum Quality
Here’s something that blew my mind when I discovered it: most modern smartphones can shoot in RAW format. RAW files contain way more image data than regular JPEGs, giving you incredible flexibility when editing. I found this especially helpful when I need to recover details from shadows or highlights. Just be aware that RAW files take up more storage space, but trust me, the quality boost is worth it.
Explore Pro Mode (If Your Phone Has It)
If your phone has a Pro mode, you’ve hit the jackpot! I spent a weekend just playing with the manual controls, and it completely changed how I approach mobile photography. You can adjust ISO, shutter speed, and white balance just like with a professional camera. I love using this for night photography when I want to avoid that grainy look that automatic mode often produces.
Pro Tip: Don’t have Pro mode? No worries! Apps like Lightroom Mobile offer professional camera controls that work on almost any smartphone. I use this all the time when I need more control over my shots.
Tip 2: Clean Your Lens (Yes, Really!)
This might sound obvious, but I can’t tell you how many times I’ve wondered why my photos looked blurry, only to realize my lens was covered in fingerprints. I discovered this the hard way during a trip to the beach—my phone was covered in sunscreen and sand, and every shot looked hazy.
Make It a Habit
Now, I make it a habit to clean my lens before every important shot. I keep a microfiber cloth in my phone case, but honestly, your t-shirt works in a pinch. Just give it a quick wipe, and you’ll be amazed at the difference in clarity and sharpness.
Check for Hidden Smudges
Here’s something I learned: sometimes the smudges are so small you can’t see them until you’re looking at your photos on a bigger screen. I now hold my phone at an angle under good light to check for any residue before shooting. This simple habit has saved countless photos from the dreaded “soft focus” look.
Personal Experience: I was taking photos at a wedding once, and all my shots looked slightly blurry. I was panicking, thinking my phone was broken. Then I remembered to check the lens—sure enough, there was a tiny fingerprint that was ruining everything. A quick wipe, and my photos were crystal clear!
Tip 3: Harness the Power of Natural Light
I used to think that taking photos in bright, direct sunlight was ideal. Boy, was I wrong! Through trial and error, I discovered that natural light is your best friend, but only if you know how to use it properly.
The Golden Hour is Your Best Friend
Let me tell you about my favorite time to shoot: the golden hour. This is the first hour after sunrise and the last hour before sunset. The light during these times is soft, warm, and creates beautiful shadows that add depth to your photos. I’ve captured some of my best shots during these times, and people always ask me what filter I used—little do they know it’s all about the natural light!
Seek Out Shade for Portraits
When I’m shooting portraits, I look for open shade. This means finding areas where the subject is in shadow but there’s still plenty of ambient light. I discovered this technique when I was struggling with harsh shadows on people’s faces during midday shoots. Now, I position my subjects under trees or building overhangs, and the difference is night and day.
Use Window Light for Indoor Shots
For indoor photography, I’ve found that window light is incredibly versatile. I love positioning my subject near a window and using the soft, diffused light to create beautiful portraits. One of my favorite tricks is to have the subject face the window directly for even lighting, or turn slightly to create more dramatic shadows.
Pro Tip: If you’re shooting indoors and the light is too harsh, try hanging a white sheet or thin curtain over the window. I’ve done this countless times, and it instantly softens the light and creates that professional look everyone wants.
Tip 4: Composition Techniques That Actually Work
I used to just point my phone at things and hope for the best. But then I discovered that composition is what separates good photos from great ones. These are the techniques I use every single time I shoot.
Leading Lines Draw the Eye
Leading lines are my secret weapon for creating depth and guiding viewers through my photos. I look for natural lines like roads, fences, rivers, or even shadows that lead toward my subject. I discovered this technique while shooting landscapes, and now I use it for everything from street photography to portraits.
The Rule of Thirds (But Don’t Be Afraid to Break It)
I mentioned the grid lines earlier, but let me dive deeper into the rule of thirds. I place my subject at the intersection points rather than dead center, and it instantly makes my photos more dynamic. However, I’ve learned that sometimes breaking this rule creates even more impact—especially with symmetrical subjects or when I want to create a sense of isolation.
Fill the Frame for Impact
Sometimes, less is more. I love getting close to my subject and filling the entire frame. This technique works especially well for details, textures, and portraits. I discovered this when I was shooting flowers—instead of capturing the whole garden, I focused on a single bloom and the results were stunning.
Use Negative Space Creatively
Negative space is the area around your subject, and I’ve learned to use it intentionally. When I’m shooting portraits, I often leave space in the direction the subject is looking or moving. This creates a sense of anticipation and tells a better story. I also use negative space to create minimalist compositions that really make my subject pop.
Personal Experience: I was shooting a sunset once and kept including too much foreground clutter. Then I remembered to use negative space—I positioned the horizon low in the frame, letting the sky and colors dominate. That photo ended up being one of my most popular shots!
Also Read: Fuji 18 55 Vs 16 55
Tip 5: Get Close and Personal (But Not Too Close)
I used to rely on my phone’s zoom function all the time. Big mistake! What I discovered is that digital zoom destroys image quality, and there’s a much better way to get close-up shots.
Zoom With Your Feet
Here’s the golden rule I live by: zoom with your feet, not with your fingers. When I want to get closer to my subject, I physically move closer. This maintains the full resolution and quality of my photos. I learned this the hard way when I zoomed in on a beautiful bird, only to find the image was pixelated and useless.
Discover the Power of Macro Photography
Most modern smartphones have incredible macro capabilities, and I’ve fallen in love with close-up photography. I love getting super close to flowers, insects, textures, and everyday objects to reveal details that are often missed. The best part? You don’t need any special equipment—just steady hands and good lighting.
Use Portrait Mode for Selective Focus
Portrait mode isn’t just for people! I use it all the time for food photography, product shots, and even landscapes when I want to create that beautiful background blur (called bokeh). The key is to make sure there’s enough distance between your subject and the background for the effect to work properly.
Pro Tip: If your phone doesn’t have portrait mode, don’t worry! You can achieve a similar effect by getting close to your subject and making sure the background is far away. I use this technique all the time with older phones, and it works surprisingly well.
Tip 6: Master the Art of Focus and Exposure
I can’t tell you how many potentially great photos I’ve ruined because the focus or exposure was off. But once I learned to control these manually, my photography improved dramatically.
Tap to Focus, Hold to Lock
This simple technique changed everything for me. When I tap on my screen, my phone focuses on that specific point. But here’s the game-changer: if I tap and hold, it locks both focus and exposure. This is incredibly useful when I’m shooting in tricky lighting conditions or when I want to maintain consistent focus across multiple shots.
Adjust Exposure Manually
Did you know you can adjust exposure on your smartphone? I discovered this by accident when I was frustrated with overly bright or dark photos. After tapping to focus, I simply slide my finger up or down on the screen to make the image brighter or darker. This gives me complete control over the mood and feel of my photos.
Use AE/AF Lock for Consistency
AE/AF Lock (Auto Exposure/Auto Focus Lock) is my secret weapon for consistent results. When I’m shooting a series of photos in the same lighting conditions, I lock the exposure and focus on the first shot, and all subsequent photos maintain the same settings. This is especially useful for panoramas and photo sequences.
Personal Experience: I was shooting a series of photos at a concert, and the lighting kept changing dramatically. By using AE/AF lock, I was able to maintain consistent exposure throughout the entire set, making my photos look much more professional and cohesive.
Tip 7: Explore Different Angles and Perspectives
I used to take all my photos from eye level, standing up. Boring! Once I started experimenting with different angles, my photography became infinitely more interesting and creative.
Get Low for Dramatic Effect
Getting down low is one of my favorite techniques. I love crouching down or even lying on the ground to shoot upwards. This angle makes subjects look more imposing and dramatic, and it’s perfect for architecture, nature, and even portraits. I discovered this when I was shooting flowers—getting down to their level completely changed the perspective.
Shoot From Above for a Unique View
Shooting from above (bird’s eye view) is another technique I use frequently. It’s perfect for flat lays, food photography, and showing patterns from above. I love using this for Instagram shots, as it creates a clean, organized look that’s very popular on the platform.
Try Dutch Angles for Dynamic Shots
A Dutch angle (tilting the camera) might seem gimmicky, but when used intentionally, it can create dynamic, energetic photos. I use this sparingly for action shots, street photography, and when I want to convey a sense of movement or unease. The key is to make it look deliberate, not accidental.
Pro Tip: Don’t be afraid to look silly! I’ve gotten some strange looks while lying on the ground in public places, but the photos I’ve captured are worth it. Remember, the best photographers aren’t afraid to get into uncomfortable positions for the perfect shot.
Tip 8: Capture Movement and Action
Static photos are great, but sometimes you want to capture the energy and excitement of a moment. I’ve learned several techniques for capturing movement that add life to my mobile photography.
Use Burst Mode for Action Shots
Burst mode is my go-to for any kind of action photography. Whether I’m shooting sports, kids playing, or even just someone walking, I hold down the shutter button to capture a rapid series of photos. This way, I’m guaranteed to get at least one perfect shot from the sequence. I discovered this when I was trying to photograph my dog jumping—single shots kept missing the moment, but burst mode captured every frame.
Try Panning for Motion Blur
Panning is a technique where you move your camera at the same speed as your moving subject. This keeps the subject sharp while creating a beautiful motion blur in the background. It takes practice, but once you master it, the results are stunning. I love using this for cars, cyclists, and even people walking.
Experiment with Long Exposures
Many smartphones now offer long exposure capabilities, either natively or through third-party apps. I use this for creating silky smooth water effects, light trails from cars at night, and even for artistic portraits. The key is to keep your phone as steady as possible—I often rest it on a surface or use a mini tripod.
Personal Experience: I was shooting a waterfall once and wanted that silky water effect I’d seen in professional photos. I discovered my phone had a long exposure mode, and after a few attempts (and keeping my hands steady), I captured exactly what I was looking for. My friends couldn’t believe it was taken with a smartphone!
Tip 9: Edit Like a Pro (Without Breaking the Bank)
I used to think editing was cheating or that it required expensive software. Then I discovered that mobile editing apps are incredibly powerful and can transform good photos into great ones.
Start with Basic Adjustments
Before I apply any filters or effects, I always start with basic adjustments. I adjust brightness, contrast, saturation, and sharpness to make my photos pop. I’ve learned that less is more—subtle adjustments often look more natural and professional than heavy-handed edits.
Use Presets Wisely
Presets and filters can be great, but I use them as starting points rather than final looks. I love apps like VSCO and Lightroom Mobile for their high-quality presets. The key is to adjust the intensity to suit your specific photo—what works for one image might not work for another.
Crop for Better Composition
Cropping is one of the most powerful editing tools, and I use it constantly. I can straighten crooked horizons, improve composition, and remove distracting elements from my photos. I always make sure to crop with intention, thinking about how it will affect the overall balance and impact of the image.
Pro Tip: Don’t overdo it! I’ve made the mistake of over-editing photos, making them look unnatural and processed. Now, I step away from my edits for a few minutes and come back with fresh eyes before finalizing them. This helps me avoid going too far with adjustments.
Also Read: Olympus OMD Vs Sony A7Iii
Tip 10: Practice, Experiment, and Have Fun!
This might sound cliché, but it’s the most important tip I can give you. The best mobile photographers I know didn’t get there overnight—they practiced constantly and weren’t afraid to experiment.
Take Your Phone Everywhere
I take my phone everywhere I go, and I’m always looking for photo opportunities. Whether I’m walking to work, waiting in line, or just sitting in a café, I’m observing the world around me and thinking about how I could capture it photographically. This constant practice has dramatically improved my skills and my eye for composition.
Challenge Yourself Regularly
I regularly set photography challenges for myself to keep things interesting and push my boundaries. Sometimes it’s as simple as “shoot only in black and white for a week” or “use only leading lines in today’s photos.” These challenges force me to think creatively and try new techniques.
Learn from Others (But Find Your Own Style)
I love following other mobile photographers on Instagram and Pinterest for inspiration. I analyze their techniques, composition, and editing styles, but I’m careful to develop my own unique voice. The best photographers have a distinctive style that sets them apart, and that’s what I’m constantly working toward.
Personal Experience: When I first started, I tried to copy exactly what other photographers were doing. While this was great for learning, my photos lacked personality. Once I started experimenting and finding my own style, my photography became much more authentic and engaging.
Frequently Asked Questions (FAQ)
What’s the best smartphone for photography?
Honestly, the best smartphone is the one you have with you! I’ve taken amazing photos with budget phones and mediocre shots with flagship models. What matters more is understanding photography fundamentals and knowing how to use your device’s features. That said, phones with multiple lenses, RAW shooting capabilities, and good low-light performance do offer more creative possibilities.
Do I need expensive accessories to get good results?
Not at all! While accessories like tripods, lenses, and lighting can enhance your photography, I’ve taken incredible shots with just my phone and natural light. Start with mastering the basics, then gradually add accessories as you identify specific needs. A small tripod and a simple lens cleaning cloth are the only accessories I’d consider essential for beginners.
How do I avoid blurry photos?
Blurry photos usually come from camera shake or incorrect focus. To avoid this, I always make sure to clean my lens, hold my phone with both hands, keep my elbows close to my body for stability, and tap to focus on my subject. In low light, I rest my phone on a stable surface or use a tripod. Burst mode is also great for capturing sharp shots of moving subjects.
What’s the best time of day for mobile photography?
The golden hours (first hour after sunrise and last hour before sunset) are my favorite times to shoot. The light is soft, warm, and creates beautiful shadows. However, I’ve also discovered that overcast days can be perfect for portraits and close-ups, as the clouds act as a natural diffuser. Don’t let weather stop you—different conditions offer unique photographic opportunities!
How do I make my photos stand out on social media?
To make your photos stand out, I focus on three things: unique composition, consistent editing style, and authentic storytelling. I avoid overused filters and trends, instead developing my own visual style. I also pay attention to the technical aspects—ensuring my photos are sharp, well-exposed, and properly sized for each platform. Most importantly, I shoot what I love and let my passion show through in my work.
Pro Photography Tips Section
Advanced Composition Techniques
Once you’ve mastered the basics, try these advanced techniques I’ve discovered:
- Framing: Use natural frames like doorways, windows, or tree branches to draw attention to your subject
- Symmetry: Look for symmetrical scenes and use them to create visually striking images
- Patterns and Repetition: Train your eye to spot patterns in everyday scenes and use them to create compelling compositions
Lighting Mastery
Take your lighting skills to the next level with these pro tips:
- Backlighting: Place your subject between you and the light source for beautiful silhouettes or rim lighting
- Side Lighting: Use light from the side to create depth and texture in your photos
- Reflected Light: Look for surfaces that bounce light back onto your subject, like white walls or water
Creative Editing Techniques
Push your editing skills beyond basic adjustments:
- Selective Editing: Use apps like Snapseed to edit specific areas of your photo rather than the entire image
- Color Grading: Learn to manipulate colors to create specific moods and styles
- HDR Blending: Combine multiple exposures for perfectly balanced images in high-contrast scenes
Save This Guide for Future Reference
Photography is a journey of continuous learning and improvement. I recommend bookmarking this guide so you can refer back to these tips as you practice and grow your skills. Photography techniques take time to master, so don’t get discouraged if your first attempts aren’t perfect.
Pro Tip: Create a photography folder on your phone and save screenshots of the techniques you want to try. I do this all the time when I learn new tips, and it’s incredibly helpful when I’m out shooting and need a quick reminder.
Final Thoughts: Your Mobile Photography Journey Starts Now
We’ve covered a lot of ground in this guide, from mastering your camera settings to advanced composition techniques. But remember, the most important tip I can give you is to start practicing today. Don’t wait for the perfect moment or the perfect gear—grab your phone and start shooting.
I’ve seen incredible transformations in my own photography by consistently applying these techniques, and I know you can achieve the same results. The beauty of mobile photography is that it’s accessible to everyone, and with practice and patience, you can create images that rival those taken with professional cameras.
So what are you waiting for? Pick one tip from this guide and try it today. Then tomorrow, try another. Before you know it, you’ll be seeing the world through a photographer’s eyes, capturing moments and creating art with the device that’s always in your pocket.
Happy shooting, and I can’t wait to see the amazing photos you create!