I remember when I first started photography, I thought I needed expensive equipment and exotic locations to create beautiful images. Boy, was I wrong! After years of shooting in every imaginable situation, I’ve discovered that some of my most creative and meaningful photos were taken right in my own home. Today, I’m excited to share my favorite home photoshoot ideas that anyone can try, regardless of your experience level or gear.
Your home is actually a goldmine of photographic opportunities. Every room offers different lighting, textures, and backgrounds that can transform ordinary moments into extraordinary memories. I’ve spent countless hours experimenting with different setups, and I’m thrilled to share what I’ve learned with you.
1. Master Natural Light Portraits by Your Window
I’ll never forget the first time I discovered the magic of window light. I was struggling with harsh indoor lighting when I decided to try positioning my subject near a large window. The results were absolutely stunning—soft, flattering light that made everything look professional.
Why It Works: Window light is nature’s softbox. It provides directional light that’s soft enough to be flattering but defined enough to create interesting shadows and depth in your photos.
How to Set It Up:
- Find your largest window (north-facing windows are ideal as they provide consistent light throughout the day)
- Position your subject about 2-3 feet from the window
- Turn off all indoor lights to avoid color mixing
- Use a white foam board or even a white sheet on the opposite side to bounce light back onto your subject’s face
Pro Tips I’ve Discovered:
- Early morning or late afternoon light creates the most beautiful, warm tones
- Sheer curtains can act as a natural diffuser for even softer light
- Experiment with different angles—side lighting creates drama, while front lighting is more flattering
- If the light is too harsh, hang a white sheet over the window to diffuse it
Camera Settings to Try:
- Aperture: f/2.8-f/4 for that beautiful background blur
- Shutter Speed: At least 1/125s to avoid camera shake
- ISO: Keep as low as possible (start at 100-400)
- White Balance: Set to “Daylight” or “Cloudy” depending on the weather
2. Create Stunning Food Photography in Your Kitchen
Food photography has become one of my favorite home photography genres. There’s something incredibly satisfying about turning everyday meals into works of art. I started by simply snapping photos of my dinner, but now I create entire scenes that tell stories.
Why It Works: Food is colorful, textured, and relatable. Everyone connects with food, making it perfect for social media and personal projects.
Essential Setup:
- Find a spot near a window for natural light
- Use a simple background (white poster board, wooden cutting board, or even your countertop)
- Gather props: plates, utensils, napkins, and ingredients
- Consider the story you want to tell (cooking process, finished dish, ingredients)
My Go-To Techniques:
- Overhead shots: Stand on a chair or step stool for that perfect flat-lay angle
- 45-degree angle: This is how we naturally see food, making it very relatable
- Close-up details: Focus on textures like steam, bubbles, or ingredients
- Action shots: Capture pouring, cutting, or sprinkling for dynamic images
Lighting Secrets I’ve Learned:
- Side lighting creates texture and dimension
- Back lighting makes steam and liquids glow
- Use a white card to fill in shadows
- Dark backgrounds can make colorful food pop
Simple Props to Use:
- Fresh herbs from your kitchen
- Olive oil and other cooking ingredients
- Textured napkins or kitchen towels
- Vintage utensils or cutting boards
3. Transform Your Bathroom into a Luxury Spa Scene
I discovered this technique during a rainy weekend when I was feeling creative but stuck indoors. My bathroom has become one of my favorite photography studios, and I’m excited to share how you can create stunning images too.
Why It Works: Bathrooms offer unique lighting, reflective surfaces, and an intimate atmosphere that’s perfect for creative portraits.
Setting Up Your Spa Scene:
- Clean your bathroom thoroughly (trust me on this one)
- Light candles or use battery-operated LED candles for ambiance
- Add flowers or greenery for a touch of nature
- Use bubble bath, bath bombs, or flower petals for visual interest
- Consider adding essential oils for aroma (though this won’t affect the photos)
My Favorite Spa Shoot Ideas:
- Flower bath: Fill the tub with warm water and add flower petals
- Bubble bath: Create mountains of bubbles for a dreamy look
- Candlelit silhouette: Turn off lights and use only candles for dramatic silhouettes
- Mirror reflections: Use bathroom mirrors for creative compositions
Safety First:
- Never use real candles near water (LED candles work great)
- Be careful with electrical equipment near water
- Have a helper nearby if you’re shooting in the tub
- Keep your camera dry at all times
Camera Settings for Low Light:
- Aperture: Open wide (f/1.8-f/2.8 if possible)
- Shutter Speed: Use a tripod to allow slower speeds
- ISO: Don’t be afraid to increase it (800-1600 if needed)
- White Balance: Tungsten or custom to handle mixed lighting
4. Build a DIY Home Studio with Household Items
I used to think I needed expensive studio equipment to create professional-looking portraits. Then I discovered that my home is filled with items that work just as well, if not better, for creating stunning studio-style images.
Why It Works: A home studio gives you complete control over lighting and background, allowing you to create consistent, professional-looking images without leaving your house.
Essential DIY Studio Equipment:
- Backdrop: A white wall, bed sheet, or even poster board
- Lighting: Desk lamps with white paper over them as diffusers
- Reflector: White foam board, aluminum foil, or even a white t-shirt
- Light stand: A stack of books or a tripod
- Props: Anything from your home that fits your theme
My Simple Studio Setup:
- Choose a plain wall or hang a sheet as your backdrop
- Position two desk lamps at 45-degree angles to your subject
- Cover the lamps with white paper to soften the light
- Use a white foam board to fill in shadows
- Experiment with moving lights closer or farther for different effects
Creative Background Ideas:
- Textured blankets or throws
- Brick or patterned walls
- Curtains or fabric hung creatively
- Bookshelves (use a wide aperture to blur them)
- Even a simple colored wall can look professional
Lighting Patterns to Try:
- Butterfly lighting: One light directly above and slightly in front
- Rembrandt lighting: Light at 45 degrees, creating a triangle of light on the cheek
- Split lighting: Light directly to the side, dramatic and artistic
- Broad lighting: Light on the side of the face turned toward the camera
5. Capture Magical Moments with Your Pets
As a pet owner and photographer, I’ve found that some of the most authentic and heartwarming photos happen right at home with our furry friends. Pets are completely themselves in their home environment, making for incredibly genuine images.
Why It Works: Pets are relaxed and natural in their home environment, allowing you to capture their true personalities and the special bond they share with their humans.
Getting Great Pet Photos:
- Use natural light near windows or doors
- Get down to their eye level for more intimate shots
- Use treats or toys to get their attention
- Be patient and wait for natural moments
- Capture them in their favorite spots around the house
My Favorite Pet Photo Locations at Home:
- By the window: Beautiful light and pets love to watch outside
- On their bed: Cozy and natural, shows their personality
- In the kitchen: Many pets love hanging out where food is prepared
- On the couch: Great for capturing pets with their humans
- In the yard: If you have outdoor space, natural light is perfect
Tips for Better Pet Photography:
- Use a fast shutter speed (1/250s or faster) to freeze motion
- Focus on the eyes—they’re the windows to the soul
- Use continuous shooting mode to capture the perfect moment
- Be ready for unexpected moments—some of the best shots are unplanned
- Consider your pet’s personality and capture them doing what they love
Equipment That Helps:
- Treats or toys to get attention
- A squeaky toy for sudden attention-getting
- Patience—lots and lots of patience
- A helper can be invaluable for directing attention
6. Create Artistic Still Life with Everyday Objects
I discovered still life photography during a creative block, and it’s become one of my most meditative and rewarding photography practices. There’s something incredibly satisfying about arranging ordinary objects into beautiful compositions.
Why It Works: Still life photography teaches you about light, composition, and storytelling. Plus, you have complete control over every element of your image.
Getting Started with Still Life:
- Choose objects that interest you visually
- Consider color, texture, and shape
- Think about the story or mood you want to create
- Start simple with 3-5 objects
- Build your arrangement gradually
My Favorite Still Life Subjects:
- Kitchen items: Utensils, fruits, vegetables, ceramics
- Personal objects: Books, jewelry, keys, glasses
- Natural elements: Flowers, leaves, stones, branches
- Vintage items: Old cameras, clocks, bottles
- Art supplies: Paints, brushes, pencils, paper
Composition Techniques I Love:
- Rule of thirds: Place key elements along imaginary grid lines
- Leading lines: Use objects to guide the viewer’s eye
- Negative space: Let empty areas breathe and create balance
- Color harmony: Choose objects that work well together color-wise
- Texture contrast: Mix smooth and rough textures for interest
Lighting for Still Life:
- Natural light from windows is often best
- Side lighting creates dimension and texture
- Back lighting can create beautiful silhouettes and rim light
- Use reflectors to fill in shadows
- Experiment with different times of day for varying light quality
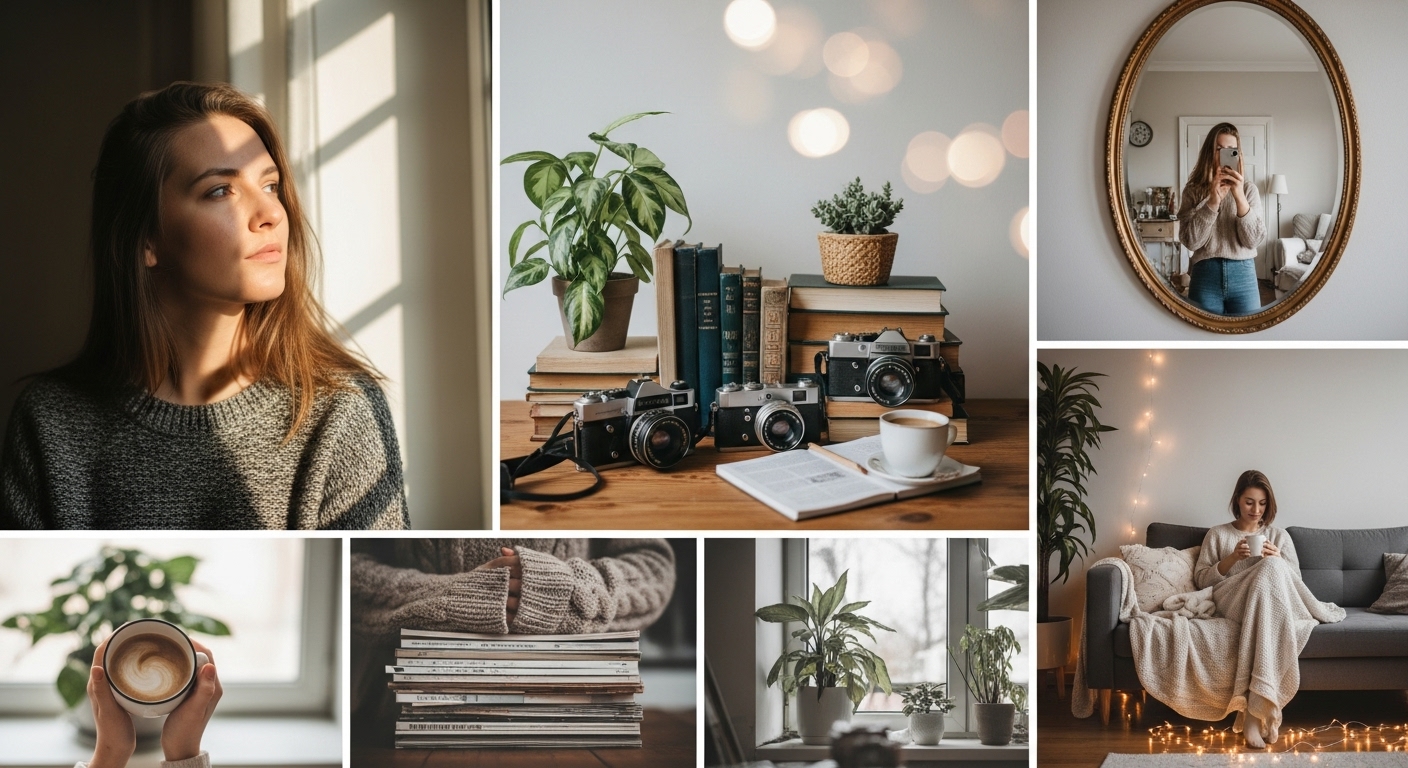
7. Use Mirrors for Creative Self-Portraits
Self-portraiture has been one of my most challenging but rewarding photography journeys. Using mirrors opened up a whole new world of creative possibilities, allowing me to experiment with perspectives and storytelling in ways I never imagined.
Why It Works: Mirrors create interesting reflections, allow you to see yourself while shooting, and add depth and dimension to your images.
Setting Up Mirror Self-Portraits:
- Choose a mirror with an interesting frame or shape
- Clean the mirror thoroughly (fingerprints show up in photos!)
- Position yourself and the camera to create the composition you want
- Consider what’s reflected in the mirror besides yourself
- Experiment with different angles and distances
Creative Mirror Ideas I’ve Tried:
- Full-length mirror: Great for showing your entire outfit or environment
- Handheld mirror: Creates interesting close-ups and details
- Bathroom mirror: Classic but can be very effective
- Decorative mirrors: Interesting shapes and frames add visual interest
- Multiple mirrors: Create infinite reflections and complex compositions
Technical Tips for Mirror Shots:
- Use a tripod to keep the camera steady
- Use a remote shutter or timer to avoid camera shake
- Be mindful of what’s in the reflection—including your camera!
- Experiment with focus—sometimes focusing on the mirror surface rather than the reflection creates interesting effects
- Consider depth of field carefully
Creative Approaches:
- Hide the camera: Position it so it’s not visible in the reflection
- Show the process: Let the camera be part of the story
- Use props: Hold objects that reflect your personality or interests
- Play with clothing and accessories: Mirrors are great for showing off outfits
- Tell a story: Use the mirror to create a narrative or mood
Also Read: 9 Best Memory Cards For Sony A6600
8. Transform Your Hallway into a Photo Studio
I used to think hallways were just boring passages in my home—until I discovered their photographic potential. Now, my hallway is one of my favorite spots for creative portraits and artistic shots.
Why It Works: Hallways create natural leading lines, offer interesting lighting opportunities, and provide a simple background that really makes your subject stand out.
Making the Most of Your Hallway:
- Use the lines created by walls, ceiling, and floor
- Experiment with different lighting—overhead lights, lamps, or natural light from doors
- Try shooting from different angles and perspectives
- Use the length of the hallway to create depth
- Consider the color and texture of your hallway walls
My Favorite Hallway Shots:
- Leading lines portraits: Position your subject at the end of the hallway
- Silhouette shots: Use backlighting from windows or doors
- Low angle shots: Get on the floor for a dramatic perspective
- Overhead shots: If possible, shoot from above looking down the hallway
- Detail shots: Focus on interesting textures or architectural elements
Lighting Techniques for Hallways:
- Natural light: If your hallway has windows, use them
- Overhead lights: Can create interesting shadows and patterns
- Lamps: Place floor lamps for directional lighting
- Flash: Bounce flash off walls or ceiling for softer light
- Candles: For a moody, atmospheric effect
Composition Tips:
- Use the rule of thirds for positioning your subject
- Create depth by placing objects at different distances
- Experiment with symmetry and asymmetry
- Use doorways as natural frames within your frame
- Consider the negative space in your composition
9. Create Cozy Lifestyle Shots in Your Living Room
Your living room is probably where you spend most of your time at home, making it the perfect place for authentic lifestyle photography. I’ve found that some of my favorite images are the ones that capture real, everyday moments in this comfortable space.
Why It Works: Living rooms offer comfortable, natural settings where people can relax and be themselves, resulting in genuine, authentic images.
Setting Up Lifestyle Shots:
- Keep the space tidy but not overly perfect—lived-in looks more authentic
- Use natural light from windows whenever possible
- Consider the story you want to tell (reading, watching TV, family time)
- Use props that reflect real life (books, blankets, mugs)
- Encourage natural interactions and emotions
My Favorite Living Room Scenes:
- Reading nook: Capture someone lost in a good book
- Movie night: Cozy on the couch with blankets and snacks
- Family time: Natural interactions between family members
- Morning coffee: Quiet moments with a cup of coffee
- Pet cuddles: Capture the bond between people and their pets
Lighting Tips for Living Rooms:
- Window light: Position subjects near windows for beautiful natural light
- Lamps: Use table and floor lamps for warm, cozy lighting
- Overhead lights: Can be harsh, but sometimes work for certain moods
- Fireplace: If you have one, it creates beautiful, warm light
- Mixed lighting: Don’t be afraid to combine different light sources
Capturing Authentic Moments:
- Be patient and wait for natural interactions
- Use continuous shooting mode to capture fleeting expressions
- Give direction but allow for spontaneity
- Focus on emotions and connections between people
- Consider details like hands, expressions, and environment
10. Experiment with Creative Product Photography
I never thought I’d enjoy product photography until I started experimenting with everyday household items. Now, I love turning ordinary objects into extraordinary images through creative lighting and composition.
Why It Works: Product photography teaches you about lighting, composition, and attention to detail. Plus, you can practice with objects you already have at home.
Getting Started with Product Photography:
- Choose interesting objects from around your home
- Consider the shape, texture, and color of your subject
- Think about the story or mood you want to create
- Start with simple setups and gradually add complexity
- Experiment with different backgrounds and surfaces
Great Household Items to Photograph:
- Kitchen items: Utensils, glasses, bottles, cutting boards
- Personal items: Jewelry, watches, glasses, keys
- Electronics: Phones, headphones, cameras (ironic, I know)
- Books and magazines: Great for flat lays and detail shots
- Plants and flowers: Bring life and color to your images
Lighting Techniques for Products:
- Side lighting: Creates dimension and texture
- Back lighting: Creates dramatic silhouettes and rim light
- Top lighting: Good for flat lays and overhead shots
- Reflected light: Use white cards to fill in shadows
- Diffused light: Softens harsh shadows and highlights
Composition Tips:
- Rule of thirds: Position key elements along grid lines
- Negative space: Let empty areas create balance
- Leading lines: Guide the viewer’s eye through the image
- Color harmony: Choose complementary colors for visual appeal
- Texture contrast: Mix smooth and rough textures for interest
Also Read: 8 Best Sony Camera For Beginners
Pro Photography Tips for Home Photoshoots
After years of shooting at home, I’ve learned some valuable lessons that I want to share with you:
Lighting Is Everything
I can’t stress this enough—good lighting can make or break your photos. Natural light is almost always best, so position your subjects near windows whenever possible. If you must use artificial light, diffuse it with white paper or fabric to soften harsh shadows.
Declutter Your Backgrounds
I’ve ruined countless great shots by forgetting to check what’s in the background. Before you press the shutter, take a moment to look at everything that will appear in your frame. Move distracting items or change your angle if needed.
Use What You Have
You don’t need expensive equipment to create amazing photos. I’ve used bedsheets as backdrops, desk lamps as studio lights, and cardboard as reflectors. Creativity is more important than gear.
Experiment with Angles
Don’t just shoot from eye level. Get low, shoot from above, try unusual angles. I’ve discovered some of my favorite compositions simply by moving around and seeing things from different perspectives.
Tell a Story
The best photos do more than just show what something looks like—they tell a story. Think about the mood, emotion, or narrative you want to convey before you start shooting.
Essential Equipment for Home Photoshoots
While you don’t need much to get started, having a few basic items can significantly improve your results:
Must-Have Items:
- Camera: Even a smartphone camera can work great
- Tripod: Essential for steady shots and self-portraits
- Reflector: A white foam board or even a white sheet works
- Backdrop: A white wall, sheet, or poster board
- Light source: Window light is best, but lamps work too
Nice-to-Have Items:
- External flash: For more lighting control
- Remote shutter: For self-portraits and long exposures
- Diffusers: White paper or fabric to soften light
- Props: Items that add interest and tell a story
- Editing software: To polish your final images
Common Mistakes to Avoid
I’ve made all of these mistakes myself, so learn from my experience:
Poor Lighting
Shooting in dim light or harsh direct light can ruin otherwise great photos. Always seek soft, diffused light whenever possible.
Cluttered Backgrounds
I can’t tell you how many great shots I’ve ruined by not checking the background first. Always scan your frame for distractions.
Wrong White Balance
Mixed lighting can create weird color casts. Learn to set your white balance correctly or shoot in RAW so you can adjust it later.
Not Using a Tripod
Camera shake is the enemy of sharp photos. Use a tripod whenever possible, especially in low light.
Rushing the Process
Great photography takes time and patience. Don’t rush your setups or your subjects. Take the time to get everything right.
FAQ: Your Home Photoshoot Questions Answered
Do I need an expensive camera for home photoshoots?
Absolutely not! I’ve taken some of my favorite photos with my smartphone. What matters more is your creativity and understanding of light and composition. Start with what you have and upgrade as you learn.
What’s the best time of day for indoor photography?
Early morning and late afternoon are usually best because the light is softer and warmer. However, I’ve found that any time you have good window light can work great. Avoid the middle of the day when light is harsh.
How can I make a small space work for photoshoots?
Small spaces can actually be great for photography! Use tight compositions, focus on details, and use wide-angle lenses to make spaces appear larger. I’ve shot in tiny apartments and created amazing images.
What’s the simplest home photoshoot idea for beginners?
Natural light portraits by a window are the easiest and most rewarding place to start. All you need is a window, a subject, and your camera. The results can look professional with minimal effort.
How do I avoid harsh shadows in indoor photos?
The key is to diffuse your light source. If you’re using a window, hang a sheer curtain. If you’re using lamps, cover them with white paper. You can also use a reflector to fill in shadows.
Can I do professional-looking photoshoots at home?
Definitely! I’ve created images that look like they were shot in professional studios using nothing but household items and natural light. It’s all about understanding light and composition.
What props should I use for home photoshoots?
Look around your home—almost anything can be a prop! I love using books, plants, blankets, mugs, and personal items that tell a story. The best props are meaningful to you or fit the mood you’re creating.
How do I get good photos of kids at home?
The secret is to make it fun and let them be themselves. Use natural light, get down to their level, and capture them doing what they love. Some of my best kid photos happened when I just let them play.
What’s the best background for home photoshoots?
Simple is usually best. A plain wall, a sheet, or even a tidy corner of a room can work great. The key is to choose something that doesn’t distract from your subject.
How can I improve my home photography quickly?
Practice, practice, practice! Take photos every day, experiment with different techniques, and study what works. I improved dramatically just by shooting regularly and analyzing my results.
Conclusion: Your Creative Journey Begins at Home
I hope these ideas have inspired you to see your home in a new light. Remember, the most important thing is to start creating and experimenting. Your home is filled with photographic opportunities—you just need to open your eyes and your mind to see them.
Photography is a journey, and there’s always something new to learn. I’m still discovering new techniques and ideas every time I pick up my camera. Don’t be afraid to make mistakes—some of my best shots came from happy accidents.
Start with one idea that excites you, master it, and then move on to the next. Before you know it, you’ll have a portfolio of amazing images created right in your own home.
Don’t forget to bookmark this guide for future reference—I’ll be updating it regularly with new ideas and tips as I discover them. And if you found this helpful, be sure to check out my other photography guides for more expert advice.
Your creative journey starts now. Grab your camera, pick an idea that speaks to you, and start creating. I can’t wait to see what you come up with!