Leading lines in photography are compositional elements — real or implied lines within a scene — that guide the viewer’s eye from one point in the frame toward the main subject or a specific point of interest. That one sentence is the core of it. Everything else is just practice.
I’ve been obsessed with this technique since I first noticed how a simple country road, positioned deliberately in a frame, could pull a viewer’s gaze deep into a landscape image without any conscious effort on their part. It felt almost like a trick. But it isn’t a trick — it’s how human vision works, and once you understand it, you start seeing potential leading lines everywhere you look.
In this guide, I’ll break down what leading lines actually are, walk through every type you’ll encounter, and give you a systematic way to find them in any environment — from a city street to a forest trail to your own backyard. Whether you’re just starting out or you’ve been shooting for years, this is one composition technique that will immediately change how you approach a scene.
What Are Leading Lines in Photography?
Leading lines are visual paths created by lines — natural or human-made — that draw the viewer’s eye through a photograph toward the main subject or a focal point.
They work because our brains are hard-wired to follow lines. When we look at an image, our eyes don’t just randomly scan the frame. They move along paths of least resistance, and lines are the clearest path there is. A photographer who understands this can control exactly where the viewer looks, in what order, and for how long.
This is what separates a snapshot from a considered photograph. Both might contain the same subject, but one has depth, narrative, and direction. The other is just a record of what was in front of the camera.
Leading lines can start anywhere in the frame — a corner, an edge, the foreground — and ideally lead toward something meaningful: your subject, an area of strong tonal contrast, or even an implied space beyond the frame. They add a sense of three-dimensionality to what is, by definition, a flat medium.
The technique works in conjunction with other composition rules. When you combine leading lines with the rule of thirds — positioning the end point of your lines near one of the power points of the grid — you get compositions that feel both natural and intentional at the same time.
Types of Leading Lines in Photography
Not all leading lines feel the same. The direction a line travels carries real emotional weight, and understanding that effect lets you choose lines deliberately rather than just stumbling across them. Here are the five main types you’ll use.
Horizontal Lines
Horizontal lines feel stable, calm, and grounded. A flat horizon over a calm sea, a long wall stretching across the frame, a row of sleeping rooftops — these lines suggest rest and permanence.
In landscape photography, horizontal lines created by the horizon itself are everywhere. The challenge is not to let them split the frame exactly in half, which tends to create visual deadlock. Placing the horizon on the upper or lower third of the frame activates the image and gives your leading lines more room to breathe.
Horizontal lines work especially well when you want to convey tranquility — a misty lake at dawn, a still field in early morning light. The line isn’t urgently pulling the eye; it’s inviting the viewer to settle in and look around.
Vertical Lines
Vertical lines suggest height, strength, and power. Tall trees in a forest, the columns of a cathedral, skyscrapers lining a city street — all of these create a sense of upward energy.
They’re particularly effective in portrait and architectural photography. When you photograph a person standing in front of a series of vertical columns, the lines reinforce the subject’s presence and give the image a sense of formality and weight.
In street photography, vertical lines created by buildings and lamp posts can be used to frame the subject, boxing them into a narrow slice of the frame and creating strong visual tension.
Diagonal Lines
Diagonal lines are the most dynamic of the group. They suggest movement, energy, and tension. A road cutting across a frame at an angle, a staircase descending from upper left to lower right, a beam of light slicing through fog — all of these create a sense that something is happening or is about to happen.
Diagonals are your go-to when you want to add life to an otherwise static scene. A portrait taken in front of diagonal architectural lines will feel more energetic than one taken in front of flat, horizontal walls. This is why urban environments are such fertile ground for diagonal leading lines — the built world is full of angles.
One useful trick: stronger diagonals come from lower shooting positions. Get close to the ground and shoot upward along a diagonal line, and it will appear far more dramatic than it would from eye level.
Curved Lines and the S-Curve
Curved lines feel organic and elegant. A winding river, a country path that bends around a hill, a gentle arc of sand along a shoreline — these lines feel natural because they mirror the kinds of lines found in the natural world.
The S-curve is the most celebrated version of this. When a curved line snakes through the frame in an S-shape — entering at the bottom, curving left, then right, then disappearing into the background — it creates a sense of flow and movement that feels deeply satisfying to look at. You see this constantly in landscape photography, particularly with rivers and roads photographed from slightly elevated positions with a wide-angle lens.
Curved lines tend to feel less urgent than diagonals. They invite the eye to travel slowly, taking in the scene. If you want a serene, flowing composition, look for curves. If you want energy and tension, look for diagonals.
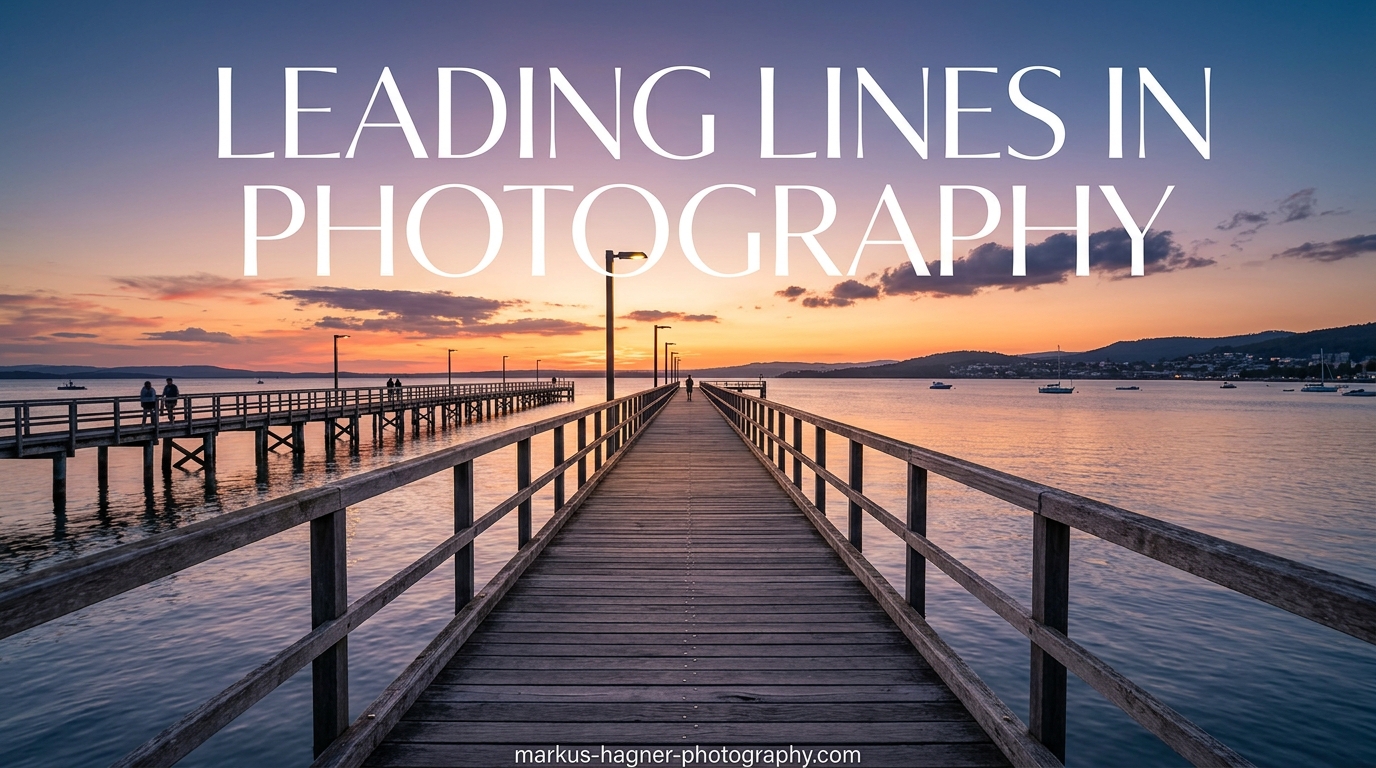
Converging Lines
Converging lines are two or more lines that move toward a common vanishing point. Railroad tracks stretching into the distance are the most iconic example, but you’ll find converging lines in corridors, colonnades, roads, fences, rows of trees, and any other repeated element that recedes into space.
The power of converging lines is their ability to create extreme depth. Because they mimic the way our eyes perceive perspective in the real world, they pull the viewer deep into the image. The further they converge, the greater the implied depth.
Wide-angle lenses exaggerate this effect significantly. A 16mm or 24mm lens close to a set of converging lines will make them appear to rush toward the vanishing point far more dramatically than they would in real life. This is a tool worth experimenting with deliberately.
How to Find Leading Lines in Photography Anywhere
Finding leading lines anywhere is about training your eye to see structure before you see subject matter. Most photographers learn to look for the subject first, then compose around it. Leading line photographers work the other way — they find the line, then find the subject that the line leads to.
Here’s a practical system for finding leading lines in any environment:
Urban and City Environments
Cities are the richest hunting ground for leading lines. Pavements, kerb edges, building facades, stairways, bridges, escalators, tram tracks, alleyways, road markings — every human-built space is constructed on a framework of lines.
The key is to look low. Most photographers stand at eye level and look at what’s in front of them. Drop to knee height or lower, and suddenly the pavement becomes a dramatic leading element rushing toward your subject. Road markings become bold graphic lines. Kerb edges become strong directional forces.
Look for these specifically in cities:
- Bridge railings and walkways — strong parallel lines that converge dramatically with a wide lens
- Pedestrian crossings — bold horizontal stripes that create rhythm
- Alleyways and passages — natural corridor shots with converging walls
- Staircases — diagonal or spiral leading elements
- Subway platforms — long, corridor-like spaces with converging track lines
- Glass facades — repeating geometric patterns that create implied lines
Nature and Landscape Environments
Nature is full of leading lines, but they tend to be softer and more organic than the hard lines of cities. Rivers, streams, paths, shorelines, tree rows, fences, hedgerows, mountain ridges, sand dunes — all of these can serve as leading elements.
The challenge with natural leading lines is that they’re rarely perfectly placed. You have to move around to find the angle where the line is most effective. This is where physically walking the scene pays off — the line that looks useless from one angle can become a powerful compositional tool from ten metres to the left.
Useful natural leading lines include:
- Rivers and streams — especially effective with S-curve compositions
- Paths and trails — work well disappearing into forests or over hill crests
- Shorelines and beaches — create elegant curved horizontals
- Rows of trees or crops — create strong converging diagonals
- Rock formations and cliff edges — create dramatic directional edges
- Light rays — implied lines created by sun rays through clouds or trees
Architectural and Interior Spaces
Architecture is designed with leading lines built in. Architects think about how people move through space, and that thinking translates directly into visual lines that photographers can use. Corridors, colonnades, arched doorways, ceiling beams, tiled floors, vaulted ceilings — all of these create ready-made leading lines.
Interior photography particularly benefits from deliberate use of leading lines. A long hotel corridor shot from floor level creates a dramatic vanishing-point composition. A church nave photographed from the entrance gives you parallel lines of pews, columns, and a tiled floor all converging on the altar.
The Phone Scouting Technique
Before you arrive on location with your camera, use your phone to scout the scene. Walk around and use your phone’s camera to experiment with different angles and positions. This is a low-pressure way to find where the leading lines are strongest without worrying about camera settings or missing shots.
It’s also a useful way to pre-visualise how different lens focal lengths will affect the lines. A narrower field of view on your phone approximates a longer lens; zooming out approximates a wider angle. Once you’ve found the angle that makes the lines sing, you know exactly where to set up with your main camera.
How to Use Leading Lines in Composition
Finding a leading line is the first step. Using it effectively in your composition is where the real skill comes in. Here’s a step-by-step approach that works for almost any genre.
Step 1: Identify What the Line Should Lead To
Before you compose, decide what your subject is. Leading lines need a destination — without one, they’re just lines. The most powerful compositions have a clear visual journey: the eye enters the frame, travels along the line, and arrives at something meaningful.
That destination doesn’t have to be a person or an obvious object. It can be a distant mountain, a patch of light, an area of tonal contrast, or even an implied space beyond the edge of the frame. What matters is that the viewer’s eye has somewhere to go.
Step 2: Position the Start of the Line in the Frame
Leading lines are most effective when they enter from a corner or edge of the frame, particularly the bottom corners. This gives the eye the longest possible journey through the image. A line that starts from the centre of the frame is far less powerful than one that begins at the lower left or lower right.
Try to avoid lines that enter from the top of the frame, as these tend to push the eye out of the image rather than drawing it in. The eye naturally reads an image from bottom to top, so lines that enter from the bottom and move upward into the scene work with this natural tendency.
Step 3: Use Camera Position to Control the Line’s Direction
Your shooting position has a huge effect on how leading lines behave. Moving left or right changes the angle of the line relative to the frame. Moving higher or lower changes how dramatically lines converge.
Low shooting positions make lines feel more dramatic and expansive — the foreground takes up more space, and the line rushes away from the camera with greater urgency. High positions compress the scene and reduce the apparent convergence of lines. Neither is better; they serve different creative intentions.
Step 4: Apply the Near-Far Technique
The near-far technique is one of the most powerful tools in landscape photography, and it relies entirely on leading lines. The idea is to find a strong foreground subject close to the camera, then use a wide-angle lens and small aperture to keep both the foreground and a distant background element sharp.
The leading line — a path, a river, a fence — connects the near foreground element to the far background, creating a complete visual journey through the frame. You get depth, visual interest, and a clear narrative path all in one composition.
To execute this well, you typically need a wide-angle lens (35mm or wider), a small aperture (f/8 to f/16 for maximum depth of field), and a tripod to keep the image sharp at slower shutter speeds.
Step 5: Combine Multiple Leading Lines
You don’t have to limit yourself to a single leading line per composition. Multiple lines working in concert can create compositions of extraordinary richness. The key is to make sure the lines are working together, not competing against each other.
Parallel converging lines — like train tracks or the edges of a road — are a simple version of this. More complex compositions might combine a diagonal path with a horizontal fence, or a curved river with diagonal shadows from trees. The lines create a layered visual journey through the image.
When multiple lines conflict — pulling the eye in different directions without resolving toward a common point — the composition falls apart. Before pressing the shutter, trace the journey you expect the viewer’s eye to take. If it gets confused or stuck, simplify.
Step 6: Integrate with the Rule of Thirds
Leading lines and the rule of thirds work together naturally. Ideally, your leading line should start near one corner of the frame and lead toward a subject or point of interest positioned on one of the rule-of-thirds power points — the four intersection points of the grid.
This combination is almost universally effective because it satisfies two of our deep compositional instincts at once: the desire to follow a path and the sense of visual balance that off-centre placement creates. When both are in play, the image feels complete.
Common Mistakes Photographers Make with Leading Lines
Most photography guides tell you how to use leading lines, but they don’t warn you about what goes wrong. After years of shooting and reviewing compositions on forums and in photo critiques, I’ve noticed the same errors come up again and again.
The Line Leads to Nothing
This is the most common mistake. There’s a strong leading line — a great road, a beautiful river — but it leads the eye to an empty, uninteresting part of the frame. The viewer follows the path faithfully and then arrives at… nothing.
Always ask yourself: what is this line leading to? If the answer is “the sky” or “more road,” you haven’t finished composing your shot. Either find a subject to place at the end of the line, wait for one to appear, or reconsider whether this particular line is worth using at all.
The Line Leads the Eye Out of the Frame
A leading line that exits the frame through the side or top pulls the viewer’s eye right out of the image. This is the opposite of what you want. The goal is to keep the eye inside the image, moving through it.
If you’re working with a line that exits the frame, try repositioning so the exit point is in a corner rather than along a mid-edge, or introduce a secondary element that stops the eye before it escapes. Sometimes the fix is as simple as turning the camera slightly.
Overreliance on Leading Lines at the Expense of Other Elements
Forum discussions among photographers regularly surface this problem: the obsession with finding leading lines becomes so strong that other compositional considerations get ignored. Light, colour, texture, negative space — all of these matter too.
A great leading line in flat, dull light is still a mediocre photograph. A strong composition doesn’t need leading lines at all if the light is extraordinary and the subject is compelling. Leading lines are a tool, not a requirement. The best photographers know when to use them and when to leave them out.
Lines That Are Too Subtle to Read
Sometimes a line exists but doesn’t read clearly in the final image. A crack in a pavement, a faint shadow line, a barely-visible path through long grass — these can feel like leading lines to the photographer in the moment, but fail to register for a viewer looking at the image later.
Before you commit to a composition, check: is this line strong enough to actually do its job? Contrast, sharpness, and tonal difference all affect how clearly a line reads in a photograph. A line needs enough visual weight to guide the eye, or it becomes background noise.
Ignoring the Direction of Lines That Lead Backward
Not all lines lead forward into the scene. Some lead backward — toward the camera position, toward the edges of the frame, or in directions that actively work against your subject. Lines that lead away from the main point of interest are a problem, because they divide the viewer’s attention.
Scan the full frame before shooting. Are there any lines pulling in directions that undermine the primary leading element? If so, either reposition to eliminate them or find a shooting angle where they’re not visible.
Practical Tips to Strengthen Your Leading Line Compositions
These are the specific habits and approaches that have made the biggest difference in my own leading line photography — drawn from years of practice and from studying the work of photographers who do this at a genuinely high level.
Use a Wide-Angle Lens When Possible
A wide-angle lens — anything from 14mm to 35mm — exaggerates the convergence of leading lines in a way that telephoto lenses cannot. It makes foreground elements larger and more prominent, and it stretches the apparent distance to background elements, creating a dramatic sense of depth.
If you’re working with a zoom lens, pull it to its widest setting when you want to maximise the power of your leading lines. Get physically closer to the line itself rather than zooming in from a distance. The closer you are, the more dramatic the convergence.
Look for Light as a Leading Element
Light itself can function as a leading line. A beam of sunlight cutting through fog at an angle, a line of shadow across a lit surface, rays of light filtering through a forest canopy — these all create implied lines that guide the viewer’s eye just as effectively as physical lines do.
Light changes quickly, so this type of leading line is often time-sensitive. If you spot a beautiful light line, shoot immediately. Come back the next day at the same time if you want to refine the composition. Unlike roads and rivers, light-based leading lines don’t wait.
Experiment with Shooting Height
Changing your shooting height by even a metre can completely transform how a leading line behaves in the frame. Get low — as close to ground level as possible — for maximum drama and foreground expansion. Shoot from above — a stairwell, a bridge, a ladder — to compress the scene and reveal patterns that are invisible from ground level.
Most photographers default to eye level and miss both extremes. The most memorable leading line compositions I’ve seen have been shot from positions that required some physical effort — lying flat on cold pavement, climbing to the top of a wall, leaning out over a railing.
Visit Locations at Multiple Times of Day
The same leading line looks completely different depending on the time of day. A road at midday has flat, harsh light and no particularly interesting shadows. The same road at golden hour is transformed by long shadows that create additional implied lines, rich warm light along its surface, and a quality of light that makes everything feel more cinematic.
If you find a location with strong leading lines, visit it at least twice — once in the morning and once in the evening — and see how the light changes the composition. You’ll often find that a scene you thought was mediocre becomes extraordinary with the right light.
Study the Work of Photographers Who Do This Well
The fastest way to train your eye is to look at a large volume of images by photographers who use leading lines masterfully. Study landscape photographers like Charlie Waite or Ansel Adams, architectural photographers like Julius Shulman, and street photographers like Henri Cartier-Bresson.
When you look at their images, don’t just admire them — trace the lines. Where do they enter the frame? Where do they lead? How is the subject positioned relative to the end of the line? How does the shooting position affect the line’s angle? You can learn more from careful study of great photographs than from any tutorial.
Know When to Leave Leading Lines Out
This is the most counterintuitive tip, but it’s the one that separates confident photographers from those still learning: sometimes the best composition has no leading lines at all.
A powerful portrait taken against a clean, simple background with no directional elements is not a failed composition — it’s a deliberate one. An abstract close-up of texture or pattern doesn’t need a leading line. A wide landscape where the light itself is the story doesn’t necessarily need lines to guide the eye.
Use leading lines when they genuinely add to the image. Resist the temptation to introduce them just because you know they’re a “good composition technique.” Every compositional decision should serve the photograph, not the other way around.
How to find leading lines in photography?
To find leading lines, look for any line in the scene that starts near the edge or corner of your frame and travels toward your subject or a point of interest. Train yourself to look for roads, fences, rivers, walls, shadows, and light beams. Get low — a low camera position transforms ordinary elements like pavements and kerb edges into powerful leading lines. Walk around the scene to discover angles where lines become most dramatic.
Where can you find leading lines?
Leading lines are everywhere once you know how to look for them. In cities: roads, pavements, bridge railings, alleyways, stairways, tram tracks, and building facades. In nature: rivers, paths, shorelines, rows of trees or crops, cliff edges, and rock formations. In architecture: corridors, columns, staircases, ceiling beams, tiled floors, and arched doorways. Even light itself — sun rays through fog, window light across a floor — can serve as a leading line.
Why are leading lines important in photography?
Leading lines are important because they give the viewer’s eye a clear path through the frame, creating depth, visual flow, and a sense of three-dimensionality in what is fundamentally a flat medium. They help control where the viewer looks, in what order, and for how long — which means a photographer using leading lines effectively is telling a story, not just recording a scene.
What is the 20 60 20 rule in photography?
The 20-60-20 rule is a compositional guideline that suggests roughly 20% of an image should be foreground, 60% should be the main subject or middle ground, and 20% should be background or sky. It encourages photographers to think in three layers rather than two, and it pairs naturally with leading lines — the foreground 20% is often where your leading line begins, drawing the eye up into the dominant 60% middle zone where your subject lives.
Final Thoughts
Understanding what leading lines are in photography is the easy part. The harder part — and the rewarding part — is training yourself to see them automatically, before the camera even comes up to your eye.
Start deliberately. Pick a location you know well and spend a full session looking only for leading lines. Don’t shoot anything unless there’s a clear line guiding the eye to a clear destination. You’ll probably feel frustrated at first. Then, somewhere in that session, the way you see will shift, and you’ll realize you’re looking at structure rather than subjects. That’s the moment the technique starts to become instinct.
The five types — horizontal, vertical, diagonal, curved, and converging — cover virtually every line you’ll ever find. Learn their emotional qualities, practice using them one at a time, and then start combining them. Avoid the common mistakes: lines that lead nowhere, lines that exit the frame, lines too subtle to read. And know when to put the technique aside entirely and let a great subject or extraordinary light carry the image on its own.
Leading lines in photography are not a formula. They’re a way of thinking about how vision works and how photographs can direct it. Master that thinking, and every environment you step into becomes a composition waiting to be found.