As a professional photographer who’s spent countless hours in the field chasing that perfect shot, I know the frustration of being tethered to my camera. Whether I’m shooting wildlife from a blind, capturing architectural details from awkward angles, or trying to direct portrait sessions without breaking the flow, being physically stuck to my camera has always limited my creativity. That’s why I’ve been on a mission to find the perfect wireless camera remote control solution.
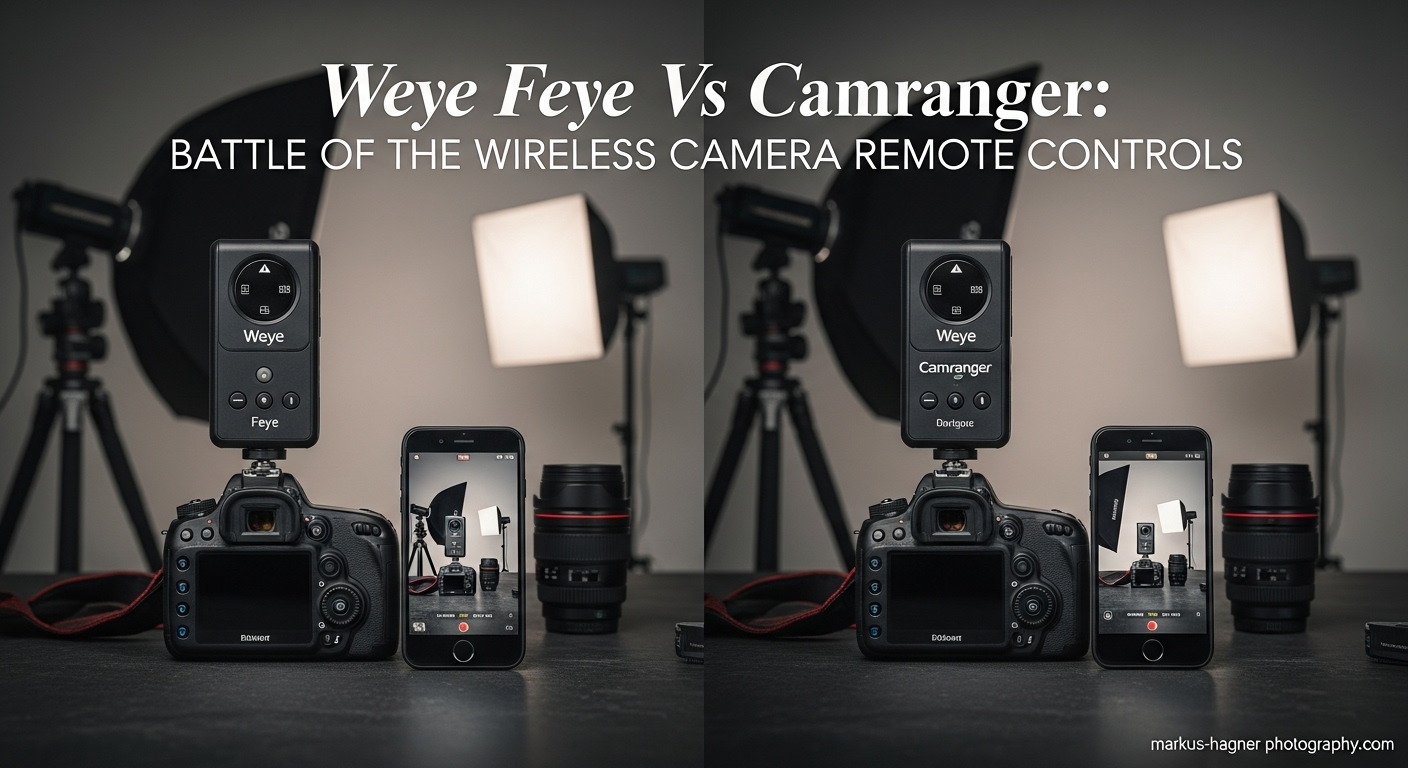
After years of testing various options, I’ve narrowed it down to two major players: Weye Feye and Camranger. These devices have revolutionized how I work, but they each bring their own strengths and weaknesses to the table. Today, I’m going to share my hands-on experience with both systems and help you decide which one deserves a spot in your camera bag.
My Journey to Wireless Freedom
Let me take you back to when I first discovered these game-changing tools. I was on a landscape photography trip in the mountains, trying to capture the perfect sunrise. The temperature was hovering around freezing, and I found myself running back and forth between my warm hiding spot and my camera setup on the tripod. Not only was this exhausting, but I was also missing shots because I couldn’t stay with my camera to adjust settings at the critical moment.
That’s when I knew I needed a wireless solution. I started researching and came across both Weye Feye and Camranger. At first glance, they seemed similar – both promised to free me from cables and give me remote control over my camera. But as I dug deeper and actually put them through their paces, I discovered some significant differences that could make or break your shooting experience.
What Exactly Are These Devices?
Before we dive into the nitty-gritty comparison, let me explain what these devices actually do. Both Weye Feye and Camranger are wireless camera remote controls that connect to your DSLR via USB and create their own Wi-Fi network. This network allows you to control your camera from your smartphone or tablet, giving you access to live view, camera settings, and the ability to trigger shots remotely.
Think of them as giving your camera a brain that you can access from anywhere within range. You can adjust aperture, shutter speed, ISO, focus points, and even trigger the shutter without ever touching your camera. For photographers like me who work in studios, on location, or in challenging environments, this freedom is nothing short of revolutionary.
Weye Feye: The Sleek Contender
Let me start with Weye Feye. When I first unboxed this device, I was impressed by its design. It’s a compact unit (about 2″ x 3.5″ and ¾” thick) encased in a bright orange rubberized cover that makes it easy to spot if you drop it. The device is made by a company called XSories, and while it might not be as well-known as Camranger, it packs some serious features.
Physical Design and Build Quality
The Weye Feye feels solid in hand, with all electronics sealed in a thick black plastic box. The orange rubber cover not only protects it but also includes Velcro strips for mounting to tripods. It has a simple interface with just one power button and two LED status lights. There’s a mini-USB port for charging and a regular USB port for connecting to your camera.
I’ve found the build quality to be quite good, though I wouldn’t call it weatherproof. It can probably handle light drizzle if you’re careful, but for serious weather conditions, I’d recommend putting it in a protective bag.
Setup Process: My Experience
Setting up the Weye Feye was relatively straightforward. Here’s what I did:
- Charged the device (takes about 4 hours for a full charge)
- Downloaded the Weye Feye app from the App Store
- Connected the device to my camera via USB
- Powered on both the camera and Weye Feye
- Connected my phone to the Weye Feye Wi-Fi network
- Launched the app and started shooting
The whole process took me about 5 minutes the first time, and now I can do it in under 2 minutes. The app automatically detected my camera model, which was a nice touch.
App Interface and User Experience
This is where Weye Feye really shines in my opinion. The app interface is clean, intuitive, and doesn’t overwhelm you with options. When you first open it, you see two main options: Camera and Gallery. Tapping Camera brings up the live view feed with basic controls overlaid.
What I love about the Weye Feye app is that it’s designed to get out of your way. The controls are simple and straightforward, allowing you to focus on composition rather than fumbling through menus. The live view feed is clear and responsive, with only about a 0.2-second delay between tapping the shutter and the camera actually firing.
Key Features I’ve Discovered
During my extensive testing, I’ve found several features that make Weye Feye stand out:
Live View Control: The live view feed is surprisingly clear and responsive. I can tap anywhere on the screen to set focus points, and double-tapping zooms in to 100% for critical focus checking. This has been invaluable for my macro work.
Time-Lapse Capabilities: Weye Feye handles time-lapse sequences beautifully. I can set intervals and let it run while I monitor from a distance. The app shows me each frame as it’s captured, so I know immediately if something’s not working.
Bracketing for HDR: For my landscape work, I often use HDR techniques, and Weye Feye makes bracketing simple. I can set the number of shots and exposure increments, then let the device handle the rest.
Image Transfer: One feature I didn’t expect to love as much as I do is the quick image transfer. After capturing a shot, I can immediately review it on my phone at full resolution. This has been a game-changer for client previews during portrait sessions.
Battery Life and Performance
Weye Feye claims up to 8 hours of battery life, and in my testing, this has been pretty accurate. I’ve used it for full-day shoots without needing to recharge. The device uses a built-in, non-replaceable battery, which is a bit of a downside, but the 8-hour life has been sufficient for most of my needs.
Range is where Weye Feye shows some limitations. In open areas, I’ve gotten reliable performance up to about 80 meters (roughly 260 feet). However, this range drops significantly if there are walls or obstacles in the way. In urban environments or indoors, I find myself staying within 30-50 meters for reliable connections.
Real-World Performance: My Field Tests
I’ve put Weye Feye through its paces in various shooting scenarios, and here’s what I’ve discovered:
Portrait Sessions: For studio and location portraits, Weye Feye has been fantastic. I can step away from my camera, interact with my subjects, and adjust settings without interrupting the flow. The simple interface means I’m not fumbling with controls when I should be connecting with my subjects.
Landscape Photography: On a recent mountain sunrise shoot, I set up my camera on a tripod and retreated to a warm shelter while Weye Feye handled the shooting. I could monitor the changing light and trigger shots at the perfect moments without freezing my fingers off.
Event Photography: At a crowded wedding, Weye Feye allowed me to capture candid moments from across the room without drawing attention to myself. People act more naturally when they don’t know they’re being photographed, and this device has helped me capture those authentic moments.
Also Read: Mamiya 645 vs RB67
The Downsides I’ve Encountered
As much as I love Weye Feye, it’s not perfect. Here are the issues I’ve run into:
Limited Camera Compatibility: While it works with most Canon and Nikon DSLRs, compatibility with other brands is limited. If you shoot with Sony, Fuji, or other brands, you might be out of luck.
Connectivity Issues in Crowded Areas: I’ve noticed that in locations with lots of Wi-Fi networks (like downtown areas or event venues), the connection can become unstable. The signal weakens, and I’ve experienced occasional dropouts.
App Updates: The app doesn’t seem to get updated as frequently as I’d like. While it works well, I’d love to see more features and improvements based on user feedback.
No Replaceable Battery: The fact that the battery isn’t user-replaceable means that if it fails, you’re looking at replacing the entire device. This is a concern for long-term reliability.
Camranger: The Professional Powerhouse
Now let’s talk about Camranger. When I first started researching wireless camera controls, Camranger was the name that kept coming up. It’s been around longer and has built a reputation as the professional’s choice. After testing it extensively, I can see why it has such a strong following.
Physical Design and Build Quality
Camranger has a more utilitarian design compared to Weye Feye. It’s slightly larger but still portable enough to fit in a camera bag. The build quality feels robust and professional, designed to withstand the rigors of professional use. It has a more industrial look, with clear port labeling and a straightforward interface.
One thing I immediately noticed is that Camranger feels more substantial in hand. This isn’t necessarily a bad thing – it gives me confidence that it can handle being tossed in a gear bag with other equipment.
Setup Process: Getting Started
Setting up Camranger follows a similar process to Weye Feye, but with a few differences:
- Charge the device (Camranger charges via USB)
- Download the Camranger app (available for iOS, Android, Mac, and Windows)
- Connect Camranger to your camera via USB
- Power on both devices
- Connect your device to the Camranger Wi-Fi network
- Launch the app and begin controlling your camera
The setup took me slightly longer the first time, maybe 7-8 minutes, because the Camranger app has more features to get familiar with. However, once I understood the interface, the process became just as quick as with Weye Feye.
App Interface and Features
This is where Camranger really differentiates itself. The Camranger app is packed with features that cater to professional photographers. While this might be overwhelming at first, the depth of control it offers is impressive.
The interface is more complex than Weye Feye’s, with multiple menus and options. But once you get the hang of it, you realize that this complexity translates to incredible control over your camera. You can adjust virtually every camera setting remotely, from basic exposure controls to advanced functions like focus stacking and HDR bracketing.
Advanced Features That Impress Me
Camranger offers several features that go beyond what Weye Feye provides:
Focus Stacking: This has been a game-changer for my macro photography. Camranger can automatically capture a series of images at different focus points, which I can then combine in post-processing for incredible depth of field. The precision and automation of this feature have saved me countless hours.
Advanced Bracketing: While Weye Feye handles basic bracketing well, Camranger takes it to another level. I can create custom bracketing sequences with precise control over exposure increments, making it perfect for challenging lighting situations.
Video Control: For my hybrid photography/videography work, Camranger’s video controls have been invaluable. I can start and stop recording remotely, adjust focus during recording, and even pull focus smoothly. This has elevated my video work significantly.
Motorized Head Support: Camranger works with optional motorized tripod heads, allowing me to pan and tilt my camera remotely. This has opened up creative possibilities I never thought possible, especially for architectural and landscape photography.
Battery Life and Range
Camranger matches Weye Feye’s 8-hour battery life claim in my testing. However, one significant advantage is that Camranger has a replaceable battery. If you’re planning on using it for extended periods, you can carry spare batteries and swap them out as needed.
Range is where Camranger really shines. In open areas, I’ve consistently achieved reliable connections up to 150 meters (nearly 500 feet). Even in challenging environments, the connection remains stable. I’ve used it from different rooms in buildings and maintained solid control over my camera.
Real-World Performance: Putting It to the Test
I’ve used Camranger in various professional scenarios, and here’s how it has performed:
Wildlife Photography: On a recent wildlife shoot, I set up my camera near a bird feeder and retreated to a blind about 100 meters away. Camranger allowed me to capture intimate shots of birds without disturbing them. The range and reliability were impressive, and I never missed a shot due to connection issues.
Architectural Photography: For architectural work, Camranger has been indispensable. I can set up my camera in hard-to-reach positions and still have full control. The ability to pan and tilt with a motorized head has allowed me to create perfect compositions without physically moving my camera.
Product Photography: In my studio, Camranger has streamlined my product photography workflow. I can adjust lighting, camera settings, and composition from my iPad, making the entire process more efficient. The focus stacking feature has been particularly useful for jewelry and small product shots.
The Limitations I’ve Found
Despite its impressive features, Camranger isn’t without its drawbacks:
Higher Price Point: Camranger is significantly more expensive than Weye Feye. While the additional features may justify the cost for professionals, it might be overkill for casual photographers.
Steeper Learning Curve: The app’s complexity means there’s more to learn. I spent several hours exploring all the features and still feel like I haven’t mastered everything.
Device Requirements: Camranger demands more from your smartphone or tablet. I’ve noticed that older devices can struggle with the app, sometimes becoming laggy or unresponsive.
Size and Weight: While still portable, Camranger is larger and heavier than Weye Feye. For photographers who count every ounce in their gear bag, this might be a consideration.
Head-to-Head Comparison: The Battle Details
Now that I’ve shared my experiences with both devices, let’s break down how they compare across key categories. This will help you understand which device might be better suited for your specific needs.
Range and Connectivity
Winner: Camranger
There’s no contest here. Camranger’s 150-meter range in open areas significantly outperforms Weye Feye’s 80-meter limit. More importantly, Camranger maintains its connection better in challenging environments. I’ve used Camranger through walls and in areas with lots of interference, while Weye Feye struggles in these conditions.
For wildlife photographers, architectural shooters, or anyone who needs to be far from their camera, Camranger’s superior range makes it the clear winner.
App Interface and Ease of Use
Winner: Weye Feye
This one’s subjective, but I prefer Weye Feye’s simpler interface. It’s designed to get out of your way and let you focus on photography. The controls are intuitive, and I can start shooting immediately without navigating complex menus.
Camranger’s app is more powerful but also more complex. If you value simplicity and speed over advanced features, Weye Feye’s approach will appeal to you.
Battery Life and Power Management
Winner: Camranger
While both devices claim 8-hour battery life and deliver on that promise in my testing, Camranger’s replaceable battery gives it the edge. For long shooting days or remote locations where charging isn’t available, being able to swap batteries is crucial.
Weye Feye’s built-in battery means you’re stuck with whatever charge you have, and if the battery fails, you’re looking at replacing the entire device.
Feature Set and Advanced Capabilities
Winner: Camranger
Camranger offers significantly more features than Weye Feye. Focus stacking, advanced bracketing, video controls, and motorized head support make it the more versatile device. For professional photographers who need these advanced capabilities, Camranger is the obvious choice.
However, if you primarily need basic remote control with live view, Weye Feye’s simpler feature set might be all you need.
Camera Compatibility
Winner: Camranger
Camranger supports a wider range of cameras, including Canon, Nikon, Sony, and Fuji models. Weye Feye is primarily limited to Canon and Nikon DSLRs. If you shoot with mirrorless cameras or less common brands, Camranger offers better compatibility.
Price and Value
Winner: Weye Feye
Weye Feye is significantly more affordable than Camranger. While exact prices vary, you can expect to pay roughly $250 for Weye Feye compared to $370-460 for Camranger (depending on the model). For photographers on a budget or those who don’t need advanced features, Weye Feye offers better value.
Portability and Design
Winner: Weye Feye
Weye Feye’s compact size and lighter weight make it more portable. The bright orange rubber cover also makes it easier to spot if you drop it. For photographers who travel light or work in tight spaces, Weye Feye’s smaller footprint is advantageous.
My Personal Recommendation
After spending countless hours with both devices in various shooting scenarios, I’ve developed some clear preferences based on different needs:
Choose Weye Feye If:
- You’re primarily a portrait or event photographer who needs simple remote control
- You value an intuitive, easy-to-use interface over advanced features
- You’re on a budget but still want reliable wireless control
- You shoot primarily with Canon or Nikon DSLRs
- You prefer a more portable, lightweight solution
I find myself reaching for Weye Feye when I’m doing portrait sessions, event photography, or casual landscape work. It’s the perfect “grab and go” solution that doesn’t overwhelm me with features I don’t need.
Also Read: Nikon D300 Vs D7000
Choose Camranger If:
- You’re a professional photographer who needs advanced features
- You shoot wildlife, architecture, or macro photography regularly
- You require the longest possible range and most reliable connection
- You want focus stacking, advanced bracketing, or video control capabilities
- You shoot with a variety of camera brands including mirrorless models
Camranger has become my go-to device for professional assignments where I need maximum control and reliability. The advanced features have saved me time and opened up creative possibilities I wouldn’t have otherwise.
Pro Tips I’ve Discovered
Through my extensive testing, I’ve picked up some tips that will help you get the most out of whichever device you choose:
For Both Devices:
Always Update Firmware: Before any important shoot, I check for and install firmware updates. This ensures I have the latest features and bug fixes.
Carry Backup Power: Even though both devices have good battery life, I always carry a portable power bank. There’s nothing worse than running out of power mid-shoot.
Test Before the Shoot: I never use these devices for the first time on a paid gig. I always test them thoroughly in different conditions to understand their limitations.
Manage Expectations: Remember that these devices supplement, not replace, your camera’s built-in controls. I always have my camera’s physical controls accessible as a backup.
For Weye Feye Users:
Optimize Your Position: Since range is limited, I’ve found that positioning myself with a clear line of sight to the camera significantly improves connection stability.
Use a Tablet for Better Control: While the phone app works well, I’ve found that using a tablet gives me a larger, more detailed view of the live feed, making composition easier.
Keep Apps Updated: The Weye Feye app doesn’t update as frequently as I’d like, but when updates are available, they often include important improvements.
For Camranger Users:
Learn the Advanced Features: Take the time to explore all the features. I discovered several capabilities months after I started using it that have become essential to my workflow.
Invest in a Quality Tablet: Camranger’s advanced features are best utilized on a larger screen. I use an iPad Pro, and the additional screen real estate makes a significant difference.
Consider the Motorized Head: If you do architectural or landscape photography, the optional motorized head is worth the investment. It has transformed how I approach these genres.
The Future of Wireless Camera Control
As I look at where photography technology is heading, I see wireless camera control becoming even more important. Both Weye Feye and Camranger represent the current state of this technology, but I expect to see several developments in the coming years:
Improved Range and Reliability: Future devices will likely offer even greater range and more stable connections, possibly using different wireless technologies.
Enhanced AI Integration: I wouldn’t be surprised to see AI features that can automatically detect and track subjects, adjust settings based on scene analysis, and even suggest compositions.
Cross-Platform Compatibility: As camera systems become more diverse, I expect to see solutions that work seamlessly across all brands and models.
Integration with Other Systems: Future devices will likely integrate more smoothly with lighting systems, drones, and other photography equipment.
AR and VR Capabilities: The possibility of augmented reality overlays showing focus points, depth of field, and composition guides excites me about where this technology could go.
Final Thoughts: Which Device Reigns Supreme?
After months of testing both devices in real-world shooting scenarios, I’ve come to the conclusion that there’s no one-size-fits-all answer. Both Weye Feye and Camranger excel in different areas, and the right choice depends entirely on your specific needs as a photographer.
For me, both devices have earned a permanent place in my camera bag. I use Weye Feye for simpler shoots where I need quick, easy remote control without fuss. I reach for Camranger when I’m tackling complex assignments that demand advanced features and maximum reliability.
The wireless camera control revolution is here, and these devices are at the forefront. Whether you choose Weye Feye, Camranger, or another solution, embracing this technology will transform how you work and open up creative possibilities you never imagined.
Remember, the best camera is the one you have with you, and the best remote control is the one that empowers you to capture your vision without limitations. Choose wisely, shoot often, and don’t let cables hold you back from creating amazing photography.
Frequently Asked Questions
What makes wireless remotes like these essential for photographers?
Wireless remotes free you from physical limitations, allowing you to control your camera from a distance. This is essential for capturing shots in challenging positions, working with subjects who respond better when you’re not behind the camera, and maintaining flexibility in your shooting approach. I’ve found that having wireless control has opened up creative possibilities I never thought possible.
How do I connect these devices to my DSLR?
Both devices connect via your camera’s USB port. The process is straightforward: connect the device to your camera using the included USB cable, power on both devices, connect your smartphone or tablet to the device’s Wi-Fi network, and launch the app. I can typically set up either device in under 5 minutes, even when I’m in a hurry on location.
Can I use them for video as well as stills?
Yes, both devices support video recording, but with different levels of control. Camranger offers more advanced video features, including the ability to start/stop recording and adjust focus during recording. Weye Feye allows basic video control and quick transfer of footage for review. I’ve used both for hybrid photo/video shoots with good results.
What if the signal drops during a shoot?
Signal drops can happen, especially in areas with lots of Wi-Fi interference. My go-to solution is to restart both the device and my phone, then reconnect to the Wi-Fi network. Moving closer to the camera usually helps reestablish the connection. I always have a backup plan, such as using my camera’s built-in timer or a traditional remote trigger.
Are the apps free and easy to update?
Both apps are free to download from their respective app stores. Updates are also free and usually include bug fixes and occasional new features. I’ve found that Camranger updates more frequently than Weye Feye, but both apps are generally stable and reliable.
How do they handle battery in long sessions?
Both devices claim 8-hour battery life, which has been accurate in my testing. For extended shoots, I recommend carrying a portable power bank to recharge on the go. Camranger has the advantage of a replaceable battery, so you can carry spares for very long sessions.
Do they work with mirrorless cameras?
Camranger has better mirrorless camera support, including compatibility with Sony and Fuji models. Weye Feye is primarily designed for DSLRs and has limited mirrorless support. If you shoot primarily with mirrorless cameras, Camranger is likely the better choice.
Which one has better customer support?
In my experience, Camranger has more responsive customer support and a larger user community. Weye Feye support can be slower to respond, especially for technical questions. However, both companies provide adequate support for common issues.
Can I use multiple cameras with one device?
Both devices are designed to control one camera at a time. If you need to control multiple cameras simultaneously, you would need multiple devices. I’ve used this setup for special effects and commercial work, but it requires careful planning and coordination.
Are there any monthly subscription fees?
No, both devices work with a one-time purchase. There are no monthly subscription fees required to use the basic features. Some advanced Camranger features might require additional purchases, but the core functionality is included in the initial price.