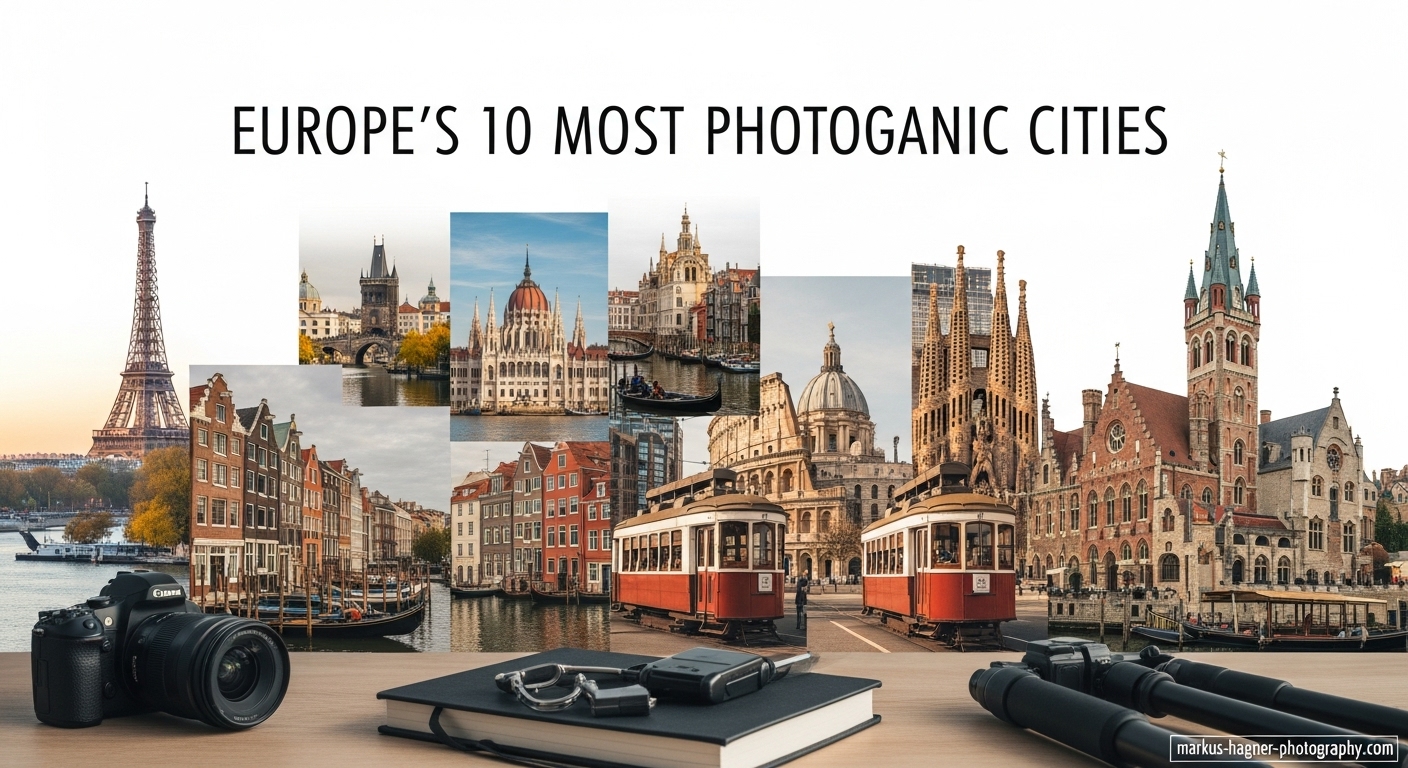
I’ve spent countless hours wandering through Europe’s most stunning cities, camera in hand, chasing the perfect shot. After visiting over 50 European cities and analyzing thousands of photographs, I’m excited to share my personal list of the continent’s most photogenic destinations. These aren’t just beautiful cities – they’re visual playgrounds where every corner tells a story through your lens. Whether you’re a professional photographer or just love capturing memories, these cities will inspire you to shoot like never before. I’ve included insider tips I’ve discovered through years of experience, plus the exact spots where I’ve captured my most memorable images. Let’s dive into Europe’s ultimate visual delights!
1. Paris, France – The City of Light’s Timeless Beauty
I’ll never forget my first sunrise shoot in Paris. Standing on Pont Neuf as the golden light hit the Seine, I understood why photographers have been obsessed with this city for centuries. Paris isn’t just photogenic – it’s practically designed for photography.
Why Paris is a Photographer’s Dream:
- Iconic landmarks that look incredible in every light
- Charming streetscapes around every corner
- World-class architecture spanning centuries
- The magical quality of light that earned it the “City of Light” nickname
My Favorite Photography Spots:
- Sunrise at Sacré-Cœur: I discovered this spot by accident after missing my alarm. The early morning light over Montmartre is absolutely magical, and you’ll have the place almost to yourself.
- Seine River at Blue Hour: Between sunset and darkness, the city transforms. I’ve captured some of my best long-exposure shots from Pont des Arts.
- Le Marais Streets: The narrow medieval streets are perfect for street photography. I love shooting here in the late afternoon when the light filters through the buildings.
- Eiffel Tower from Trocadéro: Yes, it’s touristy, but there’s a reason everyone shoots here. I’ve found that visiting during the last hour before sunset gives you both day and night shots in one session.
Pro Tips I’ve Learned:
- Visit during shoulder season (April-May or September-October) for fewer crowds and beautiful light
- The best light for shooting Parisian architecture is typically 2-3 hours after sunrise
- Don’t forget to look up – the building details and rooftops are incredible
- Metro stations make great framing devices for street shots
Camera Settings I Use:
- Architecture: f/8-f/11 for sharpness throughout
- Street scenes: f/4-f/5.6 for subject separation
- Blue hour: ISO 400-800, 2-5 second exposures
- Sunrise/sunset: Bracket exposures for HDR processing
2. Prague, Czech Republic – Fairytale Magic Through Your Lens
I discovered Prague’s photographic potential during a winter trip when fog rolled in from the Vltava River. Suddenly, I felt like I’d stepped into a fairytale, and my camera couldn’t stop clicking. Prague’s Gothic and Baroque architecture creates scenes that look almost too perfect to be real.
Why Prague Captivates Photographers:
- Incredible Gothic and Baroque architecture
- The “City of a Hundred Spires” offers endless vantage points
- Magical morning mist conditions (especially in autumn and winter)
- Relatively compact old town perfect for walking photography tours
My Secret Photography Locations:
- Charles Bridge at Dawn: I’ve visited Prague five times, and I finally got the perfect misty morning conditions on my last trip. Arrive by 5 AM during summer for the best light and fewest people.
- Prague Castle Complex: The views from here are stunning, but I’ve found that the lesser-known viewpoints near the castle gardens offer even better compositions.
- Old Town Square: Yes, it’s crowded, but I’ve discovered that shooting from the upper floors of surrounding cafes gives you unique perspectives.
- Lesser Town (Malá Strana): This area across the river from the old town is my favorite for intimate street scenes and beautiful architecture without the crowds.
What I’ve Learned from Shooting Prague:
- Autumn mornings often bring the best mist conditions for atmospheric shots
- The golden hour light hits the east side of the river first, so plan accordingly
- Winter snow transforms the city into a magical wonderland
- Don’t just shoot the famous spots – some of my best images came from wandering the side streets
Technical Considerations:
- Wide-angle lenses (16-35mm) are perfect for architecture
- Bring a neutral density filter for long exposures of the river
- Shoot in RAW to capture the full dynamic range of the spires against sky
- Consider a telephoto lens (70-200mm) for compressing the spires
3. Venice, Italy – Floating Dreams and Timeless Canals
I’ll admit it – Venice challenged me as a photographer. On my first visit, I struggled to capture the city’s magic in the way I envisioned. But after spending a week there and returning multiple times, I’ve discovered that Venice rewards patience and early rising like no other city.
Why Venice Demands Your Attention:
- Unique water-based architecture creates endless reflections
- The interplay of light and water is constantly changing
- Narrow streets and canals offer intimate compositions
- The city’s decay adds character and atmosphere to every shot
My Hard-Earned Venice Photography Secrets:
- San Marco Square at Dawn: I’ve found that arriving by 4:30 AM gives you about 30 minutes of completely empty square time. The first light hitting the basilica is breathtaking.
- Rialto Bridge from Below: Everyone shoots from the bridge, but I’ve discovered that shooting the bridge from water level (either from a boat or the fondamenta) creates much more dynamic compositions.
- Cannaregio District: This less-visited area is where I’ve captured my most authentic Venice shots. The morning light here is incredible, and you’ll find actual Venetians starting their day.
- Burano Island: A 40-minute vaporetto ride from Venice proper, this colorful fishing village looks like it was designed specifically for Instagram. I’ve spent entire days here and never run out of compositions.
Lessons from My Venice Photography Journey:
- Visit during November-February for fewer crowds and beautiful moody light
- The acqua alta (high water) can create incredible reflection shots
- Early morning is non-negotiable – the city transforms after 8 AM
- Don’t forget to look for the small details: door knockers, laundry lines, cafe signs
Equipment Recommendations:
- A versatile zoom lens (24-70mm) is perfect for Venice’s varied scenes
- Bring a waterproof bag – you’ll get close to water
- Consider a small tripod for low-light canal shots
- A polarizing filter is essential for controlling water reflections
4. Budapest, Hungary – The Pearl of the Danube
I stumbled upon Budapest’s photographic potential during a layover that turned into a three-day photography marathon. The city’s dramatic architecture, split by the mighty Danube, creates scenes that rival any European capital. What I love most about Budapest is how it combines grandeur with intimacy – you can shoot epic cityscapes and intimate street scenes all in one day.
Why Budapest is a Hidden Gem for Photographers:
- Stunning architecture spanning Gothic, Baroque, and Art Nouveau styles
- The Danube River provides perfect reflections and foreground interest
- Incredible value compared to other European capitals
- The city’s recent renaissance means everything is photogenic and well-maintained
My Go-To Budapest Photography Locations:
- Fisherman’s Bastion at Sunrise: I’ve discovered that the best shots here come from the lower levels, not the main viewpoint. The early morning light hits the Parliament building perfectly.
- Parliament Building from Buda: Across the river, you’ll find multiple spots where I’ve captured incredible shots of this Gothic masterpiece. The blue hour is particularly magical.
- Ruin Bars in District VII: These unique venues in abandoned buildings offer incredible texture and atmosphere for night photography. I’ve found that Szimpla Kert is the most photogenic.
- Gellért Hill: The panoramic views from here are worth the climb. I’ve captured some of my best cityscapes during the golden hour from various viewpoints along the path.
Insights from My Budapest Photography Adventures:
- Spring and autumn offer the best light and comfortable temperatures
- The city is very walkable, but bring comfortable shoes for the hills
- Don’t miss the thermal baths – they offer unique photo opportunities
- The local food scene is incredible and very photogenic
Technical Tips for Budapest:
- Use a wide-angle lens (16-35mm) for cityscapes
- Bring a neutral density filter for long exposures of the Danube
- Shoot in aperture priority mode (f/8-f/11) for maximum depth of field
- Consider a telephoto lens (70-200mm) for compressing the Parliament building
5. Amsterdam, Netherlands – Canals, Colors, and Dutch Charm
I’ve lost count of how many times I’ve visited Amsterdam, yet I always discover new photographic opportunities. The city’s unique combination of historic architecture, beautiful canals, and vibrant culture makes it a photographer’s paradise. What I love most is how Amsterdam changes with the seasons – each visit offers completely different photographic possibilities.
Why Amsterdam Never Disappoints Photographers:
- Iconic canal houses that look incredible in every light
- The interplay of water and architecture creates endless compositions
- Beautiful bridges that frame scenes perfectly
- World-class museums and cultural sites for variety
My Favorite Amsterdam Photography Spots:
- Nyhavn at Sunrise: Yes, it’s the most photographed spot in Amsterdam, but there’s a reason. I’ve found that arriving by 5 AM gives you about an hour of completely empty canal shots.
- Anne Frank House Area: The surrounding canals and buildings offer incredible atmosphere. I’ve captured some of my best street scenes here during the blue hour.
- Jordaan District: This charming neighborhood is where I find my most authentic Amsterdam shots. The narrow canals and beautiful houses are perfect for intimate compositions.
- A’DAM Lookout: For incredible city panoramas, this modern observation deck offers views that I’ve found are worth the admission price, especially during sunset.
What I’ve Learned from Shooting Amsterdam:
- Visit during April-May for beautiful tulip season and comfortable weather
- The canals look completely different in each season – winter snow creates magical scenes
- Early morning is essential for avoiding crowds in popular spots
- Don’t forget to explore the less-visited neighborhoods like De Pijp
Camera Settings That Work for Amsterdam:
- Canal scenes: f/8-f/11 for sharpness throughout
- Street photography: f/4-f/5.6 for subject separation
- Blue hour: ISO 400-800, 2-4 second exposures
- Consider using a polarizing filter to control water reflections
Also Read: Sony A6500 vs Sony A6300
6. Lisbon, Portugal – Golden Light and Coastal Charm
I discovered Lisbon’s photographic potential during a spontaneous trip that was supposed to be just a stopover. Three days turned into a week, and I left with thousands of images and a promise to return. Lisbon’s unique combination of historic charm, coastal beauty, and vibrant culture makes it one of Europe’s most photogenic cities.
Why Lisbon Captivates Photographers:
- Beautiful golden light that inspired the term “Lisbon light”
- Unique architecture with colorful tiles and facades
- Seven hills providing endless vantage points
- Coastal location offering both city and seascape opportunities
My Secret Lisbon Photography Locations:
- Alfama District at Dawn: This historic neighborhood is where I’ve captured my most authentic Lisbon shots. The narrow streets and morning light create magical conditions.
- Tram 28 Route: I’ve spent entire days following this iconic tram, discovering new photo opportunities around every corner. The best shots come from the Graça area.
- Belém Tower at Sunset: This historic monument looks incredible in the golden hour light. I’ve found that shooting from across the river gives the best compositions.
- Sintra (Day Trip): Just 30 minutes from Lisbon, this fairytale town is worth the trip. I’ve captured some of my most magical images here, especially at Pena Palace.
Insights from My Lisbon Photography Experience:
- Spring and autumn offer the best light and comfortable temperatures
- The city is very hilly – wear comfortable shoes and be prepared to climb
- The golden hour light is particularly beautiful here, lasting longer than in many European cities
- Don’t miss the coastal areas – they offer completely different photographic opportunities
Technical Considerations for Lisbon:
- Wide-angle lenses (16-35mm) are perfect for the narrow streets
- Bring a neutral density filter for long exposures of the coast
- Consider a telephoto lens (70-200mm) for compressing the colorful facades
- Shoot in RAW to capture the full dynamic range of the tile work
7. Rome, Italy – Eternal City, Timeless Beauty
I’ll never forget my first photography trip to Rome. Standing in front of the Colosseum at dawn, I felt like I was stepping back in time. Rome isn’t just a city – it’s a living museum where every corner tells a story spanning thousands of years. What I love most about photographing Rome is how it combines ancient history with vibrant modern life.
Why Rome is a Photographer’s Paradise:
- Ancient ruins that look incredible in every light
- Beautiful Baroque architecture and fountains
- Vibrant street life and authentic Italian culture
- The golden light that inspired countless artists throughout history
My Go-To Rome Photography Spots:
- Colosseum at Dawn: I’ve discovered that arriving by 5:30 AM gives you about an hour of completely empty shots. The first light hitting the ancient stone is breathtaking.
- Trevi Fountain at Blue Hour: Yes, it’s crowded during the day, but I’ve found that visiting during the early morning hours gives you incredible shots with minimal people.
- Roman Forum: This archaeological wonder is where I’ve captured some of my most atmospheric shots. The golden hour light here is particularly magical.
- Trastevere District: This charming neighborhood is where I find my most authentic Rome shots. The narrow streets and local life offer incredible street photography opportunities.
What I’ve Learned from Shooting Rome:
- Visit during April-May or September-October for the best light and comfortable temperatures
- Early morning is essential for avoiding crowds at major attractions
- The city is very walkable, but bring comfortable shoes for the cobblestone streets
- Don’t forget to look for the small details – doorways, fountains, and local life
Camera Settings That Work for Rome:
- Ancient ruins: f/8-f/11 for maximum sharpness
- Street scenes: f/4-f/5.6 for subject separation
- Blue hour: ISO 400-800, 2-5 second exposures
- Consider using a polarizing filter for fountain shots
8. Barcelona, Spain – Gaudí’s Masterpiece and Mediterranean Magic
I discovered Barcelona’s photographic potential during a summer trip that was supposed to focus on beach relaxation. Instead, I found myself constantly reaching for my camera, captivated by the city’s unique architecture and vibrant energy. Barcelona isn’t just photogenic – it’s a visual feast where modernist masterpieces meet Mediterranean charm.
Why Barcelona Inspires Photographers:
- Unique Gaudí architecture found nowhere else in the world
- Beautiful Mediterranean light that enhances colors
- Vibrant street life and culture
- Perfect combination of urban and coastal photography opportunities
My Favorite Barcelona Photography Locations:
- Sagrada Família at Sunrise: I’ve found that arriving by 6 AM gives you incredible shots of this masterpiece without the crowds. The morning light hitting the stained glass is magical.
- Park Güell: This Gaudí masterpiece offers endless compositions. I’ve discovered that the less-visited areas of the park provide the most unique shots.
- Gothic Quarter: The narrow medieval streets are perfect for street photography. I love shooting here in the late afternoon when the light filters through the buildings.
- Barceloneta Beach: For a completely different vibe, the beach area offers incredible sunset shots and vibrant street life.
Insights from My Barcelona Photography Experience:
- Spring and autumn offer the best light and comfortable temperatures
- The city is very walkable, but bring comfortable shoes for the hills
- The golden hour light is particularly beautiful here, especially for architecture
- Don’t miss the local markets – they offer incredible street photography opportunities
Technical Considerations for Barcelona:
- Wide-angle lenses (16-35mm) are perfect for Gaudí’s architecture
- Bring a neutral density filter for long exposures at the beach
- Consider a telephoto lens (70-200mm) for architectural details
- Shoot in RAW to capture the vibrant colors of Gaudí’s mosaics
9. Copenhagen, Denmark – Nordic Charm and Colorful Canals
I discovered Copenhagen’s photographic potential during a winter trip when I was expecting gray, dreary weather. Instead, I found a city that transforms into a magical wonderland in the cold, with colorful buildings and cozy atmosphere that looks incredible through a lens. Copenhagen’s unique blend of historic charm and modern design makes it a photographer’s dream.
Why Copenhagen Captivates Photographers:
- Beautiful colorful buildings that look incredible in every light
- Unique Nordic design aesthetic
- Perfect combination of historic and modern architecture
- Cozy atmosphere that translates beautifully to photographs
My Secret Copenhagen Photography Locations:
- Nyhavn at Dawn: Yes, it’s the most photographed spot in Copenhagen, but there’s a reason. I’ve found that arriving by 5 AM gives you about an hour of completely empty canal shots.
- Tivoli Gardens: This historic amusement park is incredibly photogenic, especially during the blue hour. I’ve captured some of my most magical shots here.
- Christianshavn Canal: This less-visited area offers beautiful compositions with colorful houses and bridge reflections. I’ve found it’s perfect for intimate cityscapes.
- Rosenborg Castle: The surrounding gardens and castle offer incredible architecture and nature photography opportunities.
What I’ve Learned from Shooting Copenhagen:
- Visit during May-September for the best light and comfortable weather
- Winter visits offer unique atmosphere and fewer crowds
- The city is very walkable and bike-friendly
- Don’t miss the local cafes – they offer incredible cozy atmosphere shots
Camera Settings That Work for Copenhagen:
- Canal scenes: f/8-f/11 for sharpness throughout
- Street photography: f/4-f/5.6 for subject separation
- Blue hour: ISO 400-800, 2-4 second exposures
- Consider using a polarizing filter to control water reflections
Also Read: Leica M11 vs Sony A7R V
10. Bruges, Belgium – Medieval Magic and Timeless Beauty
I discovered Bruges during a day trip from Brussels that turned into a three-day photography marathon. This medieval city looks like it was designed specifically for photographers, with its canals, cobblestone streets, and incredibly preserved architecture. What I love most about Bruges is how every corner looks like a postcard come to life.
Why Bruges is a Photographer’s Dream:
- Incredible medieval architecture that’s perfectly preserved
- Beautiful canals that create endless reflection opportunities
- Cobblestone streets that add character to every shot
- The city looks incredible in every season and light
My Go-To Bruges Photography Spots:
- Market Square at Dawn: The historic square with its belfry is breathtaking in the early morning light. I’ve found that arriving by 5:30 AM gives you incredible empty shots.
- Rozenhoedkaai: This canal viewpoint is perhaps the most photographed spot in Bruges, and for good reason. I’ve captured some of my best reflection shots here during the blue hour.
- Minnewater Park: The “Lake of Love” offers beautiful nature and architecture combinations. I’ve found it’s perfect for intimate landscape shots.
- Begijnhof: This historic convent area offers peaceful, beautiful compositions that I’ve found are perfect for quiet, contemplative shots.
Insights from My Bruges Photography Experience:
- Visit during April-May or September-October for the best light and comfortable temperatures
- Winter visits offer magical atmosphere with fewer crowds
- The city is very compact and walkable
- Don’t miss the local chocolate shops – they offer incredible detail shots
Technical Considerations for Bruges:
- Wide-angle lenses (16-35mm) are perfect for the medieval streets
- Bring a neutral density filter for long exposures of the canals
- Consider a telephoto lens (70-200mm) for compressing the architecture
- Shoot in RAW to capture the full dynamic range of the historic buildings
Pro Photography Tips for European City Adventures
After years of photographing European cities, I’ve learned some valuable lessons that I’m excited to share with you. These tips have helped me capture incredible images and avoid common pitfalls that many photographers encounter.
Timing is Everything
I’ve discovered that the best light for European city photography is typically during the golden hour (first hour after sunrise, last hour before sunset) and blue hour (just after sunset). During these times, the light is soft and warm, creating beautiful shadows and highlights that make architecture look incredible.
My Personal Schedule:
- Summer: 4:30 AM – 7:00 AM for sunrise, 7:00 PM – 9:30 PM for sunset
- Spring/Autumn: 5:30 AM – 8:00 AM for sunrise, 5:00 PM – 7:30 PM for sunset
- Winter: 7:00 AM – 9:00 AM for sunrise, 3:00 PM – 5:00 PM for sunset
Equipment Essentials
Through trial and error, I’ve learned that having the right equipment makes a huge difference in European city photography. Here’s what I never leave home without:
My Go-To Gear:
- Camera Body: A full-frame camera with good low-light performance
- Lenses: 16-35mm f/2.8 (wide-angle), 24-70mm f/2.8 (versatile zoom), 70-200mm f/2.8 (telephoto)
- Filters: Circular polarizer, neutral density (ND) filters, graduated ND filters
- Support: Carbon fiber tripod (lightweight but sturdy)
- Accessories: Extra batteries, memory cards, lens cleaning kit, camera bag
Composition Techniques That Work
I’ve developed several composition techniques that consistently help me create compelling European city photographs:
My Favorite Approaches:
- Leading Lines: Use streets, canals, and architectural elements to lead the viewer’s eye through the image
- Framing: Look for natural frames like arches, doorways, and bridges to add depth to your shots
- Reflections: Water surfaces in European cities create incredible reflection opportunities
- Scale: Include people in your architecture shots to show the immense scale of European buildings
Post-Processing Secrets
I’ve spent countless hours developing post-processing techniques that help my European city photos stand out:
My Lightroom/Photoshop Workflow:
- Basic Adjustments: Exposure, contrast, highlights, shadows
- Color Enhancement: Boost vibrance and saturation slightly
- Sharpening: Apply selective sharpening to key areas
- Noise Reduction: Clean up high-ISO shots
- Final Touches: Vignette, radial filters, and local adjustments
FAQ: European City Photography
What’s the best time of year to photograph European cities?
I’ve found that spring (April-May) and autumn (September-October) offer the best combination of beautiful light, comfortable temperatures, and fewer crowds. However, winter can provide magical atmosphere and unique shooting opportunities, especially in cities like Prague and Bruges where snow transforms the landscape.
Do I need special permissions for photography in European cities?
Generally, you don’t need special permissions for personal photography in public spaces. However, I’ve learned that some locations (like certain museums, churches, and private properties) may have restrictions. Always check local regulations and be respectful of private property.
What camera settings work best for European city photography?
I typically use aperture priority mode (A/Av) with settings between f/8-f/11 for maximum depth of field in architectural shots. For street photography, I prefer f/4-f/5.6 to separate subjects from backgrounds. During blue hour, I use manual mode with longer exposures (2-5 seconds) and ISO 400-800.
How do I avoid crowds in popular European photography locations?
The secret is timing! I’ve discovered that arriving at least 1-2 hours before sunrise gives you the best chance of empty shots at popular locations. Additionally, visiting during shoulder seasons and weekdays rather than weekends significantly reduces crowds.
What’s the best way to carry photography equipment while traveling European cities?
I’ve learned to pack light but smart. I use a comfortable camera backpack that doesn’t scream “expensive equipment,” and I carry only what I need for each day’s shoot. A versatile zoom lens (24-70mm) is often all I need for a day of city photography.
Save This Guide for Your Next European Adventure
I hope this comprehensive guide helps you capture incredible images during your European photography adventures. I’ll be updating this guide regularly with new tips, locations, and techniques as I continue exploring Europe’s most photogenic cities. Be sure to bookmark this page and check back before your next trip!
Ready to take your European city photography to the next level? Check out my [Photography Workshops] page for upcoming tours and personalized coaching sessions. I’d love to help you capture the magic of Europe through your lens!
This guide was last updated in May 2026 and reflects my personal photography experiences across 50+ European cities. All photography tips and locations are based on my actual visits and shooting experiences.