After editing hundreds of photos over the years, I’ve learned that choosing the wrong file format can cost you hours of rework. I’ve made the mistake of saving complex edits as JPEGs, only to realize I couldn’t make further adjustments without quality loss. Let me walk you through exactly when to use TIFF, PSD, and JPEG so you can avoid those same frustrations.
The question of TIFF vs PSD vs JPEG which file format to use when saving edited photos comes up constantly in photography forums. And for good reason – each format serves a different purpose in your workflow. Use the wrong one, and you might lose layers, degrade image quality, or waste storage space on unnecessarily large files.
In this guide, I’ll break down the technical differences between these three formats and give you practical recommendations for every stage of your editing workflow. You’ll learn which format to use for working files, print delivery, web export, and long-term archival.
Quick Comparison: TIFF vs PSD vs JPEG
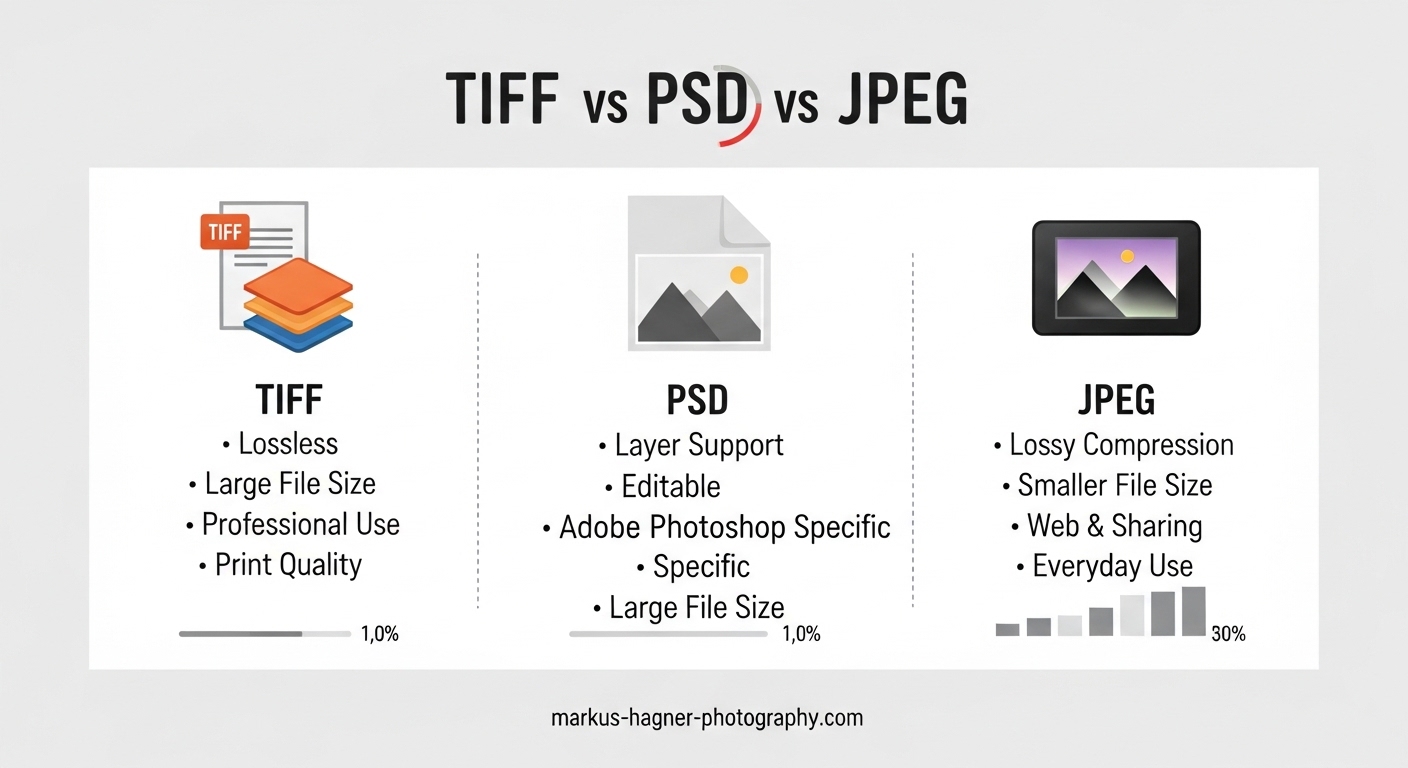
Here’s the short answer most photographers need. TIFF offers the best balance of quality and compatibility for most professional workflows. PSD works great for active Photoshop projects with complex layers. JPEG should only be your final export format for web and sharing.
Let me break down the key differences in a quick reference format:
TIFF (Tagged Image File Format)
- Compression: Lossless (no quality loss)
- Layer support: Yes (optional)
- File size: Large (2-5x JPEG)
- Best for: Print, archival, client delivery, non-Adobe workflows
- Compatibility: Universal
PSD (Photoshop Document)
- Compression: Lossless
- Layer support: Yes (full support)
- File size: Large (similar to TIFF)
- Best for: Active editing projects, complex composites
- Compatibility: Adobe products primarily
- Limitation: 2GB maximum file size
JPEG (Joint Photographic Experts Group)
- Compression: Lossy (discards data)
- Layer support: No
- File size: Small
- Best for: Web, social media, email, quick sharing
- Compatibility: Universal
The main factor that should drive your decision is whether you need to preserve all image data. If you’re still editing or plan to make future adjustments, avoid JPEG. Between TIFF and PSD, your choice depends more on software preferences and file size considerations.
Understanding Each File Format
To make informed decisions about your workflow, you need to understand what each format actually does to your image data. I’ll explain the technical details in practical terms.
What Is TIFF (Tagged Image File Format)
TIFF has been the industry standard for high-quality image storage since the 1980s. It uses lossless compression, meaning every single pixel of data from your original image gets preserved. No information is discarded during the save process.
When you save a photo as TIFF, you have several options that affect the final file:
Compression Settings
- LZW compression: Reduces file size without any quality loss (recommended)
- ZIP compression: Similar to LZW, works well for 16-bit files
- No compression: Largest file size, fastest to open
- JPEG compression: Available in TIFF but defeats the purpose – avoid this
Layer Support
TIFF files can save layers, though not all programs read them the same way Photoshop does. I typically save layered TIFFs when I need maximum compatibility but still want to preserve my edits. Most software can open a layered TIFF, even if they flatten it automatically.
Bit Depth Options
TIFF supports both 8-bit and 16-bit color depth. For most workflows, 8-bit is sufficient and keeps file sizes manageable. But if you’re doing heavy color grading or working with high dynamic range images, 16-bit TIFF gives you more headroom before banding appears in gradients.
When TIFF Shines
I use TIFF for three main scenarios: delivering files to print labs (they almost universally accept TIFF), archiving completed projects I might need to revisit, and sharing editable files with photographers who don’t use Adobe products.
What Is PSD (Photoshop Document)
PSD is Adobe’s native format for Photoshop. It preserves everything about your project – layers, masks, adjustment layers, smart objects, text layers, and layer effects. If you’re actively working on a complex edit in Photoshop, PSD is the natural choice.
Full Feature Preservation
Unlike TIFF, which flattens some Photoshop-specific features, PSD saves everything exactly as you created it. Smart filters, layer styles, and non-destructive adjustments all remain fully editable when you reopen the file.
The 2GB Limitation
Here’s a critical detail many photographers discover the hard way: PSD files cannot exceed 2GB. With modern high-resolution cameras (40+ megapixels) and complex layered edits, you can easily hit this ceiling. I’ve had panorama composites and focus stacks fail to save because they exceeded the limit.
Adobe created PSB (Photoshop Big) format specifically for files larger than 2GB. PSB supports files up to 300,000 pixels in any dimension and essentially unlimited file sizes. If you work with massive files, enable PSB support in your Photoshop preferences.
Compatibility Considerations
PSD files work seamlessly across Adobe products (Photoshop, Lightroom, Bridge). However, other software may not read layered PSDs correctly or at all. Some programs only open the flattened composite layer, losing access to your individual layers.
When PSD Makes Sense
I save as PSD when I’m in the middle of a complex Photoshop project with multiple adjustment layers, smart objects, or compositing work. The format is purpose-built for this workflow. But once I finish a project, I often convert to TIFF for archival since it offers broader compatibility.
What Is JPEG (Joint Photographic Experts Group)
JPEG is the most widely compatible image format, but it comes with a significant tradeoff: lossy compression. Every time you save a JPEG, some image data gets permanently discarded. This makes JPEG files small but unsuitable for editing workflows.
How Lossy Compression Works
JPEG compression analyzes your image and throws away color information the human eye doesn’t easily perceive. It’s clever about this – the compression algorithm exploits how our eyes are more sensitive to brightness than color variations.
The problem emerges when you edit and re-save a JPEG. Each save applies compression again, compounding the quality loss. After 3-4 save cycles, you’ll start seeing compression artifacts, especially in areas with smooth gradients or fine detail.
Quality Settings Matter
Most software lets you choose a JPEG quality level from 1-12 or 0-100%. For web use, I recommend quality 80-85% (or 10-11 on the 1-12 scale). This keeps file sizes reasonable while maintaining quality that’s virtually indistinguishable from the original for most viewers.
At quality 95% and above, JPEG files approach the quality of 8-bit TIFF for most practical purposes. The main difference is you still can’t edit them non-destructively – layers are flattened, and any re-save adds more compression.
No Layer Support
JPEG cannot save layers. When you save a multi-layer file as JPEG, everything gets flattened into a single layer. You lose access to individual adjustments, masks, and any editing flexibility.
When JPEG Is the Right Choice
Use JPEG for your final export when the image is complete and you need to share it. Web galleries, social media, email attachments, and client proofs all benefit from JPEG’s small file size and universal compatibility. Just make sure you keep your layered source file (TIFF or PSD) for any future edits.
When to Use Each Format
Now that you understand the technical differences, let me give you specific scenarios for each format. This is where the abstract becomes practical.
When to Use TIFF
Print Delivery
Professional print labs almost universally accept TIFF files. The lossless compression ensures your print quality matches what you see on screen. I send TIFF files to labs for gallery prints, albums, and any work where quality matters more than file size.
Archival Storage
For photos I want to preserve long-term, TIFF is my go-to format. The combination of lossless compression and universal compatibility means my files will be readable decades from now, regardless of which software is available.
Client Delivery for Editing
When clients need editable files (graphic designers, other photographers, publications), I deliver layered TIFFs. They get full access to my edits, but they’re not locked into Adobe software to open the files.
Lightroom External Editing
If you use Lightroom and send images to external editors like Photoshop or Affinity Photo, TIFF is often the best intermediate format. Lightroom can write TIFF files with all your raw adjustments baked in, and the external editor can return a TIFF with layers intact.
When to Use PSD
Active Complex Projects
When I’m working on a composite, focus stack, or any project with many layers and adjustments, PSD is my working format. The full feature support means I don’t lose anything when I save and reopen the file.
Photoshop-Specific Features
Smart objects with embedded raw files, complex layer effects, 3D layers, and other Photoshop-specific features all require PSD for full preservation. If your workflow depends on these capabilities, PSD is the only option.
Integration with Adobe Products
PSD files work seamlessly across Adobe’s ecosystem. Lightroom catalogs can reference PSD files, and Adobe Bridge previews them correctly. If you’re fully invested in Adobe software, PSD fits naturally into your workflow.
Beware the 2GB Limit
Monitor your file sizes if you work with high-resolution images and complex edits. Once you approach 2GB, switch to PSB or consider flattening some layers to reduce file size.
When to Use JPEG
Web Publishing
For website images, JPEG is usually the best choice. The small file size means faster page loads, and modern quality settings produce images that look excellent on screens. I export web JPEGs at 80-85% quality.
Social Media
Social platforms compress uploaded images regardless of your format. Starting with a high-quality JPEG minimizes additional quality loss from platform compression. Plus, smaller files upload faster.
Email and Quick Sharing
When you need to send someone an image quickly, JPEG keeps attachments manageable. Most email providers have attachment size limits that TIFF files easily exceed.
Client Proofs
For proofing galleries where clients select their final images, watermarked JPEGs work well. They’re fast to upload, easy to view on any device, and show the essential quality without the full-resolution file.
Recommended Photo Editing Workflow
After years of refining my process, here’s the workflow I recommend for managing file formats throughout editing:
Step 1: Import and Initial Editing
Keep your raw files untouched. Make initial adjustments in Lightroom or your preferred raw processor. These edits stay non-destructive in the catalog.
Step 2: Advanced Editing
When you need pixel-level editing in Photoshop, export from Lightroom as either TIFF or PSD. I use PSD for complex projects with many layers, and TIFF for simpler edits where I want maximum compatibility.
Step 3: Working Files
Save your working files in their native format (PSD for Photoshop projects, TIFF for everything else). Keep these files indefinitely if storage allows. They’re your insurance policy for future re-edits.
Step 4: Archival Strategy
For long-term storage, convert finished PSD files to layered TIFF. This ensures broader compatibility as software evolves. Keep your original raw files alongside the edited versions.
Step 5: Export and Delivery
Export final images as JPEG for web and sharing, TIFF for print and client delivery. Match the format to the use case rather than trying to use one format for everything.
Storage Considerations
With high-resolution cameras, storage adds up quickly. A 45-megapixel raw file plus a layered TIFF plus a JPEG export can easily exceed 500MB per image. Plan your storage accordingly, and consider whether every image needs a layered archive file or if some can be archived as flattened TIFFs or high-quality JPEGs.
Frequently Asked Questions
What is the best format to save edited photos?
TIFF is the best format for saving edited photos when you need to preserve full quality and editing flexibility. It offers lossless compression, layer support, and universal compatibility. For final exports to web or sharing, save as high-quality JPEG after your TIFF or PSD is complete.
Is it better to save as TIFF or PSD?
TIFF is slightly better for most photographers because it offers the same quality and layer support as PSD but with broader software compatibility. Use PSD when you need Photoshop-specific features like smart objects with embedded raw files, or when working on complex projects within Adobe’s ecosystem. Remember that PSD has a 2GB file size limit.
Should I save photos as JPEG or TIFF?
Save as TIFF for working files, print delivery, and archival because it preserves all image data with lossless compression. Save as JPEG only for final exports destined for web, social media, or email sharing. Never use JPEG as your working format if you plan to make further edits.
What is the best file format for editing photos?
PSD or TIFF are the best formats for editing photos because both support layers and use lossless compression. PSD works best for complex Photoshop projects with smart objects and adjustment layers. TIFF offers better compatibility across different software while maintaining full editing capability.
Conclusion
The question of TIFF vs PSD vs JPEG which file format to use when saving edited photos doesn’t have a single answer. Each format serves a specific purpose in your workflow. TIFF gives you the best combination of quality, compatibility, and flexibility for most professional work. PSD excels for active Photoshop projects that need full feature preservation. JPEG is your export format for sharing and web use.
My recommendation: Use PSD or TIFF for all working files and archival storage. Convert to JPEG only at the final export stage. This approach preserves your editing flexibility while keeping your delivery files optimized for their intended use.
The key is matching the format to the stage of your workflow. Don’t compromise on quality for working files just to save storage space – that’s a tradeoff you’ll regret when you need to make changes later. Invest in adequate storage and use the right format for each purpose.