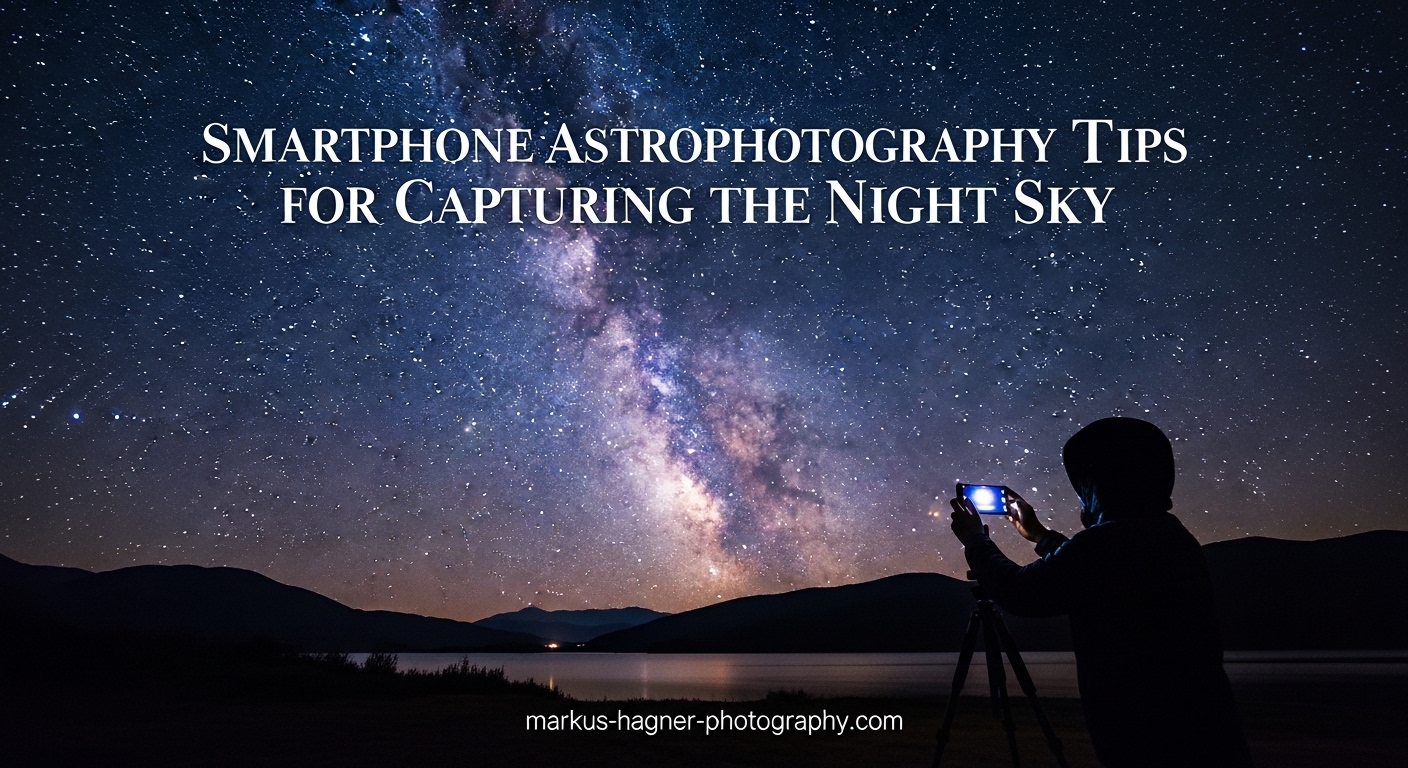
Imagine capturing the Milky Way stretching across a dark sky, or the Moon’s cratered surface in stunning detail, using nothing but the smartphone in your pocket. Smartphone astrophotography has revolutionized how we document and connect with the night sky, making what was once exclusive to professional astronomers with expensive equipment now accessible to anyone with a modern smartphone.
The good news is that today’s smartphones have remarkably capable cameras. With larger sensors, advanced computational photography, and sophisticated night modes, you can capture breathtaking images of celestial objects that would have been impossible just a few years ago. Whether you’re a complete beginner or an intermediate photographer looking to expand your skills, this comprehensive guide will walk you through everything you need to know to capture stunning night sky photos with your smartphone.
Smartphone astrophotography democratizes astronomy by allowing anyone with a smartphone to capture and share the night sky. From photographing the International Space Station passing overhead to creating beautiful star trail images, the possibilities are endless. In this guide, we’ll cover essential equipment, camera settings, best targets to photograph, and post-processing techniques that will help you create professional-looking night sky images.
Essential Equipment for Smartphone Astrophotography
Why a Tripod is Essential
The single most important piece of equipment for smartphone astrophotography is a stable tripod. When photographing stars, the Moon, or the Milky Way, you’ll need to use long exposure times ranging from several seconds to 30 seconds or more. Any movement during the exposure will result in blurry, unusable images.
A sturdy tripod keeps your smartphone perfectly still throughout the entire exposure. Look for a tripod with a phone mount or adapter that can securely hold your device. Budget-friendly options work well, but ensure the tripod is stable enough to withstand light breezes. Some photographers use weighted bags or hang weights from the tripod center hook for additional stability in windy conditions.
Beyond a tripod, consider using a remote shutter release or your phone’s timer function. Even pressing the shutter button can introduce subtle vibrations that impact image clarity, especially with longer exposures. A two-second or ten-second timer eliminates this problem entirely.
Best Apps for Astrophotography
While your phone’s built-in camera app offers basic night mode functionality, dedicated astrophotography apps provide significantly more control over essential settings. These apps allow you to manually adjust ISO, shutter speed, focus, white balance, and other parameters that dramatically affect your final images.
For iPhone users, NightCap Pro is widely considered the gold standard for smartphone astrophotography. It offers various modes specifically designed for different celestial targets, including stars, star trails, and the Moon. The app also supports long exposure times that exceed what the native camera app allows.
Android users have excellent options like Camera FV-5, which provides DSLR-like manual controls including RAW capture, adjustable ISO, shutter speed, and focus. ProCam X and Open Camera are also popular choices that give you complete control over your phone’s camera settings.
Many of these apps also support RAW format capture, which preserves much more image data than JPEG files. RAW images give you significantly more flexibility during post-processing, allowing you to recover highlights, shadows, and details that would be lost in compressed formats.
Camera Settings Guide
Understanding Exposure
The three fundamental elements of exposure in astrophotography are ISO, shutter speed, and aperture. Understanding how these settings work together will help you capture the best possible night sky images with your smartphone.
ISO controls your camera sensor’s sensitivity to light. Higher ISO values (like 800, 1600, or 3200) make the sensor more sensitive, allowing you to capture dimmer stars and nebulae. However, higher ISO also introduces more digital noise or grain into your images. For most smartphone astrophotography, start with ISO 100-800 and adjust based on your results.
Shutter speed determines how long your camera’s sensor is exposed to light. Longer exposures (10-30 seconds) capture more light, revealing faint stars and the Milky Way structure. The tradeoff is that longer exposures require a perfectly stable setup and will show star trails (which may be desirable for certain shots). Most smartphones can handle exposures up to 30 seconds in dedicated apps.
Aperture refers to the opening in your lens that lets light in. Lower f-numbers (like f/1.8 or f/2.8) mean larger openings, which gather more light. Most smartphone cameras have fixed apertures, typically around f/1.8 to f/2.2, which is excellent for astrophotography.
How to Focus on Stars
Achieving sharp focus on stars is one of the most challenging aspects of smartphone astrophotography, but it’s crucial for capturing crisp, detailed images. Your phone’s autofocus system typically struggles in low light, so manual focus is essential.
The first step is to switch your camera app to manual focus mode if available. Then, locate a bright star or planet in your frame and tap on it to initiate autofocus. Once the camera has focused on that point, lock the focus to prevent the camera from hunting for focus during the exposure. If your app offers an infinity focus option, this is ideal for astrophotography as it ensures distant objects remain sharp.
A helpful technique is to zoom in on a bright star at maximum digital zoom (around 10x), then manually adjust focus until the star appears as a tiny, sharp point rather than a fuzzy blob. Once you’ve found the sweet spot, lock the focus and zoom back out to your desired composition. This method works particularly well for ensuring your stars are pin-sharp.
Quick Settings Reference
Here’s a quick reference table for common smartphone astrophotography scenarios:
| Target | ISO | Shutter Speed | Focus |
|---|---|---|---|
| Stars (point) | 100-400 | 15-30 seconds | Infinity |
| Milky Way | 800-1600 | 15-25 seconds | Infinity |
| Moon | 100-400 | 1/125 – 1/500 second | Auto/Lock |
| Star Trails | 100 | Multiple 30-second exposures | Infinity |
Remember, these settings are starting points. Light pollution levels, atmospheric conditions, and your specific phone model will all influence the optimal settings. Always review your images immediately and adjust accordingly.
Best Celestial Targets to Photograph
The Moon
The Moon is perhaps the easiest and most rewarding celestial target for smartphone astrophotography. It’s bright, large, and visible on most nights, making it perfect for practicing your night sky photography skills.
For Moon photography, you don’t need the extremely long exposures required for stars. Instead, use faster shutter speeds (between 1/125 and 1/500 second) to capture the Moon’s surface detail without overexposing it. A lower ISO (100-400) will produce the sharpest results. Using a telescope or telephoto lens attachment will dramatically improve your Moon images by providing more magnification.
Milky Way
Photographing the Milky Way is the ultimate goal for many smartphone astrophotographers. Our galaxy’s core creates a stunning band of light across the sky, but capturing it requires dark skies, proper planning, and the right technique.
The key to Milky Way photography is finding a location with minimal light pollution. Use light pollution maps to identify dark sky areas near you. The Milky Way is typically visible from March through October in the Northern Hemisphere, with the galactic core appearing in the southern sky during summer months.
For the best results, set your ISO to 800-1600, use a 15-25 second exposure, and ensure your focus is locked at infinity. Use the widest lens available on your phone (usually the main wide-angle lens) to capture as much of the Milky Way as possible. Remember that longer exposures will begin to show star movement, so stay within the 30-second limit.
Star Trails
Star trail photography creates beautiful circular patterns that show the Earth’s rotation over time. This technique involves taking multiple long exposures and combining them to show the apparent movement of stars across the sky.
To capture star trails, use a lower ISO (100) and take multiple 30-second exposures in succession. Some dedicated apps can automate this process, automatically capturing frame after frame. Later, you can stack these images using software or apps to create the final star trail image.
Step-by-Step Shooting Process
Planning Your Shoot
Successful astrophotography begins with proper planning. Check the weather forecast to ensure clear skies—thin clouds can actually add atmosphere to your shots, but heavy overcast will block celestial objects entirely. Use apps like Clear Outside or Weather.gov to check cloud cover and humidity levels.
Understanding the Moon phase is crucial. A bright Moon can wash out dim stars and the Milky Way, so plan your shoots around new moon or when the Moon has set. Moonrise and moonset times are easily found online and in astronomy apps.
Scout your location during daylight if possible. Identify interesting foreground elements like trees, mountains, or bodies of water that can add depth and context to your night sky images. At night, use red flashlight apps to preserve your night vision while setting up your equipment.
The Capture Process
Once you’ve arrived at your location and allowed your eyes to adjust to the darkness, set up your tripod and phone mount. Make sure everything is stable and level. Connect your remote shutter release or set your timer.
Begin by composing your shot using your phone’s screen. Use the widest angle lens available to capture more of the sky. If you’re photographing the Milky Way, frame the galactic core as your focal point. For star trails, position Polaris (the North Star) slightly off-center to create a beautiful circular pattern.
Take several test shots at various settings. Review each image carefully on your phone’s display, zooming in to check star sharpness. Adjust your focus, ISO, and exposure time based on the results. Don’t be afraid to experiment—some of the best astrophotography images come from trying unconventional settings.
Take more shots than you think you need. You can always discard images later, but you cannot recreate a perfect moment. Shooting in RAW format gives you maximum flexibility for post-processing and can help salvage images that might otherwise be unusable.
iPhone vs Android: Settings Comparison
iPhone Astrophotography Settings
iPhones offer excellent astrophotography capabilities through both the native camera app and third-party applications. The native Night Mode on iPhone 11 and later models automatically activates in low-light conditions and can produce impressive results with a tripod.
For iPhone Night Mode, mount your phone on a tripod and frame your shot. The camera will automatically detect the low light and offer extended Night Mode options (up to 30 seconds on iPhone 12 and later). Select the maximum exposure time available and let the camera capture the image.
For more control, use the ProRAW format available on iPhone 12 Pro and later. This gives you RAW file flexibility with computational photography benefits. Third-party apps like NightCap Pro offer additional features including specific star, star trail, and deep sky modes that optimize settings for different celestial targets.
Android Astrophotography Settings
Android smartphones typically offer more extensive manual control through their native camera apps compared to iPhones. Most flagship Android devices include a Pro or Manual mode with adjustable ISO, shutter speed, focus, and white balance controls.
To access these features, open your camera app and look for “Pro,” “Manual,” or “Expert” mode. Here you can adjust each setting individually. Android phones like Samsung Galaxy, Google Pixel, and OnePlus devices all support long exposures and manual controls suitable for astrophotography.
Google Pixel phones feature Astro mode, which automatically detects and captures star images with impressive results. Samsung Galaxy devices offer a dedicated Night mode that works well with their pro-grade camera systems. For the most control, apps like Camera FV-5 and ProCam X provide comprehensive manual controls that rival dedicated cameras.
Image Processing Tips
Basic Editing Steps
Post-processing is an essential part of smartphone astrophotography. Even with perfect in-camera settings, a bit of editing can dramatically improve your final images by enhancing contrast, adjusting colors, and reducing noise.
Begin by adjusting the overall exposure to ensure the sky isn’t too bright or too dark. Increase contrast to make stars pop against the background. The “whites” and “highlights” sliders help recover details in bright areas, while “shadows” and “blacks” can reveal more detail in darker regions.
White balance adjustment can significantly affect the mood of your images. Cooler temperatures (around 4000-5500K) tend to make the Milky Way appear more blue, while warmer temperatures add a more golden tone. Adjust to taste based on your personal preference and the conditions of your shoot.
Image Stacking
Image stacking is a technique used by astrophotographers to reduce noise and improve overall image quality. By combining multiple exposures of the same subject, you can create a cleaner, more detailed final image than what’s possible with a single shot.
Several apps are available for stacking astrophotography images on your smartphone. Sequator (for Windows), DeepSkyStacker (for Mac), and various mobile apps can combine multiple images automatically. The process involves taking several consecutive exposures of the same scene and feeding them into the stacking software.
The software aligns the images and averages the pixel values, which significantly reduces random noise while preserving the signal from stars and other celestial objects. The result is a cleaner, more professional-looking image with better dynamic range and less grain than a single exposure.
Common Mistakes to Avoid (2026)
Understanding common mistakes can help you avoid frustration and capture better images from the start. One of the most frequent errors is using auto focus instead of manual focus. In low-light conditions, your phone’s autofocus will struggle and may hunt repeatedly, ruining your shot. Always switch to manual focus and lock it on a bright star.
Another common mistake is shooting in locations with too much light pollution. Even moderate light pollution can wash out the Milky Way and hide all but the brightest stars. Travel to darker locations away from city lights for the best results. Light pollution maps are readily available online to help you find suitable locations.
Many beginners overlook the importance of shooting in RAW format. JPEG compression discards significant image data, limiting your editing flexibility. RAW files preserve all the captured information, allowing you to recover details in highlights and shadows during post-processing.
Finally, don’t forget to check your phone’s battery level before heading out. Long exposure shooting and screen use can drain batteries quickly, especially in cold conditions. Bring a portable charger as a backup, and keep spare batteries warm in your pocket if shooting in cold weather.
Frequently Asked Questions
How do I take photos of stars with my phone?
To take photos of stars with your phone, start by mounting your smartphone on a sturdy tripod for stability. Enable either Night Mode or Pro mode on your camera app. Set your ISO to 100-800, use a 10-30 second exposure time, and manually focus on a bright star. Lock your focus to prevent the camera from hunting during the exposure.
What settings should I use for smartphone astrophotography?
For most smartphone astrophotography, start with ISO 100-800, a shutter speed of 10-30 seconds, and set your focus to infinity. Use the widest aperture available on your phone (typically f/1.8 to f/2.8). Adjust these settings based on your results and light pollution levels in your area.
Do I need a tripod for phone night sky photos?
Yes, a tripod is essential for smartphone astrophotography. Long exposures of 10-30 seconds require complete camera stability to avoid blurry images. Even slight movements can ruin the shot, making a stable tripod absolutely necessary for quality night sky photographs.
Which apps are best for smartphone astrophotography?
Popular astrophotography apps include NightCap Pro for iOS, Camera FV-5 for Android, ProCam X, and Camera+ 2. These apps provide manual controls for ISO, shutter speed, focus, and often support RAW capture for maximum flexibility in post-processing.
Can iPhone take pictures of stars?
Yes, modern iPhones can capture stars and even the Milky Way. Use Night Mode with a tripod for automatic optimization, or use ProRAW with manual settings for more control. iPhone 12 and later models support up to 30-second exposures in Night Mode, making them capable of impressive astrophotography.
How to focus on stars with smartphone camera?
To focus on stars with your smartphone, switch to manual focus mode in your camera app. Tap on a bright star to initiate autofocus, then lock the focus once achieved. If available, use the infinity focus symbol. A helpful technique is to zoom in 10x on a bright star and manually adjust focus until it appears sharp.
Conclusion
Smartphone astrophotography opens up a fascinating world of night sky exploration, allowing you to capture the beauty of the cosmos with a device you carry every day. With the right equipment, proper settings, and some practice, you can create stunning images of stars, the Moon, the Milky Way, and even star trails.
Remember that mastery comes with practice. Start with easier targets like the Moon before progressing to the Milky Way and star trails. Pay attention to your results and learn from each shoot. Use post-processing tools to enhance your images, but also remember that the best astrophotography comes from getting it right in the camera.
The night sky is waiting for you. Grab your smartphone, find a dark spot, and start capturing the wonders above. With these tips and techniques, you’re well on your way to creating breathtaking astrophotography images that will inspire wonder in everyone who sees them.