Capturing the perfect moment in sports photography comes down to one critical camera setting: shutter speed. I’ve spent years shooting everything from high school football games to professional motorsports, and I can tell you that understanding shutter speed for sports photography is the difference between blurry disappointments and razor-sharp action shots that tell a story.
The challenge? Every sport moves at a different pace. A baseball leaving a bat travels over 100 mph, while a swimmer moves relatively slowly through water. Indoor gyms have terrible lighting compared to sunny football fields. This guide will walk you through exactly what shutter speeds work for different sports, when to break the rules for creative effect, and how to handle challenging lighting conditions.
By the end of this guide, you’ll have a complete reference for choosing the right shutter speed for any sport, practical tips I’ve learned from thousands of shots, and solutions for those frustrating low-light situations that plague sports photographers.
Understanding Shutter Speed for Sports Photography
Shutter speed controls how long your camera’s sensor is exposed to light. In sports photography, this setting determines whether a sprinter appears frozen mid-stride or as a blurred streak across your frame. The faster your subject moves, the faster your shutter speed needs to be to freeze that motion.
Here’s the baseline rule I teach every photographer: 1/1000th of a second is your starting point for most sports. This speed will freeze running athletes, thrown balls, and most action you’ll encounter. Think of it as your sports photography foundation.
The Relationship Between Shutter Speed and Motion
When you press the shutter button, your camera opens a mechanical curtain for a precise duration. At 1/1000, that curtain opens and closes in one thousandth of a second. During that brief moment, anything moving appears frozen. At 1/60, the curtain stays open sixty times longer, allowing any movement to blur across the frame.
The direction of motion matters too. A runner moving directly toward you appears to move slower than one racing across your frame from left to right. Subjects crossing your field of view require faster shutter speeds than those approaching or retreating.
The Focal Length Rule for Sports
There’s another consideration that many photographers overlook: camera shake. When shooting with telephoto lenses (which you will be for most sports), your minimum shutter speed needs to account for magnification. The rule is simple: your shutter speed should be at least the reciprocal of your focal length.
Shooting with a 200mm lens? Your minimum should be 1/200 to avoid camera shake. At 400mm, you need at least 1/400. This becomes critical when light drops and you’re tempted to slow down your shutter. Camera shake ruins more sports photos than subject motion blur.
How Shutter Speed Fits the Exposure Triangle
Shutter speed doesn’t exist in isolation. It works alongside aperture and ISO to create proper exposure. When you increase shutter speed to freeze faster action, you’re letting in less light. You must compensate by opening your aperture (lower f-number) or raising your ISO.
This trade-off becomes the central challenge of indoor and night sports photography. Indoor gyms often force you into high ISO territory (3200, 6400, or higher) just to maintain that critical 1/1000 shutter speed. The resulting noise is often preferable to motion blur.
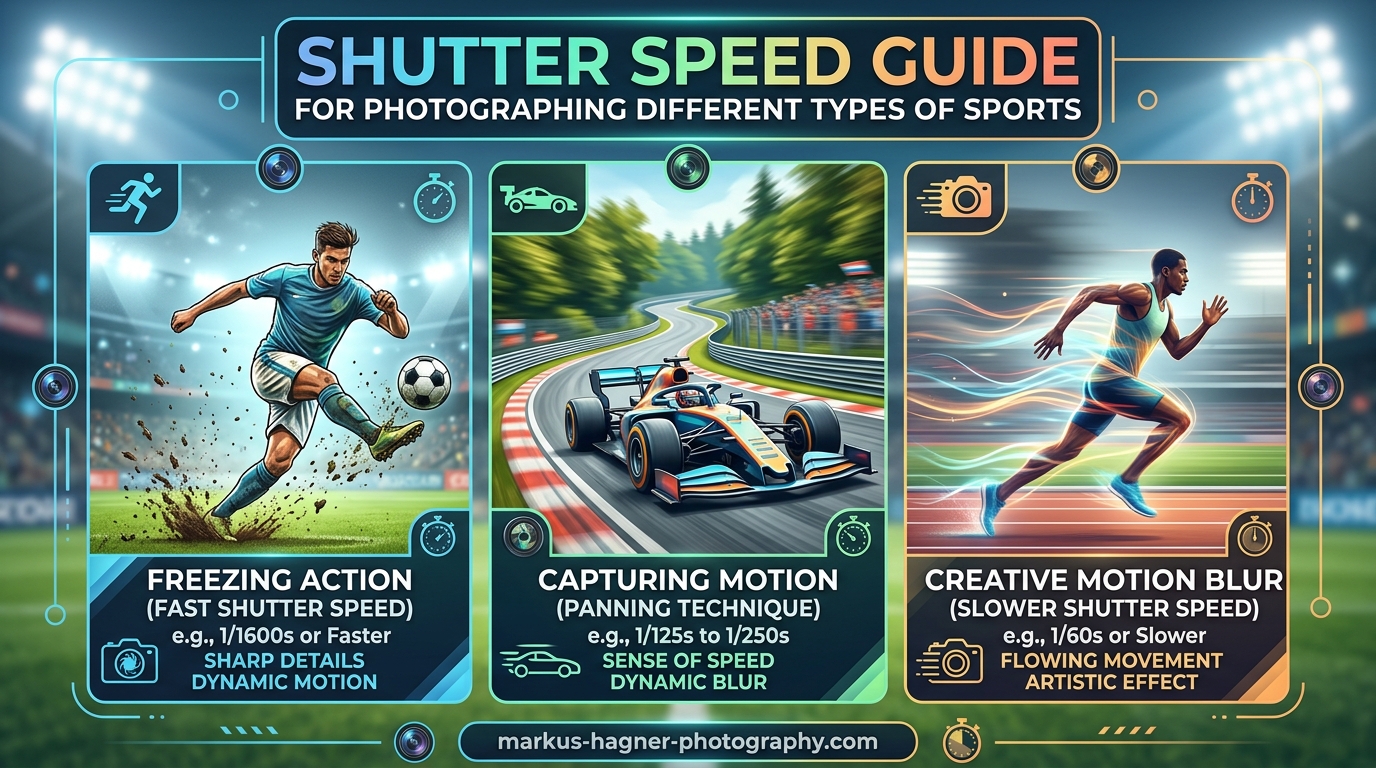
Shutter Speed Guide for Photographing Different Types of Sports
Different sports demand different approaches. A motocross bike jumping at 60 mph requires completely different settings than a golfer’s smooth swing. Let me break down specific recommendations for each sport category, along with the reasoning behind each recommendation.
Quick Reference: Shutter Speed by Sport Type
Before diving into details, here’s a quick reference I wish I had when starting out. These are the minimum shutter speeds needed to freeze action, along with recommended speeds for optimal results:
Fast-Paced Sports (1/2000 – 1/4000): Motor racing, motocross, downhill skiing, professional tennis serves, baseball pitches
Standard Sports (1/1000 – 1/2000): Football, soccer, basketball, hockey, lacrosse, rugby, track sprints
Moderate Action (1/500 – 1/1000): Baseball batting, volleyball, gymnastics, swimming, golf swings
Slower Sports (1/250 – 1/500): Fencing, martial arts stances, yoga, archery, bowling
Ball Sports Shutter Speeds
Ball sports dominate sports photography, from Friday night football to weekend soccer leagues. Each presents unique challenges based on ball speed, player movement, and typical shooting distances.
Football and Soccer
These field sports share similar requirements. Players run, cut, and jump while you shoot from the sidelines. A minimum of 1/1000 will freeze most action, but I prefer 1/1250 or 1/1600 for those explosive moments when a receiver leaps for a catch or a striker volleys at goal.
The ball itself presents the real challenge. A kicked soccer ball or thrown football moves faster than the players. If capturing the ball sharply matters to your shot, push toward 1/2000. Otherwise, slight ball blur while players remain sharp often looks natural and conveys speed.
Basketball
Indoor basketball combines fast action with challenging lighting. Gyms typically have poor, inconsistent illumination that forces compromises. I aim for 1/1000 minimum in well-lit arenas, but often settle for 1/800 in high school gyms while accepting slightly more noise from higher ISO.
Jump shots, layups, and rebounds are your key moments. Players at the peak of a jump move relatively slowly, so you can sometimes get away with 1/640 if you time your shot for maximum elevation rather than the explosive takeoff.
Baseball and Softball
Baseball offers varied action speeds. A batter swinging requires 1/800 to 1/1000 to freeze the bat. A pitched ball traveling 90+ mph demands 1/2000 or faster for complete sharpness. Field plays like tags and catches work well at 1/1000.
The beauty of baseball is predictability. You know where the action will happen (home plate, bases, specific field positions), allowing you to pre-focus and wait. This lets you push shutter speeds higher since you’re not tracking unpredictable movement.
Tennis
Recreational tennis works fine at 1/800 to 1/1000. Professional serves exceeding 120 mph require 1/2000 or faster to freeze both the ball and the racquet. Rally shots during baseline play can be captured at 1/1000 since the ball has slowed after the serve.
Tennis also offers excellent panning opportunities. Following a player’s movement along the baseline while using a slower shutter (1/250 to 1/500) creates dynamic images with blurred backgrounds that emphasize speed and agility.
Fast Action Sports: Motor and Combat
These sports push shutter speed requirements to their limits. The combination of extreme speed and close proximity creates unique challenges.
Motor Sports
Race cars, motorcycles, and motocross bikes demand the fastest shutter speeds in sports photography. At trackside, vehicles pass within feet at speeds exceeding 150 mph. Complete freeze requires 1/2000 to 1/4000.
However, perfectly frozen race cars often look static, parked on the track. Professional motorsports photographers frequently use panning at slower speeds (1/60 to 1/250) to blur backgrounds while keeping the vehicle sharp. This technique conveys the sensation of speed better than any frozen image.
Combat Sports: Boxing and MMA
Despite the intensity of combat sports, the actual movement speed is moderate. Punches travel fast but the fighters themselves move relatively slowly. A minimum of 1/800 handles most situations, with 1/1000 providing a safety margin for those explosive combinations.
The real challenge is lighting. Combat events typically occur in darkened arenas with spot lighting on the ring or cage. Expect to shoot at ISO 3200-6400 while maintaining your shutter speed. Fast lenses (f/2.8 or wider) make an enormous difference here.
Fencing
Fencing presents an interesting paradox. The sport involves lightning-fast lunges and blade movements, yet much of the action is relatively stationary. A fencer in en garde position moves minimally. The explosive lunge happens in a fraction of a second.
I’ve found 1/500 to 1/640 works well for fencing, even in poorly lit venues. The key is timing your shot for the moment of contact or the extension of the lunge rather than trying to freeze the fastest blade movements, which often appear as mere blurs even at 1/2000.
Water and Winter Sports
Environmental conditions add complexity to these sports. Water creates reflections and spray, while snow presents exposure challenges.
Swimming
Swimmers move relatively slowly compared to field sports. A minimum of 1/500 freezes most swimming action. The challenge lies in timing. Split-second moments like a swimmer breaking the surface or a turn push-off benefit from 1/800 to 1/1000.
Indoor pool lighting varies dramatically. Olympic venues offer broadcast-quality illumination, while local pools often have dim, green-tinted fluorescent lighting. Expect high ISO settings in most pool environments.
Surfing
Surfing combines athletic movement with the constantly changing ocean environment. Surfers on wave faces move moderately fast, requiring 1/800 to 1/1000. Aerial maneuvers and barrel rides push toward 1/1250 for complete sharpness.
Shooting from shore with long lenses (400mm+) adds camera shake to your considerations. Bright beach conditions usually provide plenty of light, so push that shutter speed up. I rarely shoot surfing below 1/1600 when handholding a telephoto.
Skiing and Snowboarding
Downhill skiers reach speeds of 60+ mph, demanding 1/2000 or faster for frozen action. Snow adds exposure complexity. Bright white snow reflects enormous light, but your camera’s meter wants to underexpose it to gray. Add +1 to +2 stops of exposure compensation.
Snow also creates its own motion blur. Spraying snow from a ski turn or a snowboard carve looks natural with slight blur at 1/800, while the athlete remains sharp. Don’t obsess over freezing every particle.
Hockey
Hockey combines the speed of field sports with the lighting challenges of indoor venues. Players skate at 20+ mph while handling a puck traveling even faster. Minimum shutter speed should be 1/1000, with 1/1250 preferred for puck-sharp shots.
Rink lighting varies enormously. Professional arenas offer adequate illumination, while local ice rinks can be nearly dark. I’ve shot high school hockey at ISO 6400, 1/800, f/2.8 and still struggled with exposure. A fast lens is essential for serious hockey photography.
Track and Field Events
Track and field offers diverse subjects with vastly different shutter speed requirements. Each event presents unique photographic opportunities.
Sprints and Running Events
Sprinters at full speed require 1/1000 to 1/1250 to freeze arm and leg motion. The face and torso move relatively steadily, but extremities blur at slower speeds. Distance runners move more slowly and work well at 1/800.
The finish line offers your most dramatic shots. Faces strain with effort, bodies lean forward, and timing becomes predictable. Pre-focus on the finish line and fire a burst as runners approach.
Jumping Events
High jumpers and pole vaulters at their peak elevation move minimally. You can capture sharp images at 1/500 if you time the shot for maximum height. The approach and landing require faster speeds (1/1000) if you want those moments sharp.
Long jump and triple jump combine horizontal speed with vertical movement. Aim for 1/1000 to freeze both the sprinting approach and the jumping action.
Throwing Events
Shot put, discus, and javelin throwers demonstrate explosive power. The release moment happens extremely fast, but the athlete’s body rotates rather than translating quickly across your frame. 1/800 to 1/1000 handles most throwing events adequately.
The thrown objects themselves move at varying speeds. A javelin flies faster than a shot put. If capturing the implement in flight matters to your composition, use the faster end of the range.
Three Types of Sports Action Photography
Not every sports photo needs to freeze action completely. Understanding three distinct approaches, stop-action, blur-action, and pan-action, gives you creative options beyond the standard frozen sports shot.
Stop-Action: Freezing Motion Completely
Stop-action photography freezes everything in the frame. The athlete, equipment, and any airborne elements appear razor sharp. This is the default approach for most sports photography and what editors typically expect.
The technique requires fast shutter speeds: 1/1000 minimum for most sports, faster for motor sports or close action. Your goal is to capture a moment that the human eye cannot perceive naturally. A baseball deforming against a bat, water droplets suspended around a swimmer, a boxer’s face distorting from impact.
Stop-action works best when you want to study and appreciate the athletic moment. Sports analysts, coaches, and fans use these images to understand technique and celebrate achievement. They’re the bread and butter of sports photography.
Blur-Action: Intentional Motion Blur
Intentional blur conveys speed and energy that frozen images sometimes lack. A perfectly sharp sprinter might look posed. Add slight blur to the arms and legs, and suddenly the image feels alive with motion.
The technique uses slower shutter speeds: 1/60 to 1/250 for most sports. The key is finding the right balance. Too much blur creates an unrecognizable mess. Too little looks like a mistake rather than a creative choice.
I use blur-action for artistic sports photography, promotional images, and situations where conveying the feeling of speed matters more than analyzing technique. A blurred cyclist streaking through a velodrome captures the essence of speed better than any frozen frame.
Pan-Action: Panning Technique
Panning combines motion blur with selective sharpness. You follow your moving subject with the camera during exposure, keeping the subject relatively sharp while blurring the background into streaks. The result emphasizes speed and isolates your subject from distracting backgrounds.
Panning requires practice. Set your shutter to 1/60 to 1/125 for most subjects. Position your feet stably, then rotate your upper body to follow the subject. Press the shutter while continuing to pan, and follow through after the shot.
This technique shines for motor sports, cycling, and any sport with predictable lateral movement. A race car sharp against blurred grandstands and track makes a dramatic statement. The technique also works for running events, skiing, and skateboarding.
Indoor and Night Sports Photography Challenges
Nothing frustrates sports photographers more than indoor and night events. The combination of fast action and poor lighting forces difficult compromises between shutter speed, ISO, and image quality.
The Indoor Gym Problem
High school gyms, community centers, and recreational facilities often have lighting that’s barely adequate for spectators, let alone photography. Typical gym illumination provides 2-4 stops less light than outdoor sports. This means you cannot maintain your ideal shutter speed without pushing ISO to extreme levels.
Here’s my practical approach. Start by setting your minimum acceptable shutter speed (usually 1/800 for indoor sports). Set your lens to its widest aperture. Now adjust ISO until you achieve proper exposure. Accept that noise will appear in your images.
Noise is preferable to blur. A grainy but sharp photo can be cleaned up in post-processing. A blurry photo cannot be salvaged. I’d rather shoot at ISO 6400 and 1/800 than ISO 1600 and 1/200 for most indoor sports.
Night Sports and Stadium Lighting
Professional and college stadiums offer significantly better lighting than high school venues. Friday night football under quality stadium lights might allow ISO 3200 at 1/1000, while a high school field could require ISO 6400 at 1/640.
Position yourself where stadium lights illuminate the field most brightly. Avoid shooting into dark areas of the field. The difference between well-lit and poorly-lit zones can be 2 stops or more.
Arena Lighting Flicker
Many indoor arenas use fluorescent or LED lighting that flickers at frequencies invisible to the eye but captured by your camera. This causes inconsistent exposure and color between frames shot in burst mode.
Some cameras offer anti-flicker settings that time shots to the peaks of lighting cycles. If your camera has this feature, enable it for indoor sports. Otherwise, shoot in JPEG (which can help with buffer speed) and expect to correct exposure and white balance in post-processing.
Working Without Expensive Gear
Most advice for low-light sports assumes you own an f/2.8 telephoto lens. Many photographers work with f/4-5.6 kit lenses that let in 1-2 stops less light. This dramatically limits your options.
If you’re shooting with a slower lens, get closer. Fill the frame with your subject so you can crop less later. Shoot at your lens’s widest aperture and accept the resulting depth of field. Position yourself where action slows momentarily (bases in baseball, finish lines, corners). And practice your panning technique, which works at slower shutter speeds.
Recommended Camera Settings for Sports Photography
Beyond shutter speed, several other settings dramatically affect your sports photography success. Here’s my recommended setup for most situations.
Shooting Mode: Shutter Priority or Manual
Shutter Priority (S or Tv mode) lets you set the shutter speed while the camera adjusts aperture automatically. This works well for outdoor sports with consistent lighting. Set your desired speed, and let the camera handle exposure.
Manual mode offers more control for challenging situations. Set your shutter speed and aperture manually, then use Auto ISO to handle exposure variations. This ensures you never drop below your minimum shutter speed while maintaining your preferred depth of field.
Auto ISO Setup
Auto ISO has revolutionized sports photography. Configure your camera to use Auto ISO with a maximum limit (typically 6400 for modern cameras, higher if yours handles noise well). Set your minimum shutter speed to your sport’s requirement.
This combination lets your camera adapt to changing light automatically. A football game that starts in late afternoon sun and ends under stadium lights requires constant adjustment. Auto ISO handles this seamlessly.
Aperture Considerations
For sports photography, aperture serves two purposes: controlling light and managing depth of field. Fast primes (f/1.4, f/1.8) let in maximum light but create extremely shallow depth of field. A runner’s face might be sharp while their hands are soft.
Most sports photographers prefer f/2.8 to f/4. This provides enough depth of field to keep an athlete sharp while blurring distracting backgrounds. In bright conditions, stopping down to f/4 or f/5.6 can improve sharpness across more of the frame.
Burst Mode and Autofocus
Sports photography requires continuous shooting and continuous autofocus. Set your camera to its highest burst rate. The fleeting moments you’re chasing happen in fractions of a second.
Use Continuous Autofocus (AF-C or AI Servo) with appropriate focus area selection. For field sports, I prefer a single focus point or small cluster that I position on the subject. For unpredictable action, expanded focus areas or tracking modes help the camera maintain focus as subjects move.
Common Sports Photography Mistakes to Avoid
Even experienced photographers make these errors. Being aware of them will accelerate your learning curve.
Shutter Speed Too Slow
The most common mistake is using shutter speeds that cannot freeze the action. That 1/500 that worked for a portrait will blur a soccer player’s feet. When in doubt, go faster. You can always slow down later once you understand the sport’s rhythm.
Wrong Autofocus Mode
Shooting sports with Single Autofocus (AF-S or One Shot) guarantees missed shots. The moment you press the shutter, your subject has moved. Always use Continuous Autofocus for moving subjects.
Poor Position Selection
Your position relative to the action dramatically affects your results. Study the sport beforehand. Know where the key moments happen. In soccer, position yourself near the goal for shots and saves. In baseball, the action happens at bases and home plate.
Ignoring Lighting Direction
Light direction matters enormously. Backlit subjects appear as silhouettes. Side lighting creates dramatic shadows. Front lighting illuminates faces but can look flat. Scout your venue before action starts and position yourself accordingly.
Buffer Management
Shooting RAW fills your buffer quickly. If your camera slows down during critical moments because the buffer is full, you’ll miss shots. Consider shooting JPEG for high-speed sequences, or upgrade to faster memory cards.
Frequently Asked Questions
What is the best shutter speed for sports photography?
For most sports photography, a shutter speed of 1/1000th of a second or faster is recommended to completely freeze action. This baseline works for football, soccer, basketball, and similar field sports. Faster sports like motor racing or professional tennis serves may require 1/2000 to 1/4000. Slower sports like swimming or golf can work at 1/500 to 1/800. The key is matching your shutter speed to the subject’s speed and your creative intent.
Which shutter speed is used for sports 1/125 or 1/1000?
1/1000 is the standard shutter speed for sports photography. At 1/125, you will get noticeable motion blur in all but the slowest sports. A soccer player running at full speed will appear blurry at 1/125. A swimmer might be acceptably sharp at 1/125 during the glide phase, but not during strokes. For consistently sharp sports photos, start at 1/1000 and adjust based on the specific sport and lighting conditions.
Is F4 or F2.8 better for sports photography?
F2.8 is generally better for sports photography, especially for indoor sports and night games. The wider aperture (lower f-number) lets in twice as much light as f/4, allowing faster shutter speeds or lower ISO settings. F2.8 lenses are considered the professional standard for sports. However, f/4 lenses can work well for outdoor daytime sports where light is abundant. The trade-off is that f/2.8 lenses are significantly more expensive and heavier.
What is the 20-60-20 rule in photography?
The 20-60-20 rule in photography refers to the percentage of your frame dedicated to different elements: 20% foreground, 60% subject and midground, and 20% background. This compositional guideline helps create balanced images with context and depth. For sports photography, this might mean including some field or court in front of your subject (20%), the athlete as your main focus (60%), and the stadium or environment behind (20%). This rule is flexible and many great sports photos break it intentionally.
Putting It All Together
Mastering shutter speed for sports photography requires practice and adaptation. Start with the 1/1000 baseline, then adjust based on your specific sport, lighting conditions, and creative goals. Remember that shutter speed is just one element of the exposure triangle. Balance it with aperture and ISO to achieve proper exposure while maintaining your minimum shutter speed.
The sport-by-sport recommendations in this guide provide starting points, not absolute rules. Every venue, every athlete, and every moment presents unique challenges. Use these guidelines as your foundation, then experiment and learn from your results. Review your images after each shoot, checking for sharpness in critical areas like faces, hands, and equipment.
For challenging indoor and night sports, accept that some compromises are necessary. A noisy but sharp image beats a blurry clean one every time. Position yourself thoughtfully, use continuous autofocus and burst mode, and practice your timing. With experience, you’ll develop an intuitive sense for the right shutter speed in any situation.
Now grab your camera and head to a local game. The best way to learn these techniques is through practice. Start with outdoor sports in good light where you have room to experiment, then work your way up to challenging indoor venues. Every sport you photograph will teach you something new about motion, timing, and the art of capturing athletic achievement.